Knowing how to miter quilt corners is all about joining your border strips at a perfect 45-degree angle. The result? A sharp, continuous frame around your quilt top that just looks right. This is the technique that gets rid of bulky, overlapped corners and gives you a clean, diagonal seam, turning a pretty quilt into a showstopper. This guide will provide the education you need to master this skill, and when you're ready to start your project, you'll find all the amazing products you need at Linda's to achieve a flawless finish.
Why Flawless Mitered Corners Matter
Ever look at a quilt in a show and just marvel at its polished, professional finish? I can almost guarantee that a big part of that magic comes from perfectly mitered corners. Before we get into the nitty-gritty of how it's done, let's talk about why this little detail makes such a huge impact. It's so much more than just a style choice; it’s a true sign of craftsmanship.
A beautifully executed mitered corner creates a seamless frame, letting your eyes dance around the quilt design without any awkward stops. This is a game-changer, especially if you're working with striped or patterned border fabrics. A miter lets that pattern turn the corner flawlessly, creating a visual flow that feels intentional and stunning.
A Professional Touch to Your Projects
Honestly, learning this skill is one of the best things you can do to elevate your quilting. Instead of just butting the ends of your borders together, you're creating a clean, diagonal seam by joining them at that 45-degree angle. It not only looks incredible but also adds a bit of structural integrity to your quilt's edges. The quilting pros over at Bernina have some great insights on the whole process.
For any quilter who wants to create heirlooms, getting this corner finish down is practically a must.
A mitered corner speaks volumes. It tells the story of a quilter who values precision and pays attention to the details that transform a good quilt into a great one. It’s that final, beautiful signature on your work.
Mitered Corners vs Butt-Joint Corners
When it comes to finishing your borders, you have options. Choosing the right corner technique really can make or break the final look. While butt-joint (or overlapped) corners are definitely faster, they just don't offer the same polished feel.
Let's break down the two main approaches.
| Feature | Mitered Corners | Butt-Joint (Overlap) Corners |
|---|---|---|
| Appearance | Creates a seamless, continuous frame. | Results in a visible, bulky overlap. |
| Fabric Use | Requires slightly more fabric for length. | More economical with fabric usage. |
| Complexity | Involves precise cutting and sewing. | Simpler and faster to execute. |
| Best For | Striped or patterned borders. | Solid-colored borders where seams are less obvious. |
At the end of the day, learning how to miter quilt corners is a true investment in your craft. It’s a technique that adds a touch of class and sophistication to every single project you pour your heart into. To get those corners just right, you need to start with great fabric. Shop the amazing selection of premium quilting cottons at Linda's to give your next project the flawless foundation it deserves.
Getting Your Workspace Ready for Mitered Corners
Before you even think about making a cut, let's get your supplies in order. Nailing that perfect mitered corner on your quilt is all about precision, and that starts with having the right tools for the job. Trust me, it makes a world of difference.
Having everything you need on hand not only makes the process smoother but also ensures you get those razor-sharp corners you're aiming for. It's the first real step in learning how to miter quilt corners like a pro.
Think of it this way: you wouldn't try to bake a delicate cake without measuring cups, right? For us quilters, our tools are just as crucial. A dull blade or a wobbly ruler can quickly turn a joyful project into a source of frustration. Let's set you up for success from the get-go.
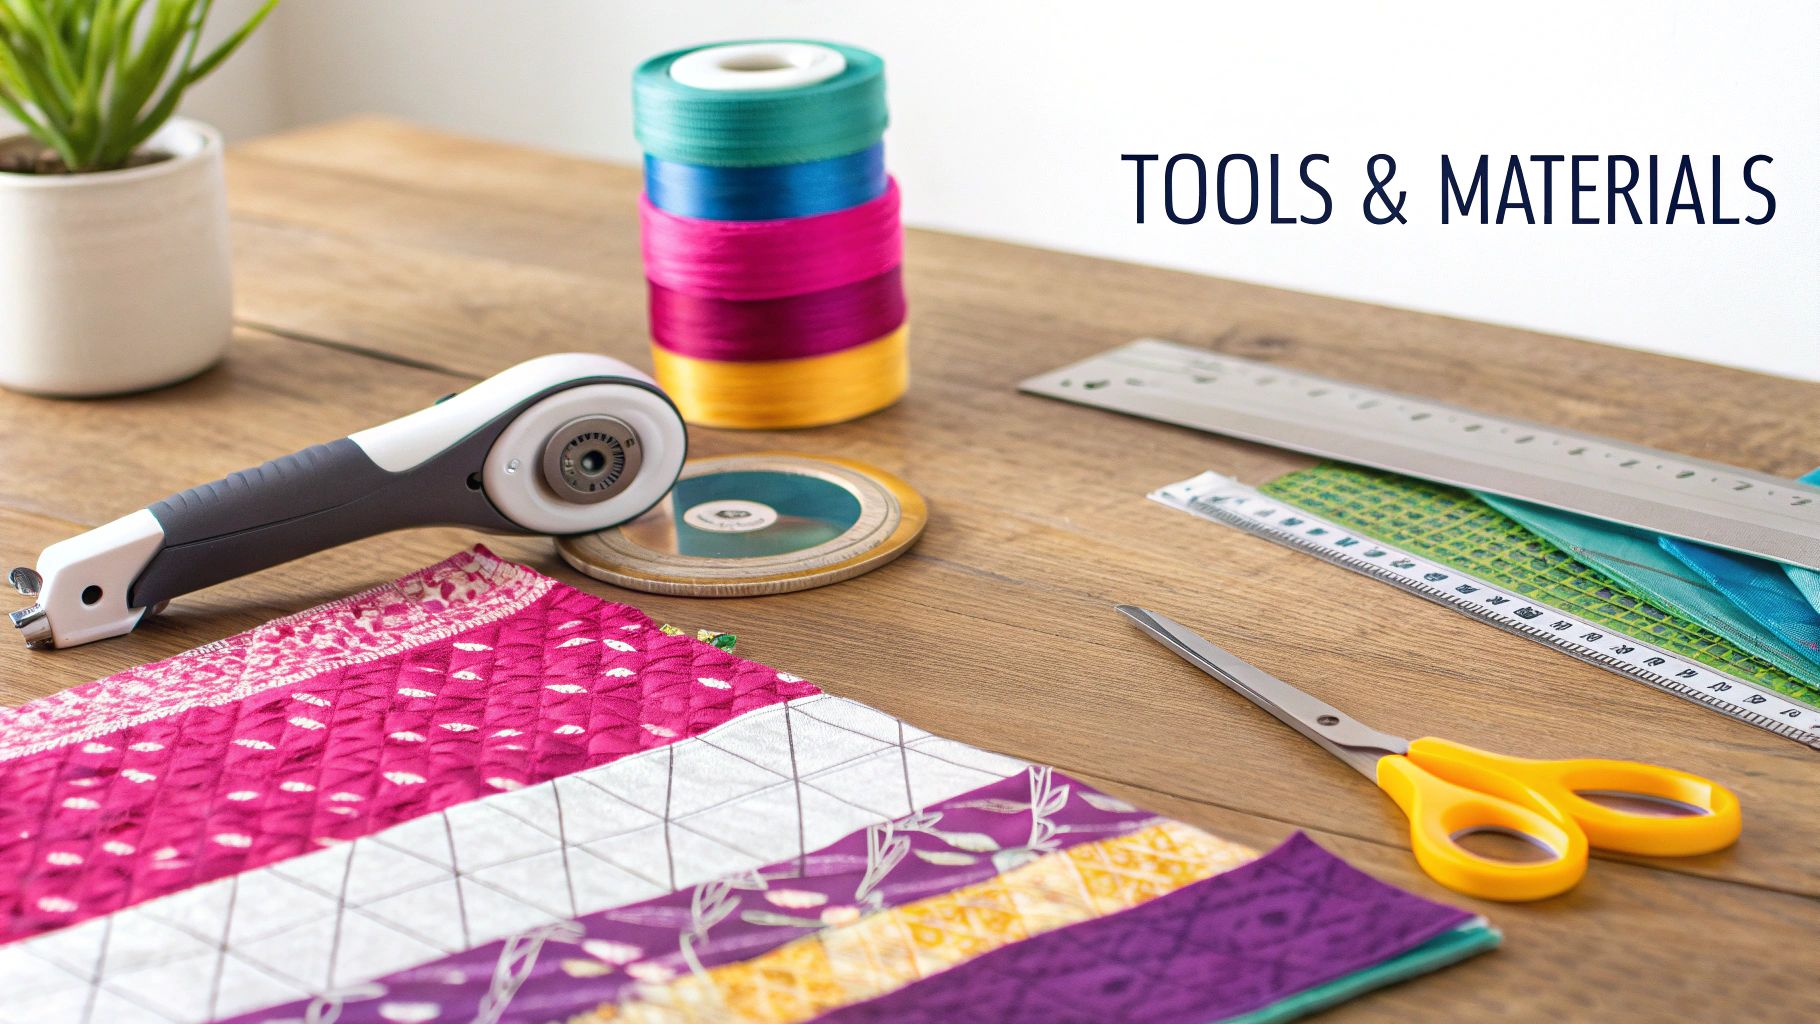
Your Go-To Toolkit for Perfect Miters
To achieve those crisp, clean angles, you’ll want a few key items within easy reach. These aren't just nice-to-haves; they are foundational for creating work you can be truly proud of.
-
A Sharp Rotary Cutter & Self-Healing Mat: This pair is absolutely non-negotiable. A fresh, sharp blade gives you perfectly clean fabric edges without any snagging or fraying—which is vital for matching up your seams later. Your self-healing mat protects your table while providing a stable, gridded surface to cut on.
-
A Quality Quilting Ruler: You'll need a clear acrylic ruler, and I suggest one that's at least 24 inches long to handle the full width of your fabric. The most critical feature here is a clearly marked 45-degree line. That line is your best friend and your guide for cutting a flawless miter.
-
High-Quality Thread: Don't skimp on the thread! A strong, good-quality thread won't break on you mid-seam and can handle the tension of a tight corner. A 50-weight cotton thread that matches your fabric is usually the perfect choice for nearly invisible stitches.
A walking foot for your sewing machine is an absolute game-changer for mitered corners. It feeds both the top and bottom layers of fabric through the machine evenly, which stops that dreaded fabric shift that can throw your carefully marked corners completely out of alignment.
Why Investing in Good Tools Matters
Using reliable, high-quality tools is a real investment in your craft. A good ruler won't warp over time, a sharp cutter helps prevent slips and mistakes, and the right presser foot gives you ultimate control.
When your tools work with you, not against you, you can put all your focus on the technique instead of wrestling with your supplies. This is especially true when you're trying to create the precise angles needed for a mitered corner.
For instance, a cheap ruler might have markings that are just slightly off. It might not look like much, but even a tiny inaccuracy on your 45-degree cut can lead to a corner that either puckers up or has a noticeable gap. It’s the same story with thread; cheap thread can snap right in the middle of a seam, forcing you to stop, re-thread, and restart, which messes with your rhythm and accuracy.
Ready to build out your quilting toolkit? Linda's has a fantastic selection of durable quilting tools and notions that quilters know and trust. Getting yourself properly equipped is the first and most important step toward mastering mitered corners with confidence.
Your Guide to Sewing the Perfect Mitered Corner
Alright, with your tools all lined up, it's time to actually frame your quilt. This is where we get into the fun part—learning how to miter quilt corners and seeing that beautiful, crisp finish come to life.
I'm going to walk you through it, step by step. We'll focus on what to do and why, so you can get those corners looking sharp every single time. It's really just a matter of precise cutting, careful stitching, and one very important diagonal seam. Let's start with the most critical step of all: getting those border strips ready.
Preparing and Cutting Your Border Strips
Getting this part right is everything. A mistake I see all the time is quilters cutting their border strips to the exact length of the quilt's sides. For a mitered corner, that just won't work—you need that extra fabric to create the fold.
My rule of thumb? Cut each border strip at least 6-8 inches longer than the side it's going on. Trust me, this gives you plenty of wiggle room to work with when it's time to make that 45-degree angle. You won't have to worry about coming up short.
The infographic here gives a great visual of how to prep your fabric strips.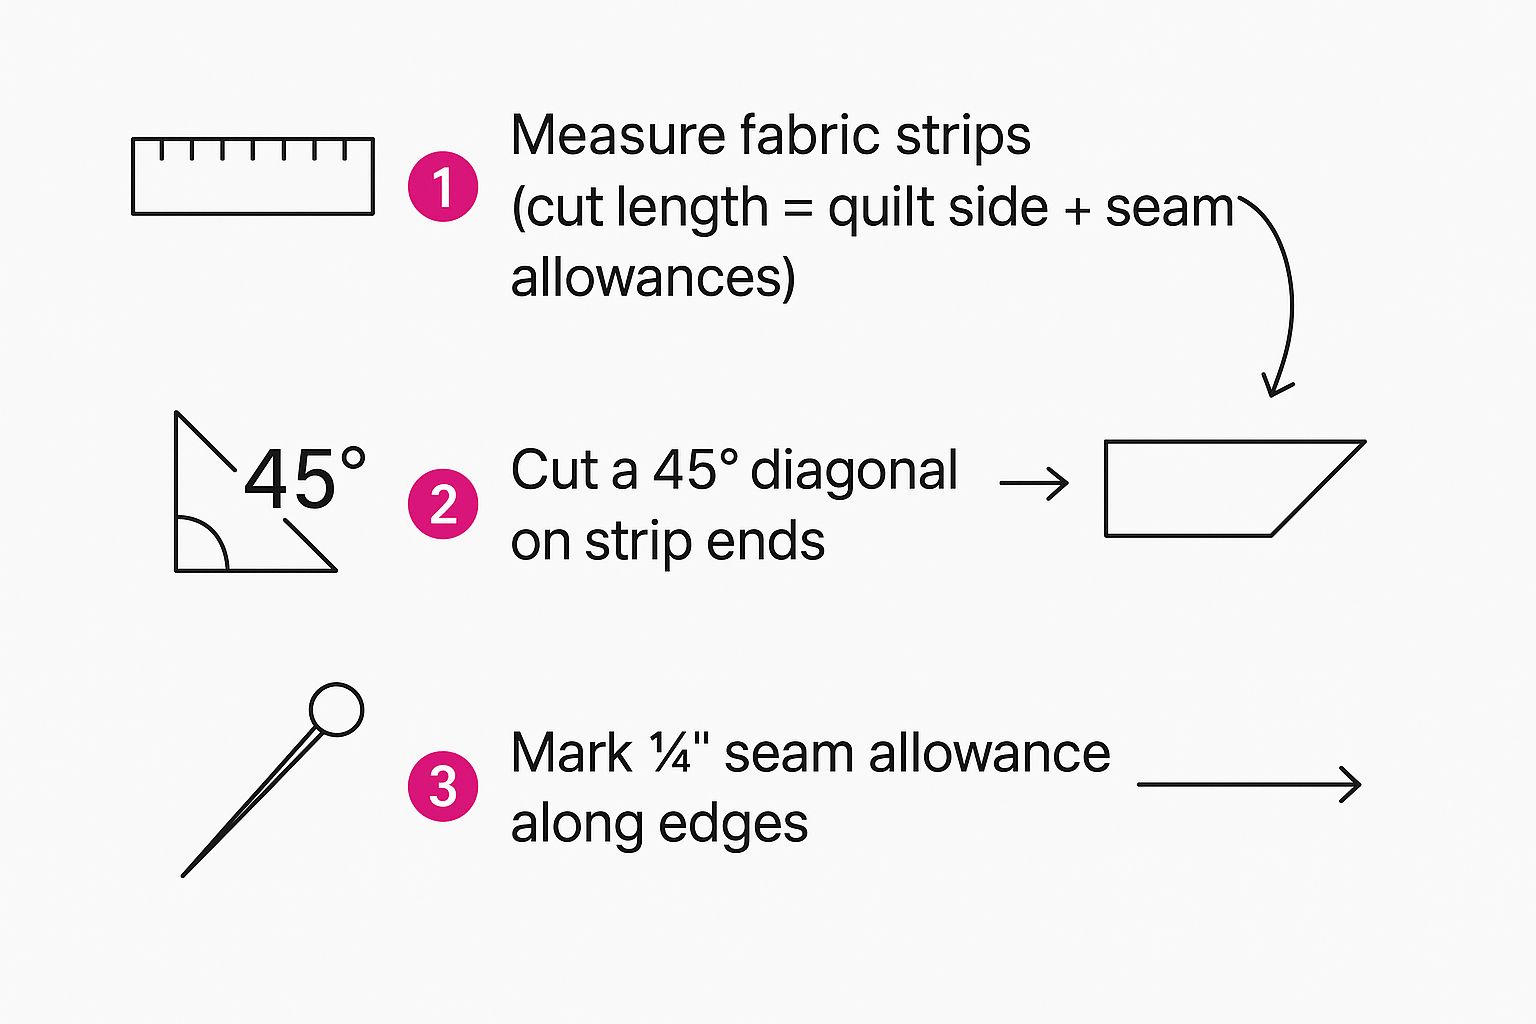
As you can see, the precision starts way before you even sit down at your sewing machine. It’s all in the measuring and marking.
Attaching the Border Strips
Once your strips are cut, you'll want to attach them in opposing pairs. I always do the top and bottom borders first, then the left and right sides. It’s a simple trick that really helps keep the whole quilt top square.
Line up the raw edge of your first border strip with the raw edge of the quilt top, making sure right sides are together. You'll be sewing with a standard 1/4-inch seam allowance, but here’s the most important part: do not start sewing right at the edge of the quilt.
You need to leave a 1/4-inch gap at the beginning and end of every seam. This means you'll start stitching 1/4 inch in from the corner and stop stitching 1/4 inch before you get to the next one. Don't forget to backstitch at the start and finish to lock it in.
That little 1/4-inch unsewn gap at each corner is absolutely essential. It’s what gives the fabric the room it needs to pivot and fold for that perfect 45-degree miter seam, all without creating any puckers in your quilt top.
Do this for all four border strips, letting the extra length hang off both ends of each side. After the borders are on, give the seams a good press toward the border fabric. This will help your corners lie nice and flat later on.
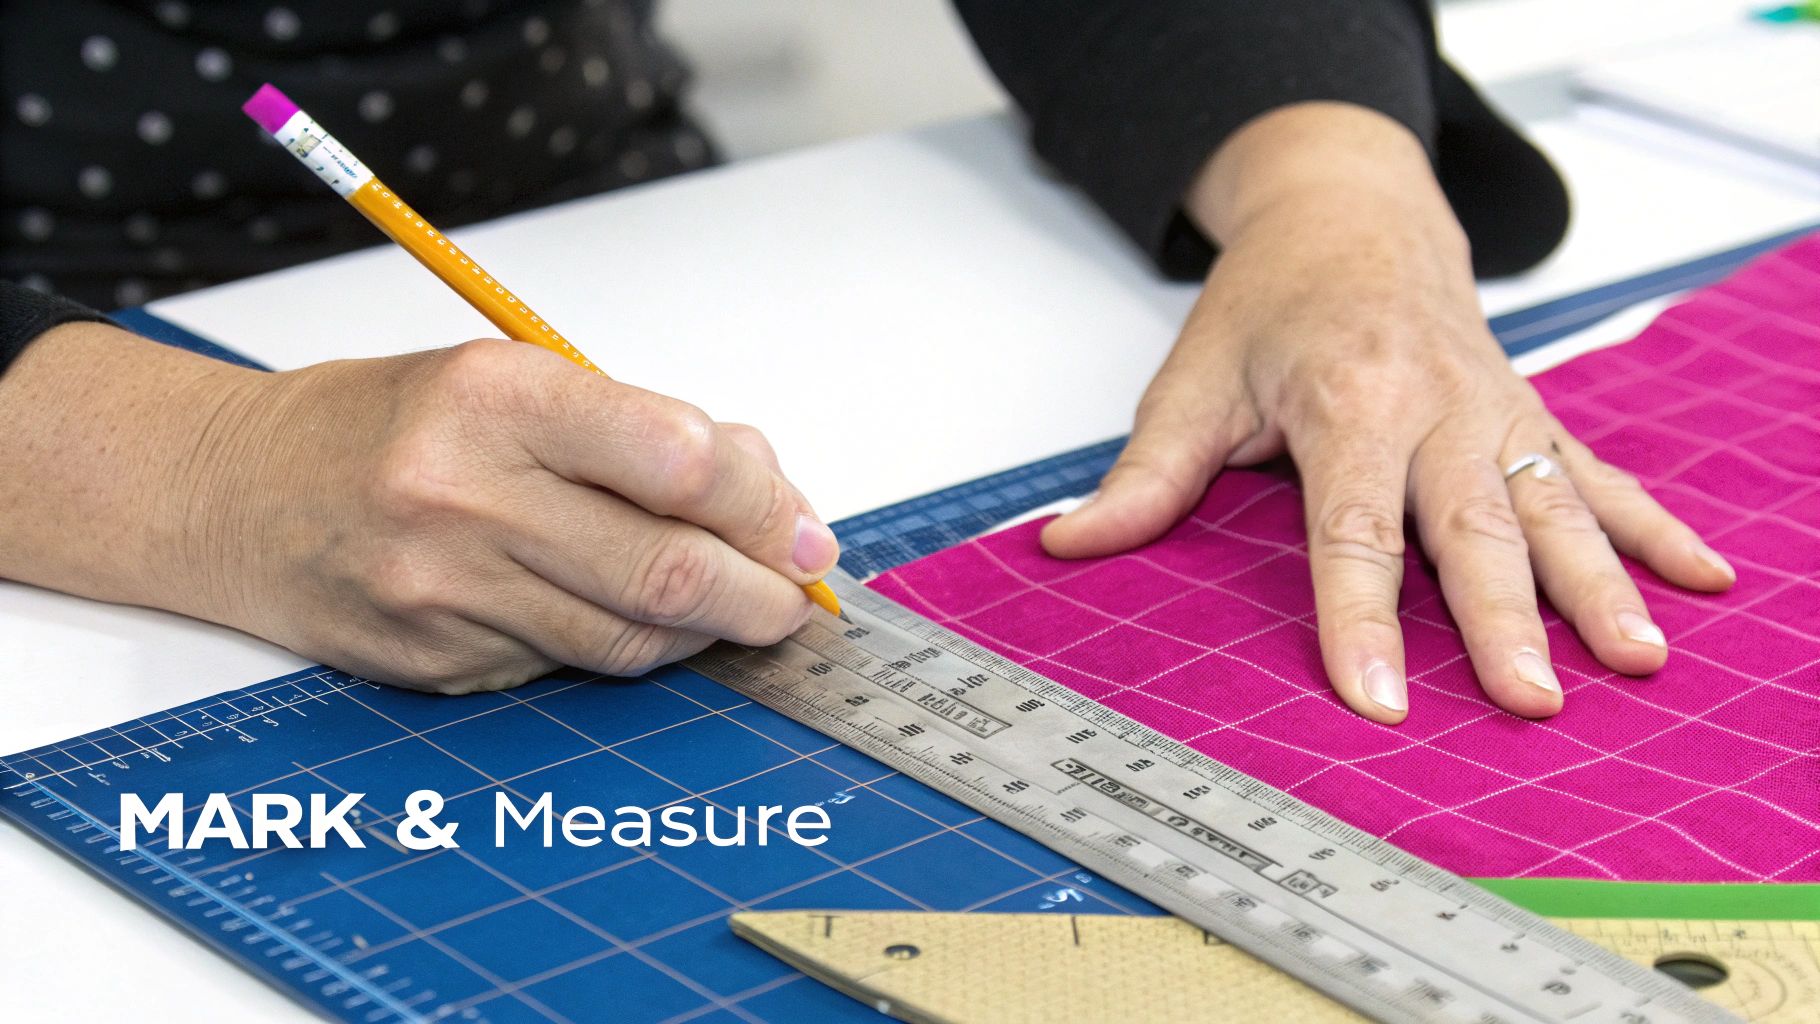
Marking and Sewing the 45-Degree Seam
This is it—the moment of truth. Lay your quilt out on a big flat surface and pick a corner to focus on. Overlap the two border strips that meet at that corner, making sure the top strip is lying perfectly smooth over the one underneath.
Grab your acrylic ruler and align its 45-degree marking with the inside edge of the top border strip. Your ruler should create a straight line running from the inner corner of the border (right where your seams stopped) out to the raw edge of the strips.
Draw a clean, sharp line with a fabric marker right along that 45-degree angle. That's your sewing line! Pin the two border strips together right on that line to make sure nothing slips.
Now, gently fold the bulk of the quilt out of the way so you have a clear path to the machine. You'll want to start sewing precisely at that inner corner where your border seams ended and stitch all the way out to the raw edge. Here’s a little tip from experience: use a shorter stitch length, maybe around 2.0 mm, to give that corner point extra strength.
Once you’ve sewn it, unfold the corner and take a look. It should be a perfect, sharp miter! If you're happy with it, you can trim away the extra fabric, leaving a 1/4-inch seam allowance past your new miter seam. Press that final corner seam open to help reduce bulk.
There's nothing quite like the feeling of finishing a quilt, and having the right supplies makes the journey so much better. If you're looking for beautiful, high-quality materials that will make your mitered corners pop, take a look at the amazing collection of quilting fabrics at Linda's.
Expert Tips for Pinpoint Miter Accuracy
Once you’ve got the basics of how to miter quilt corners down, the real fun begins. This is where we move from "good enough" to truly flawless. It's all about those tiny adjustments and insider tricks that seasoned quilters have picked up over the years—the little things that take your work from handmade to professional.
This dedication to detail is a big deal in the crafting world. The global quilting market, which was valued at about USD 695.84 million in 2024, is booming precisely because people want that personal, high-quality touch that screams craftsmanship. A perfect mitered corner is the epitome of that quality. You can actually see how this drive for precision is shaping the industry by checking out the full quilting market report.
Fussy Cut for Jaw-Dropping Visuals
Got a border fabric with a bold pattern, like stripes or a big floral print? That’s not a challenge; it’s an opportunity! This is where fussy cutting comes into play. It’s the art of deliberately cutting your fabric to highlight a specific part of the design. For mitered corners, this means you can create a gorgeous, seamless flow or a really sharp chevron effect.
The trick is to plan exactly where your 45-degree seam will land on both border strips before you sew. I like to fold the fabric along the diagonal and give it a quick press to see a preview of how the patterns will match up. When you get it right, the seam practically vanishes into the design.
The Art of Pressing Your Seams
I can't stress this enough: how you press your seams can absolutely make or break your corner. While we often press seams to one side in quilting, for a mitered corner, pressing the seam open is almost always the way to go.
Here’s why it’s my go-to method:
- It Kills the Bulk: A mitered corner brings a lot of fabric together in one tiny spot. Pressing the seam open spreads that fabric out, helping the corner lie beautifully flat.
- It Makes a Sharper Point: When the seam isn't lumpy, you get a much crisper, more defined point on the front of your quilt.
Use just the tip of your iron to carefully nudge the seam allowance open on the back. If you really want a pancake-flat finish, a tailor's clapper is your secret weapon. After you press the seam with steam, immediately place the wooden clapper on top of it for a few seconds. It traps the heat and moisture, setting the seam perfectly flat like nothing else.
Double-Check Before You Trim
Remember the old woodshop rule, "measure twice, cut once"? The quilter's version for mitering is "sew, check, then trim." Every single time you sew that 45-degree seam—and I mean every time—flip the corner to the right side and inspect your work before you even think about trimming the excess fabric.
Here's what you're looking for:
- Is the point sharp and fully formed?
- Are there any little gaps or puckers at the inside corner?
- Did your patterns line up the way you wanted?
If something looks off, it’s a simple fix to rip out that one seam and try again. But once you trim that fabric away, your options for fixing a mistake become very, very limited.
If I could only give one piece of advice for perfect miters, it would be this: slow down your stitching as you get close to that inner corner. Easing off the pedal gives you total control, letting you stop your needle right in the sweet spot where the other border seams meet. This one small action is the secret to getting rid of gaps and nailing that perfect point.
With these techniques in your back pocket, you're ready to create some absolutely pristine mitered corners. If you're looking for fabrics that press like a dream and hold their shape, shop the amazing selection of quilting cottons at Linda's and give your next quilt a flawless frame.
Troubleshooting Common Mitered Corner Mistakes
So, you've followed all the steps for how to miter quilt corners, but something’s still not quite right. A pucker here, a tiny gap there—believe me, it happens to every single one of us. But before you reach for that seam ripper, let's take a breath. Most of these little quirks are easy to diagnose and even easier to fix once you know what you’re looking for.
Think of these imperfections as free lessons, not failures. Each one teaches you something new about how fabric behaves, the importance of precision, and why your tools matter. A simple adjustment is often all it takes to turn a frustrating corner into a flawless one.
The Case of the Puckered Corner
One of the most common issues I see is a corner that just won't lie flat. It has a little pucker or bubble right at the point. This almost always points back to a single culprit: your 1/4-inch starting and stopping points when you attached the borders.
If you sew too far into that corner—even by just a stitch or two—the fabric doesn't have enough room to fold over into that clean 45-degree angle. The fix is simple: just unpick the last few stitches of your border seam. You need to give yourself that full 1/4-inch breathing room before you sew the miter.
Gaps and Misaligned Points
On the flip side, you might find a tiny hole or gap right at the inner corner where the miter should meet. This is the opposite problem—you stopped your border seam too soon, leaving more than a 1/4-inch gap.
Don't be afraid to grab a fine-tipped fabric marker and draw a tiny dot exactly 1/4 inch from the corner. This gives you a clear visual target to stop your needle on, which takes all the guesswork out of it and ensures a perfect pivot point for your miter.
Another reason for a wonky point is fabric shift. Using a walking foot is a game-changer here. I also like to place a pin directly on my marked 45-degree line to hold everything securely in place. If I'm working with a particularly slippery fabric, I'll even hand-baste the corner before taking it to the machine for extra stability.
Preventing Mistakes Before They Happen
Honestly, the best way to troubleshoot is to avoid the problems in the first place. Starting with high-quality, stable quilting cotton is key, as it's far less likely to stretch or warp on you. Also, making sure you’re consistently using a sharp rotary blade and a reliable ruler guarantees your cuts are spot-on from the get-go.
Ultimately, precision tools and good materials are your best defense against those common little errors. To really set yourself up for success, you should explore the amazing selection of quilting notions and fabrics at Linda's. They have everything you need to create perfect mitered corners with total confidence.
Answering Your Top Questions on Mitering Corners
Let's tackle some of the questions I hear all the time from quilters. Getting these sorted out will give you a major confidence boost when you sit down to try how to miter quilt corners on your own project.
Can I Use This Miter Technique for My Quilt Binding?
You absolutely can! The method for mitering your binding is almost the same as for borders. You're still aiming for that clean, continuous frame with a perfect 45-degree angle.
The only real difference is that you’re working with a folded binding strip. But the folding and stitching process? Nearly identical. It’s a great way to get that same polished look.
What Is the Best Way to Press Bulky Corner Seams?
My go-to method for mitered corners is always pressing the seam open. It’s a simple trick that makes a huge difference.
This distributes the fabric bulk evenly on both sides of the seam, helping the corner lie incredibly flat. If you really want a crisp finish, a tailor's clapper is your best friend here. It helps set the seam and gives it that professional, sharp look.
It's this kind of detailed work that people are falling in love with again. The global quilt market was valued at about USD 5.32 billion in 2024, and a big part of that growth is a renewed appreciation for high-quality, handcrafted quilts. Techniques like mitering are right at the heart of that trend, supported by a booming fiber production that hit 116 million tons in 2022. You can dive deeper into these exciting quilting industry trends if you're curious!
The secret to a truly flat corner isn't just about pressing; it's about reducing bulk from the start. Pressing the miter seam open, rather than to one side, is the key to preventing a lumpy, rounded corner and achieving that sharp point.
Do I Need a Special Sewing Machine Foot?
You don't need anything fancy, but a walking foot is a game-changer. I highly recommend it.
A walking foot feeds the top and bottom layers of your fabric through the machine at the exact same pace. This prevents that frustrating shifting and stretching that can completely ruin your alignment. It's especially helpful for keeping your marked 45-degree lines perfectly matched up while you sew.
With these tips in your back pocket, you’re all set to create gorgeous mitered corners. To get your next masterpiece started on the right foot, check out the incredible collection of fabrics, threads, and all the notions you could ever need at Linda's Electric Quilters. Find everything to bring your vision to life at https://lindas.com.


