
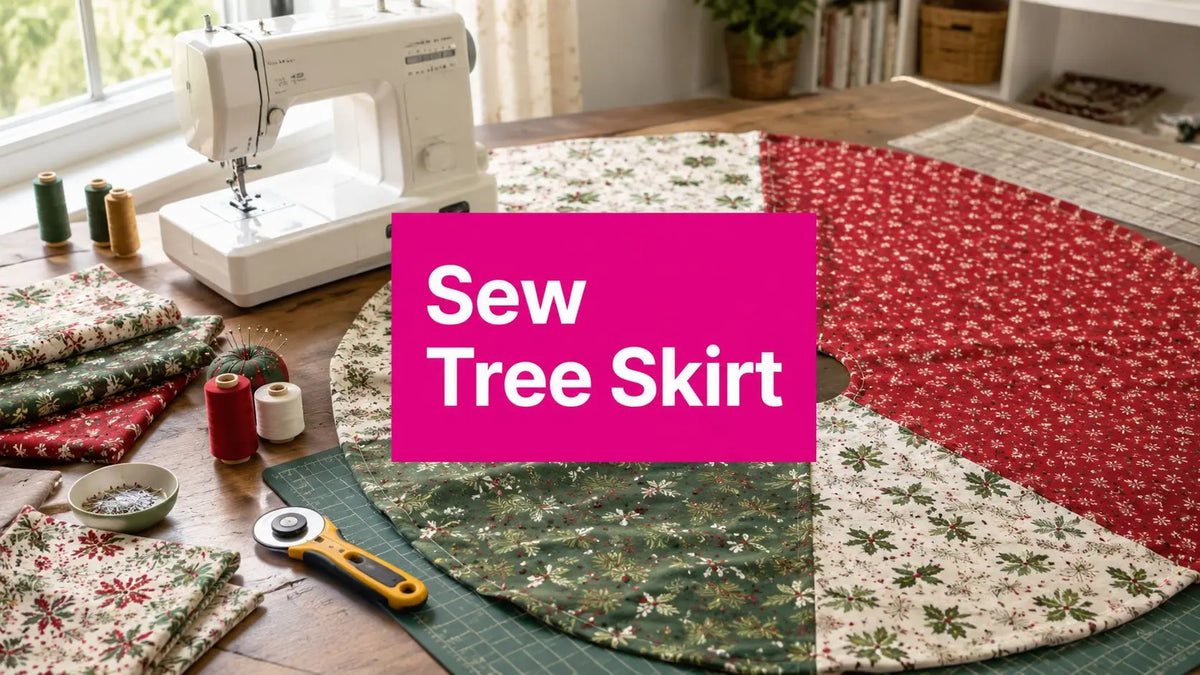
The tree is up, the lights are glowing, and the stand is still visible beneath the lowest branches. A handmade skirt solves that problem while giving you a manageable quilting project. The simplest method uses a circular fabric piece with a center opening, a straight slit, batting, backing, and finished binding. You can adjust the diameter, opening, layers, and trim to suit your tree instead of forcing a ready-made size to work.
The classic tree-skirt shape has practical roots. Christmas tree skirts emerged in 19th-century Germany, with several accounts placing their appearance in the 1870s, when fabric helped catch hot candle wax beneath decorated trees. As electric lights replaced candles, the skirt became primarily decorative while continuing to hide the stand and frame gifts, an evolution described in this history of Christmas tree skirts. That same circle, center opening, and finished edge still make an excellent beginner sewing project.
Why a Handmade Tree Skirt Beats Store Bought
A handmade tree skirt makes the base of the tree part of the room's decorating plan. You can repeat colors from a quilt, coordinate with stockings, use fabric from a family collection, or add appliqué that reflects your household. A purchased skirt may cover the stand, but a sewn version can match your exact palette and the amount of coverage you want.

A useful first quilting project
If you're learning how to sew a tree skirt, start with a full circle rather than scallops or complex patchwork. The shape lets you practice several important skills without requiring a complicated block design:
- Curved cutting: You'll learn to keep the outer radius smooth and consistent.
- Layer control: The top, batting, and backing must remain flat while you baste and quilt.
- Edge finishing: Binding teaches you how to ease fabric around a curve.
- Center construction: The opening and slit need a clean, reinforced finish.
- Decorative planning: You can add trims after the basic structure is stable.
Cotton fabric, low-loft batting, and ordinary sewing notions are enough for a flexible skirt that lies neatly around the stand. You won't need heavy equipment for the basic version, although a walking foot makes layered quilting easier.
A custom skirt also becomes a holiday keepsake. Add embroidered names, family dates, small tree motifs, or pieces from memorable garments. For a home with pets or children, choose washable materials and secure embellishments carefully. For a more formal room, use a polished binding, piping, or understated metallic thread.
Country-inspired decorating can help you choose a palette before you shop. Browse country Christmas decorating ideas from Farmhouse World for inspiration, then pull fabric colors from the room rather than choosing prints in isolation.
Sizing Your Tree Skirt and Picking a Pattern
A six-foot tree in a McKinney living room may have a narrow stand but branches that spread much farther at the bottom. Measure before buying fabric. Gently spread the lowest branches, then measure from the trunk to the widest point in several directions. Let the finished skirt extend beyond that spread enough to cover the stand and frame the gifts without looking undersized.
The center opening needs its own measurement. Check the stand tube or the space around the trunk, then add a little ease so the skirt slips into position without pulling against the slit. For a circular draft, measure the opening first, add about 1/4 inch of allowance for attaching bias tape, and mark the outer radius from the same center point. The theseamanmom tree-skirt measurement guide demonstrates this sequence. Treat the draft like a compass: one mark controls the opening, and the second controls the outer edge.
Quick fabric planning
Use this table for an initial shopping list, then check the pattern envelope. Directional prints, large motifs, pieced tops, scallops, and layout waste can increase the required yardage.
| Finished Diameter | Typical Tree Height | Minimum Top Fabric | Common Opening |
|---|---|---|---|
| 44 inches | 6-foot tree | About 2.5 yards when the bolt is at least 44 inches wide, based on this six-foot tree skirt guide | Sized to the stand tube |
| 48 inches | Medium home tree | Plan the pattern's listed yardage and allow layout ease | Sized to the stand and trunk |
| 56 inches | Tree with a wide base | Around 3 yards total for assorted Christmas fabrics in one quilted pattern tutorial | Sized for a relaxed fit |
| 60 inches | Fuller coverage | Follow the pattern layout, especially for piecing and backing | Sized to the stand tube |
One pattern source recommends making the finished skirt 5 to 6 inches wider than the tree's base. Its example uses a 50-inch-wide tree and a 56-inch skirt, with around 3 yards total of assorted Christmas fabrics. A separate quilted design finishes at 60 inches in diameter and lists multiple 3/8-yard fabric cuts plus 4 yards of backing. These examples show why a single shopping rule cannot fit every tree.
For a plain circle, fold the fabric into quarters. Mark the opening radius at the folded corner, then mark the outer radius and cut through the layers. If you prefer patchwork, choose wedges, panels, or concentric rings. Straight pieced sections usually align and quilt more easily than one large uninterrupted circle. Select the pattern after measuring, so the materials and notions you buy match the actual skirt rather than an assumed size.
Materials and Notions Worth Buying Once
A tree skirt is easier to sew when the fabrics behave similarly. Choose tightly woven quilting cotton for the top and backing. It presses cleanly, follows curved edges predictably, and offers plenty of seasonal color. Heavy home décor fabric can work when a pattern allows it, but its extra bulk makes the center opening and binding harder to control for a first project.
Prewash washable fabrics together and press them flat. Fabric can change slightly during washing, so this step lets the layers settle before assembly and reduces the chance that the finished skirt will shift shape later.
Match the supplies to the project
| Supply | Recommended Choice | Best For | When to Change It |
|---|---|---|---|
| Top and backing | Quilting cotton | A stable beginner skirt with clean pressing | Use heavier fabric only when the pattern supports the extra bulk |
| Batting | Low-loft cotton or cotton-poly | Flexible coverage with enough body to hide the stand | Choose polyester for soft drape and quick drying; avoid very high loft for tight curves |
| Piecing thread | 50-weight cotton | Piecing and general quilting | Choose polyester when dense fabric or stronger topstitching calls for it |
| Needle | Universal 80/12 | Most quilting cotton | Move to 90/14 for heavier fabric, multiple layers, or metallic accents |
| Fusible web | Lightweight, washable option | Appliqué details | Skip it for a plain circle or use washable fabric glue for temporary control |
| Binding | Double-fold bias or handmade bias strips | Outer curve and center opening | Use a contrasting fabric when the edge should become a design feature |
Cotton or cotton-poly batting gives the skirt flexible body. Polyester provides softer drape and dries quickly. Wool and very high-loft batting can make curved seams and binding too thick, so check the finished thickness before cutting. For machine quilting, confirm that the batting suits the space between your stitched lines.
Keep the supporting tools together: a rotary cutter and mat, clear ruler, fabric scissors, quilting clips or pins, washable marker, seam ripper, pressing cloth, and iron. Double-sided tape or long quilting pins can steady the center slit while you sew. An accurate 1/4-inch presser foot, good lighting, and a walking foot or dual-feed system also help keep the layers aligned.
Linda's Electric Quilters carries batting, quilting cotton, thread, bias binding, rotary tools, and downloadable patterns for this project. That makes it practical to compare the fabric, batting, binding, and notions against your chosen circle or patchwork design before ordering.
Pro Tip: Insert a fresh needle before quilting through the batting. Change it again if you switch to metallic thread. A needle that handled clean cotton may begin skipping as the layers become dense or the stitching turns decorative.
Cutting and Assembling the Layers
A clear floor or large table gives the circle room to lie flat. Crowded fabric can shift while you fold, making the center drift or the outer curve uneven. Before cutting, press the top fabric and fold it into quarters, matching the edges carefully. Pin the folded edges so the center stays fixed.
At the folded corner, mark the opening radius first. Measure from that point outward to the finished outer radius, then connect the marks with a smooth curve. For a simple opening, cut a small wedge from the center. If you prefer a straight slit from the outer edge to the center, mark the line while the fabric remains folded so both sides stay aligned. Cut the top, batting, and backing to the same shape, allowing approximately a 1/2-inch seam allowance around the perimeter and along one slit before turning the piece right side out.
Choose your edge shape
A plain circle is easiest to cut and bind. For scallops, draw gentle arcs around the outside with a plate or bowl as a curve guide. Repeat one template around the edge, and mark a pivot point so each scallop begins and ends in a consistent position.
Patchwork or quilting needs more planning before the final cut. Assemble the top from wedges, strip sets, or blocks, then place a circle template over it and trim the finished shape. One source describes a 45-inch circle template for a quilted layout and recommends leaving the backing and batting oversized by about 2 inches on all sides. That extra fabric gives you room to trim the three layers evenly after quilting.

Stack and baste
Lay the layers in this order:
- Backing: Right side down.
- Batting: Centered over the backing.
- Top: Right side up.
Smooth each layer from the center toward the edge. Let the fabric settle naturally instead of pulling it outward, since stretching now can create puckers later. Baste inside the future seam allowance with long temporary stitches, quilting pins, clips, or fabric-safe temporary spray adhesive.
For a straight slit, baste on both sides of the marked line without crossing the cutting path. The added stability helps keep the layers together during quilting and gives the binding a cleaner edge.
The video below demonstrates the folding and layering sequence described here.
Stitching Settings and Quilting the Layers
Set up the machine before you bring the full circle under the presser foot. Use a fresh universal or Microtex needle, all-purpose cotton thread in the top and bobbin, and a 1/4-inch foot when piecing or marking seams. Check the bobbin casing and upper-thread path if the tension looks uneven. A clean, correctly seated bobbin matters more than decorative thread when you're feeding three layers.
For quilting passes, lengthen the stitch slightly to about 2.5 mm. Very short stitches can perforate the batting and make the curve difficult to manage. A walking foot or dual feed helps the top, batting, and backing move together instead of letting the upper fabric creep ahead.
| Layer Combination | Stitch Length | Foot Type | Tension Adjustment |
|---|---|---|---|
| Cotton top with low-loft batting and cotton backing | About 2.5 mm for quilting | Walking foot or dual feed | Begin with normal balanced tension and test first |
| Cotton top with cotton-poly batting | About 2.5 mm for quilting | Walking foot preferred | Adjust only after checking needle, threading, and bobbin seating |
| Multiple layers or heavier accents | Slightly longer quilting stitch may help | Walking foot or dual feed | Test on a scrap with the same layer stack |
Begin at the center and work outward. Concentric circles, gentle echo curves, or radiating spokes all suit a round skirt. If the top is pieced, stitch in the ditch along the seam lines first to anchor the blocks, then add decorative quilting.
Keep both hands flat on the fabric. Don't push or pull the circle through the machine. Near the curved edge, stop every few inches with the needle down, lift the foot, and rotate or ease the fabric. This pause prevents fullness from folding into a tuck.
Machine-room advice: If the stitches skip, don't immediately change the tension. First confirm that the needle is fresh and appropriate for the layer thickness, the thread is seated in every guide, and the walking foot is engaged.
Quilt within the area that will remain after trimming and binding. Leave the marked slit clear if your design makes cutting there easier. Once the quilting is complete, remove the basting pins or temporary stitches and inspect both sides before trimming.
Binding, Finishing, and Embellishment Ideas
After quilting, trim the circle so the backing and batting match the top. A regular perimeter gives the binding a stable path. Measure the outer curve, then cut 2.25-inch bias binding strips long enough to reach around it with about 10 inches of overlap. For a Linda's-tested supply setup, you can source quilting batting and notions at Linda's Electric Quilters without adding another materials search.
Join the strips on the diagonal and press the continuous piece in half lengthwise. Sew it to the skirt edge with a 1/4-inch seam, using a bias tape foot if available. Bias binding follows a curve much like a flexible tape around a bowl, yet it still needs gentle easing. Stretching it during stitching can create a wavy finished edge.
The center opening takes slower, careful work. Begin at the outer slit, continue around the inner trunk opening, and miter the binding where the curves meet. Turn the remaining edge to the back and slip stitch it by hand. Finish with edge topstitching for a defined outline, or leave the hand-finished side softer.
Finish the design for your room
- Button and twill tie: Reinforce both sides of the slit before attaching the closure.
- Jingle bells: Group small bells at scallop points and secure them firmly.
- Hand embroidery: Stitch tree motifs near the hem with embroidery floss.
- Contrast piping: Choose a holiday color that outlines the skirt without competing with the tree.
- Appliqué: Fuse and stitch seasonal shapes before quilting so the quilting helps hold them in place.
Match each embellishment to how the skirt will be used. A washable skirt needs details that can withstand laundering. A display piece can use more delicate trim, as long as it will not catch on gifts or invite small children and pets to pull at it.
For a fuller patchwork approach, compare the construction requirements in this published quilted Christmas tree-skirt pattern. Its finished size and backing requirements illustrate why patchwork designs require more fabric planning than a plain circle.
Troubleshooting and Where to Shop Your Supplies
Tree-skirt problems usually show up during quilting or binding rather than circle drafting. Match the symptom to the likely cause first, then correct that area instead of unpicking the whole project.

| Problem | Likely Cause | Concrete Fix |
|---|---|---|
| Puckered top fabric | Loose or uneven basting | Smooth from the center, add quilting pins or temporary spray adhesive, and re-baste before sewing |
| Wavy outer edge | Bias binding was stretched | Remove the affected section, ease the binding around the curve, and press carefully |
| Skipped stitches | Dull or unsuitable needle, or thread path trouble | Insert a fresh needle, rethread the machine, and check the bobbin casing |
| Uneven scallops | Curves were traced freehand | Use one plate or bowl as a template and secure a pivot pin |
| Center slit pulls open | Closure area lacks reinforcement | Add a small bar tack, interfaced patch, button, or twill tie at the stress point |
| Bulky seam | Too many thick layers meet | Trim seam bulk, press it open or to one side, and use a pressing cloth |
If the bound edge ripples, let the skirt cool completely after pressing before deciding whether it needs repair. Temporary waviness may settle as the fabric cools. Bias binding that was stretched will not correct itself, so unpick that section and ease it around the curve without pulling.
A practical supply list keeps troubleshooting simpler. You can source pre-cut batting bundles, coordinating thread, double-fold bias binding, rotary supplies, and related notions through Linda's Electric Quilters. Its pattern library, instructional videos, and live shopping content can support the project from the first cut through final pressing.
Pause the embedded tutorial after each major phase and compare your layers, seam direction, and binding placement. Checking at these stopping points catches shifted fabric or a misplaced edge before the next stage makes the error harder to remove.
Frequently asked questions
How large should a Christmas tree skirt be?
Choose a finished diameter that covers the stand and extends 5 to 6 inches beyond the tree's base. A six-foot tree guide recommends at least 44 inches round, while other patterns use 56-inch or 60-inch finished sizes for broader coverage. Measure the actual stand and check the pattern layout before cutting.
How much fabric do I need for a tree skirt?
The amount depends on the finished diameter, fabric width, print direction, and whether the top is pieced. One six-foot tree guide calls for about 2.5 yards when the fabric bolt is at least 44 inches wide. A contrasting top and bottom uses about 1.25 yards of each, while a pattern using assorted Christmas fabrics lists around 3 yards total. For a plain circle, confirm that the fabric width accommodates the radius before purchasing.
Should a tree skirt have batting?
Batting is optional, but low-loft cotton or cotton-poly batting adds body and creates a quilted finish. It keeps the skirt flexible enough to settle around the stand without making the layers stiff.
How do I keep the center opening from tearing?
Stabilize the slit with interfacing, dense stitching, or a small bar tack before adding the button and twill tie. Bind the opening carefully, and avoid lifting or pulling the skirt into place by the slit alone.
Can I make a scalloped tree skirt as a beginner?
Yes, although a plain circle is easier to control. For scallops, use one consistent plate or bowl as your template and secure a pivot point so every arc repeats evenly around the edge. Mark the curve on the fabric before cutting, then check that the final scallop meets the starting point cleanly.
For a first project, use the circle-skirt drafting method, then pair the measured fabric with batting, binding, thread, and notions from the same supply list. That combination lets you solve fit and construction questions before adding decorative details, while keeping the materials organized for the finished holiday project.


