
Making a t-shirt quilt is one of the best ways to wrap yourself up in good memories. But before you can get to the fun part, you have to get your supplies in order. Having sharp cutting tools, the right stabilizer, and quality fabrics from the get-go makes the entire project run smoother and sets you up for success. At Linda's, we have all the high-quality supplies you need to turn your t-shirt collection into a treasured keepsake.
Gathering Your Supplies For The Perfect Quilt
Before you even think about making that first cut, take the time to set up your workspace properly. This is probably the most important thing you can do. A well-prepped sewing station means no more frustrating mid-project hunts for a tool, letting you stay in the creative zone.
The right tools do more than just make the job easier—they ensure your cuts are accurate from the very start. That precision is what makes the difference between a quilt that looks homemade and one that looks like a treasured heirloom.
Essential Cutting and Preparation Tools
For this project, your best friends are going to be a rotary cutter, a self-healing mat, and a clear quilting ruler. A sharp rotary cutter is non-negotiable; it glides through that t-shirt material for crisp, clean edges that scissors just can’t deliver. When you use it on a self-healing mat, you protect your table and keep your blade from dulling too quickly.
Now, let's talk about the secret weapon for t-shirt quilts: fusible interfacing. This stuff is magic. T-shirt fabric is a stretchy knit, and if you try to sew it as-is, you’ll end up with wavy, puckered blocks that are impossible to line up. Find the perfect weight of fusible interfacing for your project in our shop to guarantee your success.
Applying a good quality fusible interfacing to the back of every single t-shirt block is the key. It stabilizes the fabric, making it handle just like a sturdy piece of quilting cotton. Trust me, this is a step you absolutely cannot skip if you want flat, square blocks.
Fabric, Batting, and Thread Selection
With your t-shirts all prepped and ready, it's time to gather the materials that will turn them into an actual quilt. You'll need backing fabric, some cozy batting, and a reliable thread to hold it all together.
- Backing Fabric: For your quilt's backing, you can't go wrong with a high-quality 100% cotton fabric. It's soft, it wears well, and it's a dream to work with. If you need some help picking out the perfect material to complement your shirts, check out our guide on the best quilting fabric.
- Batting: This is the fluffy middle layer that gives your quilt its warmth and weight. What you choose here really determines the final feel of your quilt. Here at Linda's, we carry fantastic options like The Warm Company batting, which gives you that wonderful loft and coziness without feeling too heavy or stiff.
- Thread: Don't skimp on the thread! A 50wt 100% cotton thread is the workhorse of quilting for a reason. It’s strong enough to last for decades but fine enough that it won’t add extra bulk to your seams. Browse our extensive collection of threads to find the perfect color and strength for your masterpiece.
Getting all these items together before you start means you can just relax and enjoy the process. Once your station is set up, you can dive right into the creative journey of building your one-of-a-kind t-shirt quilt.
Preparing And Cutting Your T-Shirt Blocks
Alright, this is where the magic really starts. Your treasured pile of t-shirts is about to become the heart of a beautiful quilt. Getting the prep work right is absolutely crucial—it's the foundation for a quilt that not only looks professional but will also stand the test of time. A little care now prevents a lot of headaches later.
First things first, wash all of your t-shirts. Even if they look clean, they might have residues that can mess with the next steps. I always recommend washing them in cold water and skipping the fabric softener. Softener leaves a film that can prevent fusible interfacing from sticking properly. Once they're washed, tumble dry them on low to get any shrinkage out of the way before you start cutting.
This little graphic gives you a great visual roadmap for the whole process, from grabbing your tools to prepping the fabric.
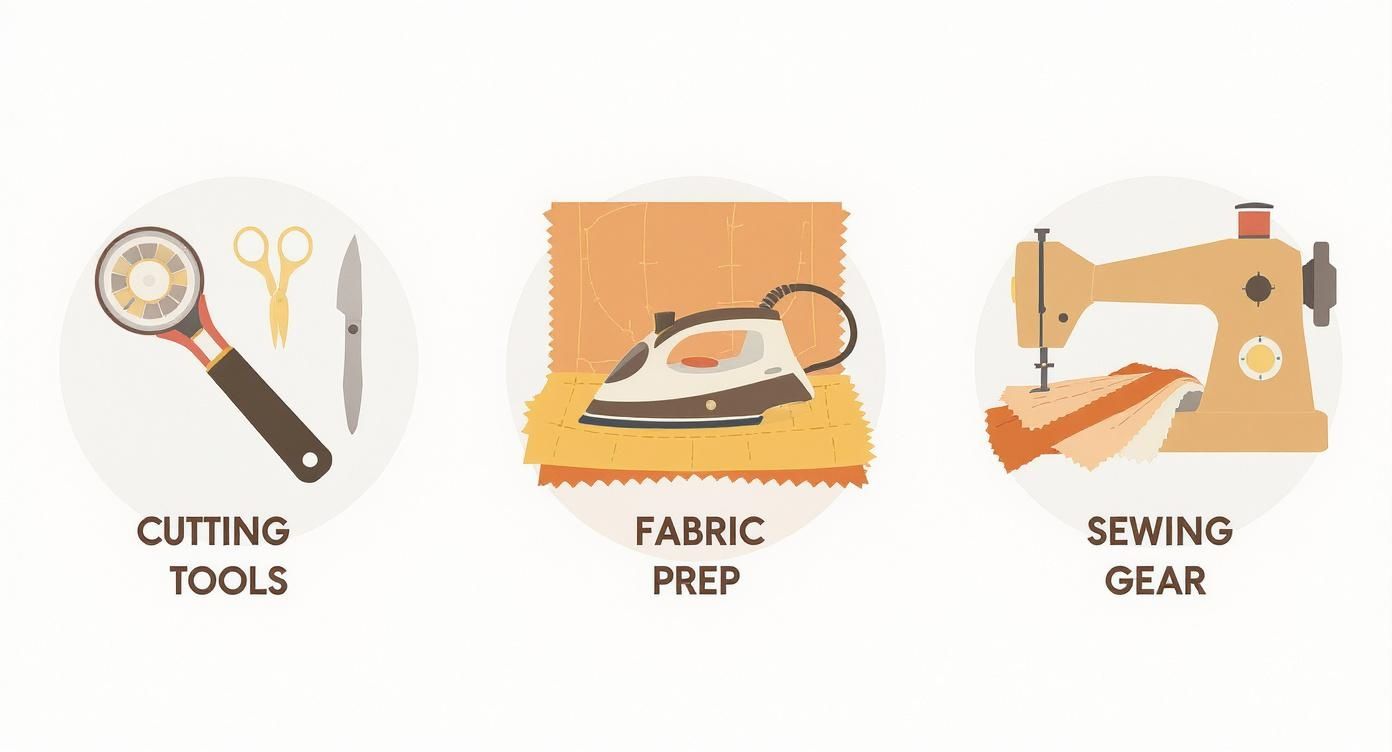
As you can see, it’s not just one step but a series of them—cutting, prepping, and then sewing—that leads to a great result.
Stabilizing Your T-Shirt Fabric
With your shirts all clean and dry, it's time to break them down. Grab your scissors and carefully cut up the side seams and along the shoulder seams. This will let you separate the front of the shirt from the back. Just set aside the pieces with the graphics you plan to use.
Now for what I consider the most important part of the whole project: applying fusible interfacing. T-shirt material is a knit fabric, which means it’s stretchy. If you try sewing it as-is, you’re in for a world of warped blocks, wavy seams, and a whole lot of frustration. Interfacing is a game-changer; it takes away the stretch and makes that knit behave just like sturdy quilting cotton.
Cut a piece of interfacing that's just a bit larger than the graphic on your shirt. Lay the t-shirt piece with the graphic facing down on your ironing board, smooth it out completely, and place the interfacing on top. Make sure the bumpy, adhesive side is touching the fabric.
Using a hot, dry iron, press down firmly—don't slide the iron around. Just lift it and press in a new spot for about 10-15 seconds. Keep doing this until the entire piece is fused solid.
Cutting Your Blocks To Size
Let the interfacing cool down completely. You'll notice the fabric feels crisp and stable, which is exactly what we want. This is where your precision really counts. The goal is to cut a perfect square around each graphic, making sure it’s nicely centered and straight. The right tools make this part a breeze.
Honestly, a clear quilting ruler and a sharp rotary cutter are non-negotiable here. The gridlines on the ruler are perfect for centering the design and guaranteeing your corners are true 90-degree angles. You can find a fantastic selection of rulers and cutters in our shop to ensure perfect cuts every time.
Many quilters, myself included, like to cut blocks to either 12.5 x 12.5 inches or 15.5 x 15.5 inches. That extra half-inch gives you a quarter-inch seam allowance on all four sides. If you're looking to get better with your rulers, check out our guide on quilting ruler templates—it's full of tips to help you master this skill.
The secret to a long-lasting quilt really comes down to how well you prep the fabric. Proper stabilization is everything when you're working with stretchy t-shirt blends. It's the one step that ensures your quilt will be loved for years to come. For more on t-shirt fabric trends, the folks at goodink.com have some fascinating insights.
Now that all your shirts are stabilized and cut into perfect squares, go ahead and stack them up. You've just knocked out the most labor-intensive part of making a t-shirt quilt. The fun part—designing the layout—is next!
T-Shirt Quilt Size And Material Estimator
Before you even start cutting, it's a good idea to know roughly how many shirts you'll need for the quilt size you have in mind. I put together this little chart to help you estimate your materials based on common quilt sizes and a standard 12x12 inch finished block size.
| Quilt Size | Approx. Dimensions | 12x12 Inch Blocks Needed | Backing Fabric (Yards) |
|---|---|---|---|
| Lap | 48 x 60 inches | 20 | 3.5 |
| Twin | 60 x 84 inches | 35 | 5 |
| Full/Double | 72 x 84 inches | 42 | 5.25 |
| Queen | 84 x 96 inches | 56 | 8 |
This table is just a starting point, of course! You can always add sashing or borders to make your quilt larger if you're a few shirts short. It’s a handy reference to keep nearby as you plan your project.
Designing Your Quilt Layout
Alright, your t-shirt blocks are all stabilized and cut, which means the heavy prep work is behind you. Now comes the really fun part—where your inner artist gets to play! This is the stage where you transform a pile of memories into a beautiful, cohesive quilt top.
And don't worry, you don't need some fancy design wall to make it happen. I've planned out dozens of quilts on a clean patch of floor or even the guest bed. Just find a space big enough to lay everything out.
Spread out all your finished blocks so you can see your collection at a glance. Start shuffling them around into rows and columns. Your main goal here is to create a pleasing balance. Try not to clump all the dark shirts in one corner and all the light ones in another. Instead, think like a checkerboard, scattering the colors and tones to keep the eye moving happily across the quilt.
It's also a good idea to think about the stories your shirts tell. Got a bunch from your college days, family vacations, or concert tours? You can either group them to create little themed sections or sprinkle them throughout to tell a broader story. There's no wrong answer—it's all about what feels right to you.
Adding Sashing and Cornerstones
Once you've landed on an arrangement you love, it’s time to think about adding sashing. Think of sashing as the picture frames for your t-shirt blocks. These strips of fabric go between each block and serve a couple of crucial purposes:
- It Looks Incredible: Sashing gives the busy graphics on your tees a little breathing room. It creates a clean, organized grid that makes the whole quilt look polished and professional.
- It Makes Assembly Way Easier: Trust me on this one. Sewing blocks into rows with sashing is so much simpler than trying to match up the corners of stretchy t-shirt blocks directly. It’s a total game-changer for getting everything to line up.
To take it up another notch, we'll also use cornerstones. These are just little fabric squares that pop in where the sashing strips meet. Not only do they add a little extra color, but they also help all your rows and columns align perfectly.
Sashing is what really elevates a t-shirt quilt from a simple blanket to a well-constructed keepsake. It ensures all your blocks, even if they're slightly different, come together in a neat, uniform grid.
How to Measure and Cut Your Sashing
Precision is your friend here. First, measure the side of one of your trimmed t-shirt blocks (for example, 12.5 inches). This measurement will be the length of your sashing strips.
For the width, it’s mostly personal preference, but a 2-inch finished width is a classic choice that looks great. To get that, you'll need to cut your fabric strips 2.5 inches wide—that extra half-inch accounts for your quarter-inch seam allowance on both sides. Your cornerstones should be cut to match the width of your sashing strips, so they'll be 2.5 x 2.5-inch squares.
Picking the right fabric is just as important as cutting it right. A good quality quilting cotton that complements the colors in your shirts will make your graphics pop. You can find an amazing selection of cottons right here at Linda's to find that perfect shade to frame your memories.
And if this project has you bitten by the quilting bug, you should check out our post on the easiest quilt patterns for beginners for some great ideas on what to tackle next
Assembling The Quilt Top
Okay, your layout is looking perfect! Now it's time to head to the sewing machine and actually bring this quilt to life. This is the moment where all that careful prep and cutting really pays off, transforming a pile of individual blocks into one beautiful quilt top. The best way to tackle this is row by row—it keeps everything organized and manageable.
First up, you'll attach your vertical sashing strips to the T-shirt blocks. Grab the blocks for your first row and the sashing strips you cut for them. Place a sashing strip on the right-hand side of your first block, making sure the right sides of the fabric are facing each other.
Sew them together using a consistent quarter-inch seam allowance. Honestly, this is the golden rule of quilting. If you can keep that seam consistent, every block, row, and corner will line up beautifully later on. Keep adding a block and then a sashing strip until your first row is all stitched together. Just repeat that process for every row you have.
Creating Clean Seams
With all your rows pieced, it’s time to head to the ironing board. Proper pressing is the secret weapon for getting that flat, professional-looking finish we all want. Remember, pressing isn't the same as ironing; you want to press the iron down and lift it up, not slide it back and forth. This simple technique prevents your fabric from stretching out of shape.
For these seams, press the seam allowances on your sashing strips towards the sashing. This little trick helps cut down on bulk right where your seams will meet up later, which makes the next steps so much smoother.
A well-pressed seam is an absolute game-changer. It doesn’t just make your quilt top lay flat; it makes the final quilting process a hundred times easier by getting rid of those bulky intersections that can be a real pain to sew through.
After pressing your row seams, you'll join the rows together by adding the long horizontal sashing strips between each one. Take a horizontal sashing strip and place it along the bottom of your first row, right sides together, and sew it on with that same quarter-inch seam. Then, you'll attach the top of your second row to the other side of that same sashing strip.
This kind of methodical process is what quilting is all about. It’s a craft that's been growing steadily, especially with a skilled community that really appreciates getting into the details. Quilters today have, on average, about 10 years of experience, starting around 11 projects and finishing nine each year. This is why clear, step-by-step guidance is so important. If you’re curious, you can find more cool insights about quilters in this 2025 quilting trends survey.
Joining Your Rows Together
Alright, time for the final assembly step: joining the sashing-separated rows to create the full quilt top. This is where a fantastic technique called nesting seams comes into play. It’s a lifesaver for getting sharp, perfect points.
- Lay your first two rows right sides together. Your goal is to line up the vertical sashing seams perfectly.
- Feel where the seams meet. Because you pressed them in opposite directions (one going up, one going down), they should lock together nice and snug.
- Pin right at these intersections. This is crucial! It keeps anything from shifting around while you’re sewing.
This nesting technique is what gives you those perfect corners where your sashing and cornerstones meet. And as a quick reminder, the stability of your blocks makes all the difference here. If you noticed your fabric stretching at all during this process, you might want to check out our guide on [how to use fusible interfacing](https://lindas.com/blogs/education/how-to-use- fusible-interfacing) for your next project. It really helps.
Keep joining your rows this way until the entire quilt top is assembled. Give it one last, gentle press, and then step back and admire what you’ve made. You've successfully pieced your memories together! Now, you're ready for the final steps to turn it into a finished, cozy quilt.
Finishing Your Quilt With Batting And Binding
You did it! You’ve pieced together all those memories into a beautiful quilt top. Now it’s time for the magic that turns it into a cozy, cuddly treasure.
This is where we build the "quilt sandwich"—that perfect combination of your backing fabric, the soft batting in the middle, and your finished quilt top. This is the part of the process that gives your quilt its warmth, weight, and that polished, professional finish.
First things first, find yourself a big, clean space to work. The floor or a couple of tables pushed together works great. Spread your backing fabric out, wrong side up, and get it as smooth as possible. I like to use painter's tape on the corners and edges to keep it pulled taut.
Next up is the batting. Lay it right on top of the backing, gently smoothing out any wrinkles. Finally, place your pieced quilt top on the very top, right side facing you. Both your quilt top and the backing should be a little bigger than your batting layer.
Basting Your Quilt Layers
Basting is how we temporarily hold these three layers together. It’s a make-or-break step that prevents the fabric from shifting and puckering while you're quilting. You’ve got a few solid options here.
- Pin Basting: This is the classic method for a reason. Using curved safety pins made for quilting, you’ll want to place a pin every 4-6 inches all over the quilt. I always start in the center and work my way out to the edges.
- Spray Basting: If you're looking for a faster alternative, a temporary spray adhesive is your best friend. Just work in sections, spraying a light, even coat on the batting before smoothing your quilt top or backing over it.
No matter which method you pick, the goal is the same: create a stable, secure quilt sandwich where none of the layers can bunch up. Trust me, taking your time here will save you a world of headaches later on.
Simple Quilting For Beginners
With your quilt basted and ready to go, it's time for the fun part—the actual quilting! This is the stitching that goes through all three layers, locking them together for good and adding that lovely quilted texture.
For a first T-shirt quilt, you can't go wrong with a technique called stitching-in-the-ditch. It’s exactly what it sounds like. You just sew directly in the seam lines, or the "ditch," created by your sashing. This is a wonderfully forgiving method that secures everything without distracting from your T-shirt designs.
A walking foot for your sewing machine is a non-negotiable for me on this step. It’s designed to feed all three layers through the machine evenly, which is critical. Linda's carries a variety of specialty feet, including walking feet, for most machine brands.
Creating And Attaching The Binding
The binding is the final touch, like the frame on a picture. It’s a fabric border that encloses all the raw edges of your quilt, giving it a durable and polished look.
To make it, you'll cut 2.5-inch wide strips of fabric, sew them together end-to-end to create one long strip, and then press it in half lengthwise. This creates a double-fold binding that is incredibly sturdy and will stand up to years of use.
You’ll sew the raw edge of this binding strip to the front of the quilt, then fold it over to the back. Most quilters, myself included, prefer to hand-stitch it down on the back for a nearly invisible finish.
For a project this special, choosing the right batting is key to getting that perfect cozy feel. If you're not sure where to start, you can explore our favorite batting options from The Warm Company to find the perfect match. This last step beautifully frames all your hard work and gets your quilt ready for a lifetime of snuggling.
Common T-Shirt Quilt Questions
Even when you follow the steps perfectly, questions always come up. It's just part of the creative process! Here are a few of the most common hurdles I see people run into when making their first T-shirt quilt, along with my go-to solutions.
How Do I Handle Graphics That Are Too Big or Too Small?
This one comes up on almost every project. What do you do when that favorite concert tee has a massive tour graphic that won't fit your standard block size? You’ve got a couple of options. You can either create a special, larger block just for that shirt, or you can get clever with your rotary cutter and trim the graphic down to its most essential part.
On the other end of the spectrum are those tiny logos, like the kind you find on a shirt pocket. My advice? Don't just chop it out as a tiny little square. Instead, cut a full-size block but place that small logo off-center. It adds a really cool, modern asymmetry to your quilt top that looks intentional and professional.
Can I Use Different Types of Shirts?
Absolutely! While your basic cotton T-shirts are definitely the easiest to handle, a great memory quilt often includes a mix of fabrics. Go ahead and throw in those sweatshirts, jerseys, or even flannel shirts.
The trick is to make them all play nicely together. Thicker fabrics like sweatshirts might not need any interfacing at all. For those slinky, slippery jerseys, you'll want to grab a slightly heavier fusible interfacing to give them the body they need.
Your goal is to make every block feel and behave like standard quilting cotton before you start sewing. Getting all your fabrics to a consistent weight and stability is the secret to a flat, pucker-free quilt.
What if My Seams Aren't Perfectly Straight?
First off, take a deep breath and don't panic. It happens to literally everyone, especially when you're starting out. If a seam is really wonky, your best friend is a good seam ripper. Carefully unpick the stitches and give it another go.
But if it's just a minor wobble? Don't sweat it. The magic of quilting is that the final stitches—the ones that go through the top, batting, and backing—hide a multitude of sins. Those quilting lines will smooth out and lock in any minor imperfections. Remember, this quilt is about the memories, and a slightly quirky seam just adds to its handmade charm.
Do I Really Need to Pre-Wash My Fabrics?
Yes. Please, please, please do not skip this step. It feels like a chore, but it's probably the most important bit of "quilt insurance" you can have.
Pre-washing all your T-shirts and any new cotton fabric for sashing and backing does two critical things:
- It pre-shrinks everything. This prevents your finished quilt from getting weirdly distorted and puckered the first time you wash it.
- It gets rid of factory gunk. Washing removes leftover chemicals and sizing, which helps your fusible interfacing stick properly. It also takes care of any excess dye that might bleed and ruin your masterpiece later.
Trust me, spending a little time at the washing machine now will save you from potential heartbreak down the road.
You did it! You’ve turned a pile of cherished memories into a beautiful, functional quilt. Now that you've got the bug, you're probably already thinking about the next project.
To get started, explore the incredible selection of fabrics, threads, and high-quality notions at Linda's Electric Quilters. Find everything you need to bring your creative vision to life at https://lindas.com.


