
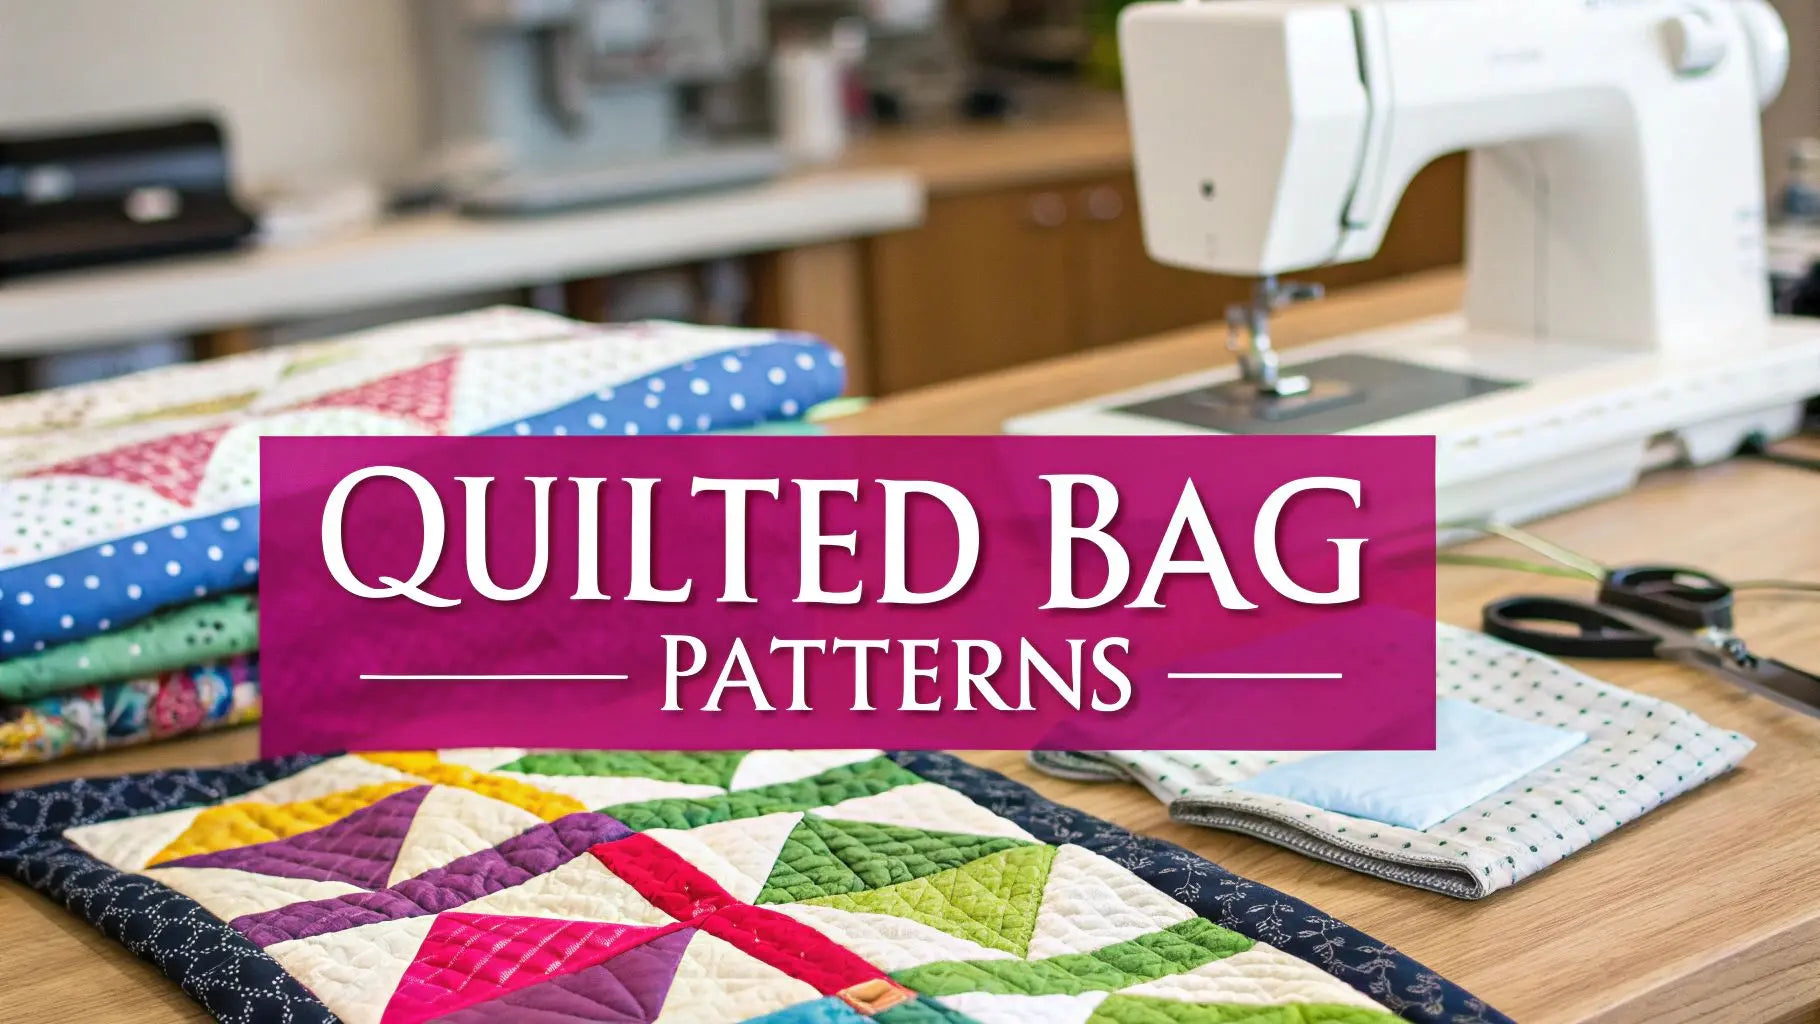
There's something truly special about turning a pile of fabric into a beautiful, sturdy bag you can carry every day. That's the magic of sewing quilted bag patterns.
This isn't just about following steps; it's a creative journey that marries the detailed art of quilting with the practical skill of bag making. This guide will walk you through the essential steps to craft anything you can dream up, from a big, roomy tote to a sleek little crossbody. The process is always the same at its core: pick a pattern you love, choose your fabrics, quilt the panels, and then bring it all together.
Your Journey Into Quilted Bag Making
Diving into quilted bag making is one of the most rewarding things you can do with a sewing machine. It’s so much more than just sewing. You’re creating a piece of functional art that’s completely you.
Whether you've been quilting for years and are looking for a new challenge, or you're a beginner itching to make something you can actually use, a quilted bag is the perfect project. It pulls together all the essential skills—cutting precisely, sewing a straight line, and quilting—into one gorgeous finished piece.
The best part? The endless possibilities for customization. You're the designer here. You get to pick the fabric combos, the hardware, and the final shape. Just imagine making your own heavy-duty tote for the farmer's market or a stylish duffel for that weekend trip you've been planning.
Why This Craft Is Taking Off
Handmade items are having a major moment, and quilted bags are right at the center of it. We've seen a huge spike in interest, especially for quilted tote bags.
In fact, according to Google Trends data, searches for 'quilted tote bags' hit their peak in May. That's right around the time everyone starts looking for stylish, practical bags for summer travels. You can dig into the data yourself over on Accio.com. This trend really shows how much people want accessories that feel personal and unique.
The Essential Supplies to Get Started
Before you even think about cutting your fabric, let's talk tools. Getting your supplies in order first is the secret to a smooth, fun project. Using quality tools not only makes the process easier but also gives your finished bag that durable, professional look we're all after.
- Quality Fabrics: For both the outside and the lining, you can't go wrong with quilting cotton. The prints are endless, and it has a nice, stable weave that’s easy to work with.
- Durable Batting: To give your bag that classic quilted look and some real structure, you'll need a foam stabilizer or fusible fleece.
- Strong Thread: This is not the place to skimp! A high-quality polyester or cotton thread is a must to make sure your seams can handle the daily wear and tear.
- Sharp Rotary Cutter & Mat: When it comes to making bags, clean, precise cuts are everything. A sharp rotary cutter isn't just a suggestion; it's non-negotiable.
Here at Linda’s, we’re firm believers that every amazing project starts with the right materials. We've hand-picked a collection of premium fabrics, threads, and all the notions you'll need for your next quilted bag. Browse our shop to find everything you need to bring your vision to life.
Choosing Your Fabric and Pattern
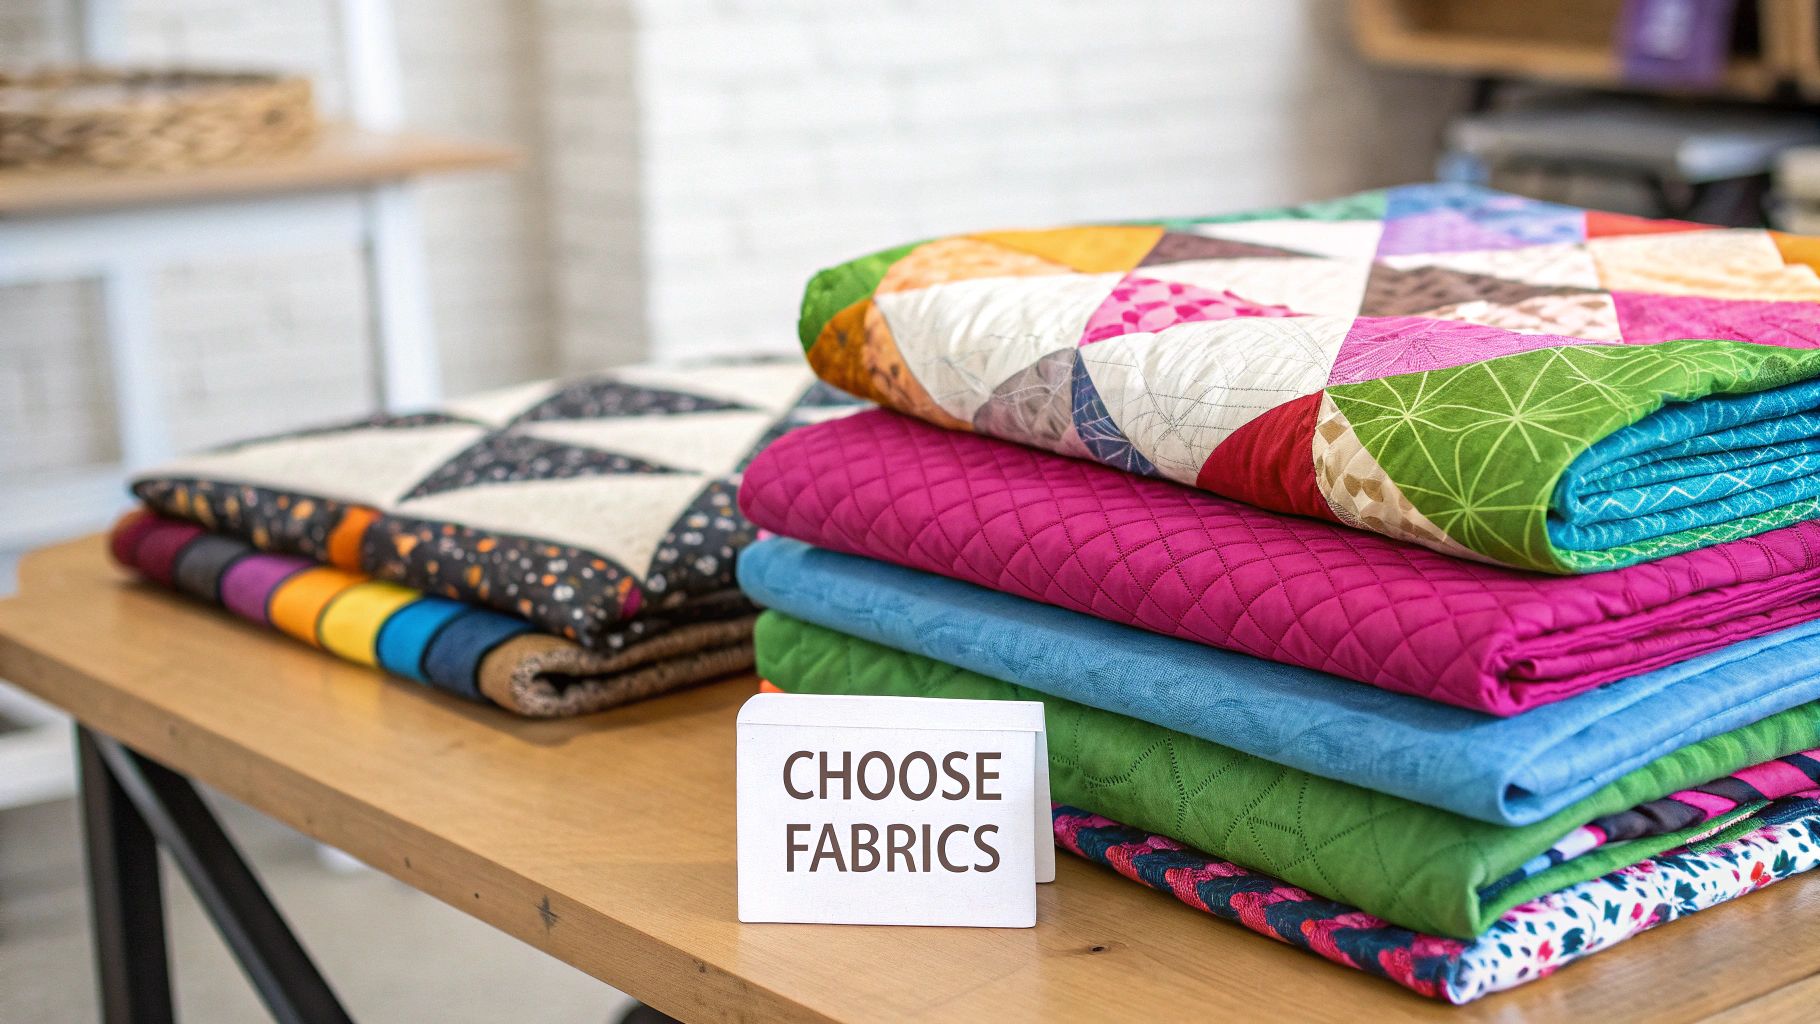
This is where the real fun begins. The journey to your perfect quilted bag starts with two crucial decisions: the fabric you'll use and the pattern you'll follow. These choices are the foundation of your project, shaping everything from the final look to the bag's durability and structure. The right combination can turn a simple tote into a true showstopper.
For the exterior, quilting cotton is always a fantastic place to start. It offers a universe of colors and prints that let your personality shine through. If you're planning a bag that needs to withstand a bit more wear and tear, consider tougher materials like canvas or denim. These heavier fabrics give the bag excellent body and can handle daily use, making them perfect for a work tote or a weekend getaway bag.
When it comes to the lining, think smooth and practical. A light-colored cotton makes it so much easier to find things inside your bag—no more black hole effect! Or, you could add a fun, contrasting print for a delightful pop of color every time you open it.
Selecting the Right Batting
Batting is the unsung hero that gives your bag its quilted texture and body. Without it, you’ve just got a regular fabric bag. The type you choose makes a huge difference in the finished feel and structure, so let's break down the most common options.
- Cotton Batting: This natural fiber gives a soft, traditional feel and quilts up beautifully. It creates that classic, slightly crinkled look after washing that we all love.
- Polyester Batting: Looking for more puff and loft? Polyester batting is your friend. It’s lightweight, holds its shape well, and gives your quilting stitches great definition.
- Foam Stabilizer: If you want a bag that stands up on its own with a really structured, professional finish, a foam stabilizer like ByAnnie's Soft and Stable is the way to go. It’s a game-changer for creating polished-looking bags.
The interplay between your fabric and batting is where the magic happens. A lightweight quilting cotton paired with a foam stabilizer, for instance, results in a bag that is both beautifully structured and visually stunning. This combo keeps your bag from feeling flimsy or collapsing when you set it down.
Pro Tip: Don't be afraid to mix and match! Sometimes the best results come from pairing a sturdy exterior fabric with a softer, more pliable batting, or vice-versa. Experimentation is key to finding your signature style.
If you want to go deeper on this, check out our complete guide to batting choices for every quilter to find the perfect match for your project.
Choosing the right combination of fabric and batting can feel overwhelming, so I've put together a quick cheat sheet to help you decide.
Fabric and Batting Combinations for Quilted Bags
| Bag Type | Recommended Fabric (Exterior) | Recommended Batting | Resulting Structure & Feel |
|---|---|---|---|
| Everyday Tote | Quilting Cotton, Canvas | Cotton or Cotton-Poly Blend | Soft, pliable, classic quilted feel. Great for casual use. |
| Structured Handbag | Denim, Canvas, Faux Leather | Foam Stabilizer (e.g., ByAnnie's) | Firm, stands on its own. Professional, high-end look. |
| Puffy Crossbody | Lightweight Nylon, Quilting Cotton | High-Loft Polyester | Puffy, cloud-like, and very lightweight. Trendy and modern. |
| Travel Duffel Bag | Heavy-duty Canvas, Duck Cloth | Fusible Fleece or Foam Stabilizer | Sturdy and durable, with enough body to hold its shape when packed. |
This table is just a starting point, of course. The best part about making your own bag is that you get to call the shots and create something that's perfectly suited to your style and needs.
How to Read a Sewing Pattern
Once your materials are gathered, it's time to tackle the pattern. Don't let all those symbols and lines intimidate you; think of it as a treasure map leading to an amazing finished bag. A great first step is finding a pattern that matches your current skill level. Beginner-friendly designs often feature simple shapes like totes or drawstring bags, while more advanced patterns might throw in complex pockets, gussets, or zippers.
Before you cut anything, take a minute to scan the pattern for key information. Find the seam allowance—it's usually 1/4" for quilting projects, but bag making can sometimes call for a larger one. You'll also want to familiarize yourself with the pattern markings for grainlines, fold lines, and placement dots. This careful prep work is what ensures all your pieces will line up perfectly during assembly.
It's this attention to detail that creates that professional finish you see in high-end bags. In fact, the luxury goods market, which includes these beautiful quilted bags, is forecasted to grow to $140.55 billion by 2030. You can discover more about this growing fashion trend on Accio.com.
Here at Linda’s, we have a fantastic selection of quilted bag patterns sewing essentials, from beginner-friendly totes to intricate duffels. Find the perfect pattern and all the high-quality fabrics and batting you need to bring your vision to life.
How to Cut and Quilt Your Panels
Okay, you've got your fabrics picked out and your pattern in hand. Now comes the part where the real magic happens—turning those flat pieces of cloth into sturdy, beautiful panels for your bag.
This is where precision is everything. I can't stress this enough. The care you take with your cutting and quilting is what will make your bag look truly handmade, not just homemade.
Get friendly with your rotary cutter and ruler. They're your best tools for the job. A rotary cutter slices through fabric and batting layers like a dream, giving you perfectly straight edges that scissors just can't match. Always use a sharp blade to avoid snagging, and work on a self-healing mat to protect your table and get the crispest cut.
Mastering the Quilt Sandwich
Before you can even think about quilting, you have to make your "quilt sandwich." It's the classic trio: your pretty exterior fabric, the fluffy batting in the middle, and your lining. The whole goal here is to make sure these three layers don't budge an inch while you're sewing. Any shifting will cause ugly puckers and a wonky finish.
Start by laying your lining fabric down, wrong side facing up. Next, smooth your batting on top of that. Finally, place your exterior fabric on the very top, right side up. A little pro tip: cut your fabric pieces just a tad larger than your batting. It gives you some breathing room.
Take your time smoothing every layer out from the center to the edges. A tiny wrinkle might seem like no big deal, but it will absolutely turn into a frustrating pucker once you start quilting. I always use a temporary spray baste or a good handful of safety pins to lock everything in place.
This little diagram is a great visual for how these pieces come together as you start building your bag.

It’s a perfect reminder that putting in the work upfront leads to a much more professional-looking bag in the end.
Choosing Your Quilting Style
Now for the fun part—the actual quilting! The stitches you add do more than just hold the sandwich together. They create texture, add a personal touch, and make your bag super durable. You have a few options, and each one gives a totally different vibe.
- Straight-Line Quilting: This is a fantastic choice for a clean, modern look. Just pop a walking foot on your machine and sew parallel lines, a simple grid, or a classic diamond pattern. It’s super beginner-friendly and always looks polished.
- Free-Motion Quilting: If you’re feeling more creative and want something truly unique, give free-motion quilting a try. You can doodle with your sewing machine, creating stipples, loops, or winding lines for an amazing, one-of-a-kind texture. This is a fantastic skill to develop as you get more comfortable with your machine.
- No Quilting at All: Believe it or not, sometimes the fabric is the star and you don't need to quilt it at all. If you're using a foam stabilizer, like ByAnnie's Soft and Stable, it often provides all the structure your bag needs on its own.
If you're excited to level up your skills, playing with different quilting styles is one of the best ways to do it. You can learn more by progressing from beginner to expert with essential quilt projects that will build your confidence stitch by stitch.
Whatever method you land on, having the right tools from Linda's—like a sharp rotary cutter, a good ruler, and some quality basting spray—will make your prep work a breeze and set you up for a bag you'll be proud of.
Assembling Your Bag Like a Pro
Alright, this is where your project really comes to life. All that patient cutting and quilting is about to pay off as your beautiful, flat panels finally become a real, three-dimensional bag you can actually use. Bringing it all together might seem daunting, but if you take it one piece at a time, you'll see your skills—and your confidence—grow with every seam.
We're going to walk through joining the bag's body, adding the hardware, and attaching those crucial straps. These are the techniques that separate a homemade project from a professional-looking accessory. And you're in good company! Sewing quilted bags is part of a huge global trend. The handbag market was valued at an incredible USD 47 billion and is expected to climb to USD 68.45 billion by 2031. That’s a whole lot of love for stylish, personal accessories. You can learn more about the expanding handbag market to see just how popular your new hobby is.
Installing Zippers and Snaps
A bag isn't much good without a way to close it. Zippers can look intimidating, I know, but getting a clean installation is much easier than you'd think. The trick is to baste the zipper in place first. You can use a long stitch on your machine or even some double-sided tape made for sewing. This simple step keeps everything from shifting while you sew that final seam with your zipper foot.
If you're looking for a simpler closure, you can't go wrong with a magnetic snap. They are ridiculously easy to install and give your bag a polished, high-end look.
- Placement is Key: Always follow your pattern markings to find the perfect center for the snap. I always add a small square of fusible interfacing behind the snap area to reinforce the fabric and prevent tearing from repeated use.
- Mark and Cut: Gently press the prongs of the snap into the fabric. They'll leave little indentations. Use those marks as your guide to cut tiny slits just big enough for the prongs to slip through.
- Secure the Backing: Push the prongs through to the other side and slide the backing washer over them. Fold the prongs outward, and you're done! The snap is locked securely in place.
Creating Structure with Boxed Corners
Ever wondered how tote bags get that nice flat bottom that lets them stand up on their own? The secret is a brilliant little technique called boxed corners. It's a game-changer for adding depth and structure, transforming a flat pouch into a truly functional bag.
After you've sewn your side and bottom seams, pinch one of the bottom corners. You want the bottom seam to line up perfectly with the side seam, creating a point. Measure down from that tip and draw a line straight across the corner. For instance, a 4-inch line will create a base that's 4 inches deep. Just sew right on that line—backstitching at the beginning and end—and then trim off the excess corner fabric. Do the same on the other side, and bam! A professional bag base.
A well-executed boxed corner is a true sign of quality craftsmanship. Take your time aligning those seams perfectly. It's a small detail that makes a massive difference in the bag's final shape and stability.
Adding Handles and Interior Pockets
No bag is complete without handles or straps. How you attach them will depend on your pattern—some are designed to be sewn directly into the seams, while others get topstitched onto the exterior panels before you assemble the whole thing. For maximum strength, always reinforce the attachment points. I like to sew a small square or an 'X' box where the strap meets the bag. This distributes the weight and keeps the strap from tearing away over time.
And don't forget about the inside! Pockets are an easy way to make your bag so much more functional. A simple patch pocket is a great starting point for beginners. Just hem a fabric rectangle and topstitch it onto your lining fabric before you sew the lining together. If you're up for a challenge, a zippered interior pocket is perfect for keeping valuables secure. If you want to build on these skills, check out our guide to elevate your quilting craft with advanced techniques for more ideas.
Of course, finding the right hardware—from zippers and snaps to D-rings and sliders—is essential for that polished look. Here at Linda's, we have a curated selection of high-quality bag hardware to give your project the durable, beautiful finish it deserves.
Adding High-End Finishing Touches
You’ve pieced and quilted, and your bag is finally taking shape. But hold on, we’re not quite done yet. The last 10% of the work is what really makes your handmade project shine and separates a good bag from a truly great one. These final details add durability, structure, and that polished, professional look we all crave.
One of my favorite ways to instantly elevate a bag is with good topstitching. A clean, straight line of stitches along the top edge or down the sides of a strap does more than just look sharp—it adds serious strength. It forces the seams to lie flat, giving your bag crisp, defined edges that look incredibly tidy. For a fun pop, try using a slightly heavier thread in a color that stands out.
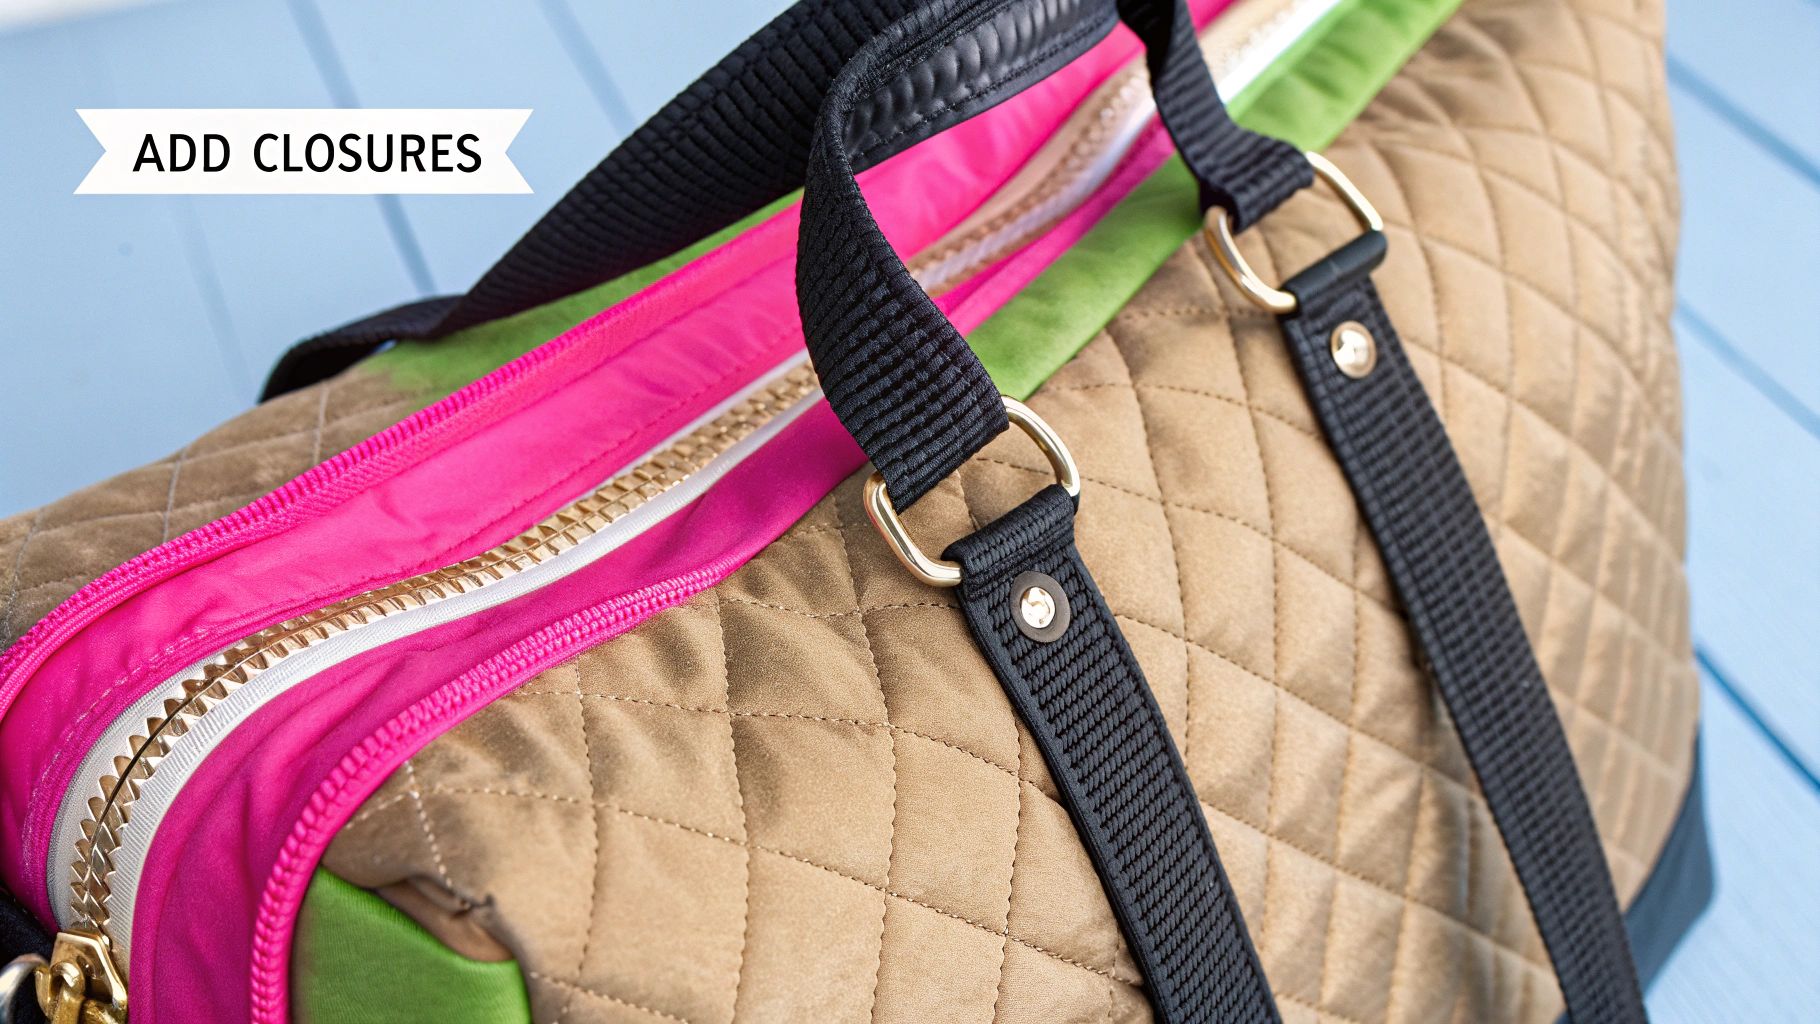
Installing Professional Hardware
Think of hardware as the jewelry for your bag. It adds function, a bit of sparkle, and that touch of luxury that makes your project look like it came from a high-end boutique. Don't let metal pieces intimidate you; they're surprisingly simple to install and make a world of difference.
- Purse Feet: These little metal studs are a bag-saver. They lift the bottom of your bag off dirty surfaces, preventing scuffs and wear. Just mark where you want them, poke small holes for the prongs, push them through, and fold the prongs down over a washer on the inside. Easy peasy.
- Rivets: When you need a connection that’s not going anywhere, rivets are your best friend. They’re perfect for permanently securing handles and straps, offering way more strength than stitching alone. Plus, they add a cool, industrial-chic vibe. All you need is a basic rivet-setting tool.
- Strap Adjusters: If you’re making a crossbody or shoulder bag, an adjustable strap is a game-changer. A simple metal slider and a couple of rectangle rings let you customize the fit, making your bag so much more versatile and comfortable to carry.
Honestly, the right hardware is what turns a pretty quilted project into a durable, everyday accessory. It’s a small investment that pays off big time in style and longevity, ensuring your beautiful creation can handle the rigors of daily life.
Finishing Interior Seams
A beautifully finished interior is the secret handshake of a dedicated bag maker. No one else might ever see it, but you'll know that the inside of your bag is just as lovely as the outside. Leaving raw seam allowances is just asking for them to fray over time.
Instead, try binding them with bias tape. This simple technique encases the raw edges, creating a super clean and durable finish inside your bag. It’s especially useful for bags with drop-in linings or those made with foam stabilizers where the seams are more exposed. You can grab some pre-made bias tape or make your own from a coordinating fabric for a truly custom touch. Thinking about who might receive your beautifully crafted bag? Our guide on why quilts make the best gifts can offer some lovely inspiration.
Ready to give your bag that final polish? Check out the amazing selection of bag hardware and specialty threads right here at Linda’s to finish your project perfectly.
Common Questions About Sewing Quilted Bags
As you start your journey with quilted bag patterns, you're bound to run into a few head-scratchers. It happens to all of us! Let's walk through some of the most common questions I hear, so you can get back to sewing with confidence and create bags that look truly professional.
What Is the Best Needle for Bag Making?
When you’re sewing through multiple layers of fabric, batting, and maybe even some sturdy interfacing, your sewing machine needle is doing some serious work. A standard universal needle just isn't going to cut it. It’ll likely struggle, skip stitches, or even snap.
For nearly all my quilted bag projects, I reach for a Denim (or Jeans) needle. A size 90/14 or 100/16 is usually perfect. These needles are built tough with a super sharp, strong point that’s designed to punch through thick layers without any drama.
Here’s another pro tip that saves a ton of frustration: change your needle often! A good rule of thumb is to swap it out after every 8-10 hours of sewing. It's a tiny thing that makes a massive difference.
How Can I Prevent My Fabric From Puckering When I Quilt?
Ah, puckering. It's the bane of many a quilter's existence, but it’s almost always preventable. Puckering happens when the layers of your "quilt sandwich" shift and slide around while you're sewing. The secret is making sure everything is secured so it moves as one single unit.
- Don't Skip the Basting: I can't stress this enough. Use a good quality spray baste or plenty of safety pins to hold your exterior fabric, batting, and lining together. Start in the middle and smooth everything out toward the edges.
- A Walking Foot is Your Best Friend: This is a game-changer. A walking foot has its own set of feed dogs on top, which work in sync with your machine's feed dogs to pull all the layers through at the same rate. This simple tool dramatically reduces shifting and puckering.
A well-basted panel is the foundation of smooth, professional-looking quilting. Don't rush this step; the time you invest here will pay off tenfold in the final appearance of your bag.
Can I Sell the Bags I Make from Patterns?
Once you get the hang of it, you might find yourself with a growing collection of gorgeous bags and wonder, "Could I sell these?" The answer is often yes!
Many independent pattern designers are happy to let you sell items made from their patterns on a small scale. But you must check the copyright policy for each specific pattern you use. It's a wonderful way to share your passion, and it taps into the deep tradition of passing on handmade skills. You can learn more about this heritage and how quilting can inspire generations in our article.
If you're thinking about turning your hobby into a little business, figuring out how to price handmade items is a critical next step. This is a great resource that offers practical advice to make sure you're valuing your time and skill properly.
Finishing your project starts with the right supplies. At Linda's Electric Quilters, we have everything you need, from durable denim needles and walking feet to high-quality bag hardware. Explore our collection at https://lindas.com and get everything you need to complete your next beautiful quilted bag.


