

You've pressed your fabric, lined up your ruler, and made what should be a clean 2.5-inch strip. Then you measure it. One end is right, the middle bows out, and the far end runs narrow. That small error will follow you into every seam, block, and border that depends on it.
A rotary cutter and ruler work as a measuring system, not as two separate tools. Treat the ruler as an instrument, keep the blade sharp, align the zero line, and check a test strip before you cut the stack. That's what separates repeatable strips from wavy ones.
Ruler and Cutter Sizes by Cut Type
A 2.5-inch strip across folded fabric is a long, straight cut. A ruler that stops short of the fold makes you reset mid-line. A blade too small for the stack makes your hand push. That push is what walks the ruler off the measurement.
| Cut type | Ruler size | Blade size | Notes |
|---|---|---|---|
| 2.5-inch strips | 6 in x 24 in | 45 mm | Standard strip cut across folded fabric |
| Small squares and rectangles | 6 in x 12 in | 45 mm | Easier to position on a small mat area |
| Squaring blocks and trimming units | 12 in x 12 in | 45 mm | Helps square block edges to a known line |
| Bias and angled cuts | 45-degree triangle ruler | 45 mm | Angled lines guide triangle and bias pieces |
| Thick stacks of layers | 6 in x 24 in | 60 mm | Larger blade for heavier fabric stacks |
Ruler Thickness and How You Hold It
As this quilting ruler guide notes, rotary-cutting rulers are commonly described as approximately 3 mm thick, about 1/8 inch, which gives the blade a substantial edge to track against. I treat that thickness as the specification, ahead of brand. Thinner rulers made for other sewing tasks can slip under the blade and leave your fingers with too little protection.
Your hand is the safety system on that edge. Spread a flat palm across the ruler, fingers back from the cutting side, with even weight rather than a pinch. If arthritis, a weak grip, or repetitive-strain symptoms make a hard squeeze painful, choose a blade size that rolls. A 60 mm blade on a heavy stack does the work a 45 mm blade would ask your wrist to force.
A dull blade changes the cut. It needs more downward force, that force slides the ruler, and the edge goes crooked even when the first alignment was right.
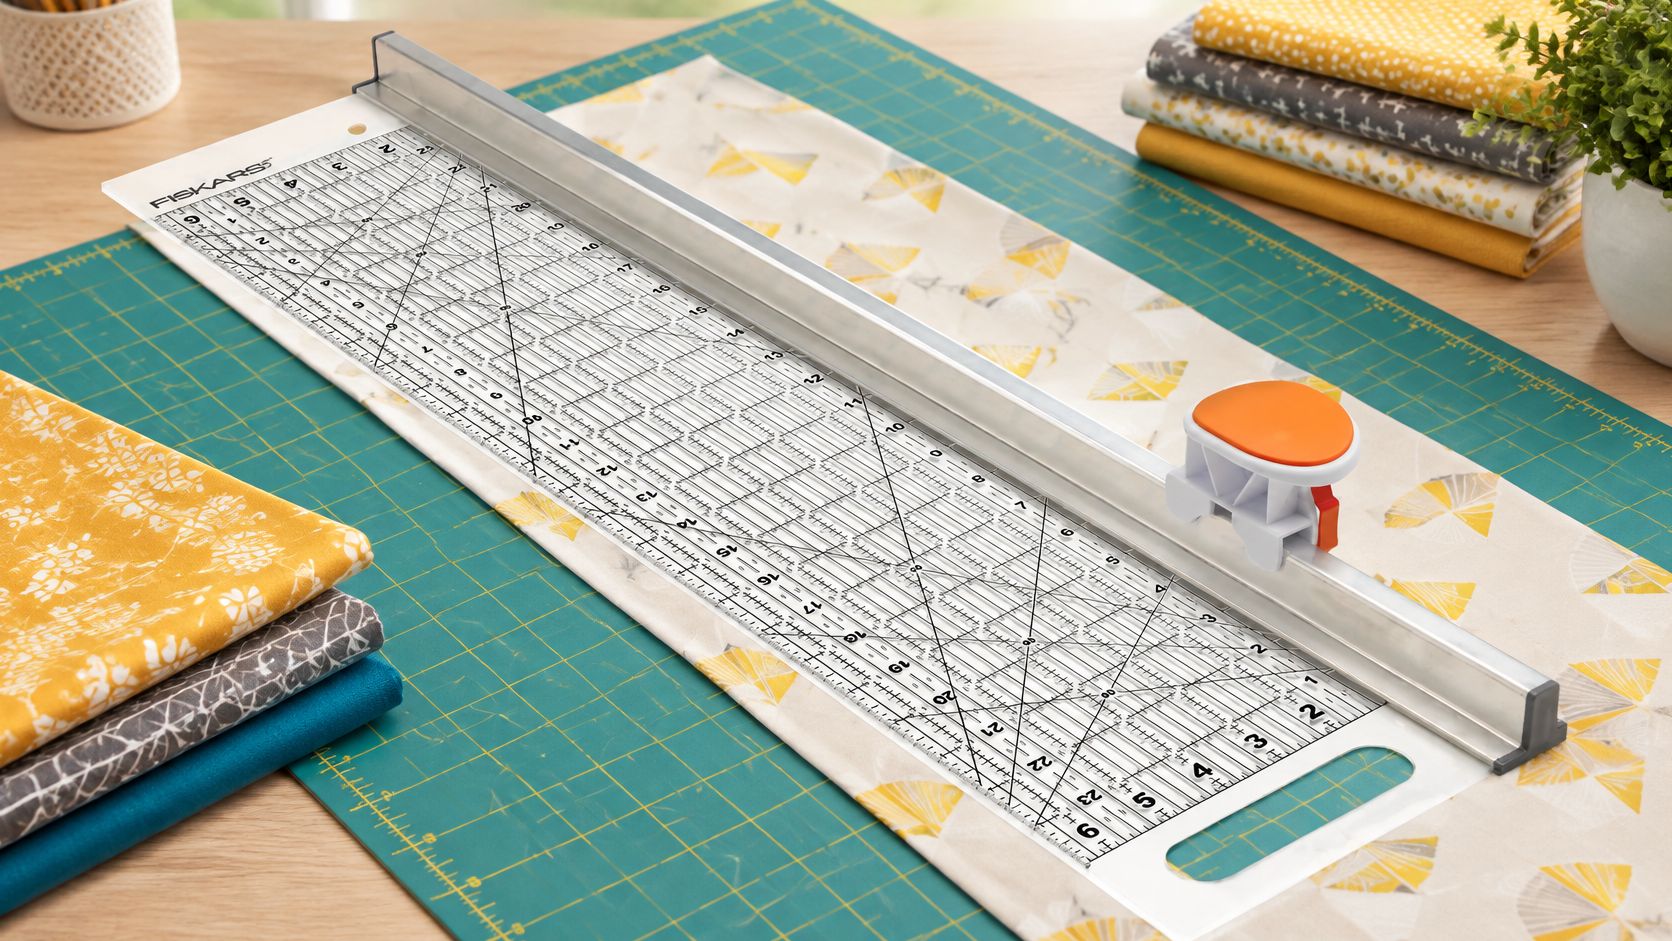
For the common strip cut, the Rotary Ruler Combo 6in x 24in Ruler and 45mm blade pairs a 6 in x 24 in ruler with a 45 mm spring-action blade in an ergonomic carriage, with highlighted numbers for light or dark fabric. A 12 in x 12 in square combo covers the same pairing when you trim blocks and square units.
Roll the blade once before you commit the stack. It should travel without extra wrist force, and the ruler should stay put under that flat hand. If the roll sticks, replace the blade. If the ruler is the wrong length for the cut, switch the pairing.
Set Up Your Mat, Fabric and Blade First
Most bad first cuts start at a messy station, not with bad technique. Get the setup right and the cut gets much easier to control.
- Place the mat flat. Put a self-healing mat on a stable table at about elbow height, large enough to hold the fabric and ruler with room to spare. A mat with deep grooves can catch the blade and pull it off line.
- Press and fold the fabric. Press it flat, then fold selvage to selvage so the layers sit evenly. A wrinkle under the ruler becomes a bump in the strip.
- Check the blade. Replace a dull or nicked blade before you start. Extra force at the cutter almost always becomes sideways movement at the ruler.
- Test the guard. Slide it closed and confirm it locks before you set the cutter down. Don't discover a sticky guard with fabric already under the ruler.
- Set your light and clean the ruler. You need to read fine grid lines without leaning into the blade path. Keep the ruler clean and dry so it doesn't skate.
Ready station check: flat fabric, square mat, sharp blade, locked guard, and ruler within easy reach. If you have to hunt for a tool mid-cut, you're not ready.
Browse the Notions category when you need to replace a mat, blade, or ruler, since those categories cover cutting and measuring tools alongside pressing aids. If your fabric won't lie flat, work through a pressing tutorial first and come back to cutting once the fold sits true. Cutting over a crease and hoping for accuracy doesn't work.
How to Cut Accurate Strips Step by Step
Clean strips come from one true reference edge and the discipline to remeasure every time. I wouldn't cut a full stack on the first alignment, no matter how confident the placement looks.
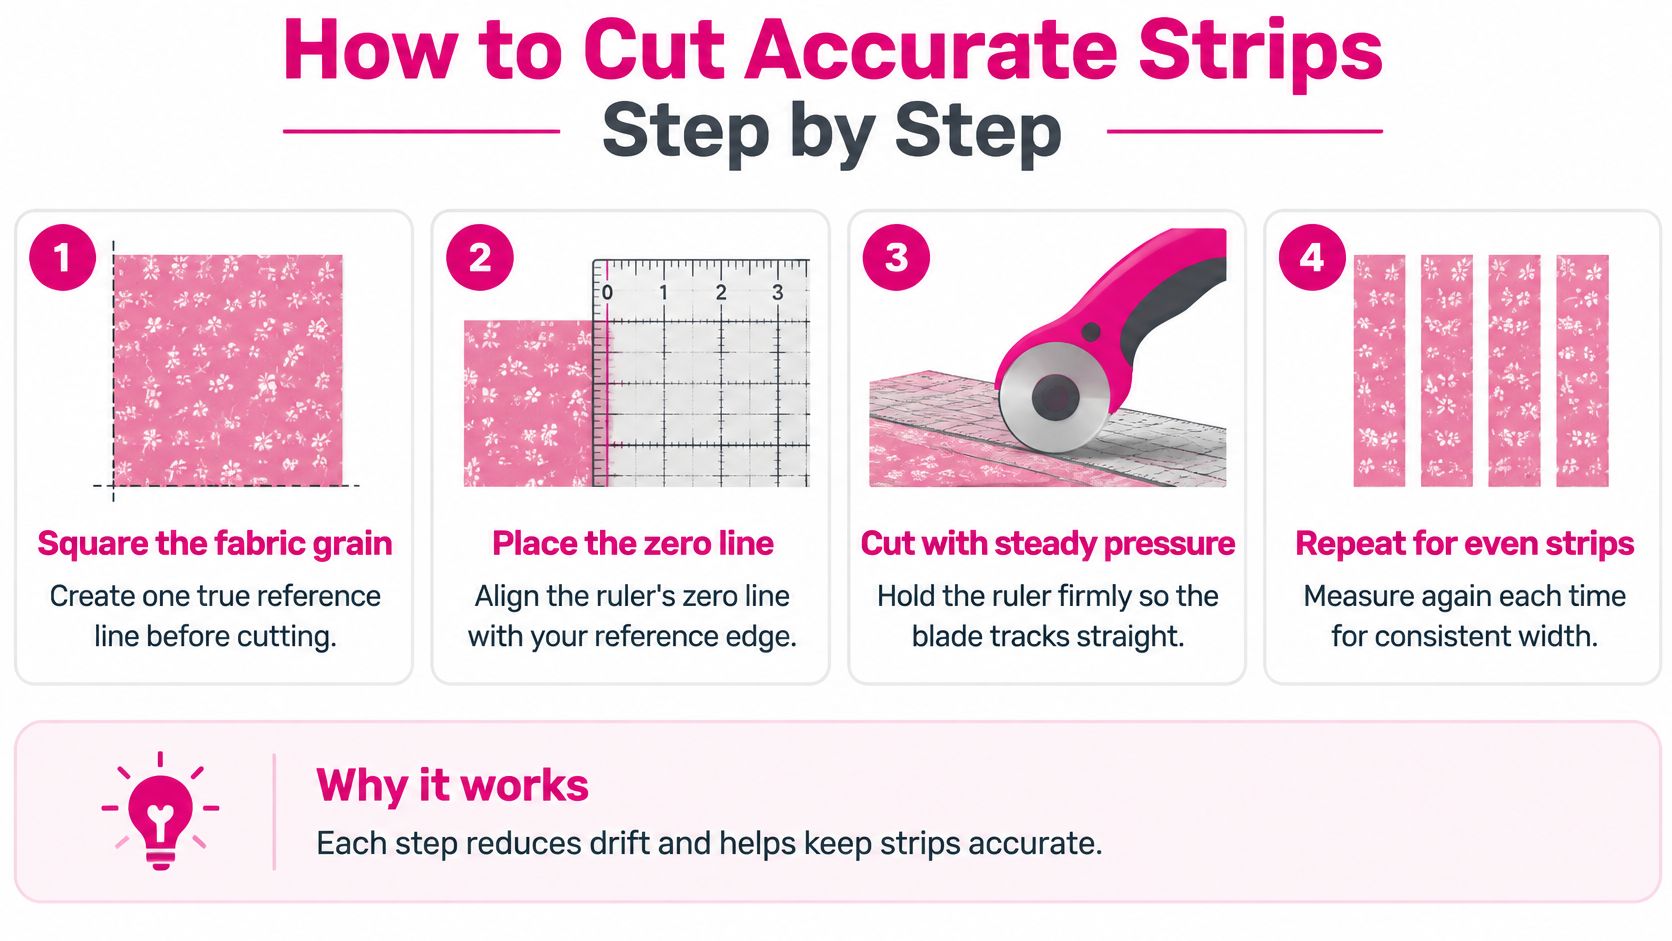
The Six-Step Method
- Square the fabric first. Trim the grain or folded edge to create one straight reference line. Every measurement after this depends on that edge, so don't skip it to save a minute.
- Place the zero line on the reference. Put the ruler's zero line, not its outside edge, exactly on the squared edge. The outside edge includes the ruler's border, so measuring from it makes every strip systematically narrow.
- Verify with a perpendicular line. Check a second measurement using a line at right angles to your cut. This confirms the strip will come out square, not just the right width at one end.
- Press down near the ruler edge. Use a flat hand with fingers spread, applying even downward pressure close to where the blade will travel. Pressing only at the far end lets the near end pivot.
- Make one controlled pass. Roll the blade flat against the ruler edge without pivoting your wrist. Watch a short instructional video of this step if you're learning, and pay attention to the wrist position and the single smooth pass before you try it on good fabric. A blade that rides up onto the acrylic can damage the ruler and ruin the cut.
- Measure the strip in three places. Check both ends and the midpoint. Equal numbers mean your setup held. A taper means the ruler moved or your pressure changed mid-pass.
Treat the Ruler as an Instrument
Don't assume printed markings are enough. Acrylic can shift, fabric compresses under pressure, and parallax can make you read the wrong line when you view the grid at an angle. Stand so you're looking straight down at the measurement you're using.
That caution has a basis in testing. Independent ruler testing reported deviations below 0.2 mm over a 45 cm span for one acrylic model and below 0.15 mm for a tested reference ruler. Those figures describe the tested products only, so don't treat them as a universal tolerance for every quilting ruler you own.
Periodically compare your ruler's edge and graduations against a known reference. Inspect for warping or chipped corners, and retire a ruler that no longer tracks consistently. Non-slip dots or grip aids help only when they don't cover measurement marks or push your hand toward the blade path.
Pro tip: Cut one test strip before every project and measure it at three points. A small systematic error repeated across dozens of pieces accumulates into visible seam mismatch, even when each strip looks fine on its own.
Once your test strip measures true, repeat the same alignment for the rest of the stack without shortcuts. If managing a separate ruler and cutter is where your alignment breaks down, a paired 6 in x 24 in combo keeps the blade traveling on a rail for strip work. Either way, the zero-line check stays essential.
Safety Habits That Protect Your Hands
The ruler is lined up and the blade is still open. Your non-cutting hand is the safety system that keeps that blade on the acrylic and off your fingers. Gloves, guards, and a comfortable handle support that system. They do not replace where you put your hand.
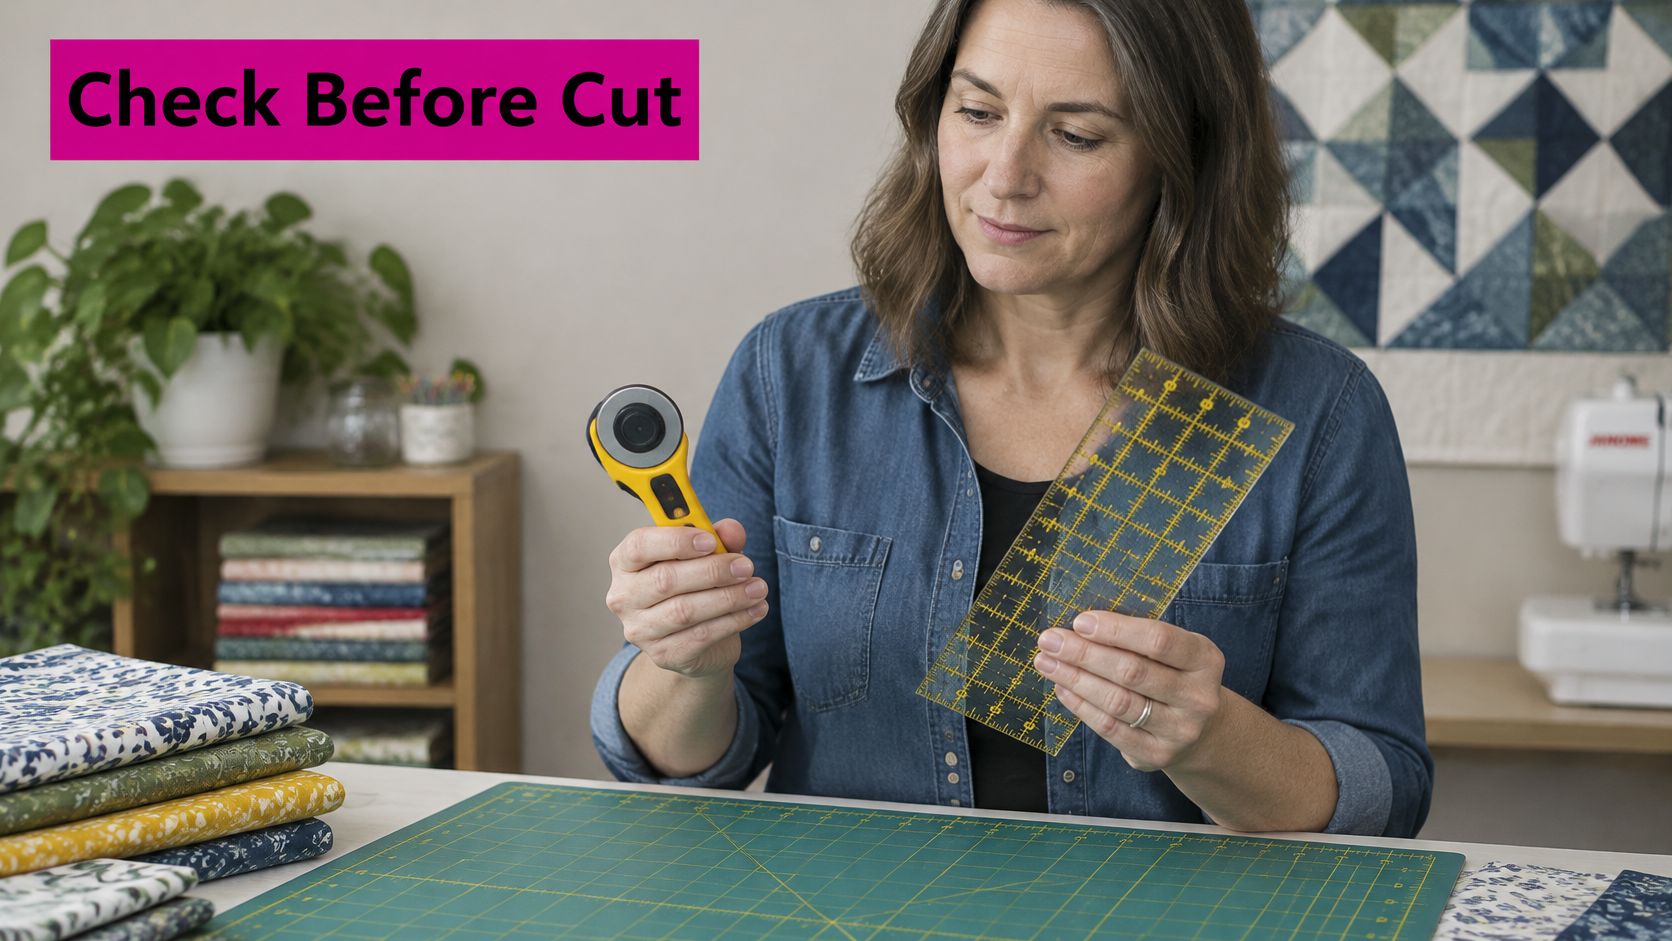
The Control-First Routine
- Inspect before each session: Check the blade guard, locking mechanism, handle, and cutting mat before fabric goes down.
- Replace tired blades: Swap out any blade that needs excess force, skips, or leaves incomplete cuts.
- Keep the holding hand back: Your non-cutting hand stays fully behind the ruler edge, fingers flat and clear of the blade path.
- Cut away from your body: Use one smooth, continuous pass moving away from you.
- Close the blade immediately: Retract or lock the guard right after each cut, every time, even between strips.
In occupational hand-injury research, lacerations represented 63% of occupational acute hand injuries, equipment or workpieces that did not perform as expected raised hand-injury risk roughly elevenfold, and a change from the normal work method raised risk about 10.5-fold. Predictable blade condition and a repeated hand position matter as much as attention.
Treat gloves as a backup layer and build the routine around guarding and hand placement. Choose a cut-resistant pair that preserves grip and does not snag fabric. Manual guards must be slid closed after every cut. Self-retracting systems cover the blade when pressure is released. A cutter set on the table goes down closed.
Watch the safe hand position and guard habit in action here before your next session.
An Ergonomic Routine for Sore Hands
Extra downward pressure makes the ruler slip and the wrist give out. If the cutter wanders, the ruler shifts, or the stack needs more force than usual, treat that as a failure signal and stop. Change the blade or reset the ruler instead of forcing the pass.
If you have arthritis, reduced grip strength, or repetitive-strain symptoms, build the routine around less force. Choose a handle shape that lets your hand stay relatively open, and a cutter size that rolls through your usual stack without wrist effort. Set the work surface so your forearm stays level rather than reaching up or pressing down.
Cut smaller stacks, take short rest breaks before fatigue changes your grip, and rotate the mat instead of twisting your wrist for cross-cuts. Mild tiredness is a cue to pause. Numbness, bleeding, or sharp pain is a cue to stop and seek medical care, not to finish the last few strips.
Common Mistakes and How to Fix Them
You square a strip on the mat, carry it to the machine, and the seam line stops short of the mark. The piece looked even under the ruler. The error was already in the cut, from a ruler that crept or from a reading taken on the wrong part of that ruler.
Standard rulers use 1/8-inch grid increments with heavier 1/4-inch lines and angled guides for triangles and bias work, as this guide to quilting ruler shapes explains. The ruler is the measuring instrument, so it has to stay still while the blade stays flat on its edge. Your hands are what hold that still. If arthritis, a weak grip, or a sore wrist makes you bear down to stop a slide, that extra force moves the ruler and tires the hand. I stop and reset rather than pressing through the rest of the stack.
| Symptom | Likely cause | Fix |
|---|---|---|
| Strip ends not parallel | Ruler moved during the cut | Hold the ruler still and recut with even pressure |
| Wavy or curved cut edge | Wrist pivoted or blade rode up the ruler | Keep the blade flat and make one smooth pass |
| Every strip slightly narrow | Measured from the outside edge, not the zero line | Align the zero line and check with a test strip |
| Ruler slides under the blade | Thin ruler or excess downward pressure | Use a ruler about 1/8 inch thick and lighten pressure |
| Blade drags or skips | Dull or nicked blade | Replace the blade and inspect the edge |
| Size drift across a whole quilt | Warped or chipped ruler | Compare against a known reference and retire the ruler |
One-Minute Fixes Versus Replacement Fixes
Realigning the ruler and recutting one test strip costs a minute and a scrap. Do that before you blame the tool. Slanted ends, and a whole pile of strips that run the same amount narrow, are alignment problems. Reset, ease the downward pressure, and cut scrap again.
Dragging, skipping, and drift that grows from block to block are hardware. Careful measuring will not straighten a nicked blade or a chipped edge. Replace the blade, or retire the ruler.
Make the check part of setup, not a reaction to a ruined block. Compare the edge and graduations with a known reference, look at the corners for chips, and run one pass on scrap to see whether the blade tracks without extra force. At Linda's Electric Quilters, replacement blades, rotary cutters, and other cutting and measuring tools are stocked with the notions.
Frequently Asked Questions About Rotary Cutters and Rulers
The cutter is closed, the ruler is still warm, and your thumb is already stiff. The ruler measures. Your hands are the safety system, especially when grip is weak or joints are sore.
How do I clean a cutter and ruler?
Wipe the acrylic and the cutter housing with a dry, lint-free cloth so lint and sizing do not leave a slick film under your fingers. Keep oil and spray starch off the ruler, or it skates. Brush lint from the guard, then shut the blade fully before you set the tool down.
How should I store them?
Blade retracted, cutter closed, ruler flat or on its long edge. A stuffed project bag can bow a long ruler and pop a guard. Do not hang the ruler from one hole if the acrylic can creep. Keep the cutter where you can lift it without a wrist twist.
What if arthritis, a weak grip, or repetitive strain shows up mid-cut?
Shorten the pass and cut fewer layers. Reset your hand behind the ruler on every strip, and let the handle roll the blade. I recommend a cutter you can close with two fingers and a non-slip ruler back, so you are not clamping to hold position. When the grip slips or the hand aches, stop that pass.
How do I choose a blade size?
Match diameter to the cut and to how far your arm travels in one smooth motion. A smaller blade suits tight curves and short detail cuts. A larger blade finishes a long straight strip in one pass, which cuts down extra strokes when your hand tires. If the handle makes you squeeze, switch size or stop.
Check Your Cutter and Ruler Before Your Next Quilt
The cutter is closed, the ruler is on the mat, and the fabric is still folded. Before the first pass, answer three questions. If your grip is weak, arthritic, or already sore, these answers matter more than a faster cut.
Can you steer the cutter with a relaxed hand, or does the handle bend your wrist before the blade moves? Once your guarding hand is planted, are the ruler marks you need still visible, or does your palm cover the line? If that hand starts to ache partway along the ruler, will you stop and reset, or keep pushing and let the ruler creep?
A no on any of them means you change the setup before yardage. Pick a handle your sore hand can steer without clamping. Set your palm on the ruler so the measurement stays in sight. I would rather lose two minutes resetting a tired grip than spend the evening fixing a strip that wandered.
Match the shortcut to the project in front of you. Pre-cut fabric comes as 2.5-inch strips, 5-inch squares, and 10-inch squares, so a strip quilt can start from the 2.5-inch strips and a simple block from the squares. You still want a cutter and ruler you trust for trimming. Rotary cutters and blades sit with the other notions: pins, needles and clips, quilt labels, and sewing machine aids.
Linda's Electric Quilters carries those pre-cuts and notions and provides daily quilting education. Run the three questions on what arrives, then cut only what your hands can still control.


