

A larger needle does not automatically make a difficult project safer. Go one size too big and you can leave visible holes, pull lightweight fabric out of shape, and create puckering that no amount of tensioning will fix. Go too small and the same project can shred thread, skip stitches, or snap the needle at speed. The right choice among the different types of sewing needles comes from matching three things in order, the machine system, the point geometry, and the size for your fabric and thread.
Needle Sizes at a Glance for Every Fabric Weight
A needle that matches the fabric but not the thread can still cause trouble. Use size as a starting filter, then check whether the eye and groove accommodate the thread without making an unnecessarily large hole. The American Sewing Guild needle notes explain that needle size is calculated from blade diameter in millimeters multiplied by 100. A size 80, for example, has a blade about 0.80 mm in diameter. The second number is the American equivalent, so the same needle is labeled 80/12.
| Metric size | American size | Blade diameter | Typical fabric |
|---|---|---|---|
| 65/9 | 9 | 0.65 mm | Sheer and fine lightweight fabrics |
| 70/10 | 10 | 0.70 mm | Fine fabrics and lightweight wovens |
| 80/12 | 12 | 0.80 mm | Quilting cotton and light to medium wovens |
| 90/14 | 14 | 0.90 mm | Medium weight fabrics with Tex 40 to 50 thread |
| 100/16 | 16 | 1.00 mm | Denim, canvas and heavy fabrics |
| 110/18 | 18 | 1.10 mm | Heavyweight fabrics with Tex 90 to 92 thread |
For quilting cotton, 80/12 is a practical starting point. Its blade can pass through a tight weave while remaining sturdy enough for two fabric layers and their seams. That makes it a common choice for piecing. A quilt sandwich with batting loft or heavier thread may call for 90/14, whose larger eye and groove leave more room for the thread. Check a scrap first: if the stitch looks clean and the fabric is not marked, increasing size may only create a larger hole.
How Fabric Weight and Thread Weight Move Together
The American Sewing Guild needle notes pair lightweight fabrics with sizes 10 to 12 and Tex 30 to 35 thread, medium weight fabrics with sizes 14 to 16 and Tex 40 to 50 thread, heavyweight fabrics with sizes 18 to 20 and Tex 90 to 92 thread, and very heavyweight materials with sizes 21 to 23 and Tex 135 or heavy PTFE thread. Treat these as a chart's typical pairings, not fixed rules for every fabric and machine. As materials become denser and thread thicker, the needle generally needs more blade strength and eye capacity.
- Lightweight fabrics: A smaller blade makes a smaller hole, helping sheer fabric retain its soft hand.
- Medium-weight fabrics: Quilting cotton, linen blends, and shirting commonly suit the 80/12 to 90/14 range for construction and quilting.
- Heavy layers: Denim, canvas, and thick quilt sandwiches may need 100/16 or larger, if that size is available for the machine's needle system.
Let the symptom guide your next adjustment. If a thick thread frays or breaks, the eye may be too small; moving up one size can give it more room. If stitches skip, a larger needle is not automatically the answer, since a wider hole can worsen fabric damage without correcting the cause. If lightweight fabric puckers or shows lasting holes, try a smaller size rather than forcing a larger blade through it.
Practical rule: Change size for thread or bulk, not out of habit. When the fabric stays the same but the thread changes, check the thread's fit in the needle eye first.
Fiber and weave also affect how fabric responds to needle holes. Cotton, linen, and synthetic cloth can differ in how well they recover, which may show up as puckering or lasting marks. For garment sewing, this comparison of natural fibers versus synthetic shirt fabrics provides useful context for distinguishing fabric behavior from a tension problem.
Heavier fabric can require a larger needle than sheer fabric, but going up too far trades one problem for another. One size up is a reasonable test for bulky batting or heavier thread. Two sizes up without first checking a scrap can replace thread breakage with conspicuous holes. Linda's Electric Quilters lists needle packs in its Notions category alongside pins, needles and clips, rotary cutters and blades, quilt labels, and sewing machine aids. Keeping the sizes you use most often on hand makes it easier to match the needle to the project instead of using one size for every fabric and thread.
Machine Needle Point Types and What Each One Does
Choose by point shape first. Size can't rescue the wrong point, because the point decides whether the needle cuts between yarns, pushes them aside, or pierces them cleanly. The American Sewing Guild guide to machine needle points identifies three broad general purpose categories, universal needles for many woven and knit fabrics, ball point needles for knits, and sharp or Microtex needles for finely woven fabrics. Specialty designs extend that system to denim, leather, embroidery, metallic thread, quilting, stretch fabrics, twin needles, and triple needles.
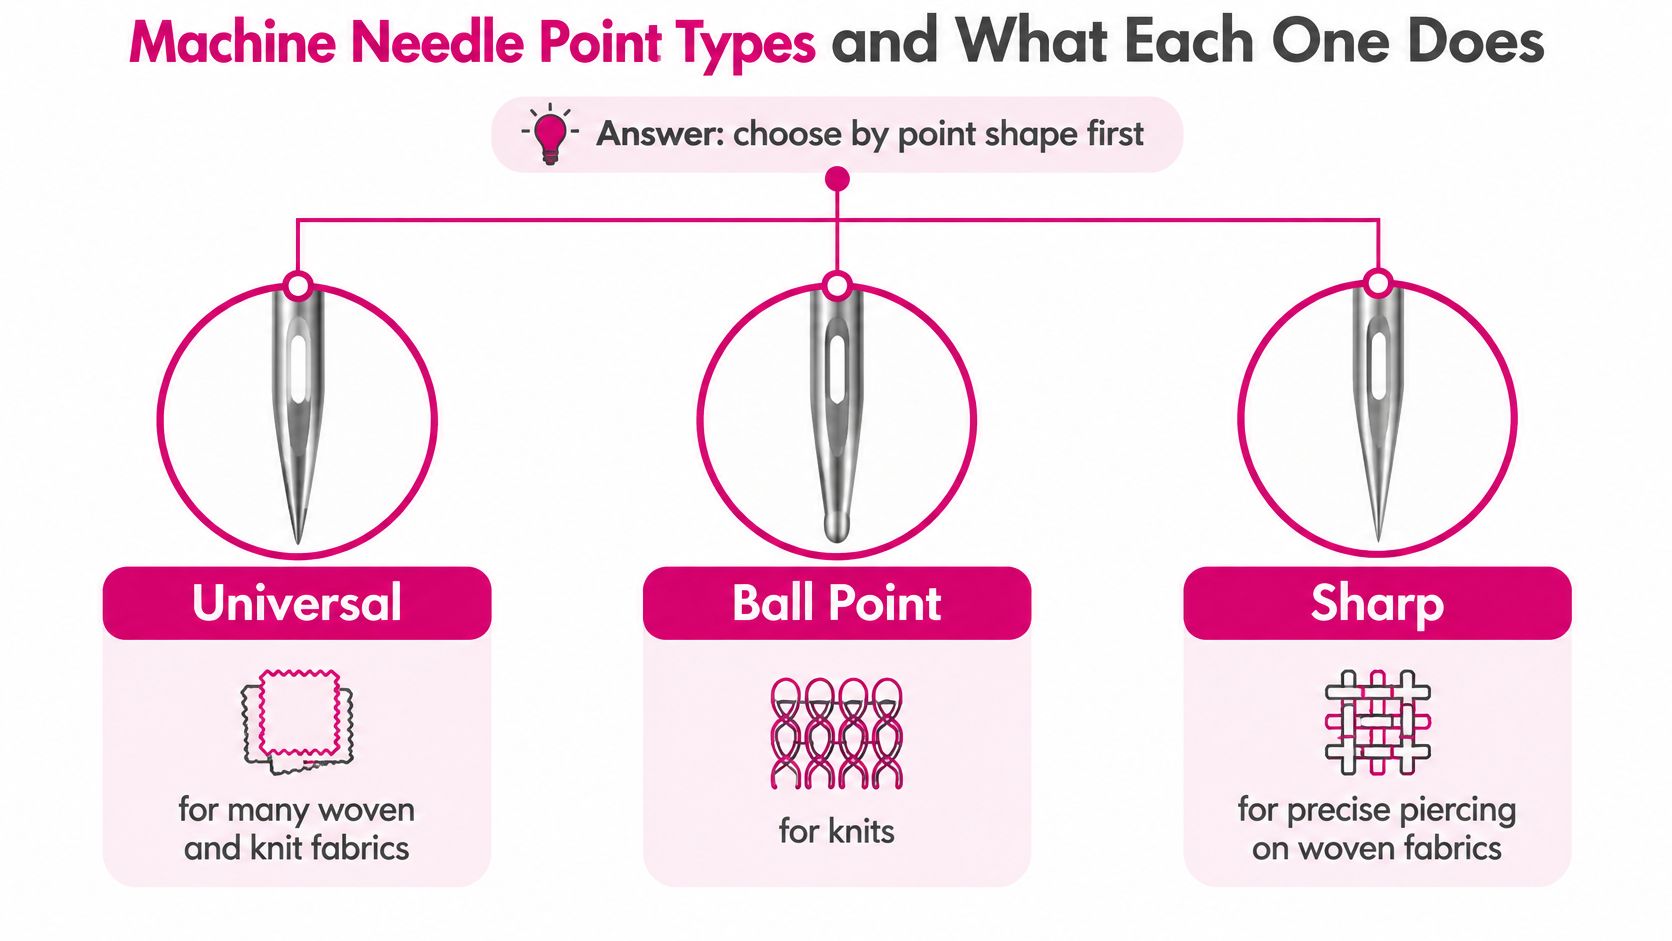
A universal point is slightly rounded. It's a compromise, and compromises work until fabric structure gets specific. On a stable woven cotton it'll usually sew an acceptable seam. On a stretch knit, that same point can push yarns unevenly, fail to form a clean loop for the hook, and skip stitches. A ball point uses a more rounded tip to pass between knit fibers instead of piercing them, which protects loops and helps stitch formation.
A sharp or Microtex point does the opposite job. Its slender, penetrating point enters tight quilting cotton with less displacement, so piecing lines stay accurate and the fabric doesn't get pushed into the throat plate hole. For precision work, that cleaner penetration matters more than a small change in tensioning.
| Point type | Designed for | Example use |
|---|---|---|
| Universal | Many woven and knit fabrics | Cottons, blends and basic seams |
| Ball point | Knit fabrics | Jersey and rib knit without skipped stitches |
| Sharp or Microtex | Finely woven fabrics | Precision piecing and quilting through tight cotton |
| Quilting | Multiple fabric layers | Quilt sandwiches with batting |
| Stretch | Elastic fabrics | Swimwear and activewear |
| Denim | Heavy woven twill | Jeans and canvas |
| Leather | Leather and vinyl | Piercing leather without tearing |
| Embroidery | Embroidery thread | Machine embroidery at higher speeds |
| Metallic | Metallic thread | Decorative stitching with metallic thread |
| Topstitch | Heavy thread and visible seams | Topstitching with thicker thread |
| Twin and triple | Parallel rows of stitching | Hems and decorative rows |
Where Specialty Points Earn Their Keep
Quilting needles use a reinforced shaft and tapered point for multiple fabric layers. That shaft resists deflection when you cross seam allowances and batting, which is where a general purpose needle starts to wander. If you're building a quilt sandwich, pair that choice with the right loft from the Batting category, because a high loft sandwich and a low loft sandwich don't load the needle the same way.
Denim points are built for dense twill and thick seam intersections. Leather points cut a small opening rather than tearing, which is why you shouldn't use them on woven fabric where cut yarns weaken the seam. Stretch needles add design features that help loop formation on elastic cloth, which is a different problem from ordinary knit sewing.
Twin and triple needles aren't stronger versions of a single needle. They create parallel rows and decorative effects, but they demand compatible presser feet, throat plates, and stitch width settings. Treat them as a system choice, not a shortcut.
Pro Tip: Keep one sharp and one ball point in your kit at all times. On knit fabric, the wrong point causes skipped stitches before size is ever the problem, and swapping point type is faster than chasing bobbin casing and tension settings that were never wrong.
Match point style to fabric structure before choosing size. Woven, knit, stretch, leather, and layered assemblies each ask the point to do a different job, and different types of sewing needles exist because one geometry can't do all of them well.
How to Choose a Needle in Four Steps
Choose the needle in four separate decisions, or the machine will punish the shortcut. System, point, size, and a scrap test each catch a different failure. Collapse them into one guess and you will retune tension that was never wrong.
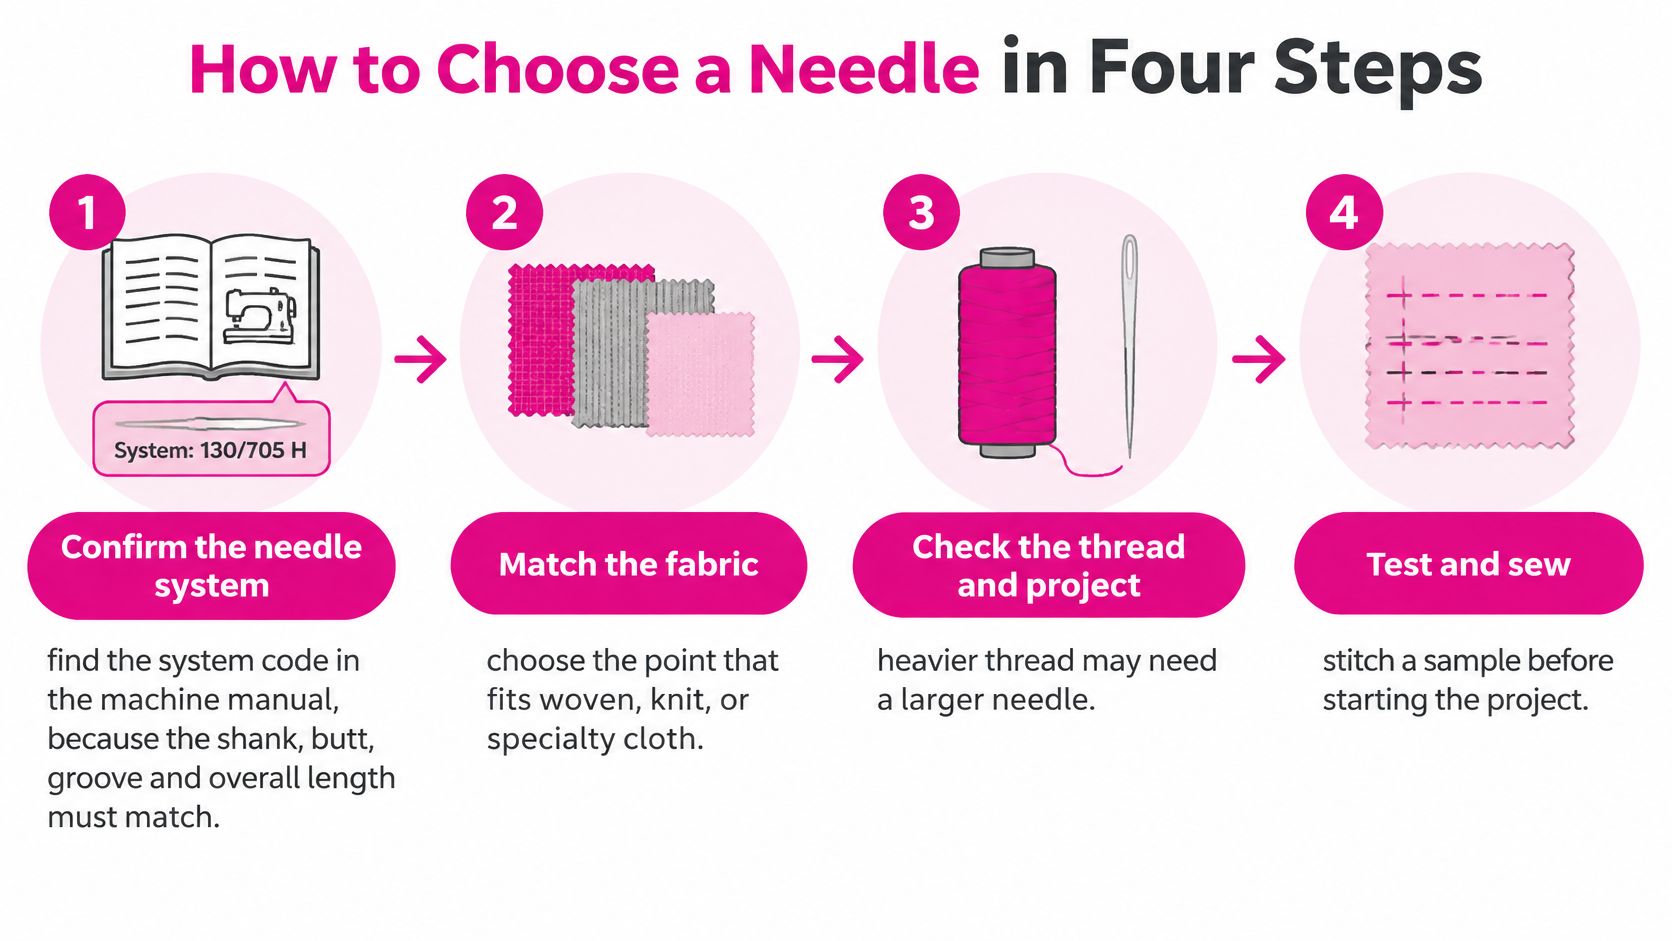
The SCHMETZ needle ABC separates needle system, the shank, butt, groove, eye position, and overall length the machine requires, from needle point or type, the geometry chosen for the material. Fitting dimensions and tolerances have to match the needle holder. Interchangeability stops the moment the system is wrong, even if the package looks familiar.
The Four Step Check
- Confirm the needle system. Read the system code in the machine manual. Visual similarity is a poor check. Two needles can share a silhouette and still differ in length, groove, or eye position enough to miss hook timing or strike metal.
- Pick the point from fabric structure. Name the cloth before you name a size: woven, knit, stretch, leather, or a layered quilt sandwich. That structure selects universal, ball point, sharp, quilting, stretch, or leather geometry.
- Set size from fabric and thread. Use the size ranges already set out for each fabric weight, then check the eye against the thread in your hand. Draw the thread through the eye once. You want light resistance, a steady drag you can feel, not a free drop and not a tug. A thread that falls through with no drag will throw a loose loop. A thread you have to pull will shred.
- Test on scrap. Sew the same fabric, batting, stabilizer, and thread the project will use. Read both sides for skipped loops and punched holes before you commit the good cloth.
After step 3, pull those sizes from the Notions category so a mid-project swap is a real needle, not whatever is left in the pincushion.
Read the symptom before you go up a size. An undersized eye abrades thread, skips stitches, and snaps it, because every stitch drags fiber across a tight contact point that heats up fast. A larger blade can open that eye and still be the wrong fix. On fine woven cotton the extra diameter leaves a visible hole and drags the weave out of square. I only step up when the blade is deflecting in bulky layers or the thread itself is heavy. If the thread is stiff, metallic, or already fraying, the failure is the eye and the thread path, not a lack of diameter. A bigger universal needle makes that shredding worse and marks the fabric on the way.
For quilting, a sharp quilting or Microtex-style point generally parts tightly woven cotton cleanly. Bulky layers or heavier thread can justify a larger size. Excessive diameter shows up on the scrap as holes and distortion, which is the trade-off that test is there to catch. Full insertion and flat-side orientation still follow the manual for that machine, domestic or longarm. On the swatch, look for a formed loop on the underside and an unmarked face on top.
Keep a labeled needle card for piecing, longarm quilting, embroidery, and knits. Write the system, point, size, and thread on the card. Memory fails faster than the point dulls.
Replace the needle after roughly one project, or at the first bent tip, run of skipped stitches, or recurring shredding. A needle is a consumable cutting and loop-forming tool. Leaving a dull one in the machine is how small faults become a ruined seam.
Specialty Needles for Metallic, Embroidery and Heavy Thread
Fabric first charts fail when thread is the difficult material. Transparent nylon is the clearest case. Official machine guidance in the Brother LS2125i and 2150 user guide states that transparent nylon should use a 90/14 to 100/16 needle regardless of fabric. That instruction overrides the usual fabric rule because the thread's stiffness and behavior in the eye matter more than a small change in cloth weight.
Metallic thread frays for mechanical reasons. It has a film or wrapped construction that doesn't tolerate tight eyes, sharp thread path turns, and high speed friction. A metallic needle gives you a larger, smoother eye and a groove that protects the thread on the downstroke. Slow the machine down as well, because eye size alone can't cancel heat and abrasion at speed.
If metallic and embroidery work is your main use, look for a dedicated specialty needle set on lindas.com rather than borrowing a universal needle from a garment project. Keeping thread specific needles separate prevents the common error of reinstalling a needle that has already been dulled by dense stitching.
Embroidery and Heavy Decorative Thread
Embroidery machines run dense patterns at high stitch counts, often through stabilizer that adds drag. Singer guidance covered in the Brother needle, fabric and thread compatibility guidance notes the value of a stronger chromium regular point needle for high stitching speeds, and that heavy thread requires an appropriately sized 16 or 18 needle plus a longer stitch length. Longer stitches give heavy thread room to lay down instead of crowding and abrading at every penetration.
| Thread type | Needle to start with | Habit or setting to change |
|---|---|---|
| Transparent nylon | 90/14 to 100/16 | Size for thread regardless of fabric |
| Metallic | Metallic, larger eye | Reduce speed, smooth thread path |
| Embroidery | Embroidery or chromium regular point | Use stabilizer test swatches |
| Heavy decorative | Topstitch size 16 or 18 | Lengthen stitch, test tensioning |
| Dense high speed work | Strong shaft embroidery style | Add cooling pauses |
Heat is the overlooked variable in dense work. At high speed, friction at the eye and fabric contact point rises, thread weakens, and synthetic materials can show damage that looks like a tension fault. Cooling pauses sound slow, but they're faster than unpicking shredded metallic thread from a finished motif.
Check lubricant compatibility before you add thread lubricant as a rescue. Some specialty threads tolerate it well, others change hand or finish. Test on a swatch with the same stabilizer stack, because a lubricant that helps thread pass the eye can still mark fabric or interfere with adhesive stabilizer.
A larger eye helps because it reduces contact pressure as thread changes direction through the needle. It doesn't license an oversized blade on delicate fabric. Use a specialty needle when the thread, not the fabric, is the source of fraying, looping, or breakage, and test it on scrap before the embroidery or decorative pass.
Hand Sewing Needle Types and How Their Numbers Work
Hand needle sizing runs opposite to what many expect: the American Sewing Guild hand needle guidance explains that a size 1 needle is thicker and longer, while a size 12 needle is finer and shorter. A higher number therefore points to a finer, shorter needle. Keep that distinction in mind when choosing by hand; machine needle sizing follows a different system.
A suitable hand needle passes through the fabric without stretching the weave, yet stays firm enough not to bend under the layers. Match four features to the work: thickness, point shape, length, and eye size. The eye must accommodate the actual thread, yarn, or ribbon. Forcing thick floss through a small eye can abrade or fray it before the stitching is complete. If the needle bends as you push, a finer size is a poor match for the fabric stack.
| Hand needle type | Length and eye | Best use |
|---|---|---|
| Sharps | Medium length, small eye | General hand sewing and basting |
| Betweens or quilting | Short, small rounded eye | Hand quilting through layers |
| Embroidery or crewel | Long, large eye | Surface embroidery with thicker floss |
| Tapestry | Long, blunt point, large eye | Yarn and counted thread work |
| Upholstery or tufting | Long, thick shaft | Thick upholstery, tufting and tying quilts |
Matching Hand Needles to the Task
Sharps suit seams, hems, and basting with a single strand of ordinary sewing thread. Their medium length works for general hand stitching, while the small eye is better suited to finer thread than bulky yarn or multiple floss strands. If the thread catches or frays as it passes through, check the eye and thread match before moving to a thicker needle.
Betweens, also sold as quilting needles, are short, with a small rounded eye. Their compact length gives control for rocking stitches through a quilt sandwich. That control comes with a trade-off: threading can be less convenient, especially when the thread is too thick for the eye. Choose them for stitch control, not only because the project is a quilt.
For surface embroidery, embroidery or crewel needles have a longer eye that accommodates multiple strands of floss. Tapestry needles have a blunt point and large eye, so they can carry yarn through counted work or canvas without splitting the ground threads. A sharp point can damage those threads; the blunt point is the useful feature here.
Upholstery and tufting needles have long, thick shafts for heavy fabric, tufting, and tying quilts. A short, fine needle may bend or be difficult to guide through loft. Choose a needle suited to the resistance of the layers rather than forcing a small needle through them.
Test the needle in the actual fabric stack. It should pass without stretching the weave open, and it should not flex under pressure. If you need pliers for each stitch, stop: the needle may be too fine, the eye may be gripping damaged thread, or the technique may need adjusting. A larger needle is not automatically the fix. Its shaft or point can leave a visible hole in delicate fabric, while an eye that still grips the thread will continue to cause damage.
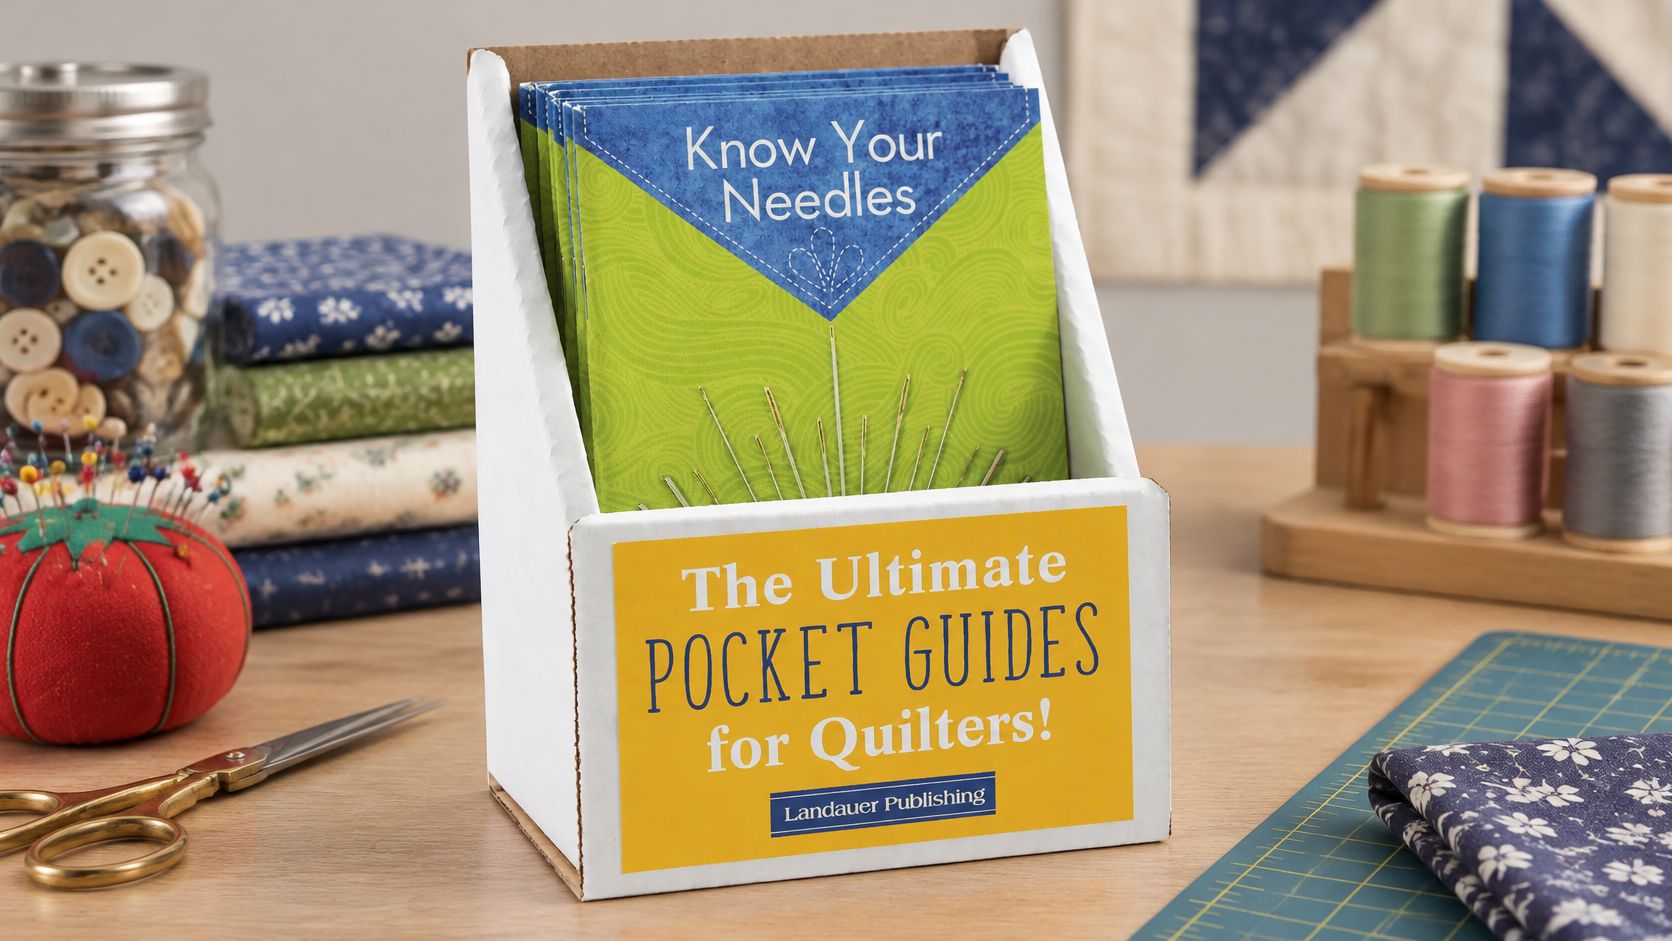
For a printed reference, see the Know Your Needles Pocket Guide Displays listing and the Know Your Needles Pocket Guide Displays reference image. Use a reference to narrow the choice, then check that the needle, thread, and fabric work together in scrap.
Hand needles cannot replace machine needles. They lack the machine shank, groove, and scarf used in machine stitching. Before sewing the quilt top by hand, thread the chosen needle with the actual thread and stitch several inches through scrap layers.
Diagnosing Breakage, Skipped Stitches and Shredding
A needle can match the fabric chart and still fail because fabric weight is only one part of the load. Thick seams can deflect the blade, a bent point can strike the throat plate, a thread can be too large for the eye, and speed can turn friction into heat. Diagnose the symptom first, then check the needle and its interaction with the thread before changing machine settings.
| Symptom | Likely needle cause | Check next |
|---|---|---|
| Repeated needle breakage | Needle too small for fabric or layers | Confirm size, then check deflection and throat plate contact |
| Skipped stitches | Dull, bent or damaged point, or undersized needle | Replace needle, then check timing and thread path |
| Thread shredding or fraying | Eye too small for thread, or heat | Use larger eye, slow down, add cooling pauses |
| Puckering | Needle too large for lightweight fabric | Drop one size, then check tension |
| Visible holes | Needle one size too large | Reduce one size and test on scrap |
| Looped bobbin stitches | Needle inserted incorrectly | Reinsert fully, then check timing |
Repeated breakage in heavy fabric with a small needle signals a mismatch between the needle's strength and the layers. A blade that flexes can shift the point off its intended path, leading to contact with metal or a break in the fabric stack. Check the throat plate after a strike. A burr can catch and shred thread even after you install a new needle, so replacing the needle alone may not solve the problem.
Skipped stitches usually call for a point and loop check before tension adjustments. A dull, bent, or damaged point may not form a consistent loop for the hook. Replace the needle, then sew on the same scrap stack. If stitches still skip with a suitable needle, inspect the thread path and consider timing or presser foot pressure. Changing tension first can mask the symptom without fixing the missed loop.
When the Needle Is Not the Whole Story
Thread shredding often points to friction at the eye. Match the eye to the thread, not just the fabric: a thick thread forced through a small eye can fray even when the needle blade appears strong enough. If the eye is already appropriate, reduce speed and pause during dense embroidery or longarm work. Heat from fast sewing can contribute to thread breakage and burn spots. A larger eye can reduce rubbing, but only choose one that remains suitable for the point type and fabric.
For metallic or other delicate thread, moving up in needle size is not an automatic fix. A larger eye may ease friction, but an oversized blade can leave holes or displace fabric yarns. Change one variable at a time, then test the actual thread and layer combination on scrap. That makes it easier to tell whether the fault comes from eye friction, speed, or the needle's effect on the fabric.
Puckering and visible holes suggest the blade is too large for lightweight cloth. It can push yarns aside and leave a track that the stitches cannot conceal. Try one size smaller and test on scrap. Check tension only after the fabric lies smoothly; tension changes cannot repair holes or distortion caused by an oversized needle.
Looped bobbin stitches can result from a needle that is not fully inserted or faces the wrong direction. Either error can interfere with loop formation at the bobbin casing. Push the needle fully to the stop, confirm its orientation in the machine manual, and rethread from spool to needle. If loops persist, inspect timing and the bobbin case rather than repeatedly changing tension.
Use a consistent diagnostic sequence: fit a fresh needle of the correct system, sew a scrap sandwich with the project's thread, and observe whether the fault remains. If it does, check the machine's thread path, needle clearance, and timing. This separates a needle or thread mismatch from a machine fault and avoids chasing the same symptom with several adjustments.
If breakage continues after a correct needle change, inspect for plate contact marks and stop sewing if the needle is striking metal. The throat plate and timing check video shows what to look for and when to have the machine serviced rather than feeding it more needles.
Replace a worn or damaged needle when symptoms appear, and keep a suitable replacement nearby so sewing does not continue with a compromised point. The replacement advice commonly associated with Singer and SCHMETZ is not identical, so treat elapsed sewing time or project completion as a prompt to inspect the needle, not as a substitute for responding to skipped stitches, shredding, or a strike.
Common Questions About Sewing Needles
How often should I change a machine needle
Swap when the stitch shows wear. A bent point, skipped stitches, or shredding thread means that needle is done. Do not answer shredding on fine thread by going larger. The wider blade opens a bigger hole and chews fibers a rough eye was already stressing. Fit the replacement to the thread in use, then resew that fault on scrap before you change tension.
Can I use a universal needle for quilting cotton
Yes, many quilting cottons sew acceptably with a universal point for basic seams. A sharp or Microtex point usually gives cleaner penetration through a tight weave, which helps precision piecing and reduces fabric push. For a batting sandwich, a quilting point is the better starting choice.
Why does my metallic thread keep fraying even with the right size
Speed, eye friction, and heat fray metallic thread even when the size looks right. Use a metallic needle with a larger eye, slow the machine, smooth the thread path, and pause so the needle can cool. A bigger blade often makes the fray worse by dragging the metallic wrap through a wider hole. Check lubricant compatibility on a test swatch before it touches the project.
How do I know which needle system my machine uses
Your machine manual lists the required needle system code. Shank, butt, groove, eye position, and overall length must match that system, with ISO 8239 as the fitting reference for dimensions and tolerances. Don't substitute a visually similar needle from another system.
What size should I start with for quilting cotton
Start with 80/12 for piecing and light to medium woven cotton. Move to 90/14 for a fuller quilt sandwich or heavier thread, and prove the change on scrap. If holes appear, or the thread still shreds, the larger size is costing more than it solves.
Name the fault before the next swap: skip, shred, or hole. Change one thing, the point or the size, and sew one more scrap. That shows whether the needle or the thread finish failed.
Shop the Right Needle Set for Your Next Project
A needle set fails when you stock it by fabric name alone. Buy the spare that matches the thread in the needle and the failure you are trying to stop. A bigger blade is often the wrong spare.

For a quilt, take a quilting-point set plus a separate pack for metallic or embroidery thread. Pair it with thread and batting from those shopping categories, and keep the specialty needles out of the everyday case so a metallic eye is not wasted on cotton piecing. For knitwear, buy ball point needles and leave sharps out of that tin. Skipped stitches on a knit are a point problem, not a size problem. Stepping up to a larger sharp punches a wider hole and can start a run in the loops.
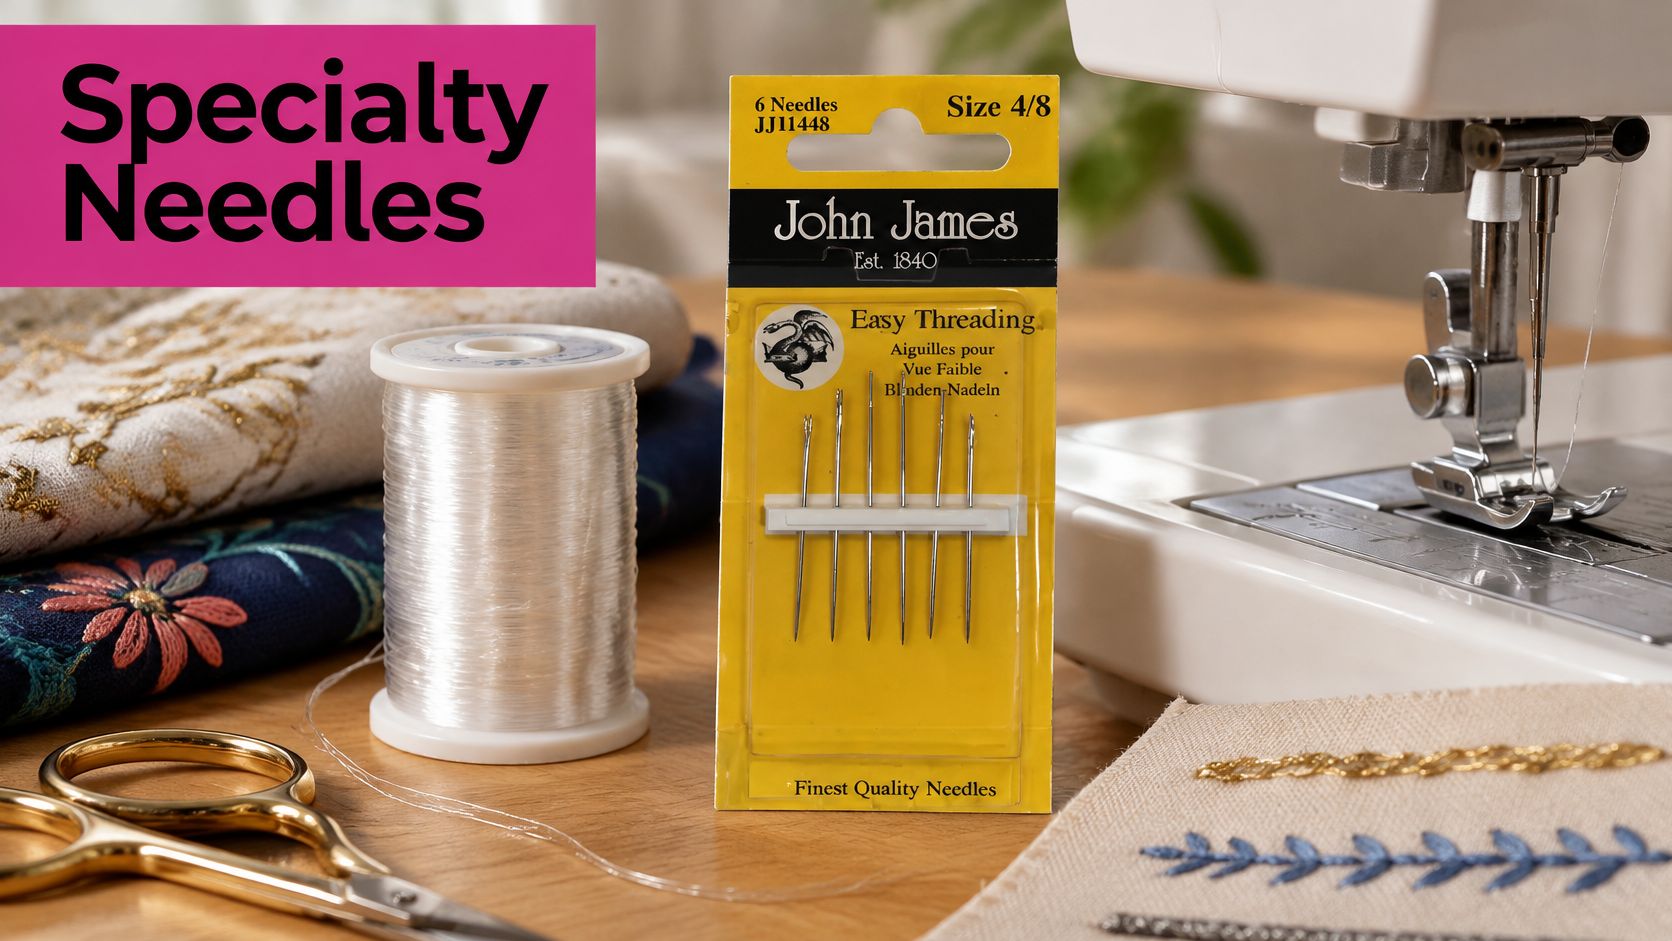
Hand finishing is a separate buy. John James Easy Threading Needles are self or easy threading needles, the practical choice when a standard eye is hard to thread under a task lamp.
Notions sit on the same menu as Batting, Fabric, Thread, Patterns, Quilting, Embroidery and Sewing, so the needle and the supplies that load it can be chosen in one stop.
I would keep two labeled starters, not one mixed box. Quilting gets quilting points in the sizes your cotton and sandwich already accept, plus one specialty needle for metallic or embroidery thread. Knitwear gets ball points sized to the yarn and thread. If shredding shows up, change the eye and the thread path before you reach for a thicker needle. Visit Linda's Electric Quilters and pick the set for the project on the machine.


