
If you've ever found yourself marveling at a quilt's impossibly perfect lines and flawless curves, you've probably seen the magic of ruler quilting templates at work. These aren't just tools; they're your creative partners, helping you achieve those crisp, professional designs you've been dreaming of for your next project.
These specialized acrylic guides, paired with a ruler foot on your sewing machine, open up a whole new world of quilting possibilities. From sharp, geometric patterns to elegant, flowing arcs, they give you the power to create designs that are incredibly difficult to replicate with free-motion quilting alone.
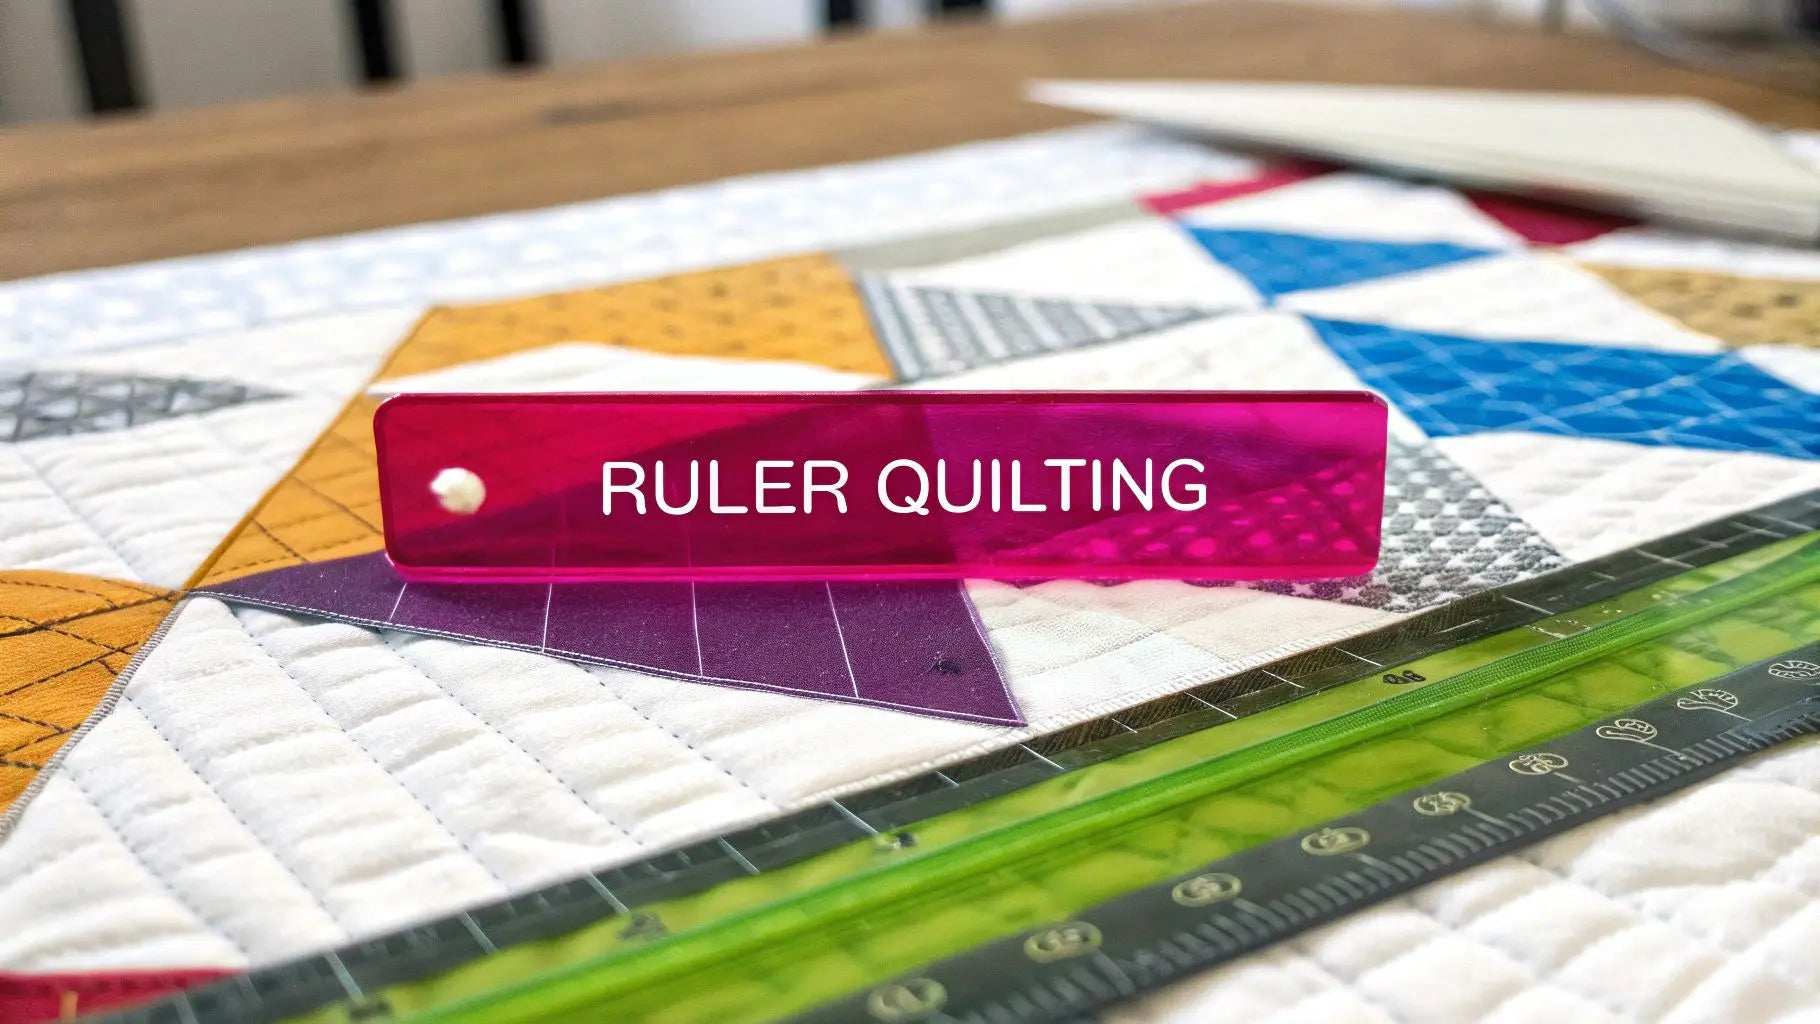
Your Guide to Perfectly Stitched Quilts
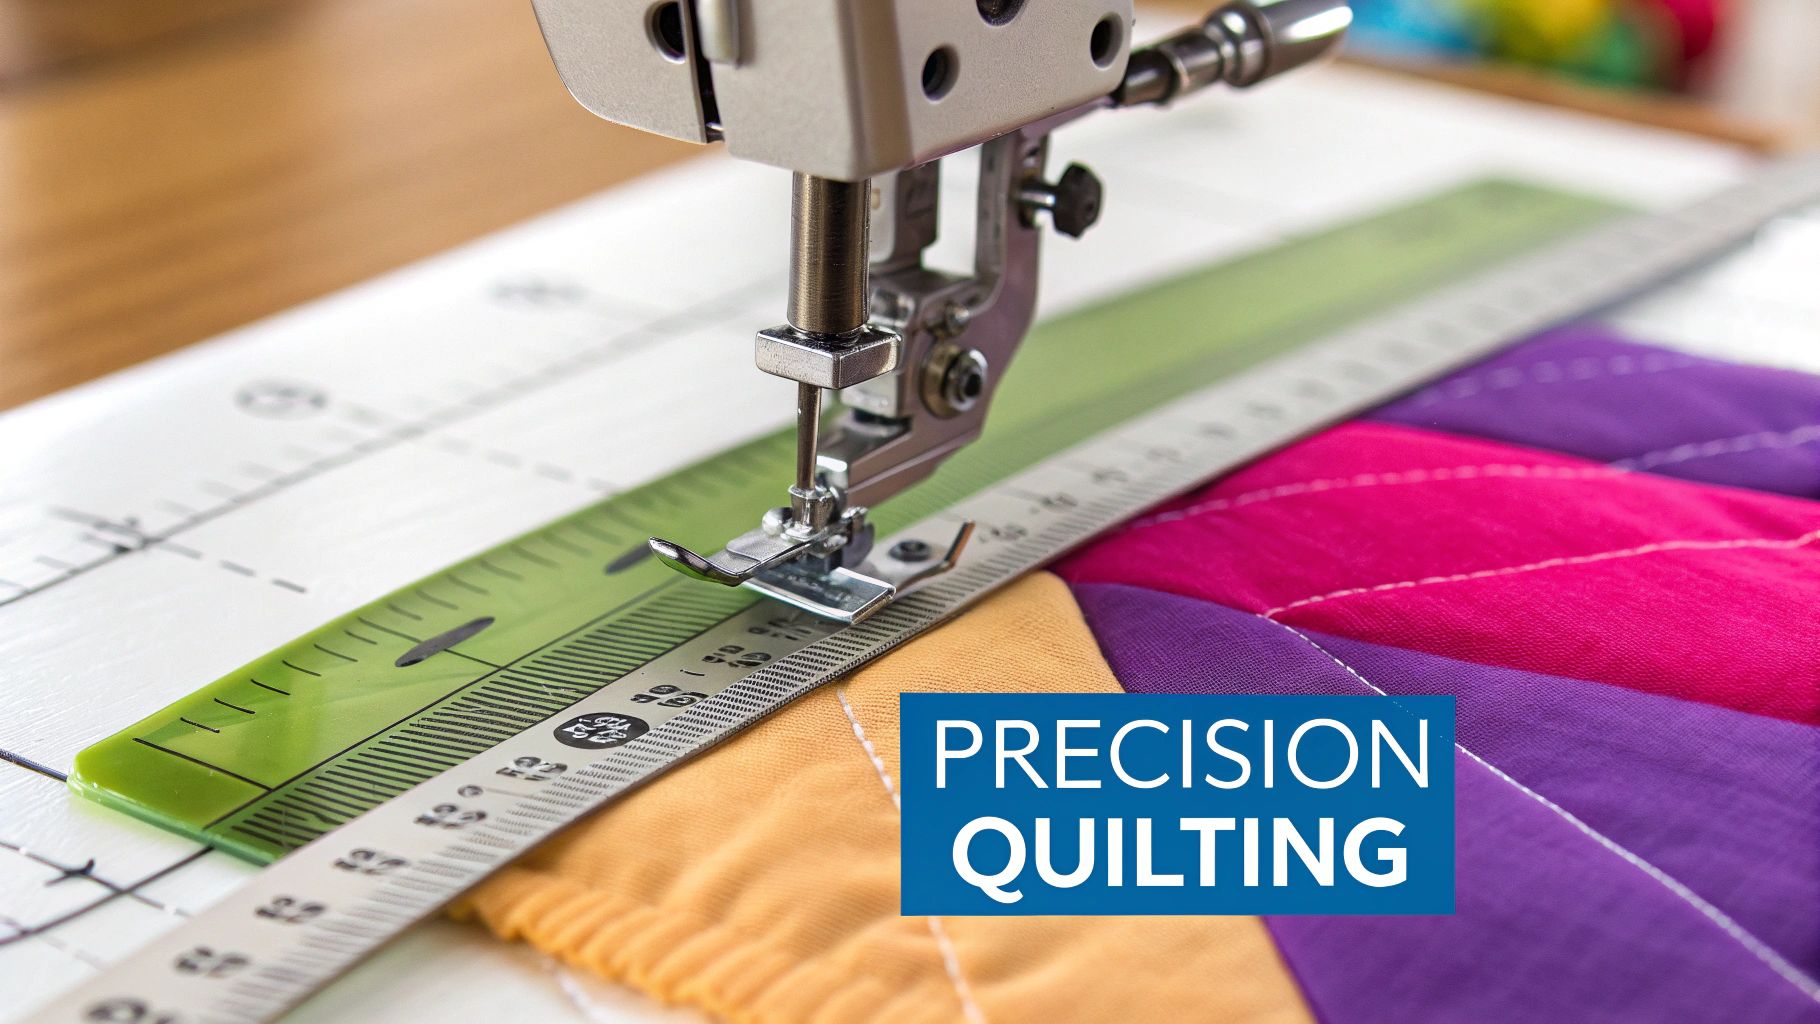
So, what's the secret sauce behind those perfectly spaced stitches and impeccable designs? It's ruler quilting. Think of it as the ultimate mashup—taking the steady control of a walking foot and blending it with the artistic freedom of free-motion work.
Instead of just your hands guiding the fabric, a sturdy template acts as a physical barrier. Your machine's ruler foot glides along the edge, steering the needle with amazing precision. It’s a simple concept that completely changes the game, turning shaky stitches into confident, beautiful lines.
Beyond Free-Motion Freedom
While I love the organic, spontaneous look of free-motion quilting, ruler work brings a level of structure and repeatability that's hard to beat. It’s the key to nailing those designs that demand absolute consistency—a challenge for even the most seasoned free-motion quilter.
And the best part? This technique isn't just for the pros with big longarm machines. You can get incredible results right on your domestic sewing machine with the right foot and a few good templates.
This guide is here to educate you on how to get started on your next project. We'll walk through everything you need to know, from the basics to the fun stuff:
- Exploring the different shapes and sizes you'll find.
- Choosing the right tools that play nicely with your machine.
- Mastering the core techniques for smooth, controlled stitching.
- Finding inspiration for your next quilting masterpiece.
By the time we're done, you'll see ruler quilting for what it is: a fun, rewarding skill that gives you the control and confidence to bring your creative vision to life, flawlessly.
Whether your style is sharp and modern or you prefer graceful, traditional curves, these templates will absolutely elevate your quilting. It's time to say goodbye to the frustration of wobbly lines and hello to quilts that look as stunning as you imagined.
Ready to take your quilting to the next level? You can find a fantastic, curated selection of high-quality options at Linda's to finish your project with confidence.
Exploring Different Types of Ruler Templates
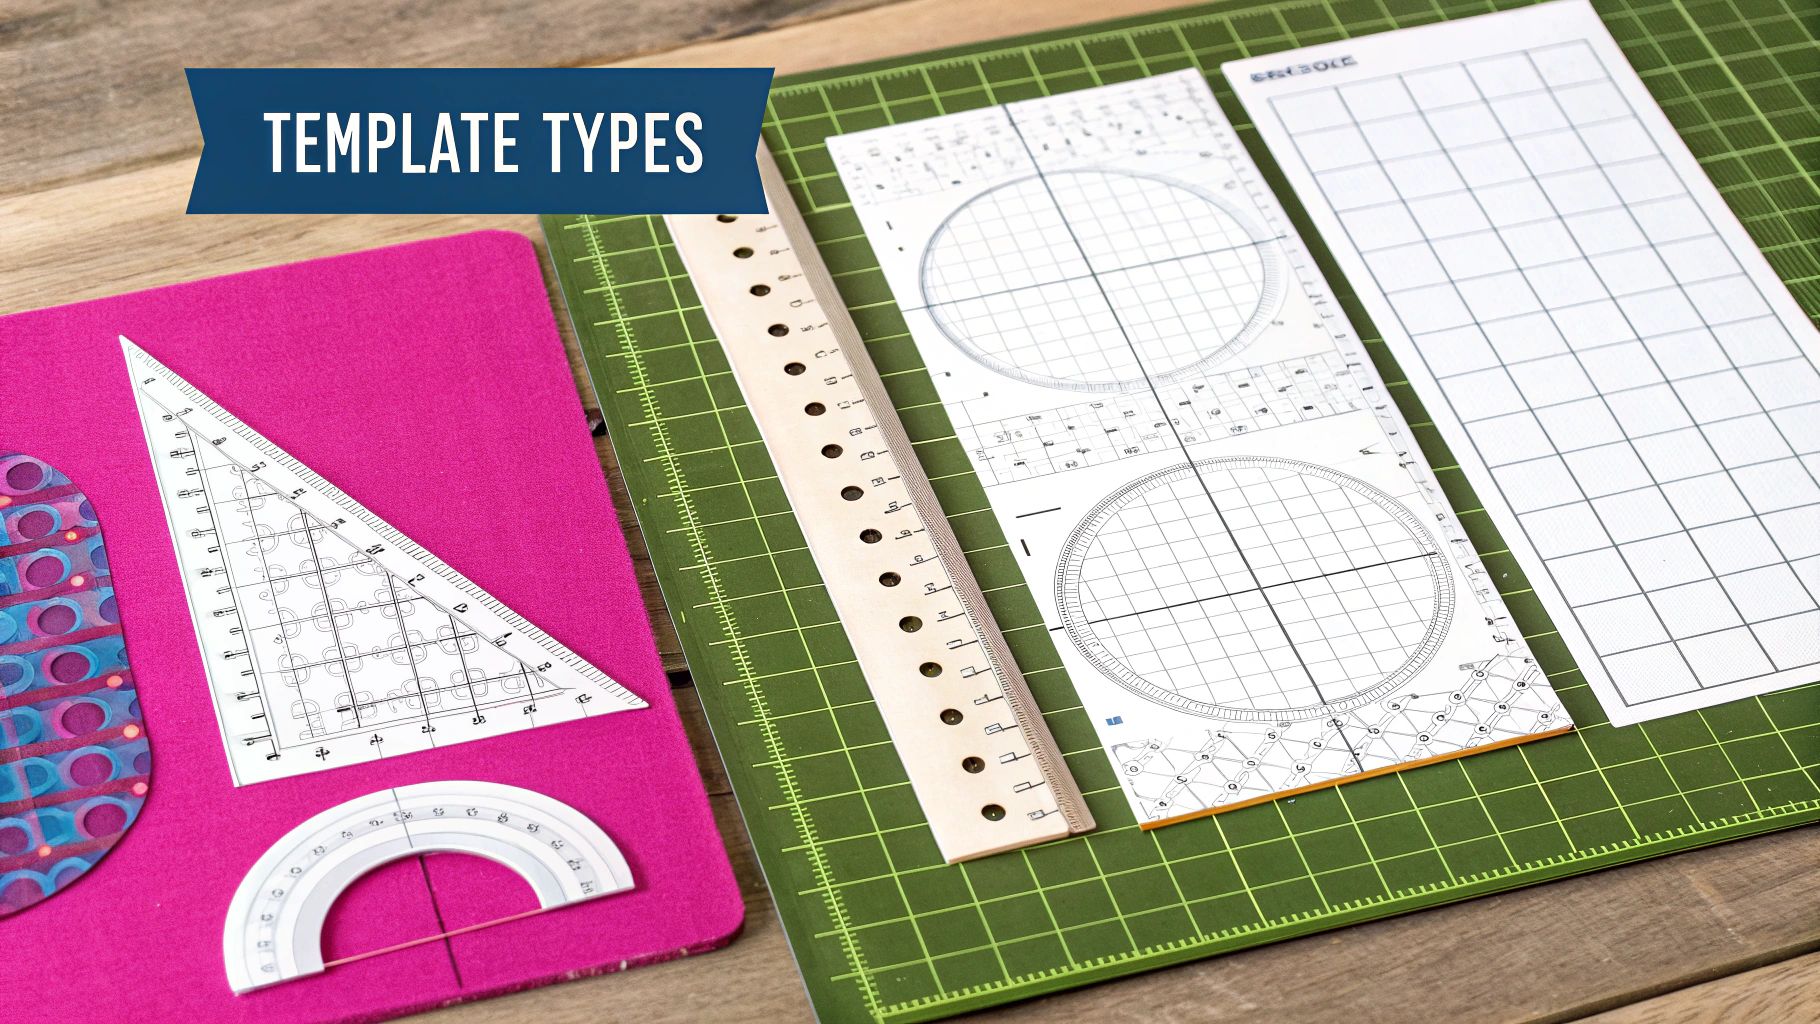
Diving into the world of ruler quilting templates is a little like opening a brand new box of crayons—suddenly, the creative possibilities feel endless! But not all templates are made the same. Each shape is designed to guide your needle to create a very specific stitch pattern, giving you an amazing toolkit to work with.
Think of these templates as stencils for your sewing machine. An artist uses different brushes for various strokes, and in the same way, a quilter uses different template shapes to stitch unique designs onto their fabric canvas. From the sharp precision of straight lines to the soft elegance of curves, each one has a special job to do.
Let's break down the essential types you'll run into.
The Foundation: Straight Line Rulers
Every quilter needs a good straight-line ruler. It's the most fundamental tool in the box. These are the workhorses that help you create crisp, clean lines, making them perfect for geometric designs, cross-hatching, and that all-important stitch-in-the-ditch quilting. They provide the backbone that so many complex patterns are built upon.
You’ll find them in all sorts of sizes, each with a purpose. A standard 6" x 24" ruler is a must-have for cutting long strips from yardage and squaring up quilt blocks. But for more detailed work on smaller pieces, something like a 6" x 12" version often gives you better control. It’s all about picking the right tool for the job to guarantee precision.
Key Takeaway: You just can't skip having a good straight-line ruler. It’s the starting point for countless designs and the secret to achieving that clean, modern look or perfectly framing more intricate work.
The Graceful Flow of Curved Templates
Once you’re comfortable with straight lines, curved templates will open up a whole new world of design. These rulers are what you'll reach for when you want to create everything from gentle, rolling waves to repeating clamshells and elegant orange peels. They add a soft, organic feel to your quilts that straight lines just can't replicate on their own.
Curved templates come in a variety of useful shapes:
- Simple Arcs: These are perfect for creating scalloped borders or continuous wavy lines that flow across a quilt.
- Circles and Ovals: Use these for stitching perfect circles, classic baptist fans, or creating fun, pebble-like textures.
- Specialty Curves: This category includes templates for specific patterns like feathers or paisley swirls, helping you produce complex, repeating designs with total ease.
The real magic happens when you start combining shapes. Imagine a quilt block filled with a precise grid, with a beautiful, flowing feather design stitched right over the top. That layering is what takes a quilt from nice to absolutely stunning.
Comparison of Common Ruler Quilting Template Types
To help you figure out where to start building your collection, here’s a quick look at the most common types of ruler templates and what they’re best used for.
| Template Type | Primary Function | Best For Projects Like |
|---|---|---|
| Straight-Line Rulers | Creating precise straight lines, grids, and cross-hatching. | Modern geometric quilts, stitch-in-the-ditch, borders, and framing blocks. |
| Curved Templates (Arcs) | Stitching consistent waves, scallops, and flowing lines. | Baby quilts with gentle patterns, decorative borders, and adding movement. |
| Circle Templates | Quilting perfect circles, semi-circles, and baptist fan designs. | Creating medallion quilts, adding pebble textures, and geometric circle patterns. |
| Specialty Shape Rulers | Producing specific, repeatable motifs like feathers or clamshells. | Traditional quilts, intricate block designs, and adding detailed embellishments. |
Remember, building your toolkit is a journey, not a race. Start with a quality straight ruler and a simple curve. As your confidence grows, you can start exploring more specialized shapes. While we're focused on quilting here, the idea of using templates to guide creativity is universal. You can even find fun coloring page templates for other artistic projects
How to Choose the Right Ruler Quilting Templates
Walking into the world of ruler quilting templates can feel a bit like being a kid in a candy store. There are so many cool shapes and designs, but where on earth do you start? The trick is to tune out the noise and focus on what matters for your machine and your projects.
By homing in on a few key factors, you can pick tools that are not only fun to use but safe and effective. Think of it like this: you wouldn't use a tiny watercolor brush for a thick oil painting. In the same way, your quilting templates have to be the right fit for your sewing machine—this is about safety just as much as it is about getting beautiful results.
Let’s break down the three most important things to consider so you can make a great choice right from the get-go.
Start with Your Machine Compatibility
Before you even think about buying a template because you love its swirly design, you have to check if it will work with your sewing machine. The most critical piece of the puzzle is your machine's shank height. This single detail determines how thick your ruler needs to be.
-
Low Shank Machines: This is what you'll find on most home sewing machines. They need thinner templates, specifically 1/8 inch (around 3mm) thick. If you use a ruler that’s too thick, it’s going to get stuck under the ruler foot, and you won’t be going anywhere.
-
High Shank Machines & Longarms: These bigger, beefier machines (and all longarms) need thicker templates, which are 1/4 inch (around 6mm) thick. That extra height is non-negotiable; it’s what keeps the machine's hopping foot from jumping right over the ruler and snapping your needle.
Crucial Safety Tip: Please, never guess your shank height. Using a thin 1/8-inch template on a longarm is asking for a broken needle and a potentially expensive machine repair. Always dig out your machine’s manual or check with the manufacturer to confirm if you have a low or high shank machine.
Evaluate Template Material and Design Quality
Okay, so you know the right thickness. Now you can start looking at the fun stuff—the templates themselves! But remember, not all acrylic is created equal. The little details in how a template is made can make a world of difference between a smooth, joyful quilting session and a frustrating one.
Here’s what to keep an eye out for when you're shopping:
-
Etched Markings: The best templates have lines that are etched or engraved right into the acrylic, not just printed on top. These won't rub off after a few uses, so you can trust your measurements for years to come.
-
Non-Slip Grips: This is a game-changer. Many high-quality templates either have a built-in non-slip coating or come with little silicone grips you can add yourself. This stops the ruler from sliding around on your fabric while you're trying to stitch a perfect line.
-
Clear Visibility: Your template should be made from crystal-clear acrylic. You need to be able to see your fabric and the stitches you've already made right through it for accurate placement.
Building Your Starter Set
When you're just starting, it's so tempting to buy one of those massive sets with dozens of complex shapes. My advice? Don't do it. It's much better to start with a couple of solid, versatile basics. Master those, and then build your collection over time.
A fantastic starter kit really only needs two things:
-
A Straight Ruler: This is the workhorse of your collection. You'll use it for stitching in the ditch, creating clean grids, and quilting any kind of straight line you can imagine.
-
A Simple Curve or Arc: This is your ticket to beautiful, flowing designs. It opens up a whole new world of gentle waves, clamshells, and other soft, organic patterns.
As ruler quilting has gotten more popular, so have counterfeit products. We're seeing more and more fake quilting rulers pop up in online marketplaces that just don't cut it when it comes to quality, accuracy, or safety. To see just how big this problem is, watch this insightful video discussing the impact of counterfeit quilting tools.
Investing in a few quality templates from a trusted source is the smartest move you can make. When you buy from a reputable retailer like Linda's, you know you're getting tools that are accurate, safe, and made to last. That solid foundation will give you the confidence to grow your skills and bring all your creative ideas to life.
Mastering Essential Ruler Quilting Techniques
So, you've got your ruler quilting templates and the right ruler foot for your machine. That's half the battle! Now comes the fun part: learning the hands-on skills that bring those beautiful designs to life on your projects.
Think of it like learning how to trace. The template is your guide, and your job is to move the needle along its edge with a steady, confident hand.
It can feel a little awkward at first—you're juggling the fabric, the ruler, and the machine all at once. But trust me, with a few key techniques and a little bit of practice, you’ll find a natural rhythm and gain incredible control over your quilting. Let’s walk through the essential steps to get you stitching like a pro.
Setting Up for Success
A good setup is everything. Before you even think about putting needle to fabric, the most important step is to install the correct ruler foot on your sewing machine. This is non-negotiable! A proper ruler foot has a high collar designed specifically to butt up against the template's edge, creating a safe barrier so the ruler can't slip over or under it.
Once the foot is securely attached, make it a habit to double-check one critical thing: make sure the presser foot is in the down position before you drop your needle. On many machines, dropping the needle while the foot is up can cause the needle bar to slam into the foot, which could lead to some seriously expensive damage. Consider this the golden rule of ruler quilting.
Finding Your Grip and Guiding the Quilt
Your hands are your most important tools here. They're in charge of guiding both the template and the fabric. The goal is to keep firm, consistent pressure on the ruler so it doesn't budge while you gently steer the quilt sandwich under the needle.
- Hand Positioning: Rest your hands on the ruler with your fingers spread out. This distributes the pressure evenly and gives you better control. And, of course, always keep your fingers a safe distance from the needle!
- Applying Pressure: You don't need a death grip. Just apply a firm but relaxed pressure to hold the template steady against the fabric.
- Smooth Motion: Think of the template and fabric as one unit, moving together. Your movements should be slow and deliberate, especially when you're just starting out. Rushing is a surefire way to get big, uneven stitches.
This visual guide breaks down the selection process, from matching the template to your machine and its thickness requirements to choosing the right design for your project.
The flow from machine type to template thickness and finally design choice shows how each decision builds upon the last for successful ruler quilting.
Achieving Perfect Lines and Curves
Once you master the basic movements, the real magic happens. Whether you're stitching a perfectly straight line or a graceful arc, the core principle is the same: keep the ruler foot pressed firmly against the template's edge for the entire line of stitching.
The secret to flawless ruler work is consistency. Consistent pressure on the template and consistent speed in your hands will result in stitches that are even, straight, and professional-looking every single time.
For straight lines, concentrate on holding the ruler perfectly still while you guide the fabric. When it comes to curves, you’ll need to pivot both the ruler and the quilt together in a smooth, fluid motion. It’s always a good idea to practice on a scrap quilt sandwich first to get the hang of it before you move on to your main project.
Troubleshooting Common Challenges
Hey, even seasoned quilters run into hiccups. Knowing how to fix them on the fly is what builds real confidence.
| Common Problem | Why It Happens | How to Fix It |
|---|---|---|
| Slipping Template | The ruler doesn't have enough grip on the fabric. | Apply non-slip grips to the back of your template. Make sure you're applying firm, even pressure with your hands. |
| Inconsistent Stitches | Your hand speed and machine speed are out of sync. | Slow down your movements. If your machine has a stitch regulator, use it! If not, just practice moving your hands at a steady pace. |
| Wobbly Lines | The ruler foot isn't staying in constant contact with the template edge. | Focus on keeping that foot pressed against the ruler for the entire length of the stitch. A relaxed but firm grip is key. |
Building these skills takes a little time, but the payoff is huge. You'll soon be able to execute precise, complex designs that take your quilts to a whole new level.
To set yourself up for success, you'll need a high-quality ruler foot and some effective non-slip grips. You can find a fantastic selection of essential ruler quilting accessories at Linda's to help you get started on your journey to perfect stitches.
Inspiring Project Ideas with Ruler Templates
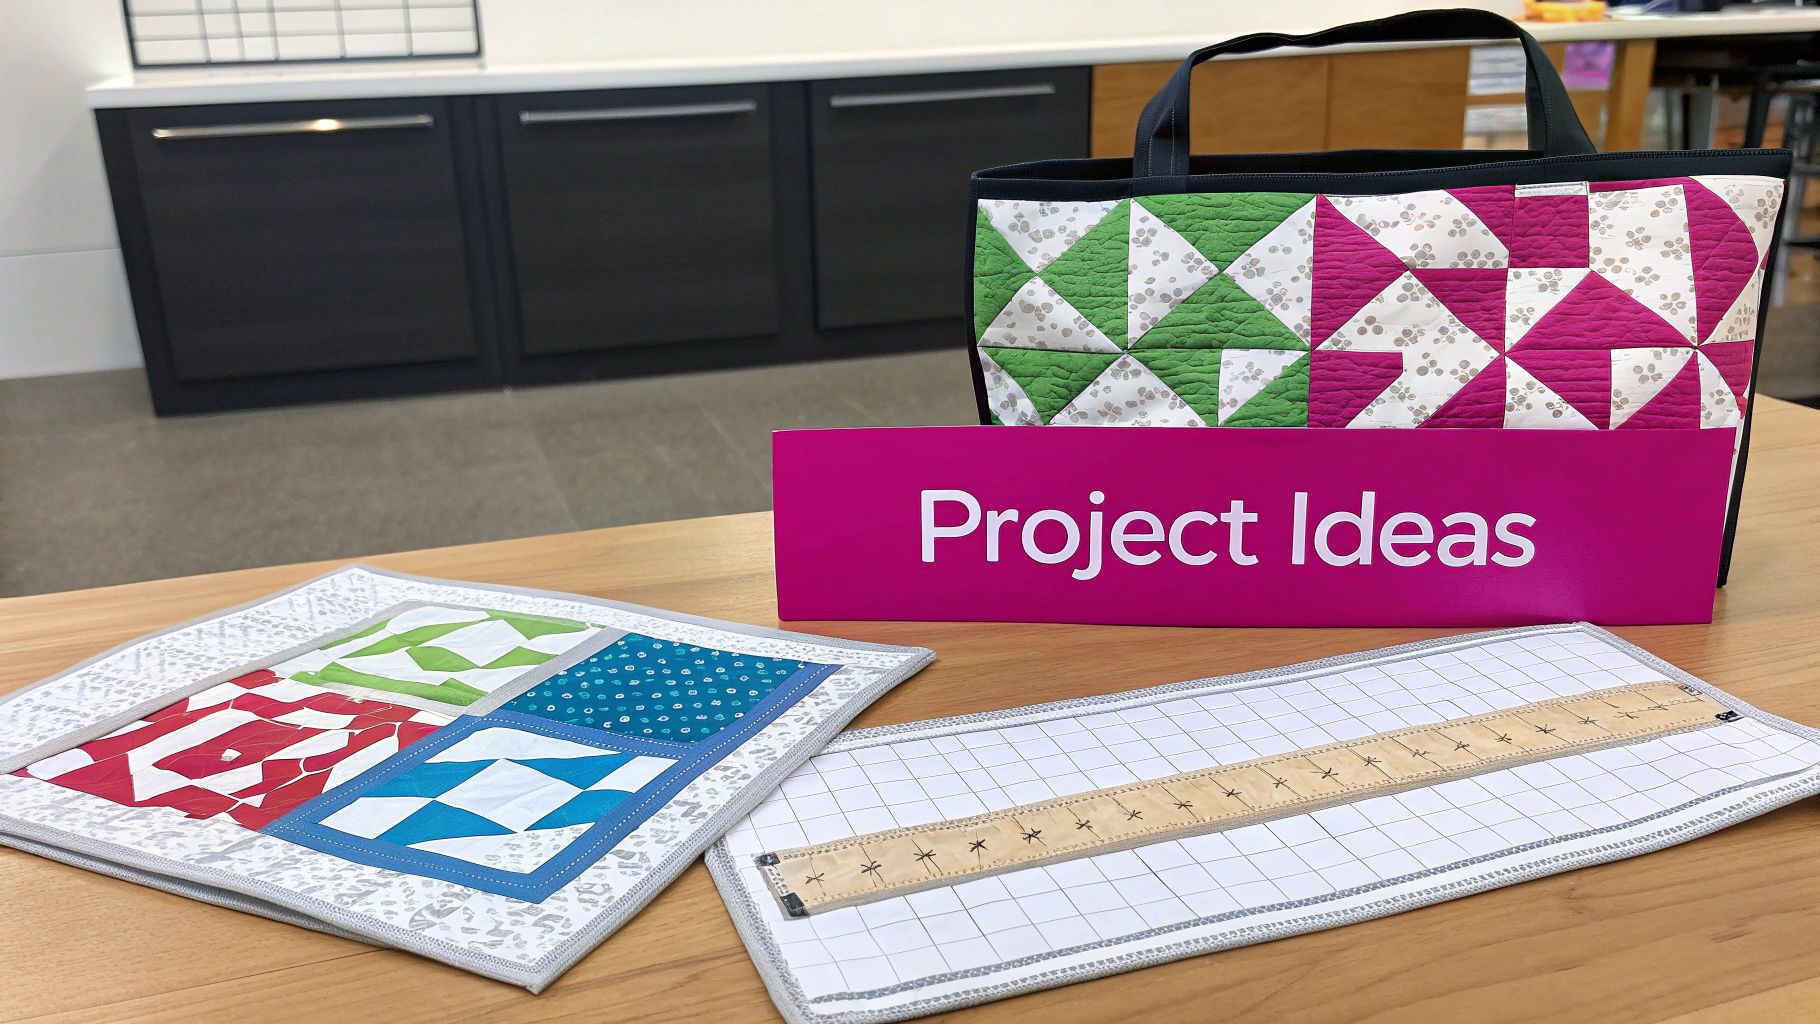
Alright, you’ve got the theory down—now for the fun part! This is where the magic really happens, when you take those gorgeous ruler quilting templates and turn a simple piece of fabric into a work of art.
We've dreamed up three project ideas to get your imagination fired up. Think of these as jumping-off points, showing you how to go from simple lines to stunning, complex designs. We’ll start easy and work our way up.
Beginner Project: Modern Grid Placemats
Dipping your toes into the world of ruler quilting? A set of modern placemats is the absolute perfect first project. They're small, quick, and the best way to get a feel for guiding your ruler foot along a straight edge. You'll build some serious confidence without the pressure of a full-size quilt.
The quilting here is beautifully simple: a clean grid. Grab a straight-line ruler and stitch a classic crosshatch, maybe with lines spaced an inch apart. Or, for a more modern twist, play with an asymmetrical grid. The goal is to nail those crisp, perfect intersections.
- Required Templates: A good, all-purpose straight-line ruler is all you need.
- Conceptual Plan: Quilt all your parallel lines in one direction first. Then, just rotate the placemat and stitch the lines going the other way.
- Finishing Touch: Pick a bold, modern fabric that lets your precise stitching be the star of the show.
Ready to create a stunning set of placemats? Linda's has the perfect straight-line rulers and a beautiful collection of modern fabrics to bring this simple, elegant project to life.
Intermediate Project: Gentle Waves Baby Quilt
Once you've mastered straight lines, it's time to introduce some beautiful curves. A baby quilt is a wonderful way to do just that. The gentle, flowing patterns you’ll create add a softness and movement that’s just perfect for a little one’s cozy blanket.
The idea is to create continuous waves that flow across the quilt top. Using a curved or arc template, you’ll stitch parallel wavy lines from one edge to the other. The real skill you're building here is keeping the spacing between your curves consistent and maintaining a smooth, fluid motion. It’s all about finding your rhythm.
Quilting is seeing a huge comeback, and the numbers prove it. The global quilting ruler market hit about $310 million in 2024 and is expected to climb to $495 million by 2033! It shows just how many crafters are looking for the right tools to bring their creative ideas to life. You can discover more insights about the quilting market growth to see just how big our community is getting.
Advanced Project: Geometric Tote Bag
Ready to really show off your new skills? A tote bag with an intricate geometric design is a fantastic challenge. This project combines everything—straight lines, sharp angles, maybe even some arcs—all in a small, focused area. It demands precision and a bit of planning.
Let your creativity run wild with this one! Use a mix of straight and specialty rulers to build a complex, layered design on the front pocket piece before you even assemble the bag. Think interlocking triangles, a bold starburst, or a cool modern block pattern. This is where you’ll perfect stopping on a dime and pivoting at those sharp corners.
- Required Templates: A mix of straight rulers and some fun geometric shapes.
- Conceptual Plan: Sketch out your design on the pocket fabric first. Quilt the whole pattern, then sew the bag together.
- Showcase Your Work: The finished tote isn't just a bag; it's a walking piece of art that screams, "I made this!"
Feeling ambitious? Turn that inspiration into reality. Find an amazing selection of specialty geometric templates and durable canvas fabrics at Linda's to construct a truly one-of-a-kind tote bag.
How to Care for Your Ruler Quilting Templates
Think of your ruler quilting templates as an investment in your craft. They're precision tools, and just like a good chef takes care of their knives, a little bit of maintenance will keep your templates in perfect shape for years to come. It’s all about protecting their accuracy, safety, and longevity.
A few simple steps after each quilting session can make all the difference. This isn't just about wiping them down; it's about preserving those smooth edges and clear markings that are so crucial for beautiful, consistent stitches.
Cleaning Your Templates Safely
Acrylic can get scratched up easier than you'd think, and even a small scuff can make it hard to see your fabric clearly. The secret is to be gentle. Stay away from harsh chemicals like alcohol or ammonia-based window cleaners, as they can cause the acrylic to get cloudy or even crack over time.
Instead, the best way to clean them is also the simplest:
- Grab a soft, damp microfiber cloth and give them a gentle wipe to get rid of dust, lint, or any sticky residue.
- For a tougher spot, a tiny drop of mild dish soap in some water is all you'll ever need.
- Always dry your templates completely with another clean, soft cloth before you put them away.
Proper Storage to Prevent Damage
How you store your templates matters just as much as how you clean them. Tossing them into a drawer together is a sure-fire way to end up with scratches, chips, or warping.
The golden rule for storing templates is to keep them from bending or rubbing against each other. Storing them flat in a shallow drawer or standing them upright in a dedicated ruler rack are your best bets for keeping them straight and scratch-free.
It's also a good habit to inspect the edges of your templates now and then. Carefully run your finger along the sides to feel for any tiny nicks or burrs. A damaged edge can snag your quilt top or, even worse, knock your needle off course and mess up your stitch quality.
Protecting your collection means every line you quilt will be as crisp and accurate as the last. For some fantastic storage solutions and cleaning supplies made just for quilters, check out the quilting notions available at Linda's to keep your tools pristine.
Common Questions About Ruler Quilting
Diving into the world of ruler quilting templates can feel like learning a new language, and it's totally normal to have questions. Getting the right answers from the start is the best way to build confidence and keep your machine happy. Let's tackle some of the biggest questions quilters ask when they get started.
Can I Use Regular Cutting Rulers for Ruler Quilting?
This is a big one, and the answer is a hard no. Please, do not ever use your standard rotary cutting rulers for machine quilting! It's a disaster waiting to happen.
Ruler quilting templates are much thicker for a reason—usually 1/4 inch (or 6mm) for longarms and high-shank domestic machines. This thickness is crucial because it acts as a safe wall for your ruler foot. A thin cutting ruler is a massive safety hazard; your machine's hopping foot can easily jump right over it, smashing your needle and potentially causing serious, expensive damage to your machine.
Think of it this way: using the right template isn't just a suggestion, it's a critical safety rule. The template and your ruler foot work together as a team to create a secure path for your needle, keeping it safe and your stitches looking perfect.
Is a Special Ruler Foot Really Necessary?
Yes, absolutely. A proper ruler foot is non-negotiable for this technique. It's designed with a high, circular collar that hugs the edge of the template, guiding your needle with incredible precision.
A standard darning or free-motion foot just won't cut it—it doesn't have that safety collar. Trying to use one with templates is not only unsafe but will give you wobbly, inconsistent stitches. Trust us, the right foot is essential.
How Do I Stop My Ruler Template from Slipping?
Ah, the dreaded ruler slip! It happens to everyone, but thankfully, it’s an easy fix. The first step is to maintain a firm but relaxed grip, always keeping your hands and fingers a safe distance from the needle.
For extra security, many quilters add a gripping product to the back of their templates. Here are a few tried-and-true favorites:
- Silicone Grips: These are little adhesive dots that add just the right amount of texture.
- Specialty Tapes: Look for tapes made specifically for rulers that add grip without leaving a sticky mess.
- Non-slip Sprays: A quick, light coating can give your template the hold it needs to stay put.
Now that we've cleared that up, you're all set to quilt like a pro! To make sure your templates stay exactly where you want them, check out the fantastic selection of non-slip grips and other essential notions at Linda's Electric Quilters. You'll find everything you need to finish your next masterpiece at https://lindas.com.


