
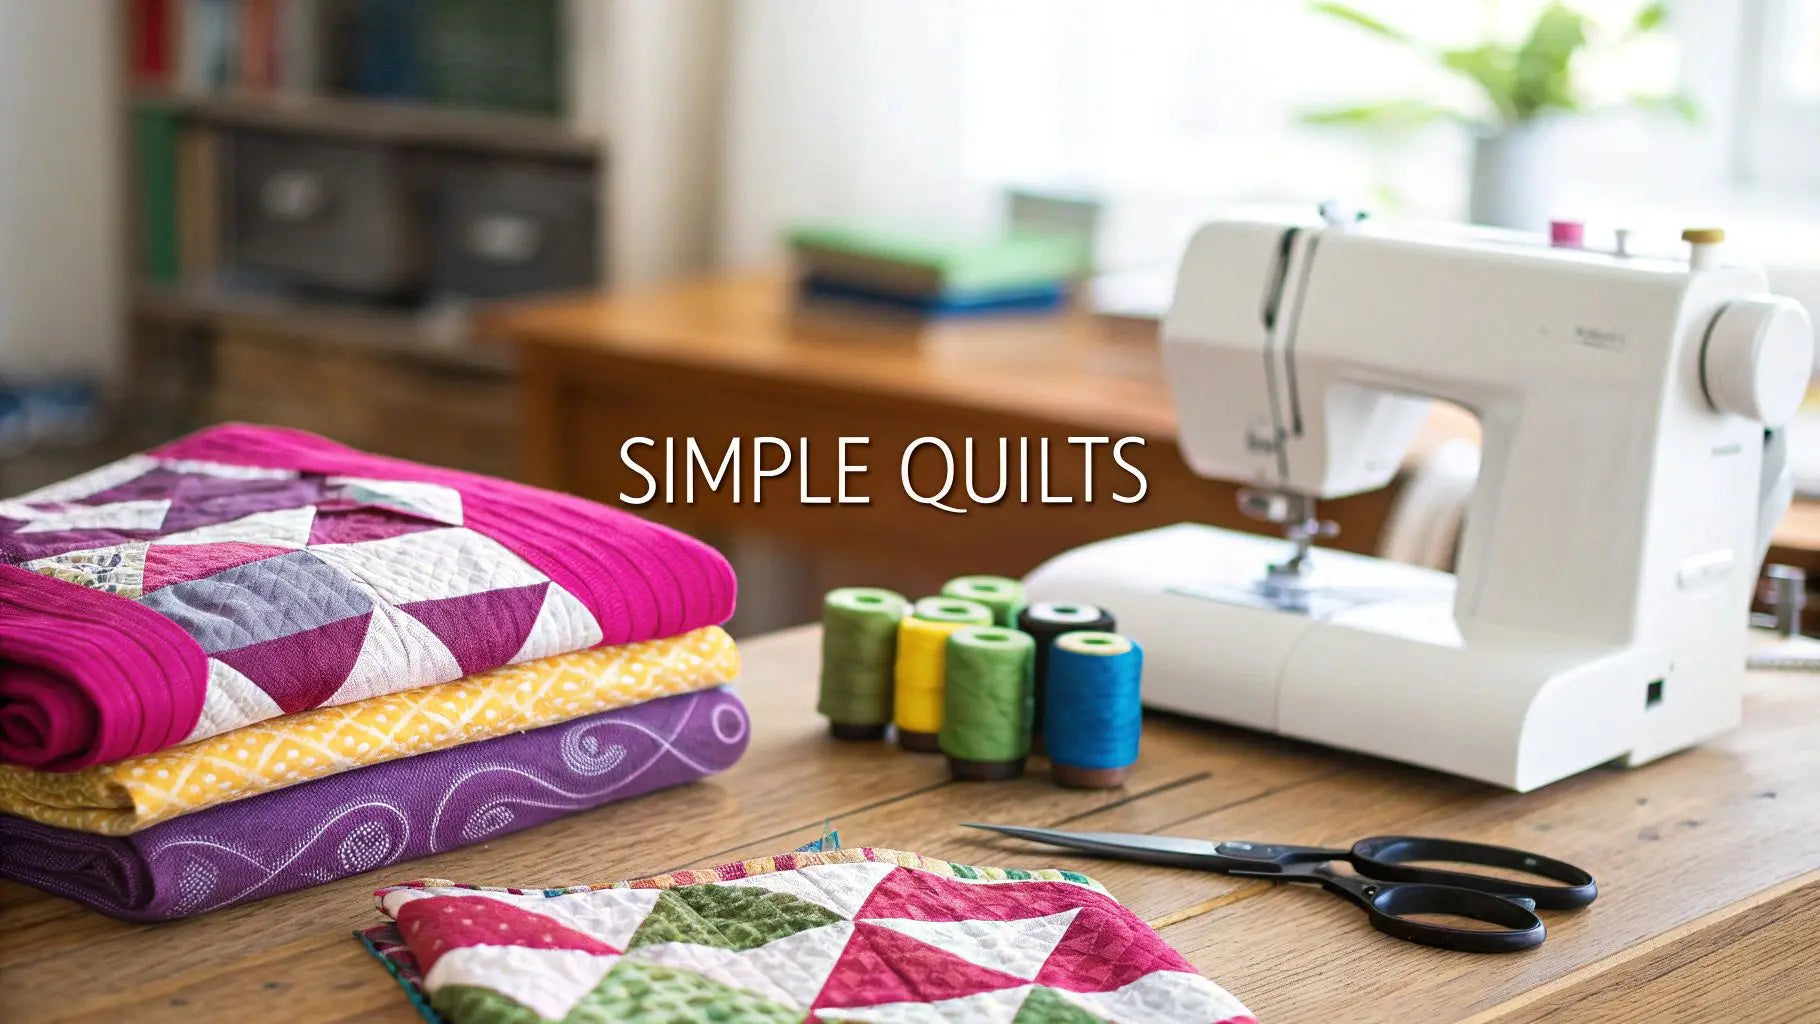
Welcome to the vibrant world of quilting! Turning a stack of fabric into a cozy, handmade treasure is a special feeling, but knowing where to begin can seem intimidating. The secret is starting with a project that builds your confidence without overwhelming you. That's precisely why we've curated this guide to the best simple quilts for beginners. Each pattern we'll explore is designed to teach fundamental skills—like achieving a perfect quarter-inch seam, mastering straight-line sewing, and understanding basic block construction—all while ensuring your first project is a stunning success.
Before cutting your first fabric square, it's essential to understand concepts like quilt dimensions. A clear plan for the final size prevents surprises and ensures your quilt fits its intended purpose, whether it's a baby blanket or a bed cover. For a detailed breakdown, this guide to choosing the right quilt size is an excellent resource.
Once you have your plan, remember that every great quilt starts with quality materials. At Linda's Electric Quilters, we offer everything from vibrant fabric bundles to the perfect thread to bring your vision to life. Let's get you started on a rewarding journey, one stitch at a time.
1. Simple Squares/Four-Patch Quilt
The Simple Squares quilt, often called a "patchwork" quilt, is the quintessential starting point for any new quilter. It is one of the most simple quilts for beginners because it relies on the most fundamental skills: cutting fabric into uniform squares and sewing them together with a straight stitch. This pattern allows you to master the basics, like achieving a consistent ¼-inch seam allowance and pressing seams properly, without the complexity of triangles or curves.
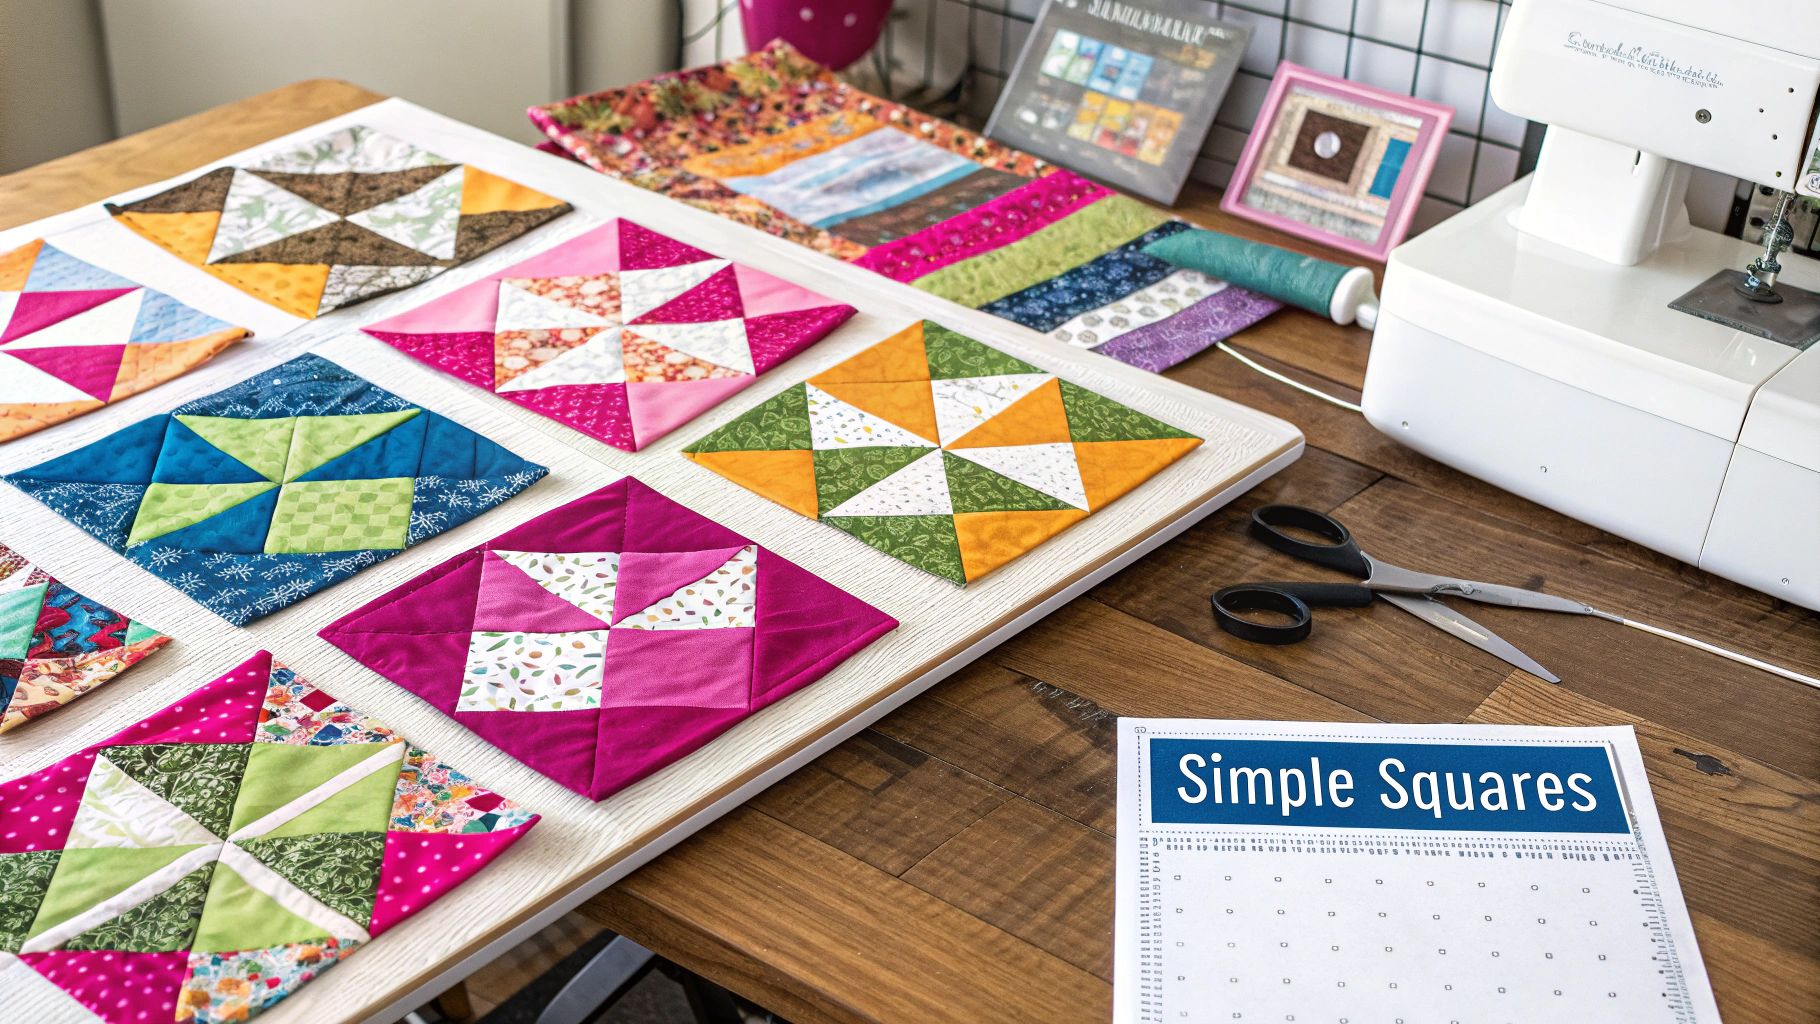
The Four-Patch is a popular variation where four squares are sewn together to form a larger block. These blocks are then arranged in a grid, creating a delightful checkerboard effect. This method introduces the concept of "block construction," a core principle in quilting, in a very manageable way.
Why It's Perfect for Beginners
The beauty of this pattern lies in its simplicity and versatility. There is no need for complicated templates or advanced cutting techniques. You can achieve a stunning result just by focusing on color and fabric placement. Jenny Doan of Missouri Star Quilt Company has popularized this style, showing how pre-cut fabrics, like 5-inch charm squares, can streamline the process. Using a pre-cut charm pack removes the stress of both cutting and color coordination, allowing you to focus purely on your sewing technique.
Actionable Tips for a Perfect Quilt
To ensure your first project is a success, follow these specific tips:
- Plan Your Layout: Before sewing a single stitch, arrange your squares on a floor or a design wall. This helps you visualize the final quilt and ensure a balanced color distribution.
- Chain Piece: To save significant time and thread, sew your squares together in pairs without cutting the thread in between. This assembly-line method is a game-changer for grid-based quilts.
- Press Seams Strategically: Press the seams of your first row to the right and the seams of your second row to the left. When you sew the rows together, the seams will "nest" snugly, creating perfectly aligned corners with less bulk.
- Finish Like a Pro: Great results start with the right tools. Ensure you have a sharp rotary cutter, a reliable sewing machine, and high-quality thread. For the finishing touch, explore the vast selection of backing fabrics and batting at Linda's Electric Quilters. Our professional longarm quilting services will give your first quilt a polished, durable finish.
2. Rail Fence Quilt
The Rail Fence quilt is another fantastic project for those looking for simple quilts for beginners, offering a visually stunning result with surprisingly simple techniques. This pattern relies on strip piecing, where you sew long strips of fabric together first and then cut them into blocks. It teaches a fundamental quilting skill in an efficient, assembly-line fashion that is both fast and satisfying.
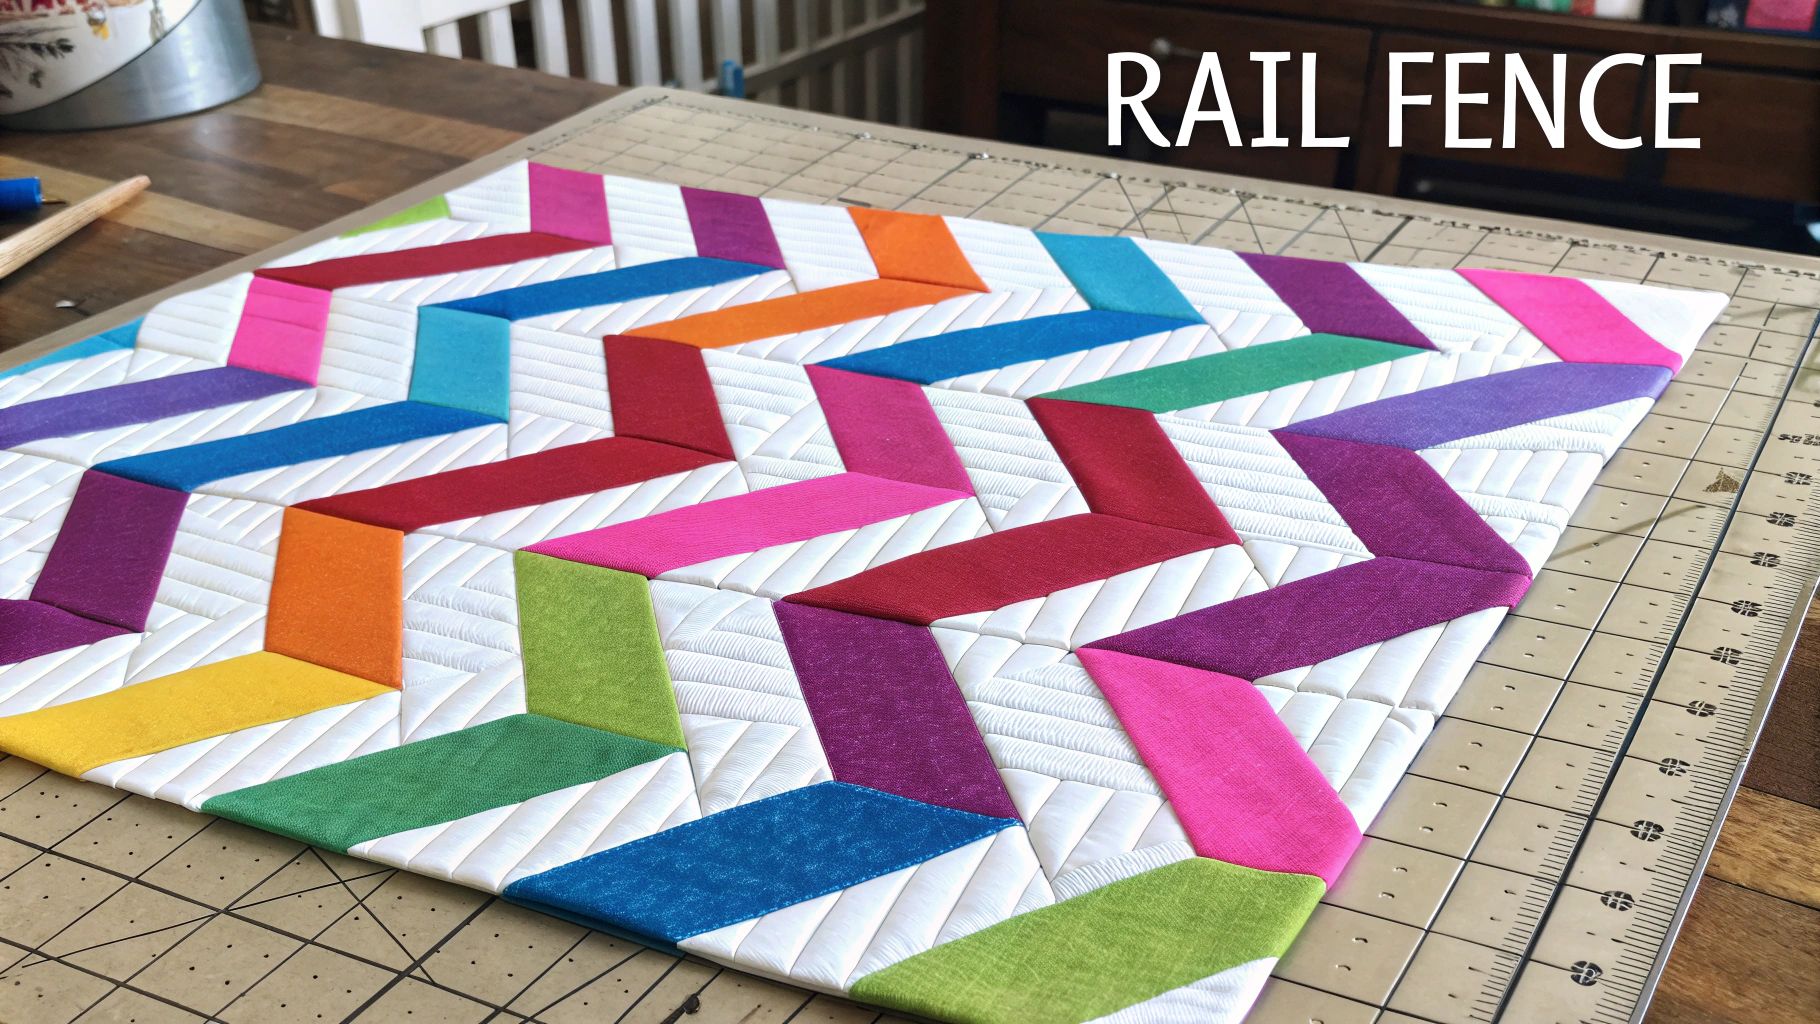
The magic happens when you arrange the blocks. By rotating every other block by 90 degrees, the simple striped units create an intricate zigzag or woven pattern. This method introduces the concept of creating secondary patterns through block placement, a key design principle in quilting, without requiring any complex cutting or piecing.
Why It's Perfect for Beginners
The Rail Fence quilt is celebrated for its efficiency and "wow" factor. It eliminates the need to cut and sew many small individual pieces, which significantly speeds up the piecing process. This pattern is particularly well-suited for pre-cut 2.5-inch strips, often called "jelly rolls," which take the guesswork out of fabric coordination and cutting. Popularized by figures like Eleanor Burns, this design proves that even the simplest quilts for beginners can look incredibly complex and modern. Using a pre-cut jelly roll ensures perfect coordination and lets you dive straight into sewing.
Actionable Tips for a Perfect Quilt
To create a flawless Rail Fence quilt, focus on consistency and layout with these tips:
- Prioritize Value: For the most dramatic effect, choose three fabrics with distinct values: a light, a medium, and a dark. This contrast is what makes the zigzag pattern pop.
- Press for Success: As you sew your long strips together to create a "strip set," press all the seams in one direction. This reduces bulk and helps your blocks lie flat.
- Cut with Precision: After sewing your strips, use a sharp rotary cutter and a clear quilting ruler to cut your blocks. Trim them to their final, precise size after they are cut from the strip set to ensure every block is perfectly square.
- Audition Your Blocks: Lay out all your finished blocks on a floor or design wall before sewing them together. This step is crucial for checking the flow of your pattern and ensuring you love the final arrangement.
- Elevate Your Finish: A beautiful quilt top deserves a beautiful finish. Explore the wide range of high-quality backing fabrics at Linda's Electric Quilters. For a truly professional look, consider our longarm quilting services to add intricate stitching that will make your Rail Fence quilt an heirloom.
3. Strip Quilt (Jelly Roll Race)
The Strip Quilt, famously known as the "Jelly Roll Race," is one of the most exciting and simple quilts for beginners who crave a fast and rewarding project. This pattern utilizes a "jelly roll," a pre-cut bundle of 40 fabric strips, each measuring 2.5 inches wide. The technique involves sewing these strips together end-to-end to create one incredibly long strip, which is then repeatedly folded and sewn to construct the entire quilt top.
This method gained viral popularity, largely thanks to tutorials from Jenny Doan of Missouri Star Quilt Company, because a quilter can finish a top in about an hour. It’s an exhilarating process that produces a modern, dynamic quilt with what feels like minimal effort, making it perfect for charity drives or anyone wanting to see a beautiful finished product quickly.
Why It's Perfect for Beginners
The genius of the Jelly Roll Race is its sheer speed and simplicity. There is no complex piecing or matching of points; the focus is on continuous straight sewing. This allows new quilters to build confidence with their sewing machine and experience the satisfaction of completing a large project in a single afternoon. Using a pre-cut jelly roll also eliminates the tedious task of cutting dozens of strips, letting you dive right into the fun part.
Actionable Tips for a Perfect Quilt
To get the best results from your first strip quilt, consider these key tips:
- Watch a Tutorial First: Before you begin, watch the video tutorial above to fully grasp the unique folding and sewing technique. This visual guide makes the process much clearer than written instructions alone.
- Prepare Your Strips: Unroll your jelly roll and consider removing any strips you strongly dislike or that don't fit your desired color scheme. You can also arrange them by light and dark values before sewing them together to ensure a more balanced, random look.
- Press Seams Open: Because this quilt has so many seams that will intersect, pressing your seams open instead of to one side is crucial. This will reduce bulk and help your quilt top lay much flatter.
- Finish with a Professional Touch: Once your quilt top is complete and squared up, bring it to Linda's Electric Quilters. Our professional longarm quilting services and wide selection of high-quality backing fabrics will give your lightning-fast quilt a beautiful, durable finish that will last for years.
4. Nine-Patch Quilt
A step up from the Four-Patch, the Nine-Patch quilt block is another cornerstone of traditional quilting and a fantastic project for those looking to build their skills. This classic pattern consists of nine equal squares arranged in a 3x3 grid. It's an ideal choice among simple quilts for beginners because it introduces strip piecing, a highly efficient technique, while reinforcing the importance of an accurate ¼-inch seam.
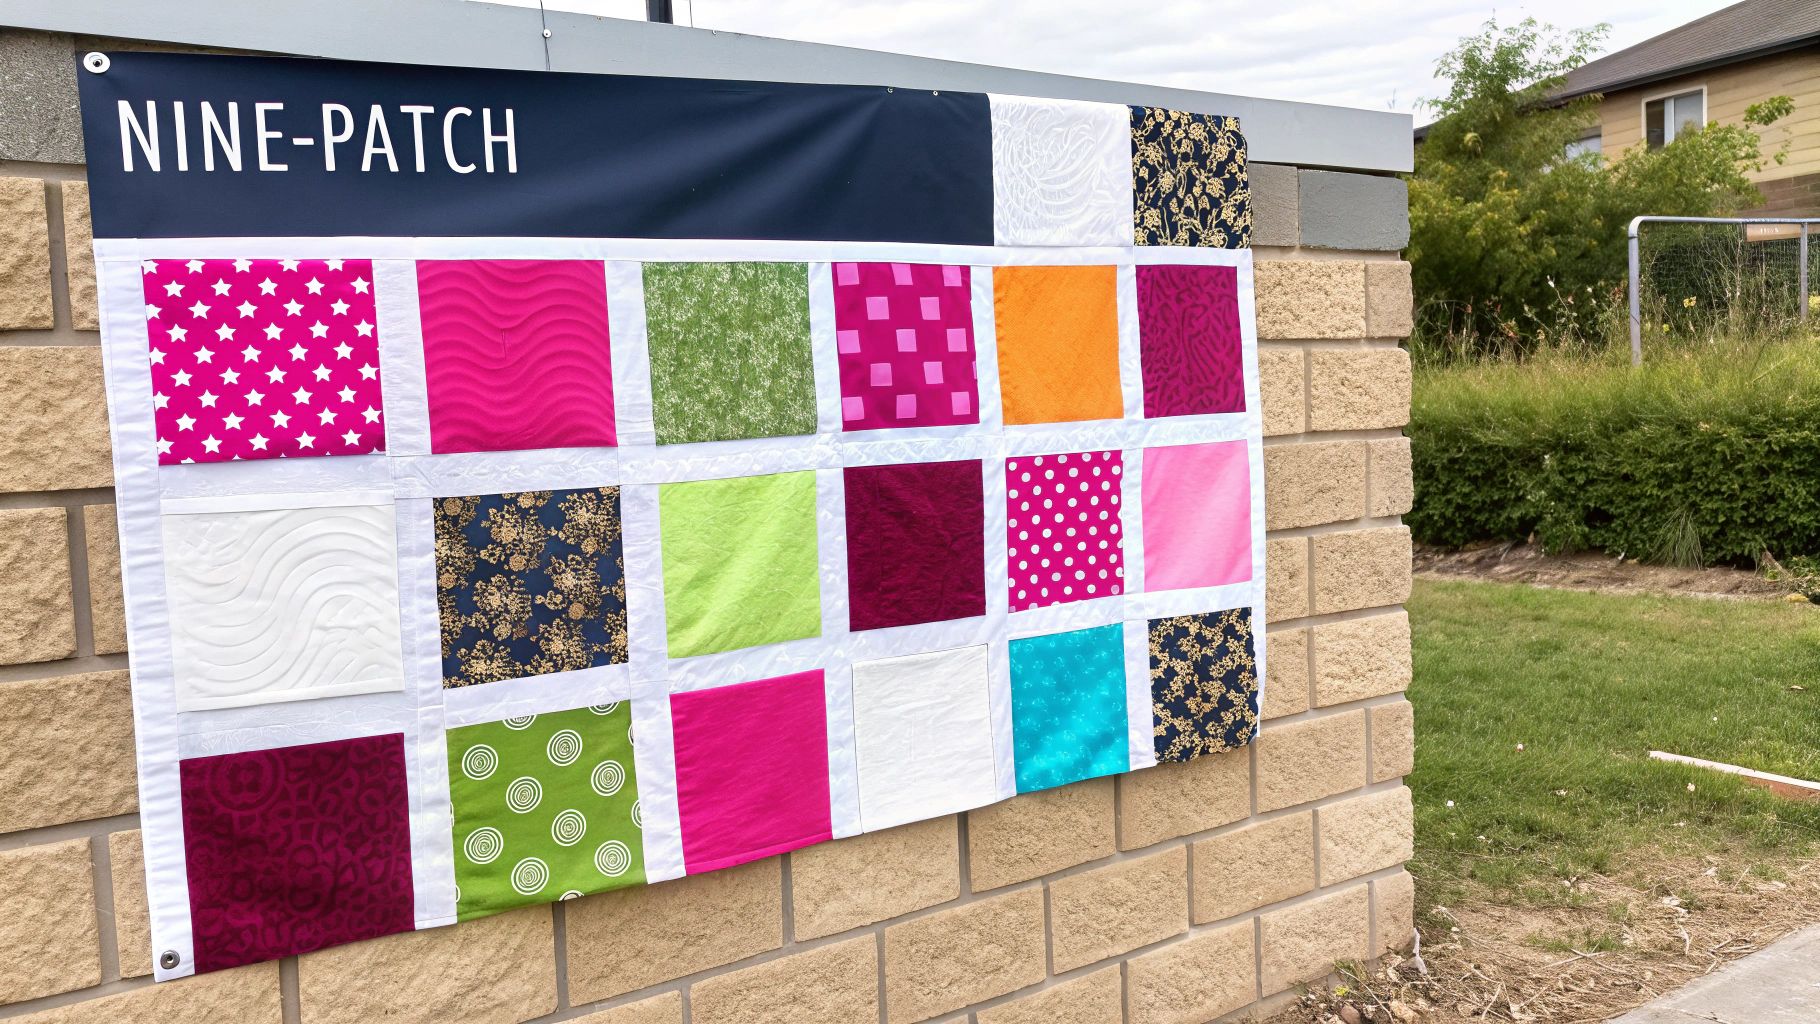
The Nine-Patch block has been a favorite for centuries, famously used by Amish and pioneer quilters to create stunning yet functional quilts. Its versatility is showcased in countless variations. The construction teaches you how to sew strips together, cut them into segments, and assemble those segments into a perfect block.
Why It's Perfect for Beginners
The Nine-Patch is the perfect next step because it builds directly on the skills learned from a simple squares quilt but introduces a more efficient construction method. The magic of strip piecing, popularized by Eleanor Burns of "Quilt in a Day," allows you to sew long strips of fabric together first and then cut them into the segments needed for your blocks. This drastically reduces cutting time and improves accuracy, making the process faster and more enjoyable. You can create complex-looking designs just by alternating Nine-Patch blocks with solid squares of fabric.
Actionable Tips for a Perfect Quilt
To master the Nine-Patch and ensure a beautiful finished quilt, focus on these key techniques:
- Master Strip Piecing: Sew three long strips of fabric together. Press the seams toward the darker fabric to prevent colors from showing through. Then, use your rotary cutter and ruler to cut this new striped fabric into segments.
- Nest Your Seams: Just like with the Four-Patch, strategic pressing is crucial. When you sew your three rows of squares together, press the seams of the top and bottom rows in one direction and the seams of the middle row in the opposite direction. This will help your corners align perfectly.
- Start with Larger Squares: For your first Nine-Patch, use fabric strips that result in larger squares (like 2.5 or 3 inches finished). This makes them more forgiving and easier to handle as you learn the technique.
- Get the Best Finishing Supplies: Once you have your beautiful blocks, you need the perfect finishing touches. At Linda's Electric Quilters, you can find a stunning array of high-quality backing fabrics and batting to complement your design. Elevate your first Nine-Patch with our professional longarm quilting services for a durable, heirloom-quality finish.
5. Disappearing Nine-Patch
The Disappearing Nine-Patch is a magical pattern that creates a surprisingly complex design from a very simple starting block. This quilt is another excellent choice for those looking for simple quilts for beginners because it introduces an exciting "slice-and-sew" technique without requiring advanced skills. The process starts by creating a standard Nine-Patch block, which is then cut into four equal quarters and rearranged to reveal a completely new, intricate pattern.
This method takes a basic block and transforms it into a design featuring smaller squares, rectangles, and even pinwheel or hourglass effects. It’s a fantastic way to learn how strategic cutting can completely alter a quilt's appearance, encouraging creative problem-solving and improvisation.
Why It's Perfect for Beginners
The Disappearing Nine-Patch delivers a "wow" factor with minimal complexity. While the finished quilt looks like it required meticulous piecing of many small shapes, it’s all built from straightforward Nine-Patch blocks. This pattern teaches precision in cutting and the importance of seam allowance, as accuracy is key to making the rearranged pieces fit together perfectly. Popularized by tutorials from Jenny Doan, it's a go-to for quilters who want to move just beyond basic squares into something more dynamic.
Actionable Tips for a Perfect Quilt
To master this clever technique on your first try, focus on precision and planning:
- Start with Larger Blocks: Create your initial Nine-Patch blocks on the larger side, such as 9 or 12 inches square. This makes the subsequent cutting and resewing steps more forgiving and easier to handle.
- Mark Before You Cut: Use a quilting ruler and a fabric marker to draw your cutting lines precisely through the horizontal and vertical centers of the block. This ensures your four new quadrants are perfectly identical.
- Preview Your New Layout: Once you have your four quarters, play with their arrangement before sewing. Rotate them to create different patterns and take a photo of your favorite layout to reference as you sew.
- Press Seams Open: After sewing your four rearranged quarters back together, press the seams open. This helps the new, more complex block lie flat and reduces bulk at the center intersection. For a truly professional finish, bring your completed top to Linda's Electric Quilters for expert longarm quilting that will beautifully complement your intricate design.
6. Half-Square Triangle (HST) Quilt
The Half-Square Triangle (HST) quilt introduces one of the most versatile and foundational blocks in quilting. This simple quilt for beginners is built from squares made by sewing two right-angle triangles together along their longest edge. These fundamental units open up a world of design possibilities, allowing new quilters to move beyond basic squares and create visually dynamic patterns.
Arranging these simple blocks can produce stunningly complex designs like chevrons, pinwheels, flying geese, and modern geometric layouts. By mastering the HST, you are learning a core skill that will appear in countless quilt patterns, from traditional to contemporary. This pattern teaches you how to handle fabric on the bias (the diagonal grain), a crucial step toward more advanced piecing.
Why It's Perfect for Beginners
The HST quilt is the perfect next step after mastering squares because it introduces a new shape without overwhelming complexity. There are many beginner-friendly methods to create HSTs efficiently and accurately, minimizing frustration. Modern quilters have shown how these simple units can be used to create everything from intricate animal portraits to bold, graphic designs. The pattern is incredibly forgiving and works beautifully for scrappy quilts, allowing you to use up leftover fabric pieces while practicing your skills.
Actionable Tips for a Perfect Quilt
Creating sharp, accurate HSTs is achievable with a few key techniques:
- Use the Two-at-a-Time Method: Place two fabric squares right sides together. Draw a diagonal line from one corner to the opposite. Sew a ¼-inch seam on both sides of the drawn line. Cut directly on the line to yield two perfect HSTs.
- Size Up, Then Trim Down: To ensure accuracy, start with squares that are ⅞-inch to 1 inch larger than your desired finished HST size. This gives you room to trim the blocks to the perfect dimension after pressing.
- Starch Your Fabric: Before cutting, use starch or a fabric stabilizer. This makes the fabric stiffer and prevents the bias edges from stretching, which is a common issue for beginners working with triangles.
- Press Seams to the Dark Side: To prevent darker fabrics from showing through lighter ones, always press your seams toward the darker fabric. This also helps your blocks nest together neatly.
- Chain Piece for Efficiency: Just like with squares, you can chain piece your HSTs by sewing multiple pairs one after another without cutting the thread. This dramatically speeds up the process. Once your top is pieced, let Linda's Electric Quilters provide the professional longarm quilting and beautiful backing fabrics to give your creation a flawless finish.
6 Simple Quilt Patterns Comparison Guide
| Pattern | Implementation Complexity 🔄 | Resource Requirements ⚡ | Expected Outcomes 📊 | Ideal Use Cases 💡 | Key Advantages ⭐ |
|---|---|---|---|---|---|
| Simple Squares/Four-Patch Quilt | Low 🔄 | Minimal ⚡ (basic tools, scraps or charm packs) | Basic, clean grid pattern 📊 | Absolute beginners; learning straight seams | Very beginner-friendly; quick completion ⭐ |
| Rail Fence Quilt | Moderate 🔄 | Moderate ⚡ (strip cutting, rotary cutter) | Dynamic zigzag/woven look 📊 | Beginners learning strip piecing | Impressive visual effect with simple steps ⭐ |
| Strip Quilt (Jelly Roll Race) | Very Low 🔄 | Low ⚡ (pre-cut jelly roll strips) | Random scrappy, modern look 📊 | Quick projects; instant gratification | Extremely fast; minimal planning required ⭐ |
| Nine-Patch Quilt | Moderate 🔄 | Moderate ⚡ (cutting small squares, strip piecing) | Classic 3x3 grid with secondary patterns 📊 | Beginners to intermediate; learning block assembly | Versatile, foundation for complex blocks ⭐ |
| Disappearing Nine-Patch | Moderate-High 🔄 | Moderate ⚡ (block cutting and reassembly) | Complex-looking 16-patch with pinwheel effect 📊 | Confident beginners; creative/improvisational | Adds visual complexity from simple blocks ⭐ |
| Half-Square Triangle (HST) Quilt | Moderate-High 🔄 | Moderate ⚡ (triangle cutting, trimming tools) | Dynamic, versatile geometric designs 📊 | Beginners to intermediate; mastering bias edges | Wide design possibilities; essential skill ⭐ |
Your Quilting Journey Starts Now
You've just walked through a gallery of possibilities, from the straightforward elegance of a Simple Squares quilt to the surprising complexity of a Disappearing Nine-Patch. Each of these patterns was chosen specifically to build your confidence and introduce you to the fundamental skills of quilting. The journey from a stack of fabric to a finished quilt is a deeply rewarding one, and these designs are your perfect starting point.
The common thread woven through all these simple quilts for beginners is their reliance on foundational techniques. By mastering straight seams, accurate cutting, and consistent pressing, you are not just making a single project; you are building a skillset that will serve you for years to come. Remember that perfection is not the goal. Your first quilt is about the process: learning how your machine feels, how different fabrics behave, and discovering the pure joy of creating something beautiful and functional with your own hands.
Key Takeaways for Your First Quilt
As you prepare to start, keep these core principles at the forefront of your mind. They are the building blocks that separate a frustrating experience from a successful and enjoyable one.
- Start with Pre-Cuts: As we saw with the Strip Quilt and Simple Squares designs, using pre-cut fabrics like jelly rolls or charm packs dramatically reduces cutting time and improves accuracy. This allows you to focus on the fun part: sewing.
- Master the Quarter-Inch Seam: This is the non-negotiable standard in quilting. A consistent quarter-inch seam allowance is what makes your blocks fit together perfectly, turning individual pieces into a cohesive whole.
- Press, Don't Iron: Remember the difference. Pressing your seams (an up-and-down motion) prevents stretching and distortion that can occur from ironing (a back-and-forth motion). This small habit makes a massive difference in your final accuracy.
Actionable Next Steps to Get Started
Feeling inspired is wonderful, but taking action is what creates a quilt. Here’s a simple, three-step plan to move from reading this article to actively sewing.
- Choose Your Pattern: Don't overthink it. Pick the one design from this list that excites you the most. Is it the clean, linear look of the Rail Fence or the classic charm of the Nine-Patch? Your enthusiasm for the design will carry you through any challenges.
- Gather Your Essential Tools: You don't need every gadget on the market. A quality rotary cutter, a self-healing mat, a clear acrylic ruler, good thread, and your sewing machine are the core essentials. High-quality tools are an investment in your success.
- Select Your Fabric: This is where your personality shines! Choose a color palette or a fabric collection that you absolutely love. Working with fabrics that make you happy will make the entire process more enjoyable.
Your quilting journey is a personal adventure. It’s a chance to disconnect from the digital world and create a tangible piece of comfort and art. Embrace the small mistakes as learning opportunities, celebrate every completed block, and watch as your skills grow with each stitch. The patterns we’ve covered are more than just beginner projects; they are your gateway to a lifelong passion.
Ready to bring your first quilt to life? Ensure your project's success with the highest quality tools, fabrics, and notions from Linda's Electric Quilters. From the perfect thread to finish your seams to the longarm services that will give your quilt a professional finish, we are here to support you every step of the way. Explore our curated selection and find everything you need to start your quilting adventure today at Linda's Electric Quilters.


