
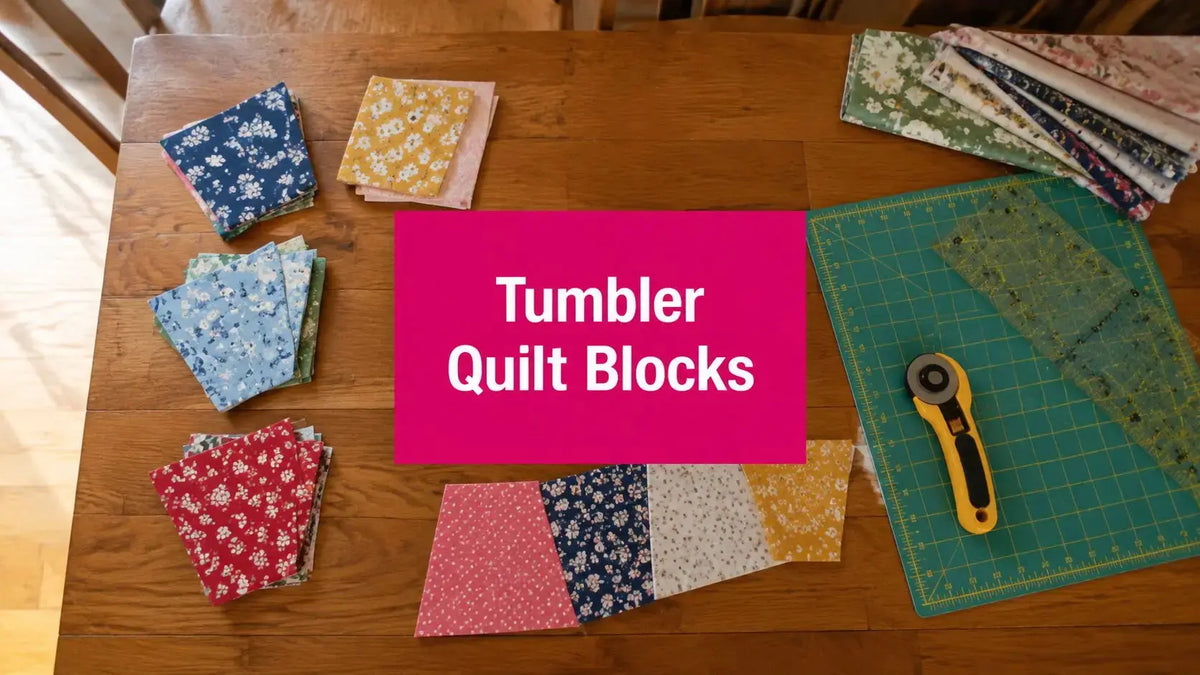
If you've ever wanted to make a quilt that comes together in a snap and looks absolutely charming, you've come to the right place. We're talking about Tumbler Quilt Blocks—a simple, two-sided trapezoid that creates a wonderful 'tumbling' effect across your quilt top. Its beauty is in its simplicity, making it a fast, fun, and forgiving project for any quilter, from beginner to pro. The best part? This pattern is perfect for using pre-cuts or busting through your scrap bin with minimal fabric waste.
Everything in this guide comes straight from our hands-on experience here at our shop in McKinney, Texas. We've tried out every single one of these techniques on our Innova longarms to make sure you get it right, from the very first cut to the final stitch.
What Are Tumbler Quilt Blocks?

The tumbler block is one of the most satisfying and efficient patterns you can add to your quilting repertoire. Because of its unique trapezoid shape, you can sew up a gorgeous quilt top by simply sewing blocks together in rows. There are no complex corners to match or intricate piecing required.
Whether you're a brand new quilter looking for a forgiving first project or a seasoned pro who wants a quick weekend sew, the tumbler quilt is a fantastic choice. Its simple construction and scrap-friendly nature make it a go-to for quilters of all skill levels. Explore our beautiful Pre-Cut Fabric Bundles to get started quickly.
The History and Appeal of Tumbler Blocks
Believe it or not, the "tumbling" block idea isn't new at all. The basic motif can be traced all the way back to ancient Greece. But its real moment in the quilting world came in the 1850s. According to the Smithsonian's Cooper Hewitt archives, a pattern published in Godey’s Lady’s Book in 1851 helped launch it into the mainstream. This rich history is what makes the block so special—it’s a heritage pattern that feels both instantly recognizable and perfect for today’s quilter.

So, what’s the secret to its staying power?
- Scrap-Friendly: As a single-patch block, it's an absolute dream for busting through your scrap bin or using up precuts. It’s an incredibly economical way to make a beautiful quilt.
- Speed and Efficiency: With no complicated corners to match, these blocks are a breeze to cut and sew. If you chain-piece them, you can have a quilt top put together in no time.
- Artistic Versatility: The creative possibilities are nearly endless. You can toss them together randomly for a scrappy, carefree look, arrange them by color to create a stunning gradient, or add sashing for a more structured, modern feel.
Pro-Tip: Pressing for Perfect Seams
The secret to a quilt top that lays perfectly flat is all in the pressing. For your first row, press all your seams to the right. For the second row, press all your seams to the left. By alternating the direction with each row, the seam allowances will "nest" together beautifully when you join the rows. This simple trick reduces bulk and helps your points line up like a dream.
How Do You Cut Tumbler Quilt Blocks?
Every beautiful quilt starts with a little bit of prep work. For Tumbler Quilt Blocks, picking the right tools and fabric is the secret to getting those clean lines and perfect points that make the final quilt sing.
The tools you use to cut your tumbler shapes will really set the pace for your project. And of course, the fabric you fall in love with is the star of the show. Good quality quilting cotton gives you the stability you need to make sure those angled blocks line up just right. Browse our extensive fabric categories to find the perfect prints.

Cutting Methods Comparison
When it comes to cutting tumbler shapes, you've got a few fantastic options. There isn't one "right" way—it all comes down to your budget, how much time you have, and what feels best for you.
| Cutting Method | Best For | Pros | Cons |
|---|---|---|---|
| Tumbler Ruler | All-around use, good balance of speed & cost | Accurate, reusable, often has multiple size markings | Initial cost of the ruler |
| Die-Cutting System | High-volume cutting, maximum speed | Extremely fast and precise, cuts multiple layers | Highest initial investment (machine + dies) |
| Printable Template | Trying the pattern, quilters on a budget | No specialty tool cost, easily customizable | Slowest method, potential for less accuracy |
- Tumbler Rulers: These acrylic rulers are a quilter's best friend. They're already shaped like a trapezoid with the perfect angles built right in. They’re fast, super accurate, and a great investment.
- Die-Cutting Systems: If you want to get your pieces cut fast, nothing beats a die-cutting system like an AccuQuilt. It slices through multiple layers of fabric at once with flawless precision every time.
- Printable Templates: This is the ultimate budget-friendly choice! Simply print a tumbler shape onto sturdy cardstock, trace it onto your fabric, and cut with your regular rotary cutter.
Our team in McKinney, Texas, tested this on an Innova longarm and found that pairing a 5-inch tumbler ruler with 5-inch charm squares is incredibly efficient. You can cut one block from each square with almost no waste. Check out our Pre-Cut Fabric Bundles to find the perfect charm packs.
The Power of Quality Fabric
No matter what cutting method you choose, always go for high-quality quilting cotton. The tight, stable weave prevents the fabric from stretching out of shape on those angled bias edges. This is absolutely key for getting your seams to nest together cleanly. Using good cotton not only makes the sewing process smoother but also ensures your finished quilt has a lovely drape and will hold up to years of cuddles and washes.
How to Sew a Tumbler Quilt
Alright, this is where the fun really begins. With your fabric and tools at the ready, it's time to watch those Tumbler Quilt Blocks come together. Let's walk through cutting and sewing, step by step, so you can build your beautiful quilt top with confidence.

Assembling Your Tumbler Quilt Blocks
Now that your pieces are cut, you'll be amazed at how quickly the sewing goes. The whole trick is just getting the alignment of those angled edges down pat.
- Align Two Blocks: Place two tumbler blocks with their right sides together. You'll immediately notice one side is shorter than the other. You'll want to offset them just a bit so the top corners and the entire angled edge line up perfectly. A small triangular "dog ear" will be sticking out at the bottom—that's exactly what you want!
- Sew the Seam: Using a scant ¼ inch seam allowance, stitch along that aligned angled edge. Your seam should start right at the top corner and finish at the bottom corner of the shorter piece.
- Chain Piece for Speed: To fly through your rows, chain-piecing is your best friend. Don't cut your thread after each pair. Instead, just feed the next two aligned blocks right into your machine. You'll create a long "chain" of pairs that you can snip apart later.
The beauty of the tumbler is its simple, one-patch shape. You can see a fantastic example of how tumbler units come together in this instructive quilting tutorial on YouTube. For a truly flawless finish on your quilt top, an automated quilting system like the Innova AutoPilot Mach 3 System can stitch intricate patterns with incredible precision.
Creative Layouts and Design Variations
The simple charm of a tumbler block is what makes it so much fun to play with. One of the easiest ways to add a "wow" factor is by getting intentional with your fabric colors and values. Instead of just a random mix, try sorting your fabrics from light to dark to create a gorgeous ombre or gradient effect.
For a look that feels fresh and modern, try sewing your tumbler rows together with strips of solid sashing in between. This negative space really makes the unique shape of each tumbler stand out.
Don't forget that what’s inside the quilt changes the whole look and feel, too! Your choice of batting will completely change the quilt's loft (puffiness), drape (how it hangs), and hand (how it feels to the touch). Check out our whole collection of Quilting Batting to find the perfect match for your project.
How to Quilt a Tumbler Quilt
All that careful piecing on your Tumbler Quilt Blocks is done, and now it's time for the magic. Bringing your quilt top to a longarm is what takes it from a beautiful project to a true heirloom, adding that gorgeous texture and durability that makes your work pop.
The first step is loading it onto the frame. Tumbler quilts have a mix of straight-grain and stretchy bias edges, so loading it just right is key to keeping your quilt top perfectly square and free of waves. If you want to nail this critical first step, we’ve got you covered with our guide, How to Load a Quilt on a Frame.
Choosing a Quilting Design
The quilting design you choose can completely change the feel of your tumbler quilt. Here are a few approaches we love:
- Gentle Curves: To soften the angles of the tumblers, think about soft, wavy lines or a simple meander. This creates a wonderful contrast and gives the whole quilt a feeling of fluid motion.
- Edge-to-Edge Pantographs: Geometric designs are fantastic for adding an all-over texture without stealing the show from your fabric choices.
- Custom Quilting: For a real showstopper, you can use the longarm to trace the individual tumbler shapes or echo their outlines. This technique adds an incredible amount of dimension.
With a design picked out, get the tensioning on your longarm dialed in. The goal is a perfect stitch where you can’t see any bobbin thread on top or top thread on the back.
FAQ: Your Tumbler Quilt Questions Answered
Whenever we talk about making Tumbler Quilt Blocks here at the shop, a few great questions always pop up. Let's get you started on your next project with total confidence!
What Is the Best Size for a Tumbler Block?
The "best" size is whichever one you fall in love with! The size you pick really just comes down to the look you're after and how fast you want the top to come together.
- Small Tumblers: Cut from 5-inch charm squares, these are fantastic for detailed, scrappy baby quilts or wall hangings.
- Large Tumblers: Cut from 10-inch layer cakes, these blocks sew up in a flash and are perfect for letting large-scale prints shine in bigger quilts like throws and bedspreads.
Can I Make a Tumbler Quilt Without a Special Ruler?
You absolutely can! While a dedicated tumbler ruler is a quilter’s best friend for speed and perfect cuts, you can make your own template. Grab some sturdy cardboard or template plastic, draw a trapezoid to your desired size (e.g., 5-inch base, 3-inch top, 4-inch sides), trace it onto your fabric, and carefully cut with your standard rotary cutter.
How Do I Figure Out How Much Fabric I Need?
First, decide on the final size of your quilt and the size of your tumbler block. Do a little quick math to get the approximate area of one block (length x average width). Next, divide the total square inches of your quilt by the area of a single block to find out how many blocks you need. For a 60" x 72" throw quilt (4,320 sq. in.) using blocks that are about 20 sq. in. each, you’d need around 216 blocks. Always add 10-15% extra fabric for "quilt insurance"!
Here at Linda's Electric Quilters, we're with you for the entire journey, from that first exciting cut to the very last stitch. Come explore our huge selection of fabrics, notions, and tools to make your next tumbler quilt a true masterpiece.


