
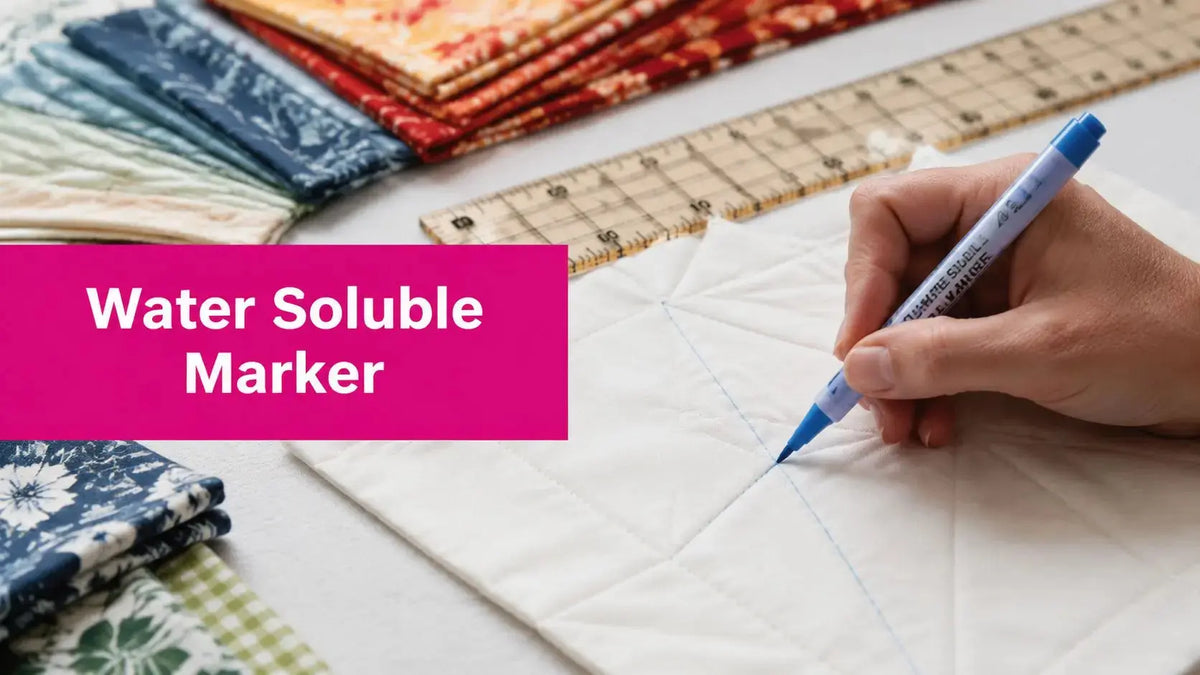
A water soluble marker should be removed by fully submerging the entire project in cool or lukewarm water before any heat or detergent touches it. In a six-month field test, marks from five water-soluble pens stayed visible the whole time and still washed away with water, but some brands needed a longer soak, which is why removal method matters just as much as the pen itself (six-month field test on five pens).
If you're standing over a finished quilt top with a ruler in one hand and a blue pen in the other, you're at one of those thrilling, slightly dangerous points in quilting. The piecing is done. The top looks right. Now every line you add needs to guide the quilting without becoming part of the quilt forever.
That's where a water soluble marker earns its keep. Used well, it gives you visible lines for feathers, crosshatching, straight-line grids, and border placement. Used carelessly, it can leave you with shadowing in the batting, fixed marks from heat, or stains that show up after the quilt is supposedly finished.
In our McKinney shop, this is one of the most common points where good projects go sideways. The problem usually isn't the marker alone. It's the combination of fabric choice, batting loft, ink load, and removal technique. A pale blue line on smooth quilting cotton behaves differently than the same line on dark cottons, textured prints, or a quilt with high-loft batting that gives diluted ink more places to travel.
Your Essential Tool for Perfect Quilt Markings
The water soluble marker is one of those notions that seems simple until a quilt is layered, stitched, and washed. Then the details matter.
A quilter marks a large throw with radiating lines for a medallion center. The lines look clean on the quilt top. The quilting goes smoothly. Then the quilt gets a quick rinse at the sink instead of a full soak. A few days later, faint brownish marks show through around the center. That's the kind of problem people blame on the pen, but the issue often lies with the removal technique.

Why quilters keep reaching for it
A water soluble marker solves a real shop problem. You need:
- Visible guidance for ruler work, cable layouts, and border repeats
- Temporary lines that won't compete with thread once quilting is done
- Control on large projects where freehanding everything isn't practical
For longarm quilting, marked reference lines can help with symmetry and spacing. For domestic-machine quilting, they can steady your path when bulk and drag make visual alignment harder.
Where things go wrong
Most marking disasters start with one of these mistakes:
- Too much pressure so the ink load is heavier than it needs to be
- Spot cleaning instead of soaking the whole piece
- Heat exposure from ironing, hot water, or even hot sunlight on a marked quilt
- Skipping a test on the exact fabric and batting combination
Practical rule: If you wouldn't trust a marking tool on a scrap made from the same top, batting, and backing, don't trust it on the quilt.
That's especially true on quilts with trapunto effects, lofty polyester blends, or thick cotton battings. More loft means more room for diluted ink to shift if removal is uneven.
If you're gathering supplies before you mark, keep your finishing materials in view too. It helps to think ahead to batting choice and washability, not just line visibility. Linda's has a broad batting selection worth reviewing before you layer the quilt, because batting loft affects how forgiving your cleanup process will be.
How Do I Choose a Water Soluble Fabric Marker
You are halfway through marking a queen-size quilt, the lights hit at a different angle, and the line you could see at the cutting table disappears on the frame. That is usually not a brand problem. It is a visibility problem, an ink-load problem, or a fabric-surface problem.
Choose the marker by asking how the dye will sit on the fabric and how you plan to remove it later. Fine tips put less liquid into the weave, so they are safer for dense quilting cottons and detailed motifs. Broader tips are easier to see through stencil openings, but they deposit more colorant and more moisture, which raises the odds of uneven rinsing, especially over high-loft batting or heavily stitched areas.

What matters most when choosing
A good choice comes down to three practical checks.
-
Can you see the line under real quilting conditions?
Check it under your machine light, not just by a window. Fine blue lines usually read well on pale solids and low-contrast prints. On dark cottons, the issue is simple. If the wavelength contrast is weak, the mark disappears into the fabric visually even if plenty of ink is present. -
How long will the quilt stay marked before washing?
Some water soluble inks remain visible for a long work period, which is helpful on custom quilting. The trade-off is that longer-lasting formulas can need more complete rinsing to release from the fibers. If a project may sit folded, rolled, or exposed to heat, be pickier about your test. -
What fabric and batting are under the line?
Ink behaves differently on a flat single layer than it does on a basted quilt sandwich. A tightly woven top can hold the mark near the surface. Lofty batting underneath can slow even rinsing because the water does not move through the marked area as evenly, especially around dense stitching.
Comparison of Common Quilting Marking Tools
| Tool | Best For | Removal Method | Pro-Tip |
|---|---|---|---|
| Water soluble marker fine-tip | Detailed feathers, grid lines, stitching paths on light fabrics | Full submersion in cool or lukewarm water | Use a light hand so the line stays close to the fabric surface |
| Water soluble marker chisel-tip | Broad layout lines, big motif placement, stencils | Full submersion in cool or lukewarm water | Better for large motifs, but it can over-wet the area if you press hard |
| Chalk-based marker | Fabrics you don't want to saturate fully, pile fabrics, quick temporary marks | Brush or wipe away depending on product | Better than water-based ink on some dark fabrics and textured surfaces |
Fabric examples from the cutting table
A scrap like 058 White Moda Grunge - Fat Quarter is a good example of where a blue water soluble marker usually shows clearly. It is a Moda Fabrics Grunge Basics print by BasicGrey, made from 100% cotton in an 18" x 22" cut. The catalog lists it at $4.19, in stock, with 1 variant. That kind of lightly mottled white cotton lets you judge line width, feathering, and rinse performance without the color confusion you get on busier prints.
The science matters here. Water soluble ink is designed to dissolve and disperse in water, but that only works cleanly when the whole marked area gets wet enough for the dye to leave the fiber surface evenly. If one section gets a quick dab and another stays dry, the dissolved color can migrate and settle back into nearby fibers. That is why a marker that looks harmless on a scrap can become a headache on a finished quilt.
On dark prints, do not force a blue marker to do a chalk marker's job. If the line is hard to see before quilting, it will be harder to remove correctly because quilters tend to redraw it darker.
If you like seeing notions in action before committing, it helps to watch a live shopping clip or product demo from a quilt shop rather than judging a pen from package art alone. Marker visibility is a table-level decision, and removal success starts with that first choice.
Proper Techniques for Marking Your Quilt
Good marking starts before the pen touches the quilt. The cleanest line is the one that's visible enough to guide stitching but light enough to rinse out cleanly.
Our team in McKinney, Texas, tested this on an Innova longarm and found that quilters often press harder than they need to, especially when marking through stencil slots. That creates darker lines, but it also pushes more ink into the fabric surface than necessary. You want guidance, not saturation.

How to mark without overloading the fabric
Use this sequence at the table or frame:
- Start with a test unit on leftover top fabric, backing, and batting if you have it
- Hold the marker like a pen, not upright like a post
- Draw with steady movement so the line stays even
- Mark in sections on large quilts to reduce smearing while you advance the quilt
- Keep rulers and stencils dry so the ink doesn't feather
A little pressure goes a long way on tightly woven quilting cottons. On softer fabrics with more surface texture, slow down rather than press harder.
Matching technique to the project
A marked crosshatch on a wall quilt isn't the same as marking an edge-to-edge design on a bed quilt.
For different situations:
- Straight-line quilting benefits from fine, crisp reference lines and ruler support.
- Feathers and fills often need only spine lines and registration points.
- Applique placement may call for dots and short registration marks instead of full outlines.
- High-loft batting projects need restraint. The more ink you apply, the more careful removal must be later.
If a line looks dark before quilting, assume it will need more soaking than you planned.
For quilters refining the finish after stitching, a related technique guide can help keep the last stage as clean as the quilting itself. Linda's tutorial on perfect quilt binding pairs well with this step because finishing choices affect when and how you wash the quilt.
If you want thread that reads cleanly over marked designs on embroidery-heavy or decorative sections, 007 ORIENTAL BLUE - Floriani Thread 40 weight 5000M is a lubricated 40 weight embroidery thread with high sheen and high tensile strength, which makes it one option to consider when stitch definition matters.
The Foolproof Method for Removing Marker Lines
This is the part that saves quilts. A water soluble marker does not disappear because it feels dry, looks faint, or gets a quick rinse at the sink. It disappears when water reaches all marked fibers evenly and gives the dye molecules somewhere else to go.
The reason is chemical, not magical. Water-soluble ink sits on fabric fibers through weak hydrogen bonds instead of permanent molecular bonds. The dye is hydrophilic, so when the whole project is submerged, water bonds rapidly with those dye molecules and carries them away. If only part of the quilt gets wet, the diluted ink can shift instead of leaving, and that's when residue or brown stains can show up later (science of weak hydrogen bonding and full submersion).

The removal method that works
Use a basin, tub, or sink large enough to support the whole project. Then follow this process:
- Fill with room-temperature to lukewarm water.
- Add a modest amount of mild soap or dishwashing liquid.
- Submerge the entire quilt or embroidered piece completely.
- Let it soak generously.
- Rinse gently under running cold water until no soap remains.
That method aligns with a detailed removal process showing that partial application, spot-wiping with a wet swab, or brief exposure to running tap water typically fails to remove all traces completely (full-submersion removal method).
Here's a video demonstration to pair with the written steps:
What not to do
A lot of quilters get in trouble by trying to save time.
Avoid these shortcuts:
- Don't spot clean marked areas with a cloth or spray bottle
- Don't rinse only the quilt top
- Don't use heat
- Don't start with laundry detergent
Industry guidance around these markers repeatedly emphasizes washing without detergent first, because detergent can set the marks as stains, and spray-only removal can drive diluted color into the batting where it later appears brown after washing (guidance on washing first without detergent and avoiding spray-only removal).
Soaking isn't overkill. It's what gives the water access to every marked fiber at the same time.
This matters even more on dense quilting, where stitches can slow water movement through the quilt sandwich. A complete soak gives the marker a true exit path.
Troubleshooting Stubborn Marks and Stains
Stubborn marks usually come from one of two causes. Either the ink hasn't had enough cool-water soak time, or the mark was exposed to heat somewhere along the way.
If the line is still visible after the first soak, repeat the cool-water process. Some pens need longer exposure than others, which matches the field observations noted earlier. Don't escalate to hotter water. That's where a recoverable problem becomes a permanent one.

The mistake that fixes the ink in place
Heat is the main culprit here. Irons, hot water, and even hot sunlight can permanently set water-soluble marker lines into fabric, making them impossible to remove. The safe approach is cool or lukewarm water only, and no ironing until every mark is gone (heat can permanently set marker lines).
If you ironed a marked border to flatten it before washing, or left a marked top in direct heat, there may be very little room to undo the damage. At that point, camouflage through quilting design, thread choice, or appliqued correction may be more realistic than stain removal.
What to try when the mark is fresh but hanging on
Work through the least risky options first:
- Repeat the soak rather than changing chemistry too fast
- Check the whole quilt for any areas that only got partial wetting
- Inspect the batting side if ghosting appears after drying
- Use test scraps before trying anything stronger
A faint shadow after spot cleaning often means the ink moved. It doesn't always mean the ink is gone.
For non-marker soils that happen during finishing, such as handling smudges or light residue near the binding, a separate targeted cleaner can be useful. If you want a general stain-treatment option for your sewing room shelf, Fillaree's refillable stain remover is worth reviewing for ordinary fabric cleanup. Just keep it separate in your mind from water-soluble marker removal, because marker lines still need the cool-water, full-submersion approach first.
Pro tip from the shop
Pro tip: If a fresh mark is being stubborn, test a cotton swab with rubbing alcohol on your scrap first, not on the quilt. Sometimes it helps break down an ink compound, but it can also disturb fabric dye, hand, or surface finish.
That test-first habit matters most on dark cottons, batiks, and any fabric with a finish that may react differently than standard quilting cotton.
When to Use an Alternative Marking Tool
You finish marking a feathered border on a dark cotton, then remember the quilt includes wool appliqué and a high-loft batting that you do not want to soak. That is the moment to put the water soluble marker down and switch tools.
A water soluble marker only makes sense when the whole removal method fits the project. The ink has to dissolve, release from the fiber, and rinse all the way out of the quilt sandwich. If the fabric, batting, or surface finish cannot handle that process well, the problem is not the line itself. The problem is that removal becomes incomplete or risky.
Some materials fight that chemistry from the start. Silk blends can water-spot. Some wools change texture. Fabrics with unstable dye can bleed during the same soak needed to clear the marker. On quilts with dense appliqué, heavy embellishment, or specialty finishes, a crease or surface mark is often the smarter choice because nothing has to dissolve into the layers.
Better choices for specific situations
Experienced quilters usually match the tool to the fabric behavior:
-
For appliqué and fold lines
A Hera marker presses a line into the fabric by compressing the fibers. That gives you a guide without adding moisture-sensitive colorants that later need to be rinsed away. -
For minky, fleece, and deep pile
Chalk wheels and chalk pencils usually show better because the mark stays on the surface instead of sinking into the nap where ink can disappear and reappear unevenly. -
For delicate fabrics
Use a mark you can brush off or a crease you can remake. That avoids the full-wet removal process that can shift hand, sheen, or dye.
Household stain advice often treats all markers as if they use the same colorants and binders. Quilting tools do not behave that easily, especially once ink passes through the top and into batting. If you want a broader comparison of general marker cleanup methods outside sewing-room use, this Birmingham homeowners' guide to marker stains gives useful background.
The skill is in tool selection
Good marking is less about brand loyalty and more about choosing a tool that matches the fabric hand, loft, and finish plan.
For a standard cotton quilt top that will get a full wash, a water soluble marker is often a solid choice. For heirloom appliqué, dark fabrics with questionable dye stability, or any project built with materials you would hesitate to submerge, an alternative tool is usually safer. That judgment saves quilts.
Frequently Asked Questions about Water Soluble Markers
Can I remove a water soluble marker with just a wet cloth
Usually, that's where trouble starts. Spot cleaning tends to dilute the line without clearing it from the whole quilt sandwich. Full submersion is the safer method.
Can I iron a quilt after marking if the line looks dry
No. If the line is still in the quilt, heat can set it. Wait until the marks are fully removed and the quilt is completely clean.
Are water soluble markers safe for long-term projects
Yes, they can be. In the earlier field test, marks stayed visible over a long project window and still washed out with water. The bigger issue isn't time alone. It's whether you test first and remove correctly.
Why do ghost marks show up after the quilt is washed
That usually points to uneven removal. Ink can migrate into batting or remain in the quilt if only part of the project was rinsed.
Should I test every new marker
Yes. Test every new pen on scrap from the actual project if possible. Include the same top fabric and, ideally, the same batting and backing. That's the fastest way to catch a pen that doesn't behave the way you expect.
<script type="application/ld+json">
{
  "@context":"https://schema.org",
  "@type":"FAQPage",
  "mainEntity":[
    {
      "@type":"Question",
      "name":"Can I remove a water soluble marker with just a wet cloth",
      "acceptedAnswer":{
        "@type":"Answer",
        "text":"Usually, that’s where trouble starts. Spot cleaning tends to dilute the line without clearing it from the whole quilt sandwich. Full submersion is the safer method."
      }
    },
    {
      "@type":"Question",
      "name":"Can I iron a quilt after marking if the line looks dry",
      "acceptedAnswer":{
        "@type":"Answer",
        "text":"No. If the line is still in the quilt, heat can set it. Wait until the marks are fully removed and the quilt is completely clean."
      }
    },
    {
      "@type":"Question",
      "name":"Are water soluble markers safe for long-term projects",
      "acceptedAnswer":{
        "@type":"Answer",
        "text":"Yes, they can be. Marks have been shown to stay visible over a long project window and still wash out with water when removed correctly. The bigger issue is testing first and using the right removal method."
      }
    },
    {
      "@type":"Question",
      "name":"Why do ghost marks show up after the quilt is washed",
      "acceptedAnswer":{
        "@type":"Answer",
        "text":"That usually points to uneven removal. Ink can migrate into batting or remain in the quilt if only part of the project was rinsed."
      }
    },
    {
      "@type":"Question",
      "name":"Should I test every new marker",
      "acceptedAnswer":{
        "@type":"Answer",
        "text":"Yes. Test every new pen on scrap from the actual project if possible, including the same top fabric and ideally the same batting and backing."
      }
    }
  ]
}
</script>
If you're finishing a quilt and need the right fabric, batting, thread, or marking notions to do it cleanly, browse Linda's Electric Quilters for the supplies that match your project and help you avoid costly marking mistakes before they happen.


