
Fabric grain is the direction of the threads in woven fabric, and it's the most important factor in whether a quilt will lie flat and square. The lengthwise warp threads have minimal stretch, typically less than 2%, while the crosswise grain stretches between 3% and 5%, which is why grain-aware cutting prevents distortion before you ever sit down at the machine.
You can sew a beautiful block, match every point, and still end up with something that twists on the ironing board. That's the moment a lot of quilters blame their seam allowance, their ruler, or their pressing. Very often, the issue started earlier. The fabric was cut off-grain.
At Linda's in McKinney, Texas, we see this all the time with pieced tops that look fine in sections but fight back once borders go on or the quilt reaches the frame. Grain is one of those foundational skills that sounds basic until you watch how much it affects drape, tensioning, seam behavior, and squareness.
If you've ever had a border wave, a block skew, or a longarm stitch line pucker for no obvious reason, this is the skill to tighten up. What is fabric grain becomes much easier to understand when you think of fabric as a grid. One direction is stable. One direction has more give. One direction stretches the most. Knowing which is which changes your cutting, your piecing, and your quilting results.
Why Your Quilt Blocks Get Warped
A quilter can cut carefully, sew an accurate quarter-inch seam, and still end up with a block that corkscrews a little when it hits the ironing board. Then frustration starts. Points matched. Measurements checked. Yet the top still feels like it is pulling against itself.
The hidden problem is often grain.
Woven fabric works like graph paper made of thread. If your patchwork pieces are cut slightly off that thread grid, the distortion may stay quiet during piecing and show up later, especially in long seams, outer borders, or on a longarm frame where uneven stretch becomes much harder to hide. At Linda's in McKinney, Texas, this is one of the most common reasons a quilt top that looked fine on the table suddenly develops puckers, drag, or odd tension once it is loaded.
That longarm piece gets overlooked by many beginners. A top with mixed grain behavior does not tension evenly from edge to edge. One area stays firm while another relaxes and stretches, so stitch quality can change as the machine moves across the quilt. What looked like a batting issue or a machine setting issue may have started at the cutting mat.
The challenge gets trickier with pre-cuts and older fabric. A fat quarter with no visible selvage, a vintage yardage remnant from a thrift find, or a scrap pulled from a stash bin does not always announce its grain direction clearly. You have to read the fabric itself. If you skip that step, the fabric decides for you.
For quilters, the practical lesson is simple. Grain is not just a textbook definition. It affects whether blocks stay square, whether borders hang flat, and whether quilting goes smoothly or turns into a wrestling match. If you want a broader look at how woven fabric behaves compared with other textiles, this custom blanket materials guide offers a useful fabric comparison.
The Three Fundamental Fabric Grains
Woven fabric has three grain directions, and each one behaves differently under your rotary cutter, your iron, and your needle. If you learn how each grain acts, a lot of quilt problems start making sense. A border that waves, a block that twists, or a quilt top that loads unevenly on a longarm often traces back to grain choice.
Lengthwise grain
The lengthwise grain is also called the straight grain. It runs parallel to the selvage and follows the warp threads. Because those threads are held under firmer tension during weaving, this is usually the most stable direction in the fabric.

For quilting, lengthwise grain is the steady worker in the room. It is the direction you want for long borders, sashing, and any strip that needs to stay straight from one end to the other. If you have ever cut a border from a stretchier direction and then wondered why it rippled after sewing, this is usually the missing piece.
Longarm quilters notice lengthwise stability quickly. A quilt top with major structural pieces cut on straight grain tends to mount more evenly and resist shifting as tension changes across the frame.
Crosswise grain
The crosswise grain runs perpendicular to the selvage and follows the weft threads. It is still a straight grain, but it usually has a little more give than the lengthwise grain because of how woven fabric is constructed.
That extra give is not a flaw. It is a behavior. Crosswise grain can work beautifully for many quilt pieces, but it needs respect in places where stretch can sneak up on you, especially in long strips or outer edges. A piece can look perfectly fine on the cutting table, then relax just enough during piecing to throw off alignment later.
This matters even more with pre-cuts. A charm square, layer cake square, or fat quarter does not always show you the selvage, so many quilters assume any straight edge is safe. Sometimes it is. Sometimes that edge is slightly off-grain, and the problem does not show itself until quilting, blocking, or binding.
Bias grain
The bias grain runs diagonally across the fabric at 45 degrees to the warp and weft. This is the stretchiest direction in the cloth.
Bias has a purpose. It bends smoothly around curves, which is why it is so useful for curved binding and shaped edges. But it also shifts, grows, and distorts faster than the other two grain directions if you handle it roughly, over-press it, or let it hang off the table while cutting.
Beginners often get tripped up here because bias can feel soft and cooperative in your hands. Then it changes size by the time you sew it. In a quilt top, that movement can create small inaccuracies that spread outward. On a longarm, those mixed behaviors can contribute to uneven tension across the quilt sandwich, especially if one section contains several bias-heavy units and the next section does not.
Fabric Grain Comparison
| Grain Type | Direction | Stretch Level | Best For |
|---|---|---|---|
| Lengthwise | Parallel to selvage | Lowest | Borders, sashing, any area that must stay stable |
| Crosswise | Perpendicular to selvage | Moderate | General cutting where slight give is acceptable |
| Bias | 45 degrees to selvage | Highest | Curved binding, shaped edges, areas needing flexibility |
One practical point gets overlooked a lot. Grain is easy to identify on fresh yardage with a clean selvage, and much harder to judge on vintage fabric, thrifted remnants, or pre-cuts that have been trimmed square without regard for the original weave. That is one reason experienced quilters pause before cutting into older stash fabric, even when the print looks perfectly straight.
If you like comparing how structure changes the behavior of textile projects beyond quilting cotton, this custom blanket materials guide is a useful side read because it helps connect weave and fiber choice to finished performance.
For small wool projects, #Charms11 is a single-variant pre-cut set priced at $23.09. It includes 11 Wooly Charms packaged in a clear box with a laser engraved keepsake. The hand-dyed wool is felted and ready for stitching, which makes it a practical way to study how material behavior affects cutting and handling on a smaller scale.
How to Find the Grain on Any Woven Fabric
You cut a stack of blocks that measured perfectly on the mat, then one corner starts pulling out of shape at the machine. Later, the quilt top goes on the longarm and one area wants to loosen while another draws up tight. Very often, the trouble started earlier, with grain that was guessed instead of found.

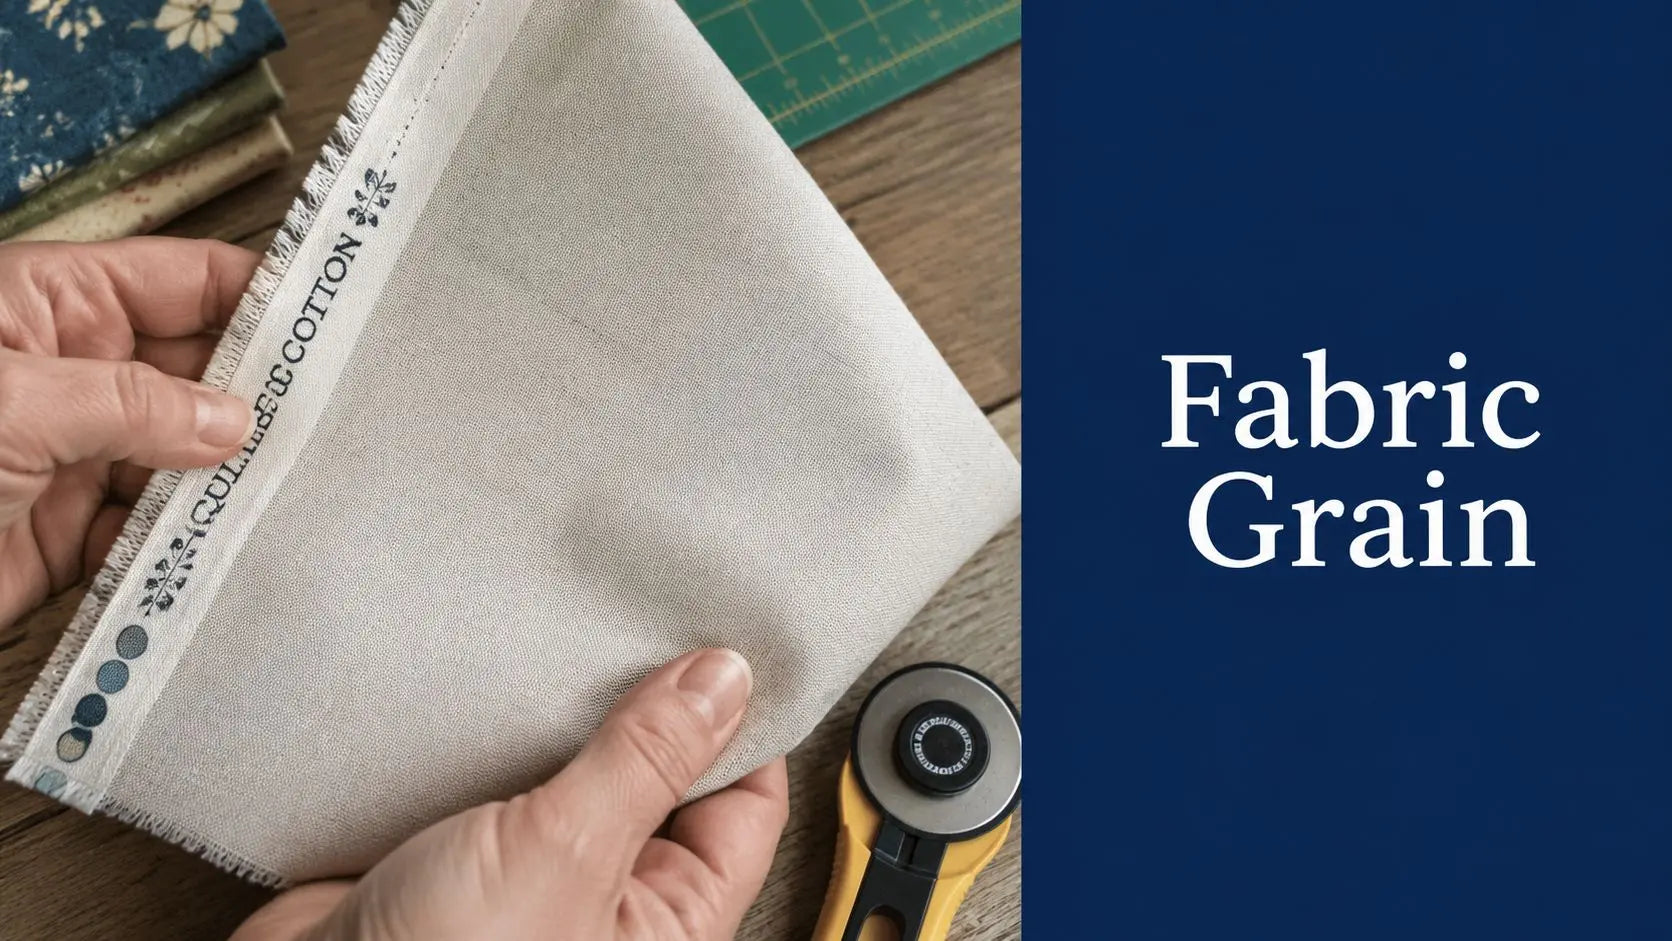
Start with the selvage
On woven fabric, the selvage is the clearest clue you can ask for. The lengthwise grain runs parallel to the selvage, and the crosswise grain runs perpendicular to it. If both selvages are still there, you have the original road map of the cloth. Use that edge to line up your ruler, because a folded edge may already be skewed from the bolt, the shop cut, or your own pressing.
A woven fabric works like graph paper. If the outer edge of that graph paper is intact, the lines are much easier to trust. If the edge is gone, you have to recover the grid before you cut anything important.
Use more than one clue on pre-cuts, scraps, and vintage fabric
Fat quarters, jelly roll leftovers, thrifted linen, and older stash pieces often arrive with the obvious clues trimmed away. Printed motifs can fool you too. A stripe may look straight while the weave underneath is slightly off, especially in vintage fabrics that have been washed and stored for years.
Start with your hands.
- Test two directions. Hold the fabric near opposite edges and give a gentle pull. Rotate and repeat.
- Compare the resistance. The direction with less give is usually the lengthwise grain.
- Watch how it hangs. Let one edge fall from your fingers. A looser direction tends to sag or swing more.
- Study the weave under good light. On linen, chambray, homespun, and some quilting cottons, you can often trace the thread path with your eyes.
If those clues disagree, stop and square a small edge first. Then test again. That extra minute can save you from cutting a whole set of pieces slightly off, which is exactly the kind of small error that shows up later as wavy borders, twisted blocks, or uneven pull on a longarm frame.
For home decor sewists working with linens and drapery fabrics, this guide for timeless window treatments is helpful because grain matters just as much in panels that need to hang straight as it does in quilt borders.
How to recover grain when the fabric looks skewed
With pre-washed fabric or older yardage, I treat the cloth before I trust it. Cutting first is usually what gets people in trouble.
Use a simple recovery process:
- Steam the fabric first. Moisture helps the threads relax back toward their original position.
- Shift the cloth gently with your fingers. Coax it back into a square shape instead of tugging hard on one corner.
- Press straight down. Set the shape with the iron. Do not slide the iron across the surface and stretch it farther off.
- Check a torn or pulled thread line if possible. On some wovens, drawing out one thread gives you a truer reference than the cut edge.
- Retest the grain before cutting final units. Fabric often reads more clearly after pressing.
Vintage fabric needs a little more patience. The fibers may be weaker, the finish may be gone, and the original cut may not have followed grain in the first place. In class at Linda's in McKinney, Texas, this is the point where I tell quilters to trust the weave over the print. Prints can drift. Threads tell the truth.
One practical caution. Pre-cuts are convenient, but they are not magic. Manufacturers cut them to standard sizes, and the weave inside that square or strip may not be perfectly aligned. If you are preparing borders, long sashings, or any piece that must stay straight under quilting tension, it is smart to verify grain before you commit.
If you want to watch the process in motion, this walkthrough is a good place to pause and study hand placement, fold alignment, and fabric behavior:
Technical note: this video is embedded with raw HTML iframe code. Some blog platforms do not render iframes in markdown, so this may need a platform-specific embed block or shortcode during publishing.
Why Respecting Grain Matters for Your Quilts
You square up a block, sew it into the row, and everything looks fine on the table. Then the border waves, one corner lifts, or the quilt starts fighting you on the longarm. In the shop, that is often the moment a quilter blames the machine. Many times, the trouble started much earlier, when the fabric was cut without enough attention to grain.
Grain is the thread-by-thread framework holding the quilt together. If that framework is straight, your pieces cooperate. If it is tilted, stretched, or mixed carelessly, the quilt can shift in ways that do not show up until pressing, assembly, or quilting.
Grain affects shape in ways rulers cannot catch
Two strips can measure exactly the same width and still behave differently. One stays true as you sew. The other grows just enough to throw off a block point or make a border buckle.
That happens because woven fabric does not resist stress equally in every direction. Along a stable grain, the threads act like a ladder held straight. Off grain, that ladder starts to skew. You may not notice it in a 2 1/2 inch strip, but you will notice it across a pieced border, a diagonal setting, or a quilt top stretched on a frame.

Longarm quilting exposes grain problems fast
This is one of the most overlooked consequences of ignoring grain. A quilt top with uneven grain does not load and tension evenly across the frame. One area may stay flat while another area pulls, relaxes, or shifts under stitching. The result can look like a tension problem even when the thread path, needle, and machine settings are correct.
In class at Linda's in McKinney, I tell quilters to watch for a pattern. If stitch quality changes from one section of the quilt to another, especially across wide borders or large background areas, stop and check the top itself. Fabric cut off grain can resist the needle and thread differently as the longarm advances. That uneven resistance can show up as inconsistent stitch formation, small ripples, or sections that suddenly look over-tight or slightly loose.
A longarm frame is honest. It reveals every place the fabric was asked to behave against its own weave.
This is why pre-cuts and vintage fabrics deserve extra caution here. With pre-cuts, you may not have a selvage to confirm direction, and the printed design can fool your eye. With vintage fabric, repeated washing, storage, and earlier cutting may have shifted the cloth enough that the current edge is no longer a trustworthy guide. If you use those fabrics for borders, sashings, backing seams, or any large section that will sit under frame tension, grain matters more than many quilters expect.
Respecting grain saves recutting, trimming, and frustration
Quilters usually notice grain first as a shape issue, but it also affects efficiency. Off-grain pieces are more likely to need re-squaring. Borders may need easing that should never have been necessary. A backing can look generous on the floor and still pull strangely once loaded.
The finish improves too. Corners meet more cleanly. Straight-line quilting tracks straighter. The quilt hangs better after washing because the fabric relaxed in a more balanced way from the start.
If you have ever seen a quilt side edge twist slightly after quilting, even though the piecing looked accurate, grain is one possible reason. Upholstery sewists deal with the same principle on a larger scale in preventing upholstery sagging with fabric bias. Different project, same lesson. Fabric direction changes how cloth carries stress over time.
Pro tip
Pro tip: Before loading a quilt, fold the top loosely in both directions and let it hang. If one direction drops straight and the other twists or swings, pause before you mount it. That small test can save a long round of unnecessary tension adjustments later.
Tips for Taming Bias and Correcting Off-Grain Fabric
Bias can be your friend or your troublemaker. It gives beautiful flexibility, but it won't tolerate rough handling.
Working with bias without stretching it out
The true bias can allow 10% to 20% elongation, which is why it needs special handling. Experts recommend generous pinning, spray starch for stability, and pressing with a straight down-and-up motion rather than dragging the iron, as explained in this bias handling guide.
That advice matters for curved binding, applique edges, and any pieced unit with diagonal cuts.
- Starch before stitching: A little body helps bias edges resist drift.
- Feed, don't push: Let the machine move the fabric. Don't pull from the front or back.
- Press vertically: Set the seam with the iron. Don't sweep across it.
For sewists who want another example of why bias direction changes long-term shape, this article on preventing upholstery sagging with fabric bias adds a useful perspective from upholstery work.
Correcting fabric that's gone off-grain
If a woven fabric has shifted, you can often improve it enough to cut accurately.

I use a simple sequence at the cutting table:
- Steam the fabric to relax the weave.
- Gently pull on the diagonal if the cloth looks skewed.
- Square one edge using the weave, not a distorted fold.
- Press flat and let it cool before recutting.
If you're gathering supplies for this step, a batting category, starch, fine pins, and a steady ruler setup all help keep the fabric from shifting while you work. A related written tutorial on grain-aware cutting and prep can also keep you from repeating the same distortion at the next stage of the project.
Frequently Asked Questions About Fabric Grain
Do I need to worry about grain with knit fabrics
Not in the same way. Knits aren't woven from perpendicular warp and weft in the same way woven quilting cotton is, so the handling question usually shifts from grain to direction of stretch. For quilting and structured piecing, woven fabric rules are the ones that matter most.
Is it ever okay to mix grain directions in one quilt
Yes, if you're doing it intentionally and know where the movement will go. Bias-cut elements can be beautiful in curved work or artistic layouts. Trouble starts when grain changes happen by accident instead of design.
Does fabric quality affect how easy grain is to find
Yes. A stable, clearly woven fabric usually reveals its structure faster. Looser weaves, pre-washed pieces, and vintage fabric can hide the thread path and make the stretch test less obvious.
Can I quilt an off-grain top anyway
Sometimes you can, but expect more management at the frame. You may need gentler loading, more checking as you advance, and realistic expectations about perfect squareness.
| FAQ Section |
|---|
| Question |
| Do I need to worry about grain with knit fabrics? |
| Is it ever okay to mix grain directions in one quilt? |
| Does fabric quality affect how easy grain is to find? |
| Can I quilt an off-grain top anyway? |
If you're ready to put this into practice, browse the fabric, batting, thread, and notions at Linda's Electric Quilters and choose supplies that help you cut straighter, piece cleaner, and finish a quilt that stays flat on the frame and on the bed.


