
Hey everyone. Today we're making a baby bib with a hidden batting core and adjustable snaps, and you'll learn how that one inside layer catches spills before they ever reach a cute little outfit.
Bibs work hard. Milk runs. Pureed peas slide. Oh my goodness, sweet potatoes go everywhere.
Two thin pieces of fabric alone get soggy fast. The wet just travels straight through. A hidden core changes that. It slows the spill down. It gives you time to wipe. And it keeps the bib from feeling like a wet paper towel.
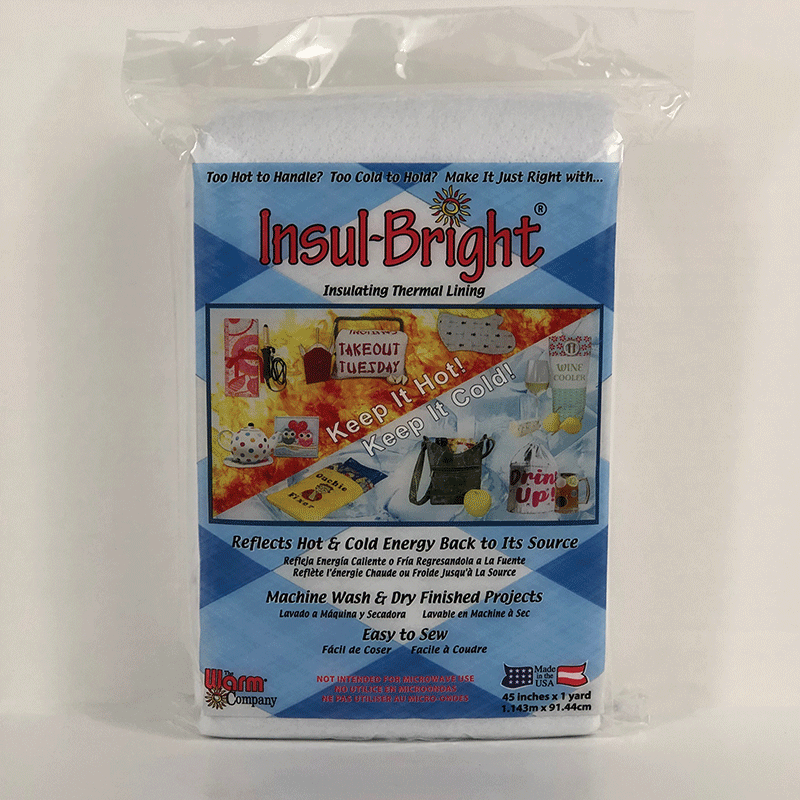
Here is the part folks miss. This version spotlights insulated batting. That family of batting is built in thin, sturdy layers. It holds its shape in the wash. It does not curl up at the edges like a loose, fluffy layer can. For a bib that gets washed again and again, that flat finish matters a lot.
Materials
- Outer fabric: quilting cotton, one fat quarter
- Backing fabric: quilting cotton or soft flannel, one fat quarter
- Insulated batting, thin layer, one piece about 10 by 13 inches
- Bib pattern or a favorite bib to trace
- Three snap sets, size 16 or 20 plastic snaps
- Snap pliers or press for your snap brand
- Matching thread, 50-weight
- Rotary cutter, ruler, and mat, or fabric scissors
- Pins or clips, and a point turner
- Optional: bias tape if you like a bound edge
How to pick the right weight
Hold the batting up. Pinch it. You want thin and flexible.
A bib has to bend around a tiny neck. Thick, high-loft batting will fight you. It puffs. It gaps. It can sit up like a little shield. Not helpful.
Reach for a low, flat layer instead. One layer is plenty here. It gives the spill somewhere to stop. It still drapes soft against the chest. If you can fold your batting piece in half and it springs right back flat, you are in the right neighborhood. Completely up to you, but one thin layer is my pick every time.
Prewash your cotton fabrics first. Batting and cotton shrink at different rates. Washing the fabric now means fewer surprises later. Then let everything dry flat and press it smooth.
How-to steps
- Trace and cut. Trace your bib pattern onto the outer fabric, the backing, and the batting. Cut the fabrics to the line. Trim the batting about 1/4 inch smaller all around, so it stays out of the seam.
- Stack the layers. Lay backing wrong side up. Center the batting on it. Lay the outer fabric right side up on top. Smooth from the center out with your hands.
- Pin the sandwich. Pin every 2 inches around the neck curve and edges. That neck curve likes to shift. Slow down here and pin it well.
- Quilt a few simple lines. Stitch three or four gentle lines across the body of the bib, about 1 inch apart. Use a walking foot if you have one, and a stitch length around 2.5 mm. These lines keep the core from bunching in the wash.
- Sew the edge. Stitch around the whole bib with a 1/4-inch seam, leaving a 3-inch opening along the bottom for turning. Backstitch at the start and stop.
- Trim the curves. Clip small notches into the neck curve. Careful here — do not clip through your stitches. Trim the corners close, too.
- Turn it right side out. Push the bib through the bottom opening. Coax the curves smooth with a point turner. Never force it. Just nudge.
- Press and topstitch. Press flat, rolling the seam to the very edge. Tuck the opening closed. Topstitch all the way around at about 1/8 inch. That pass closes the opening, too. Just like that.
- Mark the snap spots. On one neck tab, mark one snap position. On the other tab, mark three positions, spaced about 1/2 inch apart. Those three spots are your adjustment.
- Set the snaps. Install the socket side on the single-spot tab. Install the stud side at all three spots on the other tab. Test each pairing. Each one should click and hold with a gentle tug.
- Do a wash test. Wash and dry the bib once before gift day. Check that it comes out flat. If an edge waves a little, press it warm and add one more quilting line.
Tips and variations
It does not have to be perfect. If one quilting line wanders a bit, that baby will never tell. You are your own worst critic. The bib just has to work, and yours will.
Take your time with snaps. It is not a race. A snap set in crooked never holds right. Poke your awl hole dead center, then squeeze the press slow and firm. If I can do this, y'all can do it.
Add a crumb pocket. Stitch a small curved pocket across the bottom front before you stack the layers. It catches the runaway peas. Super duper handy at restaurants.
Make a matching set. Cut two or three bibs at once from different prints, all with the same core. Stack, quilt, and topstitch them assembly-line style. We're not reinventing the wheel here. We're just feeding babies a little neater.
Thanks for sewing along with me, folks. We'll see you next time. Bye.
Shop Insul-Bright® Insulating Thermal Lining – 45" x 1 Yard at Linda's Electric Quilters.


