
Hey everyone. Today we're making a faux chenille throw from recycled flannel shirts, and you'll learn how layered batting turns old plaid shirts into the softest blanket on your sofa.
Here's the thing about chenille. Real chenille is woven and expensive. Faux chenille is a quilting trick. You stack layers, stitch them in diagonal channels, and then cut between the stitching so the raw edges bloom into that soft, fuzzy texture we all love.
And here's where batting earns its keep. In faux chenille, the batting is your safety net. It is the one layer you do NOT slash. It holds everything together while the flannel above it frays into fluff. Oh my goodness, watching that bloom after the first wash is pure magic. Those old flannel shirts are perfect for this — already broken in, and their plaids make the diagonal stitching pop. Here we go.
Materials
- 4 to 6 old flannel shirts, deconstructed (backs, fronts, sleeves all usable)
- Backing fabric: one piece of flannel or quilting cotton, about 45 x 60 inches
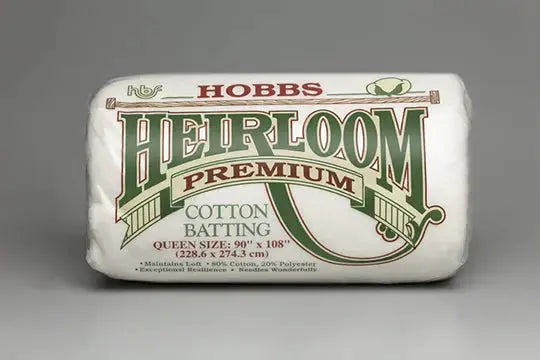
- Low-loft cotton or 80/20 cotton-poly batting, 45 x 60 inches — one flat layer
- Walking foot for your sewing machine
- Rotary cutter, cutting mat, and a long ruler or yardstick
- Chenille cutter, slash cutter, or sharp small scissors (the "bad boy" of this project)
- Marking pen or painter's tape for marking channels
- Matching or contrasting thread, 50-weight
- Size 90/14 quilting or universal needle
Why batting makes this work
Your throw is a sandwich of five to seven layers. Bottom is the backing, wrong side up. Then one layer of batting. Then four or five flannel layers on top, all facing the same direction.
You stitch diagonal channels about 1/2 inch apart through all the layers. Then you slash between the lines — cutting ONLY the top flannel. The batting and backing stay whole. That's the secret.
Why one flat layer? A low-loft cotton or 80/20 batting stitches cleanly through all those layers and is strong enough to carry the quilt once the flannel is slashed. High-loft batting makes the stitching bouncy and hard to keep straight. Completely up to you, but flat is the way here.
How-to steps
- Deconstruct the shirts. Cut off collars, cuffs, buttons, and plackets. Press every piece flat. Don't fuss over exact matching — the slashing hides mismatches.
- Build your top layer stack. Piece your flannel into panels about 45 x 60 inches, the same size as your backing. Stack four or five layers face up, smoothing each from the center out.
- Build the full sandwich. Lay the backing right side down. Center the batting on it. Lay your flannel stack on top of the batting, face up. Pin or baste every few inches — with this many layers, shifting is the enemy. Slow down here and baste well.
- Mark your channels. Draw or tape a 45-degree diagonal line across one corner. From it, mark lines 1/2 inch apart across the whole throw. These are your stitching lines, so mark generously.
- Stitch the channels. Use your walking foot — a regular foot will fight you on seven layers. Stitch each marked line with a stitch length around 3.0 mm. Keep it slow and steady; if the layers creep, stop and smooth them forward. Backstitch at each edge.
- Slash between the stitching. Here's the fun part and the risk. Slide your slash cutter or scissors between two stitching lines and cut ONLY the top flannel layers — stop before the batting. Work one channel at a time. And I mean it: slow down or the cutter slips. I have personally slashed one layer too deep before. Take your time, it's not a race.
- Bind the edges. Trim everything square, staying inside your last stitching line. Bind with bias tape or a double-fold binding strip, catching all the layers.
- Wash and bloom. Wash the throw in warm water and tumble dry. This is when the slashed edges bloom into that soft chenille fuzz. Pull it out and shake it. Just like that. Super duper cozy.
Tips and variations
It doesn't have to be perfect. If your channels wander a little off the diagonal, the fuzz hides it. You're your own worst critic. The throw just has to be soft, and yours will be.
Mind the blade. Slash with the cutter gliding on the layer you're keeping, so the batting guards the backing. One careful pass beats three hurried ones.
Try smaller first. A placemat-size piece is great practice. If I can do this, y'all can do it.
Vary the flannel count. Four layers gives a thinner bloom. Five or six gives a deeper, plusher texture. We're not reinventing the wheel here.
Thanks for sewing along with me, folks. We'll see you next time. Bye.
Shop Hobbs Heirloom 80/20 Batting Package at Linda's Electric Quilters.


