
Hey everyone. Today you will learn how to double up your batting so your quilting stitches really stand up and show off.
If you have ever finished a quilt and thought, well, that feather just disappeared — this is your fix. One flat layer gives you a nice, even quilt. Two layers, stacked the right way, give you dimension. The stitches sink in. The design puffs up between them. Just like that, your quilting reads from across the room.
Here is the idea. A flat, low-loft batting goes on the bottom. It is your foundation. A lofty batting goes on top. Wool is my favorite for that top layer. It is light, it springs back, and it does not fight you. Folks reach for this trick on show quilts and heirloom pieces. We're not reinventing the wheel here. We are just giving your stitches somewhere to sink.
Materials
- Your finished quilt top
- Backing fabric, cut 4 to 6 inches larger than the top on all sides
- One flat, low-loft batting for the base — cotton, 80/20 cotton-poly, or a thin insulated polyester batting
- One lofty batting for the top layer — wool is ideal here
- Basting spray, pins, or basting thread — you will want extra for two layers
- Size 90/14 quilting or topstitch needle
- 40- or 50-weight thread for quilting, your choice
- Walking foot or free-motion foot
- Curved safety pins and painter's tape for basting on a table or floor
How to do it
- Pick your pair on purpose. The base should feel flat and stable. The top should feel puffy and springy. Heavy plus heavy makes a stiff quilt. A light wool top over a thin base adds definition without much weight. That balance is the whole game.
- Build the sandwich in order. Backing first, wrong side up. Smooth it and tape it down. Base batting next. Top lofty batting next. Quilt top last, right side up. Take your time here. It is not a race.
- Baste more than you think you need. Two layers shift more than one. Pin every 3 to 4 inches, or spray baste lightly between each layer. Smooth from the center out every time. Wrinkles in the middle layer will haunt you later.
- Start quilting in the center. Stitch in the ditch along a main seam first to anchor everything. Work out toward the edges. With a walking foot, try a 3.0 stitch length. Go slow on thick spots. Slow down or the needle snaps — and yes, I have done that. Just laugh and change the needle.
- Let the design do the showing off. Quilt your feathers, echo lines, or ruler work as usual. Watch what happens. The thread sinks into the wool, and the unquilted areas puff up between your lines. Background fills like a tight meander will make a center motif pop even more. That contrast is where the magic lives.
- Check the back as you go. Flip it over every row or two. Look for tucks. With two battings, a small tuck hides easy. Catch it early and you can ease it out. Catch it late and you are picking stitches. Ask me how I know.
- Trim and bind as normal. The edge will feel thicker. That is fine. Trim square, then bind with your usual 2 1/2-inch binding. You may like a slightly wider binding if your sandwich feels bulky. Completely up to you.
Tips and variations
Test first, always. Make a small sandwich with the same two battings and try your design. Check your tension top and bottom. Double batting can pull your top tension tighter, so test on the sample, not the real quilt. If I can do this, y'all can do it.
Use it only where you need it. You do not have to double the whole quilt. Add the lofty layer only under a center medallion or applique area. That is a trapunto-style shortcut, and it saves weight and cost.
Pick weight by season and use. Wool on top is warm but breathes, so it works year-round. A thin insulated base adds warmth without bulk for a winter throw. For a wall hanging, go loftier. For a baby quilt washed weekly, keep it flatter and quilt closer, about every 2 to 3 inches.
Do not stress the small stuff. Your quilting does not have to be perfect to benefit from this. Really, it does not. You are your own worst critic. Double batting is forgiving. It makes simple lines look rich. Try it on a small throw first.
Alrighty. Stack it flat, then lofty, baste it well, and let those stitches sink in. You are going to love how three-dimensional your work looks. Thank you for quilting along with me today. We'll see you next time. Bye.
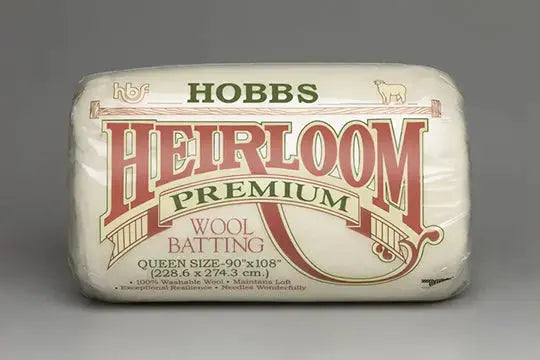
Shop Hobbs Heirloom Wool Batting Package — Queen 90" × 108" at Linda's Electric Quilters.


