
Hey everyone. Today you will learn how to make a soft fabric book with batting pages, plus one photo page full of family faces.
Here we go. Babies love books they can grab. They love books they can bend. A cloth book does all of that. No torn pages. No sharp corners.
Batting is what makes it work. A thin layer in each page gives it body. Little hands can grip it. Little hands can turn it. Without batting, pages flop and stick together. With batting, each page feels like a tiny quilt. Just like that, it is a real book.
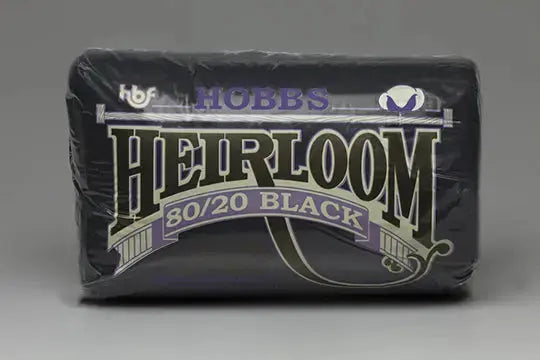
For this version, we use black batting. Dark and bright fabrics look rich over black. No pale shadow shows through. And on that photo page, faces printed on fabric pop when the layer underneath is not glowing white. Pick a low-loft 80/20 cotton-poly batting here. You want flat and flexible, not puffy. High loft fights you. Low loft turns easy and washes flat.
Materials
- Cotton fabric squares, 7 inches each — bright prints plus one solid for the photo page
- Low-loft black 80/20 cotton-poly batting, cut 6 1/2 inches square, one piece per page
- Printable fabric sheets, or a fabric photo transfer of family faces, trimmed to about 4 inches square
- Lightweight fusible interfacing, one 4 1/2-inch square, for behind the photo print
- All-purpose thread, walking foot, and an 80/12 universal needle
- Rotary cutter, mat, ruler, pins or clips, and a point turner
- Optional: ribbon loops or large-print letters for names under the faces
How to Make It
- Plan your pages. Lay out 4 spreads. That gives you 8 sides, plus front and back covers. Keep it simple. One big image per side works best. A dog. A ball. A bright star. Save a middle spread for the photo page, so it is a sweet surprise.
- Make the photo print. Print clear, close-up family faces on printable fabric, following the package directions. Let it dry fully. Heat-set it if directed. Trim to about 4 inches square. Fuse interfacing to the back. That layer stops stretch while you sew and keeps edges from curling.
- Build the photo page. Center the photo on one 7-inch square. Pin well. Stitch around it about 1/8 inch from the edge. Go slow here. Stitch a second line right next to the first. Two lines hold better when little fingers pick at edges. Add a name underneath if you like.
- Layer each page. Layer fabric right side out, batting, then fabric right side out. Smooth it flat. Pin through all three layers. Check edges in good light. Trim batting about 1/16 inch inside the fabric, so it does not peek out later.
- Quilt each page lightly. Stitch around the edge at 1/4 inch. Add one or two simple lines across. A big X works. Keep quilting 2 to 3 inches apart, no denser. Dense quilting makes pages stiff. Use your walking foot and a stitch length of about 2.5 mm.
- Pair pages and bind the spine. Place two finished sides wrong sides together. Stitch down the center twice. That is one spread. Repeat for all spreads. Stack them in order. Stitch through the stack on the center line, backstitching at both ends. Go slow or the needle struggles. Wrap the spine with a 2 1/2-inch fabric strip, folded like binding, and stitch it down. It hides raw edges and makes the book sturdy.
- Check every edge. Trim threads close. Tug every applique. Tug the photo edges. Tug the binding. If anything lifts, stitch it again now. Babies test our work harder than we do.
Tips and Variations
It does not have to be perfect. You are your own worst critic. A page that sits a little crooked will still get loved and dragged across the floor. Take your time. It is not a race.
Wash it before gifting. Gentle cycle, lay flat to dry. The black 80/20 batting helps it come out flat instead of wavy. If I can do this, y'all can do this.
Want to change it up? Completely up to you. Add counting pages with big applique numbers. Add ribbon tags along one edge. Or make every other page a photo page — grandparents, cousins, and the family dog. We are not reinventing the wheel here. We are putting the faces they love where little hands can hold them.
One last tip on weight. Squeeze the batting between your fingers. For a soft book, it should bend in half with no fight. If it springs back hard, save it for a quilt. This project wants soft and flat, really really soft.
Thanks for sewing along with me, folks. We'll see you next time. Bye.
Shop Hobbs Heirloom Black 80/20 Batting Package at Linda's Electric Quilters.


