
Hey everyone. Today you will learn how to make a sewing machine vibration mat with a matching pedal pad, so your machine stays put and your pedal stops running away.
You know the moment, y'all. You hit a good rhythm. The machine starts to hum. Then it starts to walk. Your pedal slides two inches to the left. Now you are chasing both of them.
That is not you. That is vibration on a slick table. Dense batting fixes it. A firm, low-loft layer under the machine eats the shake. A second small pad under the pedal does the same job down there. Make them as a set and your whole station settles down. Here we go.
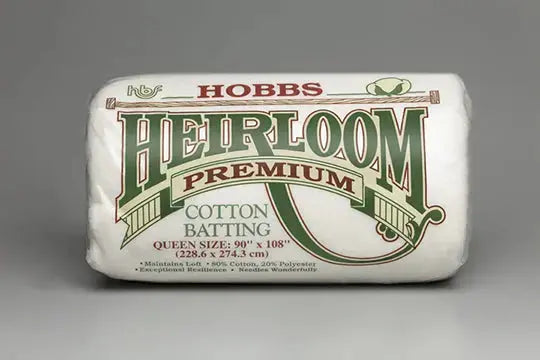
Why dense batting? Loft wants to bounce. Density wants to absorb. For this project I reach for a low-loft 80/20 cotton-poly batting. It is flat to start with. Quilt it down tight and it turns into a firm pad. It grips the table. It quiets the hum. And it does not feel tippy under a heavy machine.
You can use two thinner layers if that is what you have. Just keep the thickness even. Completely up to you. One dense layer is my preference.
Materials
- Low-loft batting, like an 80/20 cotton-poly — one crib package will make several sets
- Sturdy cotton fabric, canvas, or denim for the tops and backs — about 1 yard total
- Matching fabric scraps for binding, cut 2 1/4 inches wide
- Optional non-slip shelf liner for the bottom of the pedal pad
- Cotton thread, 50 weight
- Walking foot and a size 90/14 needle
- Pins or clips, ruler, chalk, and rotary cutting tools
Measure first, folks. Most home machines sit nicely on a 20 by 14 inch mat. Most pedals fit a 12 by 10 inch pad. Measure your base, then add room around it.
How to make it
- Cut both pads at once. For the machine mat, cut fabric and batting at 22 by 16 inches. For the pedal pad, cut fabric and batting at 14 by 12 inches. Cutting them together saves time and makes them match.
- Stack each sandwich. Lay the backing face down. Add the dense batting. Lay the top face up. Smooth from the center out. The stack should feel flat and firm already.
- Pin well. Pin every 3 to 4 inches on both pads. I skimped on pins on my first one. It shifted and came out narrow. Oh my goodness, I redid that one.
- Quilt it dense. Set your stitch length to 3.0. Use your walking foot. Stitch lines 1 1/2 inches apart across the mat. Turn it and stitch the other way for a grid. Do the same grid on the pedal pad. This dense quilting is the whole trick. It locks the batting down and makes the pad firm.
- Test the machine mat. Set your machine on it and sew a test seam at your normal speed. The machine should sit solid. No rocking. No creeping. If it still walks, add the non-slip liner underneath.
- Test the pedal pad. Set your pedal on the small pad. Press it like you are sewing a long seam. If it slides, stitch non-slip liner to the bottom of the pad.
- Trim and bind both pieces. Trim the machine mat to 20 by 14 inches. Trim the pedal pad to 12 by 10 inches. Bind all the edges, mitering the corners. Stitch in the ditch to catch the back binding. Press both pads flat. Just like that, you have a matching set.
Tips and variations
Tune the firmness. Want it firmer? Quilt your grid at 1 inch apart. Want a touch more cushion for a lightweight machine? Keep the grid at 2 inches apart. We're not reinventing the wheel here.
Use up offcuts. Butt batting scraps edge to edge and zigzag them together first. Nobody will see them inside the pad.
Care is easy. Wash gentle when dusty and lay flat to dry.
And listen, if your grid lines are not perfectly straight, leave them. This pad lives under your machine. Nobody is grading it. You are your own worst critic. Take your time. It's not a race. If I can do this, y'all can do it.
Thanks so much for sewing along with me. We'll see you next time. Bye.
Shop Hobbs Heirloom 80/20 Batting Package at Linda's Electric Quilters.


