
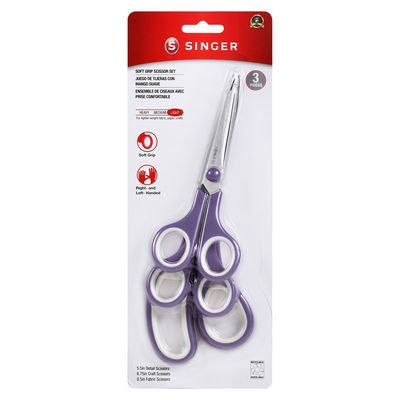
Hey everyone, today you'll learn to make a 16 by 48 inch table runner, cut with the 3-Pack Scissor Set - Singer 5.5in 6.75in 8.5in.
Meet the Scissors First
The set has three sizes: an 8.5in fabric scissor, a 6.75in multi-purpose craft fabric scissor, and a 5.5in detail scissor.
All three have durable, rust resistant stainless steel blades, strong against nicks and scratches, for long-lasting sharpness. Rubberized comfort grip handles add grip for long use. They cut easily for right-handed and left-handed users.
Why Three Sizes Help
A runner needs long panel cuts, medium batting and binding cuts, and small snips for seams and threads.
Each size gets one job: 8.5in for panels, 6.75in for batting and binding, 5.5in for trims.
What You Will Need
- The 3-Pack Scissor Set - Singer 5.5in 6.75in 8.5in
- Quilting cotton, for the top panel, 18 by 50 inches
- Backing fabric, one panel, 22 by 54 inches
- Batting, one piece, 22 by 54 inches
- Binding fabric, for one strip at least 150 inches long
- Test-seam scraps, 6 inches square, of top fabric, backing, and batting
- All-purpose thread
- Sewing machine with a walking foot
- Size 80/12 universal needle
- Long ruler
- Fabric marker or chalk
- Long pins or quilting clips
- Hand-sewing needle
- Seam ripper
Brief Steps to Make It
Step one, lay the top fabric flat, smoothed by hand.
Step two, mark the top panel, 18 by 50 inches, check it square, and cut it with the 8.5in fabric scissor.
Step three, cut backing with the 8.5in scissor and batting with the 6.75in scissor, each at 22 by 54 inches.
Step four, test first. Layer the scraps: backing right side down, batting, top fabric right side up. Sew with the walking foot, stitch length 3.0 to 3.5. Backstitch three stitches at the start and at the end.
Step five, layer the sandwich: backing right side down, batting, top panel right side up, centered, 2 inches extending per side.
Step six, pin baste every 4 to 6 inches and mark the 16 by 48 inch rectangle, centered, on top.
Step seven, quilt with the walking foot. Sew parallel lines lengthwise, 4 inches apart across the width. Run every line edge to edge. Never stop inside the runner, and do not backstitch. Those ends sit in the extra area step eight trims away; the binding covers the rest.
If a line wanders, take it out with the seam ripper and sew it again, slower.
Step eight, trim all three layers to 16 by 48 inches with the 6.75in scissor.
Step nine, cut the binding strips 2 1/2 inches wide with the 6.75in scissor. Join your strips: lay two right sides together at a right angle. Sew diagonally corner to corner across that square. Trim to 1/4 inch past the seam with the 5.5in detail scissor and finger-press open. One end sits in the fold; the attachment seam catches the other. Repeat until the strip reaches at least 150 inches: the 128-inch edge plus 22 for corners, joins, and tails. Fold it in half lengthwise, wrong sides together. Start halfway along one long edge with a 12-inch loose tail, raw edges aligned. Backstitch three stitches, then sew at a 1/4-inch seam allowance. That seam crosses every quilting line end, securing each one before the binding folds over it. Stop 12 inches before your stitching began, leaving a gap and a second tail. Leave it unbackstitched; the tail join and gap closing finish it.
At each corner, stop 1/4 inch short and backstitch. Fold the strip up at 45 degrees, then down the next edge, flush with it. Sew from the outer edge, same allowance, backstitching three stitches at the start.
Join the tails: lay the ending tail over the starting tail and trim the overlap to 2 1/2 inches, the strip width. Open both flat, right sides together at a right angle. Sew diagonally corner to corner. Trim to 1/4 inch, finger-press open, and refold. One end sits in the fold; the gap stitching catches the other. Sew the gap closed, same allowance, backstitching three stitches at each end. Fold the binding to the back, covering the front stitching line by 1/8 inch. At each corner, fold one side down, then the other, for a diagonal fold. Pick one finish. By machine: stitch in the ditch on the front, catching the back edge, backstitching three stitches at the start and the end. Or by hand: slipstitch it down with the hand-sewing needle, starting with a knotted thread. At the end, backstitch once, knot it, and bury the tail.
Practical Tips From My Table
It does not have to be perfect.
Thanks for sewing along with me. We'll see you next time. Bye.
Shop the 3-Pack Scissor Set - Singer 5.5in 6.75in 8.5in at Linda's Electric Quilters.


