
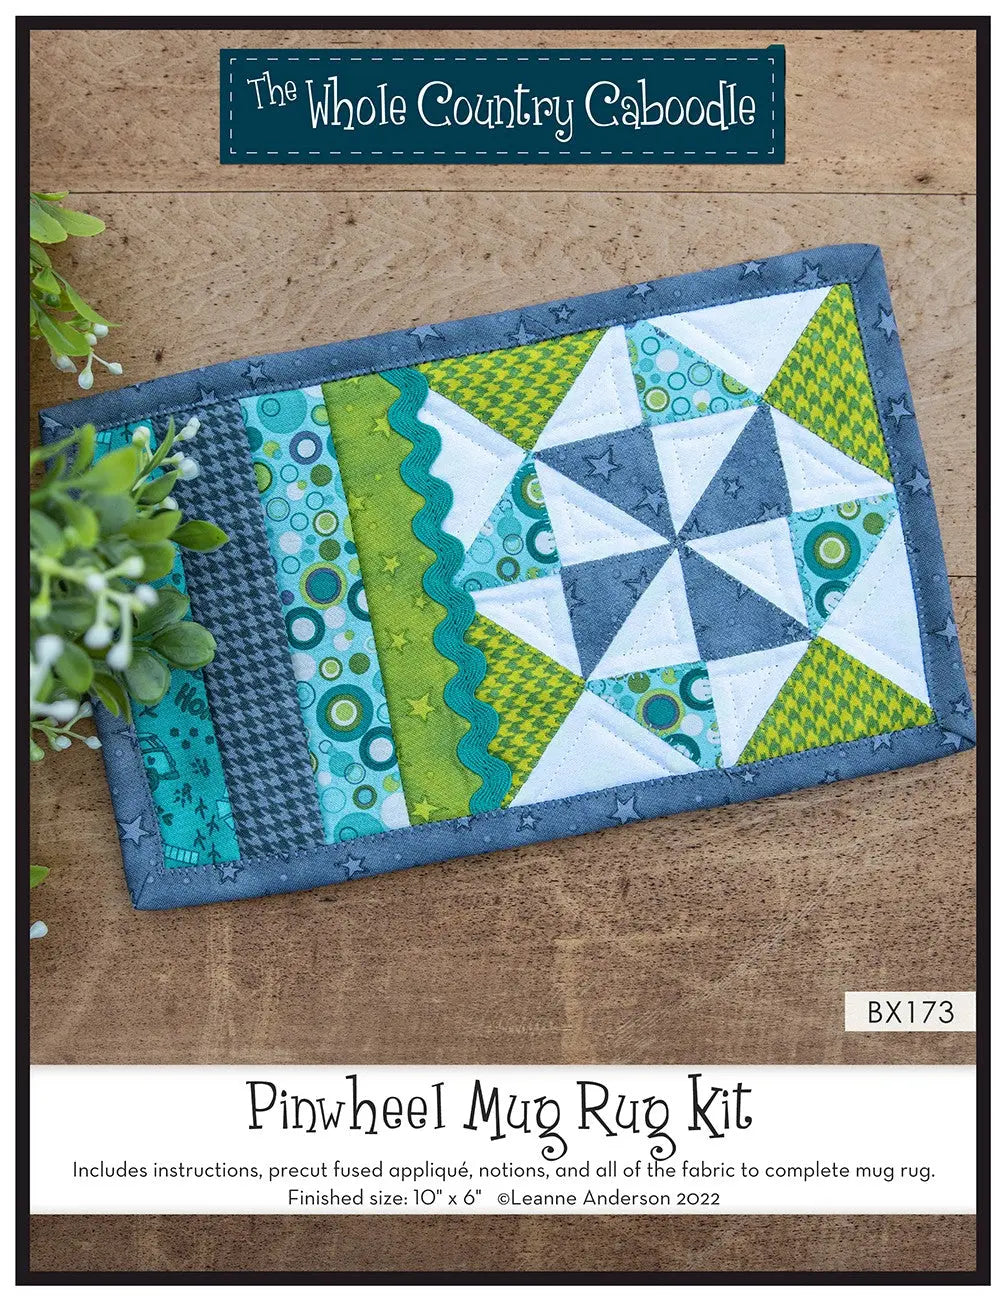
Mug Rugs Explained: How a Pinwheel Kit Becomes a Finished 10-by-6 Gift
Not every quilting project has to cover a bed. A mug rug sits between a coaster and a placemat — large enough for a mug and a small snack, small enough to finish quickly, gift easily, and use every day. The Pinwheel Mug Rug Kit is built around exactly that idea, pairing a pinwheel appliqué design with pre-measured pieces so you can go from kit to finished piece without cutting a whole quilt first.
What This Kit Makes
The finished mug rug measures 10 inches by 6 inches, with a finished appliqué measuring 5 1/2 inches by 5 1/2 inches. That appliqué is a precut quilt square, so the pinwheel focal point arrives ready to place rather than needing to be cut piece by piece. At this size, the finished rug works beside a coffee cup or teacup, under a mug on a desk or side table, or as a small handmade gift — the product description describes it as perfect for gifting or making to keep, and the scale suits both.
What's Included — and What You Will Need to Add
The kit includes a 7-inch by 7-inch base piece and a 7-inch by 10 1/2-inch backing piece. It also includes a 6-inch by 6-inch piece of stabilizer, four 2-inch by 7-inch strips, and a 7-inch by 10 1/2-inch piece of double-sided fusible foam — the layer that gives a mug rug its body and helps it lie flat under a cup.
For the finishing touches, you get a 2 1/2-inch by width-of-fabric strip for binding, the precut appliqué quilt square, and a 7-inch by 11/16-inch piece of ric rac trim. The only material listed as needed beyond the kit is thread to match your fabric, so choose that before you sit down to sew and you will not have to stop mid-project.
Skill Level and Time
This is a good project for a confident beginner and a relaxing make for an experienced quilter. The pieces are already sized for you, the appliqué square is precut, and the fusible foam removes the guesswork of layering loose batting into such a small project. The main skills are placing and securing appliqué, handling the trim, stitching the layers together, and binding a small rectangle.
Because the finished piece is only 10 inches by 6 inches, plan on a single sewing session — a few hours at a comfortable pace, including pressing and binding — rather than a multi-day commitment. That short timeline is part of the appeal if you want a test project, a quick gift, or a finished result between larger quilts.
Tips for Success With These Materials
Fuse the foam carefully. The double-sided fusible foam is cut to the same 7-inch by 10 1/2-inch size as the backing piece. Align the layers before you press, work on a flat surface, and check the edges before stitching — on a project this small, a shifted layer shows quickly.
Use the stabilizer where it belongs. The included 6-inch by 6-inch stabilizer is sized to support the 5 1/2-inch appliqué. Keep it positioned behind the appliqué square while you stitch so the base fabric does not pucker around the pinwheel.
Place the ric rac before you commit. Lay the 7-inch ric rac strip in position and pin or hold it to check the line before sewing. Its narrow 11/16-inch width is a detail accent, so even placement matters more than speed.
Treat the binding like a real quilt binding. Small projects are excellent binding practice. Take the corners slowly, keep the 2 1/2-inch strip folded evenly, and press as you go — the crisp edge is what makes a mug rug look finished rather than improvised.
Match your thread intentionally. Thread to match the fabric is the one supply you add, so test it against both the appliqué and the binding strip. A close match on both keeps the attention on the pinwheel, not on the stitching.
Shop the Pinwheel Mug Rug Kit at Linda's Electric Quilters.


