
How to Square Up Quilt Blocks with the Quilters Select 12.5 x 12.5 Non-Slip Ruler: Tips for Quilters
A finished block rarely comes off the machine exactly square. Seams ease, fabric shifts, and pressing can stretch an edge so blocks no longer line up. A square ruler sized to the block solves that in one pass — and 12.5 inches is especially useful, because many patterns use 12-inch finished blocks.
What This Ruler Is
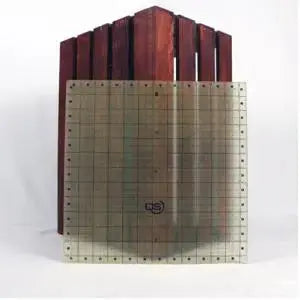
The Quilters Select 12.5" x 12.5" Non-Slip Ruler is a square quilting ruler designed for accuracy, convenience, and efficiency. Its clear, easy-to-read markings include 1/8-inch, 1/4-inch, 1/2-inch, 3/4-inch, and 1-inch measurements, as well as multiple angles for precise marking and measuring. The one-inch perimeter lines feature a dual-number, ambidextrous design that reads left to right and right to left, so you do not have to count backward when you flip the ruler. Its unique non-slip coating helps keep fabric in place for clean, accurate cuts, and is designed to last even if the edges show wear. The exact perimeter measurement helps with squaring blocks and helps eliminate accidental cuts. Quilters Select has made non-slip rulers since 2016, and this one is built for both right-handed and left-handed users.
Why Quilters Use It
Quilters reach for this size to square up 12-1/2-inch unfinished blocks — the size that finishes at 12 inches once sewn with 1/4-inch seams. Instead of measuring each side separately with a long ruler, you can check all four sides against one tool. The non-slip coating matters: a ruler that creeps mid-cut can shave too much from one side. The clear fractional markings also help when a block needs only a sliver trimmed, or when you are centering a motif before you cut.
How to Use It, Step by Step
- Press first. Press the block flat, with seams as the pattern directs. A ruler cannot fix a block distorted by wrinkles.
- Place the ruler. Center it over the block on your cutting mat. Line up seam lines, the center, or a focal motif with the ruler's markings, and confirm there is a safe trimming allowance on every side.
- Check the size. Confirm the block will measure 12-1/2 inches in both directions after trimming. If one side falls short, re-center the ruler so you trim less there and more from the opposite side.
- Trim two sides. Press down evenly so the non-slip coating grips. With a sharp rotary cutter, trim the right side and the top, keeping the blade snug against the ruler edge.
- Rotate and finish. Turn the block 180 degrees, line the trimmed edges up with the 12-1/2-inch lines, and trim the remaining two sides.
- Verify. Measure across the center in both directions and corner to corner. If the diagonals match, the block is square and ready to join.
Practical Tips
Work in good light so you can see the fine 1/8-inch markings. Use the dual numbers from whichever side you are standing on rather than reaching awkwardly across the mat. For fussy cutting, align the motif first and the edges second — the perimeter lines will show quickly whether the design will still finish at size. Use a fresh blade; a dull blade pulls fabric and defeats the non-slip grip. Square each block as you finish it, rather than in a tired batch at the end.
Care and Storage
Wipe the ruler with a soft, dry or slightly damp cloth. Store it flat, hung on a peg, or in a ruler rack where the edges will not chip. Keep it away from prolonged direct sunlight and heat, and store it apart from metal templates that could scratch the surface and obscure the markings.
Project Ideas
Use this ruler for traditional 12-inch and sampler quilts, for squaring oversized blocks before sashing, for trimming appliqué blocks to a uniform size, and for cutting 12-1/2-inch squares for pillows, tote panels, and table toppers.
A square block is not a fussy extra step — it is what lets points meet, sashing run straight, and a quilt top lie flat. With one well-sized, non-slip ruler, that step takes seconds.
Shop the Quilters Select 12.5" x 12.5" Non-Slip Ruler at Linda's Electric Quilters.


