
How to Use Magic Pins Quilting Fine Pins: Tips for Quilters
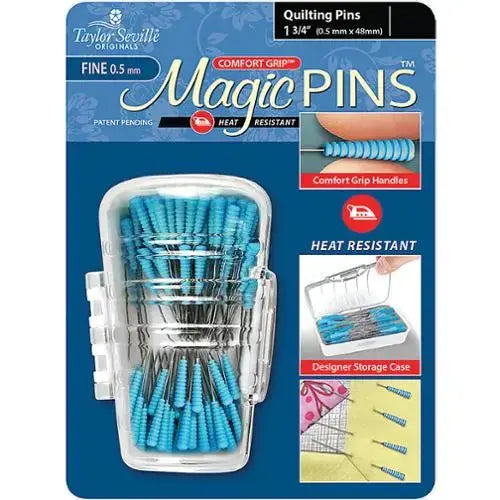
Pins look like the simplest notion in your sewing basket, but the right pin makes piecing smoother, more accurate, and kinder to your hands and fabric. The Magic Pins Quilting Fine 50 count by Taylor Seville are fine quilting pins for everyday quilting work. Each pin is 1.75 inches long and 0.5mm thick, with a heat resistant comfort grip handle, and each package contains 50 pins. That combination — a fine, longer shaft and a handle that is easy to hold — is what sets quilting pins apart from short, standard dressmaker pins.
What These Pins Are and Why Quilters Use Them
A quilting pin has two jobs: hold layers together without shifting, and do it without damaging the fabric. At 0.5mm thick, these are fine pins, so they slide into quilting cotton with a smaller hole and less distortion than a thicker pin would cause. That matters at seam intersections, where several layers meet and a heavy pin can push fabric out of alignment.
The 1.75-inch length is long enough to anchor two or more layers securely and to pin across a seam, yet still manageable for piecing blocks. The comfort grip handles give you something substantial to grasp as you insert and remove pins, which quilters appreciate during long piecing sessions. Because the handles are heat resistant, they are made to tolerate pressing work around them — a real advantage when you want to press a unit without pulling every pin first. Always test with your iron and fabric, and avoid direct, prolonged contact between a hot soleplate and any pin handle.
How to Use Them, Step by Step
- Align before you pin. Place pieces right sides together and match raw edges and seam intersections first. Pinning cannot fix misalignment — it can only hold the alignment you create.
- Pin critical points first. Put a pin at each seam intersection or point that must match, inserting it perpendicular to the seam line or at a slight angle so layers cannot creep.
- Add pins between. Fill in with additional pins every few inches along longer seams, keeping the shaft flat against the fabric so layers stay even.
- Sew up to, not over, pins. Slow down as you approach a pin and remove it just before the needle reaches it. Sewing over a pin risks a bent pin, a broken needle, and a thrown-off stitch.
- Remove and reset as you press. Take pins out as units are sewn, press as your pattern directs, and re-pin the next join fresh.
Practical Tips for Success
Pin perpendicular to the seam when you plan to remove pins as you sew — the handles sit clear of the presser foot and are easy to grab. Keep a pincushion or magnetic dish within reach and put every pin straight back into it; fine pins are easy to lose in carpet or quilt layers. Replace any pin that bends or develops a rough tip, because a damaged pin snags fabric. With 50 pins in a package, you can pin a whole block or row without stripping pins from another section mid-project.
Care and Storage
Store pins in their package, a pincushion, or a lidded pin box so the fine points stay protected. Keep them dry to prevent corrosion, and separate from heavier pins so the slender 0.5mm shafts do not bend under weight. Wipe pins clean if they pick up lint, and discard bent pins safely in a sharps container rather than loose in the trash.
Project Ideas
Use these fine pins for precision pieced blocks where points must meet, for pinning rows together before a long joining seam, and for holding binding in place before stitching. They are also handy for appliqué placement, for pinning smaller layered projects such as table runners, placemats, and baby quilts, and for any sewing where a fine pin and an easy-grip handle will do cleaner work than a standard pin.
Shop the Magic Pins Quilting Fine 50 count by Taylor Seville at Linda's Electric Quilters.


