
Table of Contents
- What Is Corey Pearson's Quilt-as-You-Go Method?
- Quilt as You Go for Beginners: Getting Started
- Essential Quilt as You Go Supplies
- How to Join Quilt-as-You-Go Blocks
- Small Projects Perfect for Quilt as You Go
- Step-by-Step Quilt-as-You-Go Demonstration
- Common Mistakes and Troubleshooting
- Frequently Asked Questions
Last Updated: October 6, 2026
What Is Corey Pearson's Quilt-as-You-Go Method?
Corey Pearson's corey pearson quilt as you go method combines piecing and quilting in one continuous process. Instead of assembling a full quilt top, adding batting and backing, then quilting the whole piece, you quilt individual blocks as you construct them. Each block becomes a finished, quilted unit before joining it to the next.

This approach suits all skill levels. You work with smaller, more manageable pieces at every stage, meaning less bulk on your machine and greater control over your stitching. It reduces the intimidation of handling a large quilt sandwich while still delivering professional results.
The corey pearson quilt as you go method works beautifully for lap quilts, throws, baby quilts, and wall hangings.
Quilt as You Go for Beginners: Getting Started
Understanding the Core Concept
The core principle is simple: piece a block, quilt it immediately, then move to the next. By the time your quilt top is assembled, the quilting is complete. This eliminates basting and the challenge of quilting through multiple layers of a full-sized quilt.
Traditional quilting requires managing a quilt sandwich, three layers that shift, bunch, or pucker if not perfectly basted. With quilt as you go for beginners, you quilt 6-inch or 8-inch blocks instead. Your machine handles the smaller scale smoothly, and minor imperfections become design features rather than disasters.
The joining process is where many new quilters feel uncertain. Once blocks are quilted individually, you connect them using a method that accounts for the quilting already done. Understanding how to handle these seams separates clean results from frustrated restarts.
Why Beginners Love This Technique
Beginners gravitate toward quilt as you go because it removes intimidating variables. You're not managing a 60-by-80-inch quilt sandwich or wrestling with a long-arm machine. Instead, you work on human-scale pieces that fit comfortably under your presser foot.
The psychological advantage matters too. Finishing a quilted block feels like a tangible win. Traditional quilting can feel like a holding pattern for weeks, but with corey pearson quilt as you go, you see progress constantly.

The method also builds confidence in your stitches. Working on smaller blocks improves stitch quality faster, and you can experiment with different quilting patterns without committing to one design across an entire quilt.
Essential Quilt as You Go Supplies
Fabrics and Batting
Your fabric selection impacts how well quilt as you go supplies perform. Use quilting-weight cotton for the top and backing; standard 44-45 inch wide quilting cotton works perfectly. Cotton blends and specialty fabrics like cuddle or minky also work if you adjust tension and needle accordingly.
Batting is the heart of this method. You need batting stable enough to quilt into small blocks without shifting, yet soft enough to maintain drape. Low-loft batting performs better than high-loft for quilt as you go work because it's easier to quilt through and creates flatter seams. Many quilters prefer 80/20 cotton-polyester blends for stability without stiffness.
The Linda's Deluxe Cotton/Poly Blend Batting comes in queen-size packages. Free shipping on all batting rolls removes a significant cost barrier for larger projects.
Tools and Notions
Your essential toolkit for quilt as you go supplies is minimal. You'll need sharp rotary cutters (dull blades create frayed edges), a self-healing cutting mat, a quilting ruler (6x24 inches is ideal), and sharp fabric scissors.
For sewing, a walking foot is essential, feeding fabric evenly from top and bottom to prevent shifting. A 1/4-inch presser foot ensures consistent seam allowances. Many machines include these, but the investment pays for itself in your first project.
Thread selection matters more than many beginners realize. Polyester thread works reliably for most quilt as you go projects, but quality matters. Cheap thread breaks, shreds, and creates tension headaches; name-brand thread from Linda's Electric Quilters prevents frustration and produces cleaner stitches.
How to Join Quilt-as-You-Go Blocks
Block Assembly Fundamentals
Once your blocks are quilted, joining them requires an approach that accounts for the quilting already completed. The traditional how to join quilt as you go blocks method uses the "stitch-and-flip" or "seam-join" technique: sew blocks together with right sides facing, then press the seam allowance to one side.
The key difference is managing bulk at seams. Because each block contains batting, seams are thicker than in traditional quilts. Use a walking foot when joining, and consider a 1/2-inch seam allowance rather than 1/4 inch, giving you more fabric and stronger seams that won't separate under stress.
Finishing Seams and Edges
After joining all your blocks, you'll have a finished quilt top that's already quilted. The final step is binding the edges. Because your quilt is already quilted, binding goes faster than traditional quilts; you're just encasing raw edges rather than quilting through additional layers.
Cut binding strips 2.5 inches wide and sew them to your quilt with a 1/4-inch seam allowance. Press toward the edges, fold to the back, and hand-stitch or machine-stitch down.
The seams where blocks join will be visible on both sides of your finished quilt. This is intentional and becomes a design feature. To minimize visibility, choose thread colors that match your fabric, or use a decorative stitch that turns seams into design elements.
Small Projects Perfect for Quilt as You Go
Lap Quilts and Throws
Lap quilts and throws are ideal first projects for quilt as you go small projects: manageable in scale yet substantial enough to feel like a real accomplishment. A typical lap quilt measures 48 by 60 inches, functional yet completable in a weekend or two.
The Northern Lights Lap Quilt by Corey Pearson offers a perfect template. It uses simple rail-fence blocks in an 8-by-10 grid, creating a striking woven effect with minimal complexity. The plan calls for 2.5-inch strips sewn into groups of three, then subcut into 6.5-inch blocks, teaching the fundamentals of corey pearson quilt as you go without complicated piecing.
Northern Lights Lap Quilt Kit - by Corey Pearson →
Throws work beautifully too. A throw typically measures 48 by 56 inches and suits living rooms or bedrooms. The Effie's Woods Cuddle Woodland Throw Quilt Kit by Corey Pearson shows how specialty fabrics like cuddle minky elevate a simple project into something luxurious. Panel-based construction keeps piecing simple while soft fabrics create an heirloom-quality piece.
Baby Quilts and Wall Hangings
Baby quilts are an excellent way to practice quilt as you go small projects: small enough to handle easily yet requiring the same techniques as larger quilts. A baby quilt typically measures 36 by 48 inches, perfect for learning without a massive commitment.
The Cloud Nine Minky Snuggle Quilt Kit by Corey Pearson targets baby quilts using soft cuddle fabrics front and back. Fat-quarter-based construction teaches you to work with precuts while the minky backing creates an irresistibly soft quilt, proving quilt as you go isn't limited to traditional cotton.
Wall hangings offer another small-scale option. A 24-by-30-inch wall hanging teaches all the fundamental skills with minimal fabric and batting, and it's perfect for experimenting with quilting designs since mistakes are less visible than on a quilt you'll sleep under.
Step-by-Step Quilt-as-You-Go Demonstration
Preparing Your Fabric and Layout
Begin by washing and pressing all your fabric. Prewashing prevents shrinkage and color bleeding, especially with darker fabrics. Press everything flat; wrinkles create uneven piecing and quilting.
Cut your fabric pieces according to your pattern. For simple projects, this means strips or squares; for more complex designs, you'll have multiple pieces per block. Organize your cut pieces by block so you can grab what you need without hunting through piles.
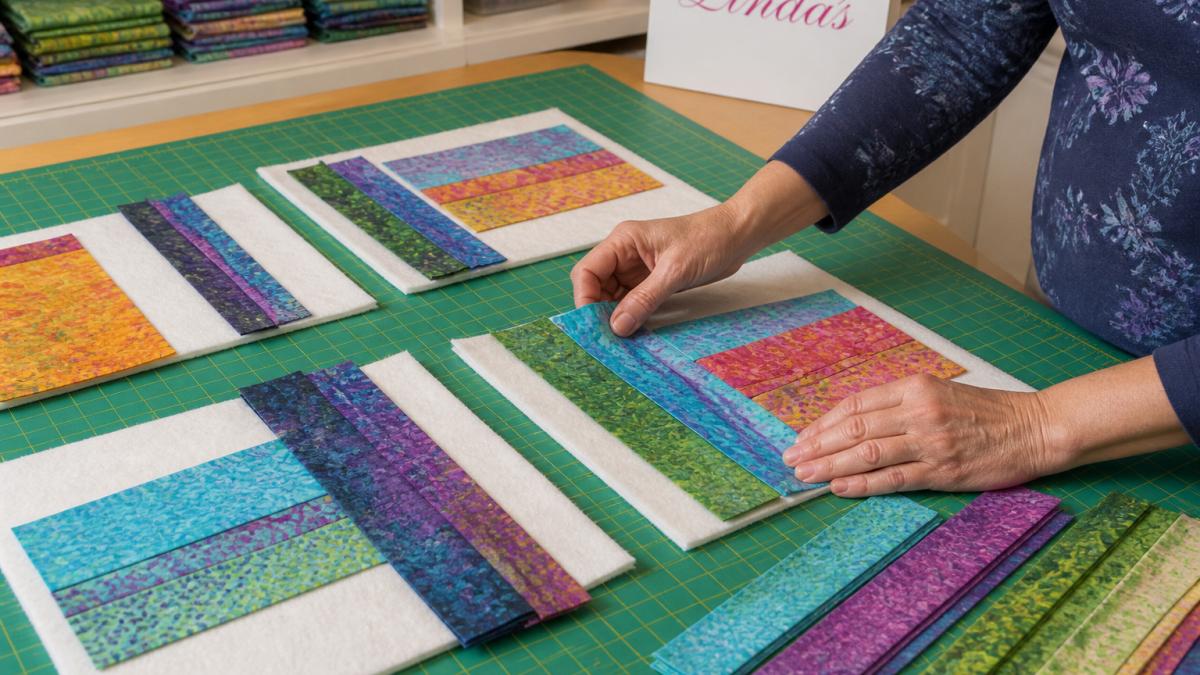
Prepare your batting pieces. Cut batting the same size as your finished block, if your block finishes at 6 inches, cut 6-inch batting squares. This prevents excess batting that complicates quilting and joining.
Constructing Individual Blocks
Repeat this process for every block in your project. Yes, it's repetitive, but the consistency creates a finished quilt where every block is identical in construction quality.
Quilting as You Build
Now comes the part that defines corey pearson quilt as you go: quilting each block individually. Install your walking foot and thread your machine with quality thread. Starting with simple designs, straight lines, gentle curves, or basic meanders, quilt each block.
The beauty of quilting at this stage is that you're working on a 6 or 8-inch square. Your hands control the fabric easily. Your machine handles the layers smoothly. Mistakes become learning opportunities rather than disasters that require unstitching an entire quilt.
Quilt consistently across all blocks. If you're using straight lines, maintain the same spacing and angle on every block. If you're using a meandering design, aim for similar density and scale. Consistency creates visual harmony in your finished quilt.
Common Mistakes and Troubleshooting
The most frequent mistake beginners make is using batting that's too thick. High-loft batting looks impressive on the shelf, but it's nearly impossible to quilt through in small blocks and creates unwieldy seams where blocks join.
Uneven seam allowances cause blocks to come out different sizes, which creates frustration when joining. Use a 1/4-inch presser foot and measure your first seam to confirm accuracy before sewing an entire block.
Many quilters skimp on thread quality, then struggle with breakage and tension issues. Quality thread costs slightly more upfront but prevents hours of troubleshooting and ripping. This is one area where saving money backfires.
Insufficient clipping or pinning causes fabric and batting to shift during quilting, creating puckers and uneven stitching. Use clips or pins every 2 inches around your block perimeter. This feels excessive until you see how much it improves your results.
Corey Pearson's quilt as you go method transforms how you approach quilting, replacing the traditional three-step process with a continuous, manageable workflow.
At Linda's Electric Quilters, we stock everything you need to get started: premium batting in multiple weights, high-quality fabrics, specialized threads, and the notions that make the difference between frustration and success. Explore our Corey Pearson quilt kits, the Northern Lights Lap Quilt Kit, Cloud Nine Minky Snuggle Quilt Kit, and Effie's Woods Cuddle Woodland Throw Quilt Kit, each designed to teach you the fundamentals while creating a finished quilt you'll treasure.

Frequently Asked Questions
What is quilt as you go, and how does Corey Pearson's method differ from traditional quilting?
Quilt-as-you-go is a technique where you quilt individual blocks as you construct them, rather than quilting the entire quilt top after assembly. Corey Pearson's approach simplifies this by using strip sets and rail fence blocks that are quick to piece and quilt. This method reduces bulk, eliminates the need for a large design wall, and produces finished blocks ready to join. It's especially appealing to quilters who find managing large quilts overwhelming.
Can beginners really use the quilt-as-you-go technique, or do you need advanced skills?
Beginners absolutely can use quilt-as-you-go. The technique actually reduces complexity because you work on smaller blocks one at a time. You don't need to manage a full quilt top or deal with layering an entire large quilt. Start with simple blocks like rail fence designs, use consistent seam allowances, and take your time joining blocks. Many quilters find it less intimidating than traditional quilting methods.
What supplies do I need to get started with quilt as you go?
You'll need cotton fabric for your quilt top, batting (such as Linda's Deluxe Cotton/Poly Blend), backing fabric, thread, a rotary cutter, self-healing mat, quilting ruler, and basic sewing notions. For Corey Pearson's designs, consider her kits like the Northern Lights Lap Quilt Kit ($169.45) or Cloud Nine Minky Snuggle Quilt Kit ($199.27), which bundle all materials. Having quality batting ensures your blocks hold their shape and quilting lines stay crisp.
How do you join quilt-as-you-go blocks without creating bulky seams?
Join blocks using a straight seam with a quarter-inch seam allowance, then press seams to one side or open, depending on your block design. The key is consistent seam allowances throughout so blocks align perfectly and seams stay flat when pressed.
What types of projects work best for quilt-as-you-go?
Lap quilts, throws, baby quilts, and wall hangings are ideal for quilt-as-you-go because they use a manageable number of blocks. Projects around 48" × 60" or smaller are perfect for beginners. Corey Pearson's kits include designs like the Effie's Woods Cuddle Woodland Throw Quilt ($174.43), which is approximately 48" × 56", a size that's rewarding without being overwhelming. Larger quilts are possible but require more blocks and planning.


