
Table of Contents
- Why Fabric Edges Fray and When to Fix Them
- How to Stop Fabric from Fraying: Prevention Methods
- How to Fix Frayed Edges on Fabric: Repair Methods
- Fabric Glue for Fraying Edges: Quick Fixes and Limitations
- Best Stitch to Prevent Fraying and Reinforce Seams
- How to Finish Organza Edges and Delicate Fabrics
- Materials and Tools You'll Need
- Common Mistakes to Avoid When Fixing Frayed Fabric
- Frequently Asked Questions
Last Updated: October 12, 2026
Why Fabric Edges Fray and When to Fix Them
Fabric edges fray because woven fabrics are made of individual threads held together by the weave structure. When you cut fabric, you expose loose threads at the edge.
Raw edges are the biggest culprit. Any edge that hasn't been finished will eventually fray. The tighter the weave, the slower the fraying process. Loosely woven fabrics like linen or cotton quilting fabric fray much faster than tightly woven materials.
When you need to fix frayed edges depends on your project. If you're making a quilt that will be washed frequently, finishing raw edges matters.
The good news is that fixing frayed edges isn't complicated. You just need to know which method works best for your situation.
How to Stop Fabric from Fraying: Prevention Methods
The easiest way to deal with frayed edges is to stop them before they start. Prevention is faster than repair and gives you cleaner results. There are several proven methods to keep raw edges from unraveling.
Using Pinking Shears for Clean Zigzag Edges
Pinking shears cut a distinctive zigzag pattern along fabric edges. This zigzag design limits the length of threads that can fray.
The zigzag cut works because it shortens the thread length. A straight cut exposes long threads that unravel easily.
Why this works: The saw-tooth pattern doesn't prevent fraying entirely, but it minimizes damage by limiting how far loose threads can travel. For quilting projects, this is one of the fastest finishing methods.
We recommend the Fiskars Premier Softgrip Pinking Shears for serious quilters. These shears feature high-grade stainless-steel blades that stay sharp through big jobs.

For those with arthritis or hand strength concerns, the Fiskars Easy Action Pinking Shears offer a spring-action design that opens the blades automatically after each cut. This reduces strain significantly.

How to use pinking shears:
- Cut along the fabric edge in one smooth motion
- Keep the shears at a consistent angle for even zigzag cuts
- Work on a flat surface for precise cutting
- Use them on raw fabric edges before sewing seams together
Machine Zigzag Stitching Along Raw Edges
A zigzag stitch on your sewing machine does the same job as pinking shears, but with added security. The thread locks the edge, preventing fraying even during washing and wear.
Set your machine to a medium zigzag width (about 2-3mm) and stitch along the raw edge. The needle catches the fabric on both sides of the zigzag, creating a locked edge that holds loose threads in place.
This method works best for:
- Garment seams that will get heavy use
- Fabrics that fray aggressively (like linen or loosely woven cotton)
- Projects you'll wash frequently
- Delicate fabrics that need reinforcement
The zigzag stitch is stronger than pinking shears alone because the thread physically locks the edge. You can feel confident that your seams won't unravel.
How to Fix Frayed Edges on Fabric: Repair Methods
Sometimes you're working with fabric that's already frayed or damaged. You need to repair the edge rather than prevent fraying. The repair method depends on how much damage you have and what the fabric will be used for.
Hand-Sewing a Running Stitch to Secure Loose Threads
Hand-sewing is the most controlled way to repair a frayed edge. A simple running stitch secures loose threads and prevents further damage. This method works well for small areas or delicate fabrics where you need precision.
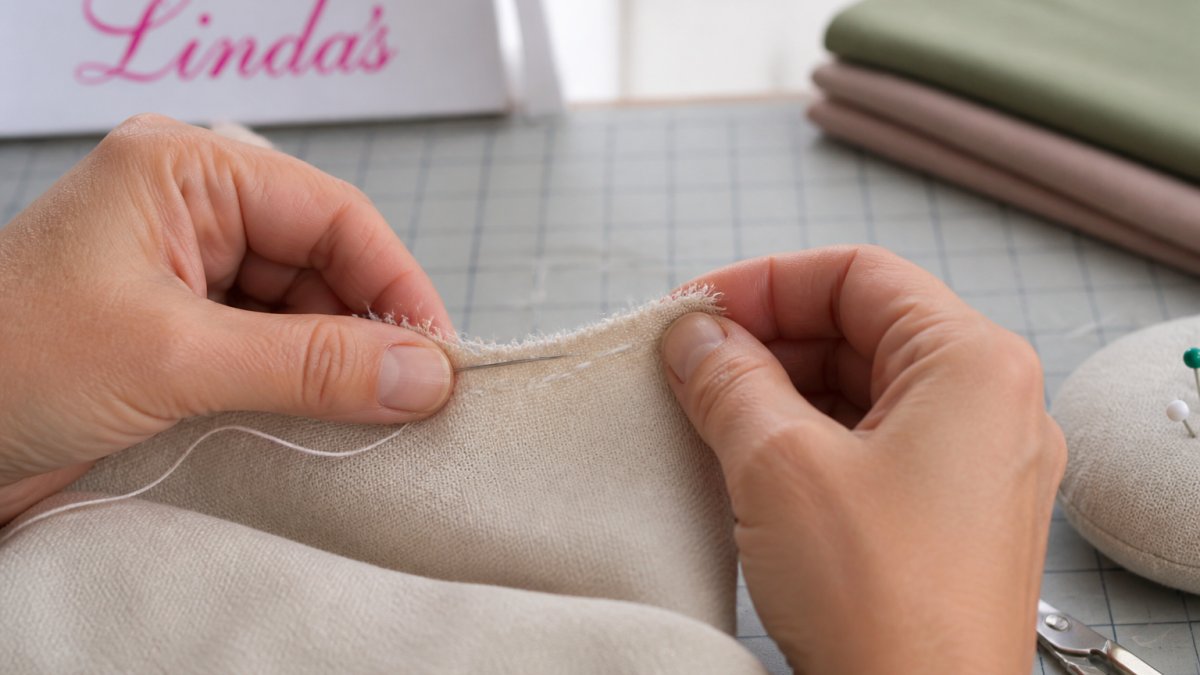
How to hand-sew a running stitch:
- Thread a needle with thread that matches your fabric
- Start about 1/4 inch from the frayed edge
- Push the needle through the fabric and pull it back out, creating small stitches
- Keep stitches close together (about 1/8 inch apart)
- Work along the entire frayed area
- Tie off the thread securely at the end
The running stitch is simple but effective. It creates a line that holds loose threads in place. This method takes time but gives you complete control over the repair.
Machine-Sewing Damaged Edges Back Together
If a seam has split or an edge is severely damaged, machine-sewing offers a stronger repair. You can re-sew the seam or create a new edge line that secures the damaged area.
This works best when you have fabric to spare. You'll lose a bit of width where you sew, so only use this method when the fabric can afford it.
Steps for machine repair:
- Trim away the most damaged threads with scissors
- Position the fabric under the presser foot
- Sew a straight stitch about 1/4 inch from the damaged edge
- Use a stitch length of 2-2.5mm for secure stitching
- Backstitch at the beginning and end to lock the thread
Machine-sewing is faster than hand-sewing and creates a stronger hold. The downside is that you're creating a new edge line, which shortens your fabric slightly.
Fabric Glue for Fraying Edges: Quick Fixes and Limitations
Fabric glue offers a no-sew option for stopping fraying. It works by coating the frayed threads and holding them in place. This method is fast and requires no sewing skills.
Apply a thin line of fabric glue along the frayed edge. The glue soaks into the threads and hardens, locking them in place. This stops fraying immediately and works on most fabric types.
When to use fabric glue:
- Quick repairs on non-structural seams
- Temporary fixes before proper finishing
- Delicate fabrics that are hard to sew
- Small frayed areas
Limitations to know: Fabric glue isn't washable in all cases. Check the product instructions carefully. Some glues hold through gentle washing but fail in the dryer. Others are permanent.
Glue works best as a temporary fix while you plan a more permanent repair. It's useful for stopping active fraying so the damage doesn't spread while you gather your tools.
Best Stitch to Prevent Fraying and Reinforce Seams
The stitch you choose determines how well your edge holds up. Different stitches offer different levels of protection and appearance.
Fiskars Premier Softgrip Pinking Shears →
Blanket Stitch for Decorative Edge Finishing
The blanket stitch is both functional and decorative. It loops around the edge of the fabric, creating a finished look while securing loose threads. This stitch is popular for quilts, blankets, and decorative projects.
How to blanket stitch by hand:
- Bring the needle up through the fabric from underneath
- Loop the thread around the needle
- Push the needle back down at the edge
- Bring it back up about 1/8 inch away
- Pull the thread tight to create the loop
- Repeat along the entire edge
The blanket stitch creates a professional-looking finished edge. It's decorative enough to show on the front of a project, which makes it ideal for quilts and blankets.
Many machines have a blanket stitch setting. Machine blanket stitching is faster than hand-sewing and creates consistent results. Set your machine to the blanket stitch and guide the fabric so the stitch loops over the edge.
Basting and Reinforcement Stitches for Stability
Basting is a temporary stitch used to hold fabric pieces together before final sewing. It uses longer stitches that are easy to remove. Reinforcement stitches are shorter, tighter stitches that add strength to seams.
Basting helps when you're working with damaged fabric edges. It holds the pieces in position while you plan your final repair. Once you've basted, you can assess the damage and decide on the best finishing method.
Reinforcement stitches are tight, close stitches that lock the weave. They prevent fraying by creating a barrier that the threads can't pass through. Use a stitch length of 1.5-2mm for strong reinforcement.
How to Finish Organza Edges and Delicate Fabrics
Delicate fabrics like organza, silk, and fine cotton require special handling. These fabrics fray easily but are too delicate for heavy stitching.
Best methods for delicate fabrics:
- Pinking shears for a quick finish
- Hand-sewing with fine thread and tiny stitches
- Fabric glue designed for delicate materials
- Rolled hems that fold the edge under and stitch it down
Organza edges benefit from a rolled hem. Fold the edge under about 1/4 inch and stitch it down with tiny stitches. This creates a finished edge that looks refined and prevents fraying completely.
For silk and fine cotton, hand-sewing with matching thread gives the best results. Use small, tight stitches that don't pucker the fabric. The goal is to secure the edge without drawing attention to the seam.
Avoid heavy machine stitching on delicate fabrics. The force of the machine can damage fine weaves. Hand-sewing or pinking shears are your best options for these materials.
Materials and Tools You'll Need
Having the right tools makes every repair easier. Here's what we recommend keeping on hand:
Essential tools:
- Sharp fabric scissors or pinking shears
- Hand-sewing needles in various sizes
- Thread that matches your fabrics
- Sewing machine with basic stitch options
- Fabric glue (optional, for quick fixes)
- Pins or clips to hold fabric steady
The KAI N5350 9 Inch Pinking Shears are lightweight and strong, perfect for regular use. They're an affordable option for quilters who want quality without the premium price tag.

For precision cutting on multiple fabric layers, the Serrated Patchwork Scissor 7in grabs fabric firmly and prevents slipping. These are ideal for cutting padded fabrics and quilting projects. They are priced on the product page and come with serrated blades that hold fabric securely.
Thread quality matters. Use thread made for sewing, not craft thread. Polyester or cotton thread works well for most repairs. Match the thread color to your fabric for invisible repairs, or use contrasting thread if the stitch is decorative.
Common Mistakes to Avoid When Fixing Frayed Fabric
Learning what NOT to do saves you time and frustration. These are the most common mistakes we see.
Waiting too long to repair: The longer you wait, the more the fraying spreads.
Using the wrong stitch: A loose stitch won't hold. Make sure your stitches are tight and close together.
Cutting too close to the seam: If you trim away too much fabric trying to remove damage, you weaken the seam.
Skipping the stabilization step: On loose weaves, a single stitch isn't enough. Use pinking shears first, then stitch.
Choosing the wrong method for your fabric: Heavy stitching damages delicate fabrics. Hand-sewing works better for silk and organza.
Not testing on scrap fabric first: If you're trying a new method, test it on leftover fabric first.
Fixing frayed fabric edges doesn't require special skills or expensive tools. Shop our selection of Fiskars pinking shears, serrated scissors, and quality threads to keep your quilting projects looking sharp and finished.
Frequently Asked Questions
How do I stop my fabric from fraying?
The most effective prevention methods are pinking shears, which cut a zigzag edge that limits frayed thread length, and machine zigzag stitching along raw edges. For woven fabrics, pinking shears work best before assembly. For finished seams, zigzag stitching on a sewing machine prevents loose threads from pulling free during washing and wear. Hand-sewing a blanket stitch offers decorative reinforcement for visible edges.
Does fabric glue help with fraying?
Fabric glue can temporarily stop fraying on small areas and delicate fabrics like organza, but it's not a permanent solution for regular use. Glue works best for quick fixes on trim edges or when you need to preserve the original fabric width. For durability, combine glue with stitching or use it only on decorative pieces that won't undergo heavy wear.
What is the best stitch to prevent fraying?
The zigzag stitch is the most effective machine stitch for preventing fraying on raw edges and seams. It limits the length of loose threads and prevents unraveling during washing. For decorative finishes, the blanket stitch reinforces edges while adding visual interest. Basting stitches stabilize fabric layers before permanent seaming. For organza and delicate fabrics, use a narrow zigzag or blanket stitch at lower tension to avoid puckering.
Can you repair frayed fabric without sewing?
Yes, fabric glue and edge compounds offer no-sew repairs for minor fraying, especially on trim, appliqués, or decorative edges. These methods work quickly but are best for small areas and pieces that won't undergo frequent washing. For stronger, longer-lasting repairs on garments or quilts, hand-sewing or machine stitching is necessary. No-sew options are ideal for temporary fixes or when you want to preserve the original fabric dimensions without shortening it.


