
Last Updated: November 8, 2026
Quick Summary
To join wideback fabric panels, lay the first panel face up, place the second face down with cut edges matched, pin every 6 to 8 inches, and sew a 1/2-inch seam. Press the seam open from the wrong side, then check it lies flat before loading.
- Wideback fabric is about 108 inches wide, so single panels cover many throw and twin quilts.
- Add 4 to 8 inches on each side of your quilt top when calculating backing size.
- Trim both selvages before joining to prevent pulling and ridges under the quilting needle.
- Pin every 6 to 8 inches, since a 6-inch spacing is safer than 10 or 12 inches.
- Press the seam open and let it cool flat before moving the panel.
Table of Contents
- Do You Need to Join Wideback Fabric at All?
- How to Measure Your Quilt Top and Calculate Backing Size
- How to Square Up Quilt Backing Fabric Before Joining
- Step-by-Step: How to Join Wideback Fabric Panels
- How to Piece Backing Fabric for a Quilt When Wideback Won't Cover It
- Troubleshooting Bowed, Wavy, or Stretched Joins
- How to Prepare Quilt Backing for Longarm Quilting
- Load Your Joined Backing and Start Quilting
- Frequently Asked Questions
Do You Need to Join Wideback Fabric at All?
Wideback fabric is a cotton that comes about 108 inches wide, which is wide enough to back many quilts without a seam. Joining wideback fabric panels is only necessary when your quilt top is bigger than a single cut of wideback can cover. Many quilters find that a single panel handles throie most throw-sized and twin-sized quilts.
So before you cut anything, check the size. A panel of wideback fabric covers a quilt that is roughly 100 inches or less in each direction, once you allow for extra fabric around the edges. Bigger quilts, like queen and king sizes, usually need either two panels joined together or a pieced backing.
Here is a quick way to decide:
- Single panel is enough: Your quilt top is smaller than about 100 inches wide and long.
- Join two panels: Your quilt is wider than one panel, or you want a seam down the middle.
- Piece the backing: You want a scrappy look, or you lack enough yardage.
Joining panels is also a good choice if you want a specific print to run across the back. Just know that every seam adds work at the longarm frame.
How to Measure Your Quilt Top and Calculate Backing Size
Measure your quilt top first, then add extra fabric for the longarm frame to grip. Quilters usually add 4 to 8 inches on each side, so the backing sits a bit larger than the top.
Here is a simple worked example for a 90-by-100-inch quilt top:
- Add 8 inches to the width: 90 + 8 = 98 inches
- Add 8 inches to the length: 100 + 8 = 108 inches
- Check that 98 inches fits within the 108-inch width of wideback fabric.
Because the fabric is 108 inches wide, this quilt fits on one panel with no join needed. Turn the fabric so the 108-inch side runs across the quilt, and cut the panel to length.
If you want a quick reference, you can compare your finished dimensions with standard quilt sizes. A reader unsure of their finished dimensions can check standard quilt sizes to confirm the backing they need.
Once you know the size, you can order the right yardage of Charcoal Jot Dot Cotton Wideback Fabric Per Yard to cover it.
How to Square Up Quilt Backing Fabric Before Joining
Squaring up is the step most quilters skip, and it causes the most trouble later. If the panel edges are crooked, the seam will pucker and the backing will pull at an angle on the frame.
Start by pressing the fabric flat. Then fold it in half lengthwise and check that the selvage edges line up. Trim the cut edge with a rotary cutter and a long acrylic ruler until the corners form true 90-degree angles.
Watch out: a single crooked cut can throw off the whole join, so measure the diagonal corner to corner. The two diagonals should match in length.
Step-by-Step: How to Join Wideback Fabric Panels
Joining two wideback panels is straightforward once you get the setup right, but wideback fabric behaves differently from standard yardage: it is heavier, it drapes off the table, and a small misalignment becomes a long, visible seam. Work on a large, clear table so the full length stays flat, and plan to support the fabric so it does not drag.
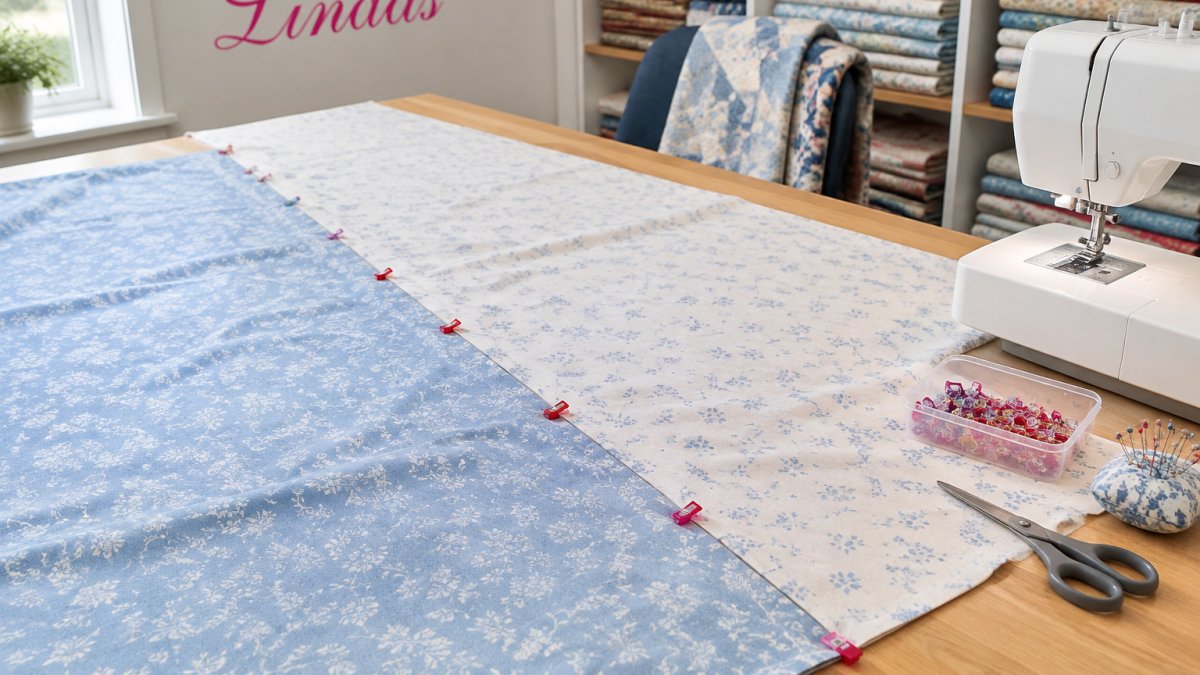
- Lay the first panel face up on the table, smoothing it flat from the center outward.
- Place the second panel face down on top, aligning one long edge with the first. Match the cut edges, not the selvages, since selvages can vary in width.
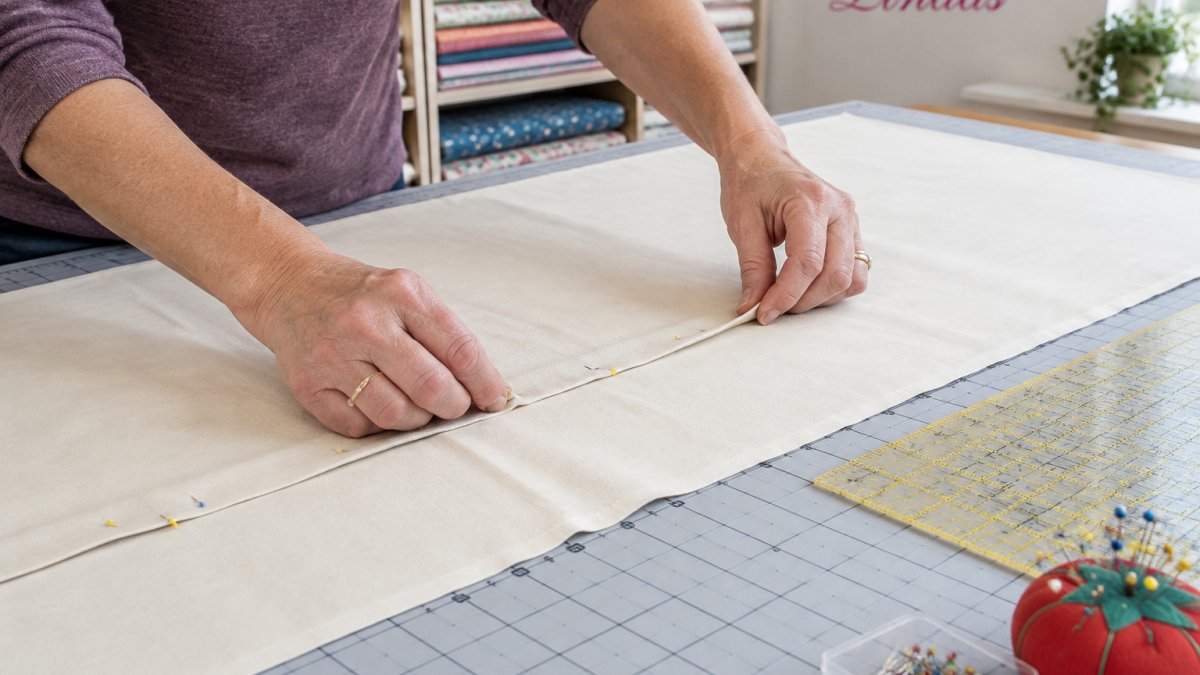
- Pin every 6 to 8 inches along the seam line, placing pins perpendicular to the edge so they are easy to remove as you sew.
- Sew with a 1/2-inch seam allowance, backstitching at each end. Keep the fabric grain straight as you feed it through the machine.
- Press the seam as described below, then check the join for flatness before loading.
A common pattern is to sew with the longer panel on the bottom and the shorter panel on top, letting the feed dogs grip the heavier layer. If your machine has a walking foot or a dual-feed system, use it; wideback fabric is heavy enough that a standard presser foot can let the top layer shift. Support the fabric behind and in front of the machine so its weight does not pull the seam off line.
Choosing Seam Placement and Selvage Handling
Place the seam where it will not cross the center of the quilt if you can help it. A seam that runs off-center is easier to hide under quilting and is less visible on the front. For a quilt that is only slightly wider than one panel, an off-center seam also leaves more uninterrupted backing under the quilting motif.
Trim both selvages before you join. Wideback selvages are often tighter than the body of the fabric and can pull the seam out of line, especially on longer joins. Removing them also eliminates the finished edge that can create a hard ridge under the quilting needle. Many quilters find that a 1/2-inch seam allowance gives enough strength without adding bulk; a 1/4-inch seam is faster but leaves less margin if the fabric ravels.
Pressing the Seam Open or to One Side
Press the seam open for the flattest back, which is the best choice for most longarm work. Use a dry iron on a cotton setting, and press from the wrong side. Avoid stretching the fabric as you press; let the weight of the iron do the work and lift and lower rather than sliding. Let the seam cool flat before you move the panel, since warm cotton can stretch out of shape.
The steps below summarise the joining process so you can check each stage at a glance.
| Step | What to do | Time or frequency |
|---|---|---|
| Lay panels | Lay first panel face up and smooth it flat | Before pinning |
| Align edges | Place second panel face down, matching cut edges | Before pinning |
| Pin | Pin perpendicular to the seam line | Every 6 to 8 inches |
| Sew | Use a 1/2-inch seam allowance and backstitch at ends | Keep grain straight |
| Press | Press the seam from the wrong side on a cotton setting | Let cool flat before moving |
| Check | Confirm the join is flat before loading | Before loading |
How to Piece Backing Fabric for a Quilt When Wideback Won't Cover It
Sometimes a quilt is simply too big for wideback alone, even with two panels. In that case, you can piece the backing from several pieces of fabric. Cut the pieces to match the widths, then sew them together with the same 1/2-inch seam and press as before.
Plan your pieces so the seams fall in a balanced pattern. Many quilters find that a simple three-panel layout looks neat and stays easy to load. For more on this approach, see our guide to piecing backing fabric, no. Please refer to the supporting guidance on piecing for further steps.

Troubleshooting Bowed, Wavy, or Stretched Joins
A bowed seam usually means the fabric stretched while you sewed. Wideback fabric is long and heavy, and the weight hanging off the table can pull the bottom layer faster than the feed dogs advance the top. Pull gently only on the top layer, and let the feed dogs do the work. If the bow is already sewn in, press the seam with steam and gently ease the longer layer back to match the shorter one before you load the backing; a small bow can often be worked out, but a pronounced one may require re-sewing the seam.
If the join looks wavy, check your pins. Pins placed too far apart let the layers shift, and wideback fabric is slippery enough that a 6-inch pin spacing is a safer default than 10 or 12 inches. Pin more often, sew slowly, and consider a glue stick or temporary fabric adhesive for the seam line if your machine tends to push the top layer.
Stretched fabric is hard to fix after the fact. Press the seam with steam only if the fabric is cotton, and let it cool flat before you load it. A common pattern is to mist the seam lightly, press, and then weight the panel flat until it is completely cool; cotton that is moved while warm can stretch again.
Watch out: if the backing is already loaded on the frame and shows a wavy seam, stop and re-pin the backing rather than quilting over it, since the distortion will be locked in by the stitching. For a join that is stretched beyond pressing, the most reliable fix is to remove the seam and re-sew it with a walking foot and closer pin spacing.
How to Prepare Quilt Backing for Longarm Quilting
Before loading, make sure the backing is flat, square, and free of stray threads. Give the fabric a light press so the seam lies smooth.
Mark the centerline of the backing with a removable marker. Matching this line to the centerline of your quilt top keeps the layers aligned on the frame. If you want a cover to protect your machine while you work, a longarm machine cover pattern can help.
Load Your Joined Backing and Start Quilting
Mount the backing on the leaders first, with the seam running horizontally across the frame. Smooth out wrinkles, then check tension from side to side.
Load the top and batting, then baste and start quilting. Check the back often for puckers. If the back looks tight or pleated, stop and adjust the tension before you go on.
Once your backing is loaded and smooth, you are ready to quilt. Linda's Electric Quilters carries wideback fabric and quilting supplies.
Frequently Asked Questions
How much extra backing fabric should you leave around a quilt top?
Leave at least 4 inches of extra backing on each side of the quilt top, so the backing measures roughly 8 inches larger than the top in both width and length. This margin gives you room for the quilt to shift during basting and loading on a longarm frame, and it lets you trim the excess square after quilting. Measure your top first, add the margin, and then square up the backing before you join any panels together.
Should you remove the selvages before joining quilt backing panels?
Yes, trim the selvages from both wideback panels before sewing. Selvage edges are often tighter woven and can pucker or pull the seam out of alignment. Cut straight along the grain, then match the trimmed edges carefully. Taking a few extra minutes here prevents a join that looks fine on the table but distorts once the quilt is loaded.
Which direction should you press a quilt backing seam?
Press the seam open or to one side, depending on your preference and how the quilt will be handled. Pressing open spreads the seam allowance and reduces bulk. If you press to one side, press toward the darker fabric. Whichever you choose, press before loading so the seam sets flat.
Do you need to piece wideback fabric for a quilt?
Often you don't. Wideback fabric is 108 inches wide, so many quilts can be backed with a single piece, or with one join at most. You only need to piece when your quilt top is wider than the fabric. In that case, join two wideback panels using a half-inch seam allowance and press the seam flat before loading.



