

Table of Contents
- What Are Simple Bargello Quilt Patterns
- Bargello Quilt Fabric Requirements and Selection
- Bargello Quilt Strip Piecing Tutorial
- How to Arrange Bargello Quilt Strips for Wave Effects
- Using a Bargello Quilt Design Chart
- Common Mistakes to Avoid When Sewing Bargello Quilts
- Finishing Your Bargello Quilt Project
- Frequently Asked Questions
Last Updated: October 10, 2026
What Are Simple Bargello Quilt Patterns
Bargello quilt patterns are geometric designs created by sewing fabric strips together and then rearranging them to form waves, chevrons, or other eye-catching effects.

The technique works in two stages: sew strips in color order (light to dark), then cut into segments and offset each to create the wave illusion.
Simple bargello quilt patterns suit all skill levels, beginners appreciate the straightforward process, experienced quilters love the speed, and the technique showcases fabric choices brilliantly.
At Linda's Electric Quilters, we carry several beginner-friendly bargello patterns, including the 123 Go! Bargello Quilt Pattern and Ride the Waves Bargello Quilt Pattern, both designed to make this technique accessible and enjoyable.

Bargello Quilt Fabric Requirements and Selection
Fabric selection determines whether your bargello quilt patterns will have a subtle or bold impact, and affects yardage calculations and construction efficiency.
Fabric Categories and Roles
Most simple bargello quilt patterns require three fabric categories:
- An ombre or color-gradated fabric: This is the foundation. Look for fabric that transitions smoothly from one color to another, light to dark, or one hue to another. Many quilters use a pre-made ombre fabric, but you can also select several solid or print fabrics in graduated values.
- A focus fabric: This is usually a larger-scale print or bold solid that anchors the design. The focus fabric becomes your accent strips within the bargello pattern.
- An accent or background fabric: This creates contrast and helps the wave effect pop visually.
Critical Fabric Selection Considerations
Directional prints and nap: Avoid directional focus fabrics for simple bargello quilt patterns, they shift orientation as you offset segments, breaking the visual flow. Use directional prints only in borders or sashing.
Ombre consistency: Check that the value progression is consistent across the width. Uneven transitions create gaps or muddy spots in your wave pattern. Lay the fabric flat in natural light; if the color shift is uneven or blotchy, choose a different bolt.
Shrinkage and prewashing: Cotton quilting fabric shrinks 2-5% when prewashed. If prewashing, add 3-5% extra yardage (e.g., 4.25 yards instead of 4). Prewashing is especially important for deep jewel tones and dark solids prone to dye bleeding. Test a small swatch first.
Calculating Total Fabric Yardage
For a simple worked example: A lap-size bargello quilt (approximately 50" × 60" finished) using 2-inch-wide strips typically requires:
- Ombre or color-gradated fabric: 1.5-2 yards (for 8-10 color gradations)
- Focus fabric: 1-1.5 yards (for accent strips and potentially borders)
- Accent or background fabric: 1-1.5 yards
- Backing fabric: 3.5-4 yards (see backing calculation below)
- Batting: 54" × 64" (one package of standard batting)
- Binding: 0.5 yard
Total: approximately 8-9 yards of fabric plus batting.
For larger quilts (twin, full, queen, king), add 1-2 yards per size increase. Always purchase an extra half-yard for testing, squaring up, or correcting cutting mistakes.
Standard-Width Versus Wide-Back Fabric
When calculating backing yardage, you have two options: standard quilting fabric (typically 42-44 inches wide after removing selvages) or wide-back fabric (typically 108 inches wide).
Standard-width backing: Requires piecing two or three widths depending on quilt size. For a 60-inch-wide quilt, you need 5-6 yards of 42-inch-wide fabric. Piecing adds seams that must be pressed carefully to avoid bulk.
Wide-back fabric: Eliminates seams. For a 60-inch-wide quilt, you need 2.5-3 yards of 108-inch-wide fabric. Trade-off: costs more per yard and offers fewer options, but ideal for avoiding seams.
Practical comparison for a 60" × 70" quilt:
- Standard-width backing: 5 yards of 42-inch-wide fabric, one horizontal seam
- Wide-back backing: 2.5 yards of 108-inch-wide fabric, no seams
Choose based on your budget, design preferences, and tolerance for seaming.
Usable Width and Selvage Removal
Fabric labeled 42-44 inches wide includes selvages; usable width is typically 40-42 inches. For 2-inch strips, you can cut approximately 20 from one width. If you need 24 strips, purchase enough for two widths.
Always remove selvages before sewing strips together. Selvages don't quilt well and can pucker during the quilting process.
Bargello Quilt Strip Piecing Tutorial
Cutting Your Strips to Size
Strip width is the foundation of your bargello quilt patterns project. Most call for strips between 1.5 and 2.5 inches wide; check your pattern for the exact measurement, as it affects how the wave reads.
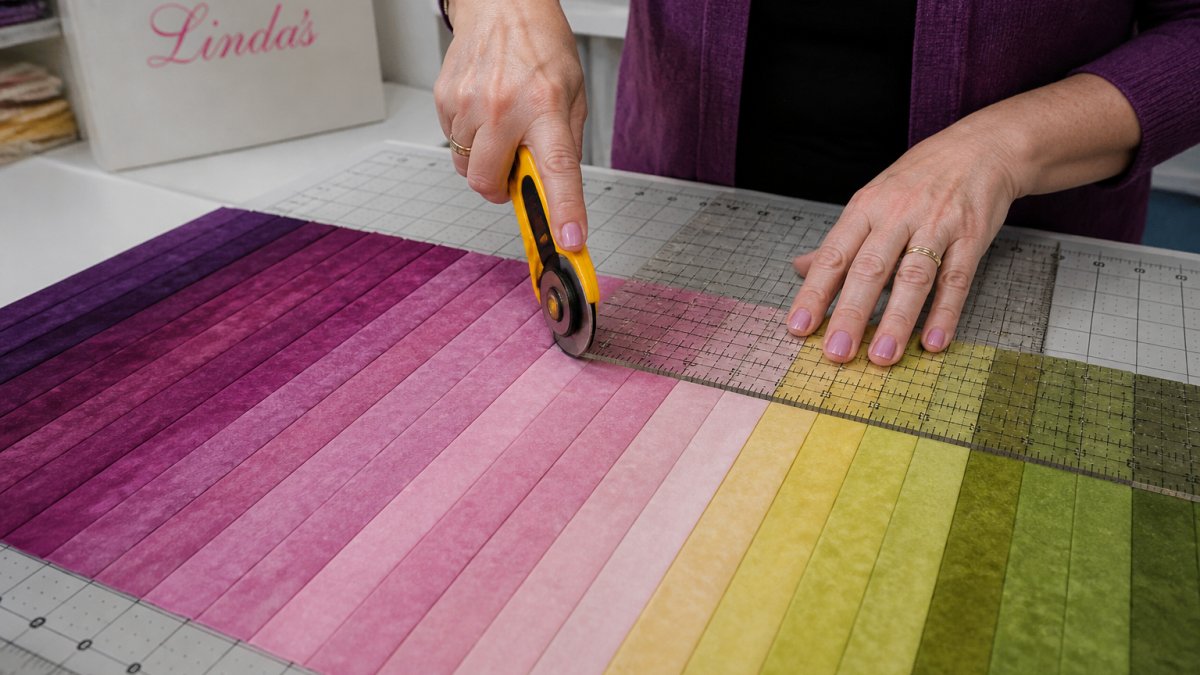
Use a rotary cutter, ruler, and self-healing mat for accuracy. A quilting ruler with clear markings makes this task faster and more precise than measuring by hand.
- Cut strips perpendicular to the selvage using a rotary cutter and ruler. Make clean, straight cuts.
- Stack strips in color order from lightest to darkest.
- Remove selvages from both edges; they don't quilt well and can pucker.
- Square up edges if crooked. Straight edges are essential for even seam allowances.
Sewing Strips Together Accurately
Consistent quarter-inch seam allowances are essential for bargello quilt patterns. Even slight variations throw off dimensions and misalign the wave.
Use a quarter-inch presser foot on your machine if you have one. If not, mark a guide on your machine bed with tape or use the needle position adjustment to ensure you're sewing exactly a quarter-inch from the edge.
- Sew strips together with right sides facing, using consistent speed.
- Press seams to one side (usually toward darker fabric) after each pair.
- Continue adding strips in order until complete.
- Press the entire strip set from the front to ensure flat seams.
How to Arrange Bargello Quilt Strips for Wave Effects
Once your strip set is complete and pressed, it's time to cut and arrange it to create the wave effect that makes bargello quilt patterns so striking.
Cut your strip set into segments perpendicular to the seams. The width of each segment depends on your pattern, typically between 1.5 and 3 inches.
Lay out segments in rows and stagger each by offsetting one or two segments left or right. This creates the wave illusion. A small offset creates a gentle wave; a larger offset creates a dramatic chevron.
Photograph your layout before sewing as a reference if pieces shift.
Using a Bargello Quilt Design Chart
A bargello quilt design chart is a numbered grid showing which segments go where and in what order.
Many simple bargello quilt patterns include a design chart in the printed instructions. If yours does, use it as your reference for arrangement. The chart removes guesswork and ensures consistency across rows.
If designing your own arrangement, create a grid on graph paper with rows and columns matching your quilt dimensions. Number each segment and fill in the grid showing where each appears in each row.
Use the design chart as your roadmap while sewing rows together. Mistakes caught early are easier to fix.
Road to Success Quilt Pattern →
Common Mistakes to Avoid When Sewing Bargello Quilts
Knowing what goes wrong helps you avoid it. Here are the pitfalls most quilters encounter:
Inconsistent seam allowances throw off wave alignment. Use a quarter-inch presser foot and test on scrap fabric.
Pressing seams in different directions causes puckering. Press all seams the same direction.
Cutting segments at an angle distorts the wave. Use a ruler and rotary cutter for 90-degree cuts.
Forgetting to remove selvages leads to puckering during quilting.
Using directional focus fabric shifts the pattern as you offset rows. Use non-directional prints or solids.
Skipping the design chart makes it easy to sew rows in the wrong order. Create or reference a chart to prevent mistakes.
Finishing Your Bargello Quilt Project
Once your quilt top is sewn and pressed, you're ready for the final steps: adding borders, quilting, and binding. Finishing is where many quilters rush, but precision here ensures your bargello wave remains sharp and your quilt lies flat for years.
Measuring and Adding Borders
Measure your quilt top through the center in three places (top, middle, bottom) and use the average for border strips. This prevents wavy borders caused by uneven piecing.
Borders can echo the color gradient or provide contrast. Choose a solid or non-directional print that complements your wave without competing for attention.
Sew borders to opposite sides first (top and bottom), then left and right. Press seams toward the border. This reduces stress and prevents stretching.
Choosing Batting for Bargello Quilts
Batting choice affects how your bargello wave reads. Batting that's too thick or lofty can obscure the geometric precision.
Low-loft cotton batting (0.25 inches) is ideal, it quilts smoothly, compresses evenly, and shrinks slightly (2-5%) during the first wash, adding texture. Polyester batting is more stable but can create a puffy appearance. Bamboo or cotton-blend batting offers a middle ground.
Avoid high-loft or thick batting for simple bargello quilts; the extra bulk will flatten your geometric precision and make quilting lines harder to see.
Layering the Quilt Sandwich
Cut backing and batting 4-8 inches larger than your quilt top. Press backing fabric before layering to prevent puckers. Layer in order: backing (wrong side up), batting, quilt top (right side up). Smooth from center outward.
Baste the layers using spray basting, hand basting, or safety pins every 4-6 inches. Do not skip basting; unbasted quilts shift during quilting.
Quilting Bargello Quilts
Straight-line quilting echoing the wave direction is most effective. Quilt along seams (stitch-in-the-ditch) or 0.25 inches on either side. Free-motion quilting is suitable if experienced; avoid dense quilting over strips, which obscures color gradation.
Quilting density: Aim for lines no more than 4 inches apart. Sparse quilting can shift; dense quilting (closer than 2 inches) can flatten the wave.
Test your quilting plan on a practice sandwich before starting your quilt.
Trimming and Squaring the Quilt
Square up your quilt using a large ruler and rotary cutter. Align the ruler with each corner, trim excess batting and backing, leaving a 0.25-inch margin for binding. Square all four corners.
A squared quilt binds more evenly and lies flatter when finished.
Binding Your Bargello Quilt
Double-fold binding is standard. Cut 2.25-inch strips, sew end-to-end, and press in half. Sew binding to the front using a 0.25-inch seam allowance, starting in the middle of one side. At corners, stop 0.25 inches from the edge, backstitch, pivot, fold at 45 degrees, and continue. Hand-stitch or machine-stitch the binding to the back with matching thread.
Press the binding after stitching to set the seams and create a crisp edge.
Final Pressing and Washing
After binding is complete, give your quilt a final gentle press from the back. Use a pressing cloth to protect the surface, and avoid pressing directly on seams, which can flatten them.
First wash: Wash your bargello quilt in cool water with a mild detergent designed for quilts (such as Quilt Wash or Ecos Free & Clear). Avoid bleach and fabric softener. The first wash allows cotton batting to shrink slightly, which adds texture and definition to your finished quilt. Dry on low heat or air dry to prevent excessive shrinkage.
Your bargello quilt is now complete and ready to be treasured for years.
Frequently Asked Questions
What is the easiest Bargello quilt pattern for beginners?
The easiest Bargello quilt patterns use pre-cut ombre or color-gradated fabrics paired with a single focus fabric. Patterns like the 123 Go! Bargello ($11.19) and Road to Success ($11.19) are designed for beginners and require only basic strip piecing and sewing in straight lines. These patterns eliminate complex color selection and focus on the fundamental strip-piecing technique that creates the signature wave effect.
How wide should fabric strips be for a Bargello quilt?
Most beginner Bargello patterns use strips between 1.5 and 2.5 inches wide, cut from selvage to selvage. The exact width depends on your pattern instructions. Wider strips (2 to 2.5 inches) create bolder, more dramatic waves and are easier for new quilters to handle. Narrower strips require more precision but produce finer detail. Always check your pattern specifications before cutting to ensure accuracy.
How do you arrange strips to create a Bargello wave effect?
Arrange your strips in a gradient sequence, moving from one color value to the next in a logical order. For example, progress from light cream through medium beiges to dark browns. Once sewn into a strip set, cut the assembled strips into segments (usually 2 to 3 inches wide), then offset each segment by one or more rows when sewing them together. This offset creates the diagonal wave pattern that defines Bargello quilts.
Can you make a Bargello quilt with a sewing machine?
Yes, Bargello quilts are made entirely on a standard sewing machine using basic straight-line seams. The technique involves strip piecing (sewing strips together), cutting the sewn strips into segments, and then reassembling those segments with an offset to create the wave effect. No special equipment is required beyond a sewing machine, rotary cutter, and quilting ruler. This makes Bargello quilting accessible to anyone with a basic machine.


