
Table of Contents
- What Are Longarm Quilting Patterns?
- Understanding Longarm Quilting Pantographs
- Longarm Quilting Designs for Beginners
- Free Longarm Quilting Patterns and Where to Find Them
- Edge-to-Edge Quilting Patterns Explained
- Digital Longarm Quilting Patterns and File Formats
- Choosing the Right Pattern for Your Quilt
- Frequently Asked Questions
Last Updated: October 20, 2026
What Are Longarm Quilting Patterns?
Longarm quilting patterns are designs stitched onto quilts using a longarm machine, which has a longer arm and throat depth than standard home sewing machines.
What makes longarm quilting patterns distinct is the freedom they offer. Unlike domestic machine quilting, which is limited by the machine's reach, longarm machines allow quilters to move fabric freely in multiple directions.
At Linda's Electric Quilters, we understand that choosing the right pattern can feel overwhelming, especially when you're new to longarm quilting.
Understanding Longarm Quilting Pantographs
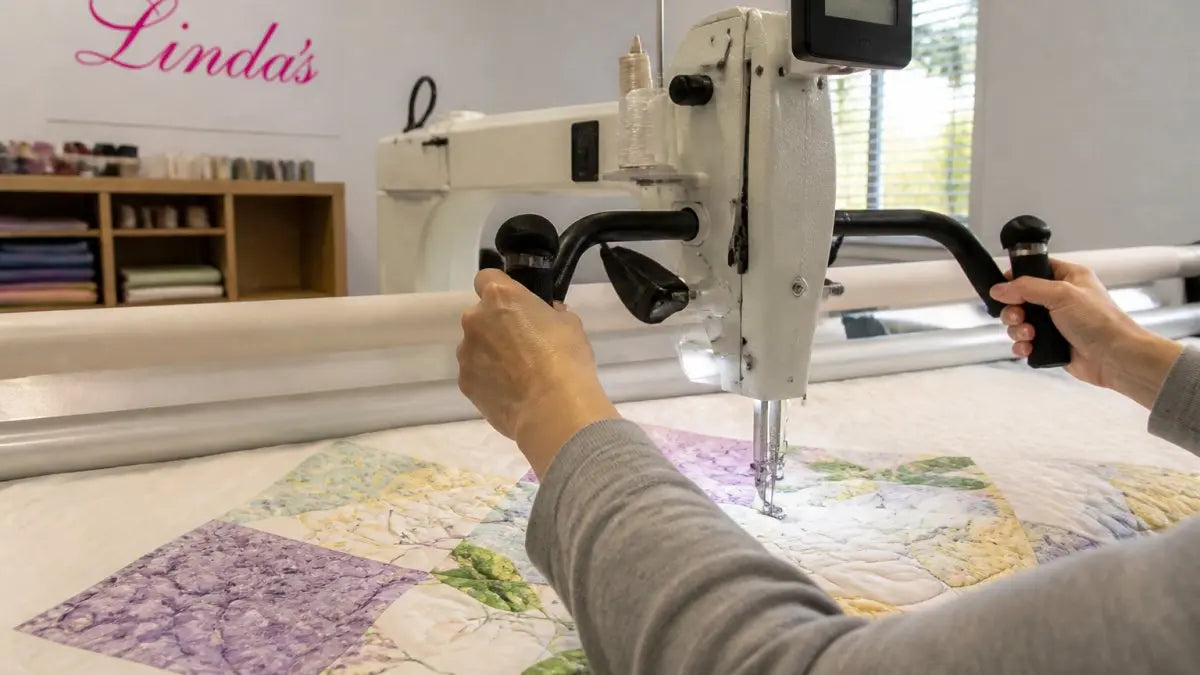
A pantograph is a paper pattern used with longarm machines to guide continuous-line quilting designs. The quilter traces along the printed lines on the pattern with a stylus or marking tool, and the needle follows that same path on the quilt. Pantographs eliminate the guesswork of freehand quilting and are perfect for beginners who want consistent, professional results without years of practice.
How Pantographs Work
Pantographs function through a simple mechanical principle: the pattern repeats continuously along its length, allowing you to stitch an entire quilt without stopping.
The pantograph pattern itself is printed on paper, typically 121 inches long, though longer versions are available. Common sizes include 4-inch, 5-inch, 6-inch, 7-inch, and 10-inch repeats, which refer to how far apart the pattern repeats vertically.
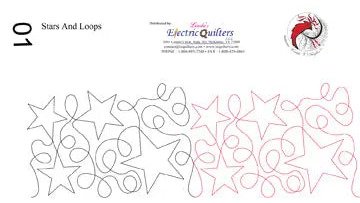
One practical advantage of pantographs is their adaptability. This pro tip appears on many pantograph product pages, including designs like the 001 Stars and Loops Pantograph by Linda V. Taylor, which offers multiple size options to suit different quilts.

Pantograph Setup and Alignment
Proper setup is essential for successful pantograph quilting. Start by securing your quilt on the longarm machine, ensuring it's stretched evenly and smoothly.
The pattern shield goes directly over the pantograph pattern. This clear overlay has a small opening (usually a crosshair or circle) that you'll follow with your stylus as you quilt.
Alignment mistakes are common but easily corrected with practice. The most frequent issue is drifting off-line, which happens when the stylus pressure is inconsistent or when you move the shield too quickly. Take your time, especially when learning.
Longarm Quilting Designs for Beginners
Beginning your longarm quilting journey doesn't require mastery of complex designs. Smart pattern selection builds confidence and creates beautiful results from your first project. Beginner-friendly longarm quilting patterns share one common trait: they use continuous lines that flow naturally without requiring sharp directional changes or intricate details.
Starting with Simple Continuous-Line Patterns
Simple continuous-line patterns are the gateway to successful longarm quilting. The 155A Meandering Pantograph by Linda V. Taylor exemplifies this approach, the meandering design has been popular in quilting for years because it's both forgiving and visually appealing.

What makes continuous-line patterns ideal for beginners is their forgiving nature. If your stitching wavers slightly, the organic flow of the design camouflages minor imperfections. This psychological advantage matters: when you can't see your mistakes, you build confidence faster. After completing a few quilts with continuous-line patterns, you'll develop the muscle memory and control needed for more intricate designs.
Building Confidence with Guided Designs
Once you've mastered basic continuous-line patterns, guided designs offer the next step. The 282 Heart and Pineapple Blocks B Pantograph by Linda V. Taylor bridges this gap, it combines block-based structure with flowing elements, giving you defined areas to quilt while maintaining the continuous-line approach.

Guided designs also teach you how pattern selection affects the finished quilt. You'll see firsthand how a pattern's scale, density, and style interact with your quilt top. This understanding becomes invaluable as you develop your own design preferences and start making intentional choices about which patterns suit which projects.
Free Longarm Quilting Patterns and Where to Find Them
Free longarm quilting patterns exist, though they're often limited in variety and design complexity. Many machine manufacturers provide basic patterns with their equipment, and some quilting organizations offer free downloads to members.
The trade-off with free patterns is worth considering. Paid patterns from established designers like Linda V. Taylor offer tested designs, consistent quality, and patterns optimized for specific machines.
Linda's Electric Quilters carries a curated selection of patterns from respected designers. This approach aligns with what many serious quilters discover: a smaller collection of excellent patterns beats a massive library of inconsistent designs.
Edge-to-Edge Quilting Patterns Explained
Edge-to-edge quilting means the pattern covers the entire quilt surface from edge to edge, with no unquilted areas. This approach differs from block quilting (which quilts inside pieced blocks) or custom quilting (which varies the design based on the quilt top). Edge-to-edge patterns are popular because they're efficient, create consistent texture, and work with virtually any quilt top.
All-Over Designs and Stitch Density
All-over designs are edge-to-edge patterns that repeat uniformly across the entire quilt. The stitch density, how close together the stitches are, dramatically affects the quilt's appearance, drape, and durability. Dense quilting (stitches 1-2 inches apart) creates pronounced texture and holds layers firmly. Open quilting (stitches 4-6 inches apart) is faster to execute and creates subtle texture.
001 Stars and Loops Pantograph by Linda V. Taylor →
Beginners often underestimate the impact of stitch density. A densely quilted quilt looks more finished and professional, while sparsely quilted quilts can appear flat or unfinished. However, denser quilting requires more time and practice to execute smoothly.
Choosing Scale and Pattern Repeat for Your Quilt Top
Pattern scale refers to the size of the design motif, small-scale patterns have tight repeats, while large-scale patterns spread across bigger areas. Your quilt's size, the quilt top's visual weight, and your skill level all influence scale selection.
Pattern repeat is the distance the design travels before it repeats. In pantographs, this is typically measured in inches (4-inch, 6-inch, 10-inch repeats). Smaller repeats create denser quilting, while larger repeats are more open. Your choice should balance visual interest with your quilting speed and skill level.
| Pattern Characteristic | Small-Scale Quilts | Large-Scale Quilts | Busy Quilt Tops | Solid Quilt Tops |
|---|---|---|---|---|
| Recommended Repeat Size | 4-6 inches | 6-10 inches | 4-6 inches | 8-10 inches |
| Stitch Density | Moderate to dense | Open to moderate | Moderate to dense | Open to moderate |
| Design Complexity | Simple to moderate | Moderate to complex | Simple | Moderate to complex |
| Quilting Time | Moderate | Moderate to long | Moderate | Moderate to long |
Digital Longarm Quilting Patterns and File Formats
Digital longarm quilting patterns have revolutionized the industry by enabling computerized quilting machines to execute complex designs automatically. Instead of manually guiding a pantograph, you load a digital file into the machine's computer, and the machine stitches the pattern precisely. This technology appeals to quilters who want intricate designs without the skill required for freehand quilting.
Computerized Quilting and Machine Compatibility
Computerized quilting machines accept specific file formats depending on the manufacturer. Before purchasing a digital pattern, verify that the file format matches your machine's capabilities. Incompatible files won't load, wasting both money and time.
Machine compatibility extends beyond file format. Some machines have limitations on design complexity, maximum pattern size, or stitch density. Older machines may struggle with intricate patterns, while newer models handle virtually any design. Check your machine's manual or contact the manufacturer to confirm specifications before committing to digital patterns.
Downloading and Preparing Files for Your Machine
Once you've purchased a compatible digital pattern, the download process is straightforward. Most sellers provide instant downloads via email or account portals. Before stitching, open the file in your machine's software to verify the design appears correctly and that the file size is appropriate for your quilt.
Some quilters resize patterns to match their quilt dimensions. This requires design software and technical knowledge. Many pattern sellers provide multiple size options to eliminate this step. When selecting a pattern, choose the size that best matches your quilt rather than attempting to resize it yourself.
Choosing the Right Pattern for Your Quilt
Pattern selection is where technical knowledge meets creative intuition. The right pattern enhances your quilt top, while the wrong one can overwhelm or underwhelm your design. Several factors guide this decision.
Matching Pattern Style to Quilt Top Design
Your quilt top's style, traditional, modern, art, or eclectic, should guide pattern selection. Traditional pieced quilts often pair well with classic motifs like feathers, swirls, or geometric patterns. Modern quilts benefit from bold, graphic patterns or negative space quilting that emphasizes the pieced design.
Color and scale matter too. A busy, multi-colored quilt top needs a pattern that won't compete visually. A simple, solid-colored quilt can carry a more elaborate design. When in doubt, choose a pattern one step simpler than you think you need, quilting is meant to enhance, not dominate.
Evaluating Pattern Density and Quilting Area
Before committing to a pattern, estimate how long the quilting will take. A 60-inch by 80-inch quilt with a 2-inch stitch spacing requires roughly 1,200-1,500 linear inches of stitching.
The quilting area also affects pattern choice. Patterns designed for edge-to-edge quilting work on any quilt size, but they must accommodate your machine's reach. Longarm machines typically handle quilts up to 120 inches wide, while midarm machines max out around 24 inches.
Choosing longarm quilting patterns transforms raw quilt tops into finished heirlooms. Linda's Electric Quilters offers an extensive collection of patterns, including designs by Linda V. Taylor and educational resources like the Designs with Lines Quilting Sketchbook and Mastering the Art of Longarm Quilting book.
Frequently Asked Questions
What is the difference between a pantograph and a longarm quilting pattern?
A pantograph is a paper or plastic template that you trace with a stylus while the machine needle follows the design. Longarm quilting patterns include pantographs and freehand designs. Pantographs work on any longarm machine without electronics. Paper pantographs like the 001 Stars and Loops Pantograph by Linda V. Taylor offer continuous-line designs you can trace and repeat.
Can beginners use longarm quilting patterns?
Yes. Beginners should start with simple continuous-line patterns and guided designs that build confidence gradually. Paper pantographs designed for beginners offer clear, repeatable lines that reduce guesswork. Resources like the Designs with Lines Quilting Sketchbook help you practice free-motion designs at home or on your machine. Many beginners find success with meandering patterns and simple floral motifs before advancing to complex edge-to-edge designs.
Where can I find free longarm quilting patterns?
Free longarm quilting patterns are available through online quilting communities, manufacturer websites, and educational resources. Many quilters also find free designs through quilting blogs and social media communities. However, paid patterns often offer higher quality, more intricate designs and better support for specific machines and skill levels.
How do I know if a longarm quilting pattern will work with my machine?
Check your machine's compatibility with the pattern format. Paper pantographs work on any longarm, midarm, or domestic machine with a standard needle and presser foot. Always verify the pattern designer's recommendations and your machine's manual before purchasing. Linda's Electric Quilters' resources can help you identify which pattern types suit your equipment.
What makes edge-to-edge quilting patterns different from other designs?
Edge-to-edge quilting patterns, also called all-over designs, cover the entire quilt surface from edge to edge with continuous stitching. Unlike custom quilting that highlights specific quilt blocks, edge-to-edge patterns create a unified texture across the whole quilt. These designs work well for scrap quilts and modern designs where you want consistent stitch density. Pattern scale and repeat length matter, larger repeats create bold texture, while smaller repeats add fine detail.
How do I set up and use a paper pantograph on my longarm machine?
Place the paper pantograph under your pattern shield on the machine frame. Align the pattern with your quilt's starting point and secure it. Use the stylus to trace the pattern line while the machine needle follows the design. Move the pattern shield smoothly and steadily, rushing causes skipped stitches. The 155A Meandering Pantograph and 282 Heart and Pineapple Blocks B Pantograph both come in multiple sizes to fit different quilts. Pro tip: when you reach the pattern's end, find the repeat point, mark it, and shift the pattern down to extend the design for larger quilts.
What is stitch density and why does it matter for longarm quilting patterns?
Stitch density refers to how many stitches per inch your pattern creates. Higher density (more stitches) adds texture and holds batting firmly, reducing shifting. Lower density creates a lighter look and quilts faster. Your choice depends on your quilt's purpose: bed quilts benefit from moderate to high density for durability, while art quilts may use varied density for visual effect. Pattern scale also affects density, tighter, smaller patterns naturally create higher stitch counts than large, flowing designs.


