

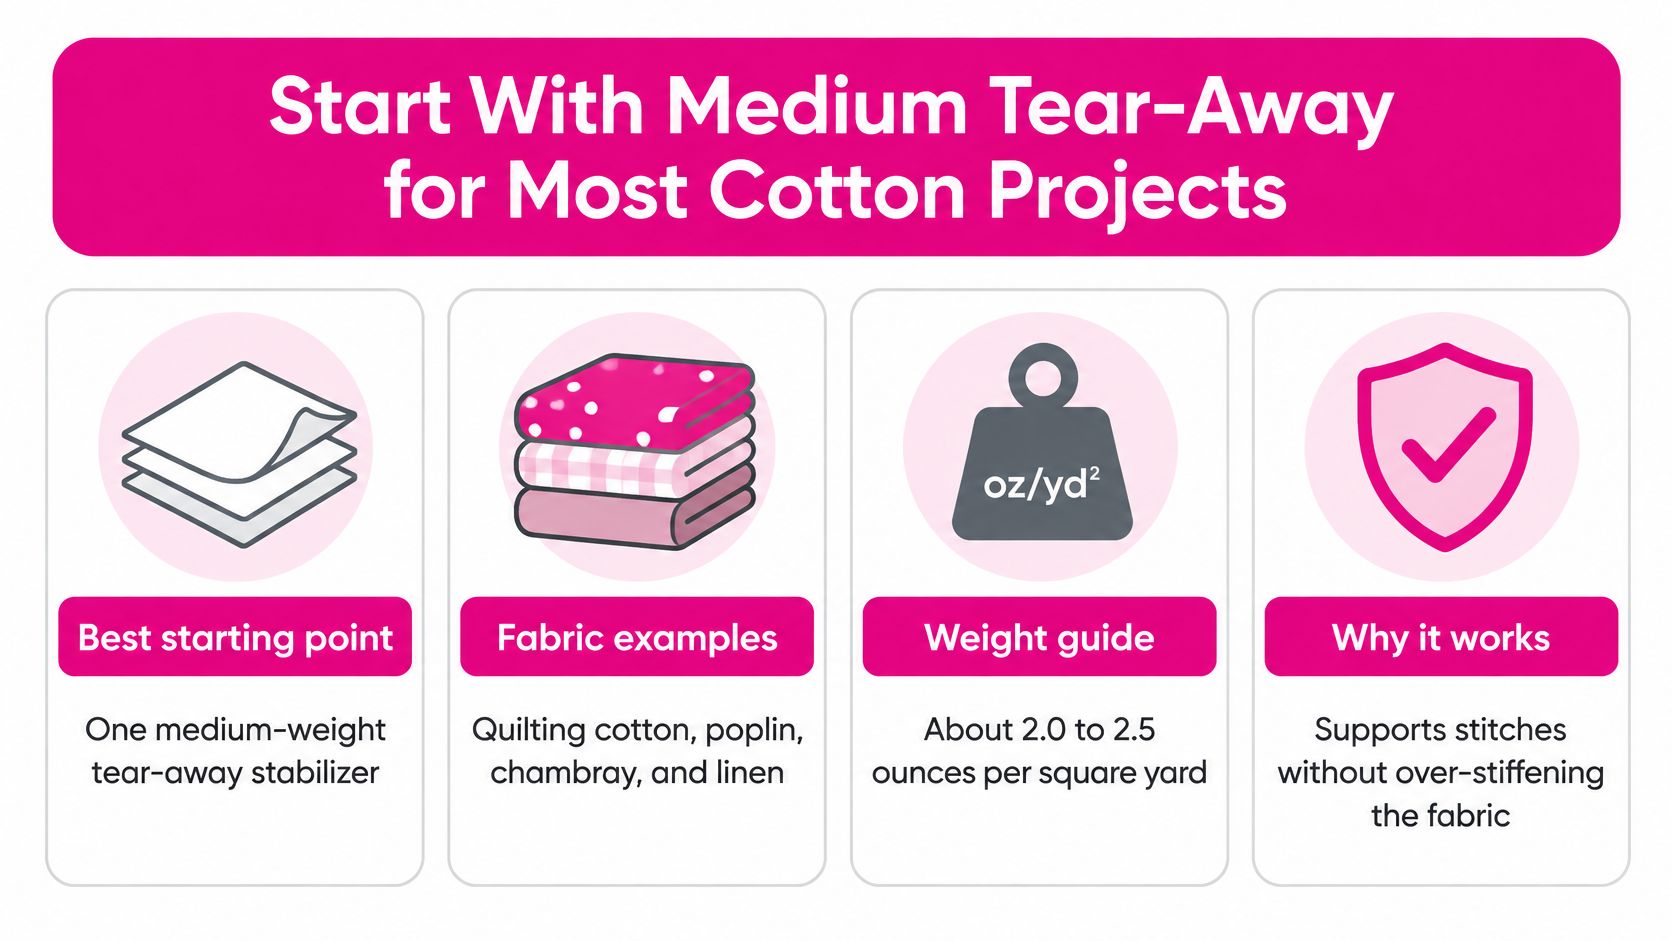
For most woven cotton, start with one medium-weight tear-away stabilizer, about 2.0 to 2.5 ounces per square yard, using two layers when fabric weight or stitch density is uncertain. But the familiar advice to “just use tear-away” misses what matters most: how the cotton behaves under the design and after washing.
A crisp quilt block, a sheer blouse, and a stretchy cotton tee don't need the same backing. The best embroidery stabilizer for cotton fabric supports the stitches without ruining the fabric's hand, drape, or finished reverse side.
Start With Medium Tear-Away for Most Cotton Projects
Medium tear-away is a practical starting point for stable woven cotton because it supports stitching without leaving a full permanent backing. Quilting cotton, poplin, and chambray usually fit this category. Linen behaves similarly in many embroidery setups, although it isn't cotton.
The University of Illinois School of Art & Design stabilizer tutorial recommends beginning with two layers of medium-weight tear-away, then checking the sample for stiffness, gaps, and irregularities. That cautious baseline is useful when you don't know whether the fabric or design will tolerate lighter support.
Quick picks by cotton project
| Project | Cotton type | Stabilizer | Layers |
|---|---|---|---|
| Quilt blocks and patchwork | Quilting cotton, medium weight | Medium-weight tear-away for removable support | 1 layer, 2 if design is dense |
| Table linens and napkins | Plain-weave cotton | Medium-weight tear-away for a cleaner reverse | 1 to 2 layers |
| Lightweight blouses | Lawn, voile, batiste | Lightweight tear-away or heat-away to limit show-through | 1 layer |
| Dense fills and satin columns | Poplin, chambray | Cut-away to resist pulling and shifting | 1 layer |
| Open-weave or eyelet cotton | Eyelet, sheer cotton | Water-soluble to avoid visible permanent backing | 1 layer |
These are sample setups, not guarantees. A small outline flower and a solid monogram can behave differently on the same cloth.
Use this visual guide when sorting fabric and backing for your project.
Is cotton cap backing the same as quilt backing?
Cap construction introduces seams, curved surfaces, and different hooping demands. If you're moving from flat cotton projects to headwear, Dirt Cheap Product, Inc. provides a separate resource to find stabilizer for embroidered caps.
For flat projects, gather your backing and sample fabric before choosing thread colors. Linda's notions selection is a useful place to start your supply list.
After testing, change only one variable at a time: backing weight, layer count, or stabilizer type. Jumping straight to the heaviest backing can replace puckering with an equally unwanted stiff patch.
Five Stabilizer Types Compared on Cotton
Five stabilizer types on cotton
| Type | Support | Removal | Best cotton use | Main risk |
|---|---|---|---|---|
| Tear-away | Medium | Tear away from the stitching | Quilt blocks, tightly woven cotton | Residue and edge fraying if removed roughly |
| Cut-away | Strong | Trim excess around stitching | Dense designs, stretch-prone cotton knits | Stiffness on soft cotton |
| Water-soluble | Temporary | Rinse or dissolve | Open-weave or eyelet cotton | Shifting if the base is too open; residue if incompletely rinsed |
| Heat-away | Light to medium | Remove with heat | Lightweight cotton where residue shows | Incomplete removal can leave a film |
| Fusible | Medium, adds body | Permanent versions stay in the piece | Patches, soft cotton needing body | Adhesive stiffness |
The best embroidery stabilizer for cotton fabric isn't necessarily the easiest backing to remove. Choose the support that suits the fabric's construction and the finished item's use.
Which stabilizer should stay behind the embroidery?
Cut-away provides lasting support. It's useful beneath dense designs on firm cotton and especially beneath cotton knits that continue stretching during wear. Trim the excess into a smooth shape rather than leaving sharp corners against the garment.
Tear-away suits cloth that can support the embroidery once the excess backing is gone. OESD's stabilizer reference identifies tightly woven quilt fabrics, poly/cotton, canvas, and duck cloth as suitable uses. Remove it patiently rather than trying to pull the entire sheet away at once.
Water-soluble backing helps when permanent material would show through eyelet or sheer cotton. Use a backing intended to support embroidery, not merely a thin topping meant to stop stitches sinking into pile.
Heat-away makes sense when washing isn't suitable and the cotton tolerates the removal temperature. Test the heat process on a scrap because fabric finishes, thread, and surrounding trims may react differently.
Fusible describes attachment, not necessarily permanence. Permanent fusible support adds body, while fusible tear-away products combine temporary bonding with removable backing.
Tear-away prioritizes removal; cut-away prioritizes lasting control. Choose according to what the finished cotton needs.
What happens with a dense napkin monogram?
A dense monogram on a cotton napkin creates competing needs. Cut-away may preserve alignment but leave an obvious firm area; tear-away may feel softer overall yet leave trapped backing beneath the stitches.
Reducing the monogram's density may produce a better napkin than adding more support. For another apparel-decoration context, the Stoles.com® guide to sash embroidery is a useful companion when planning placement and presentation, though sash construction isn't a substitute for testing cotton.
For thread selection, Linda's offers Mako Cotton Embroidery Thread Solid 50wt 6452yds Chalk, a cotton thread listed for machine embroidery as well as piecing and quilting. Match the thread to your design rather than assuming every embroidery file suits every thread.
Matching Stabilizer Weight to Fabric and Stitch Count
Stabilizer weight by stitch count
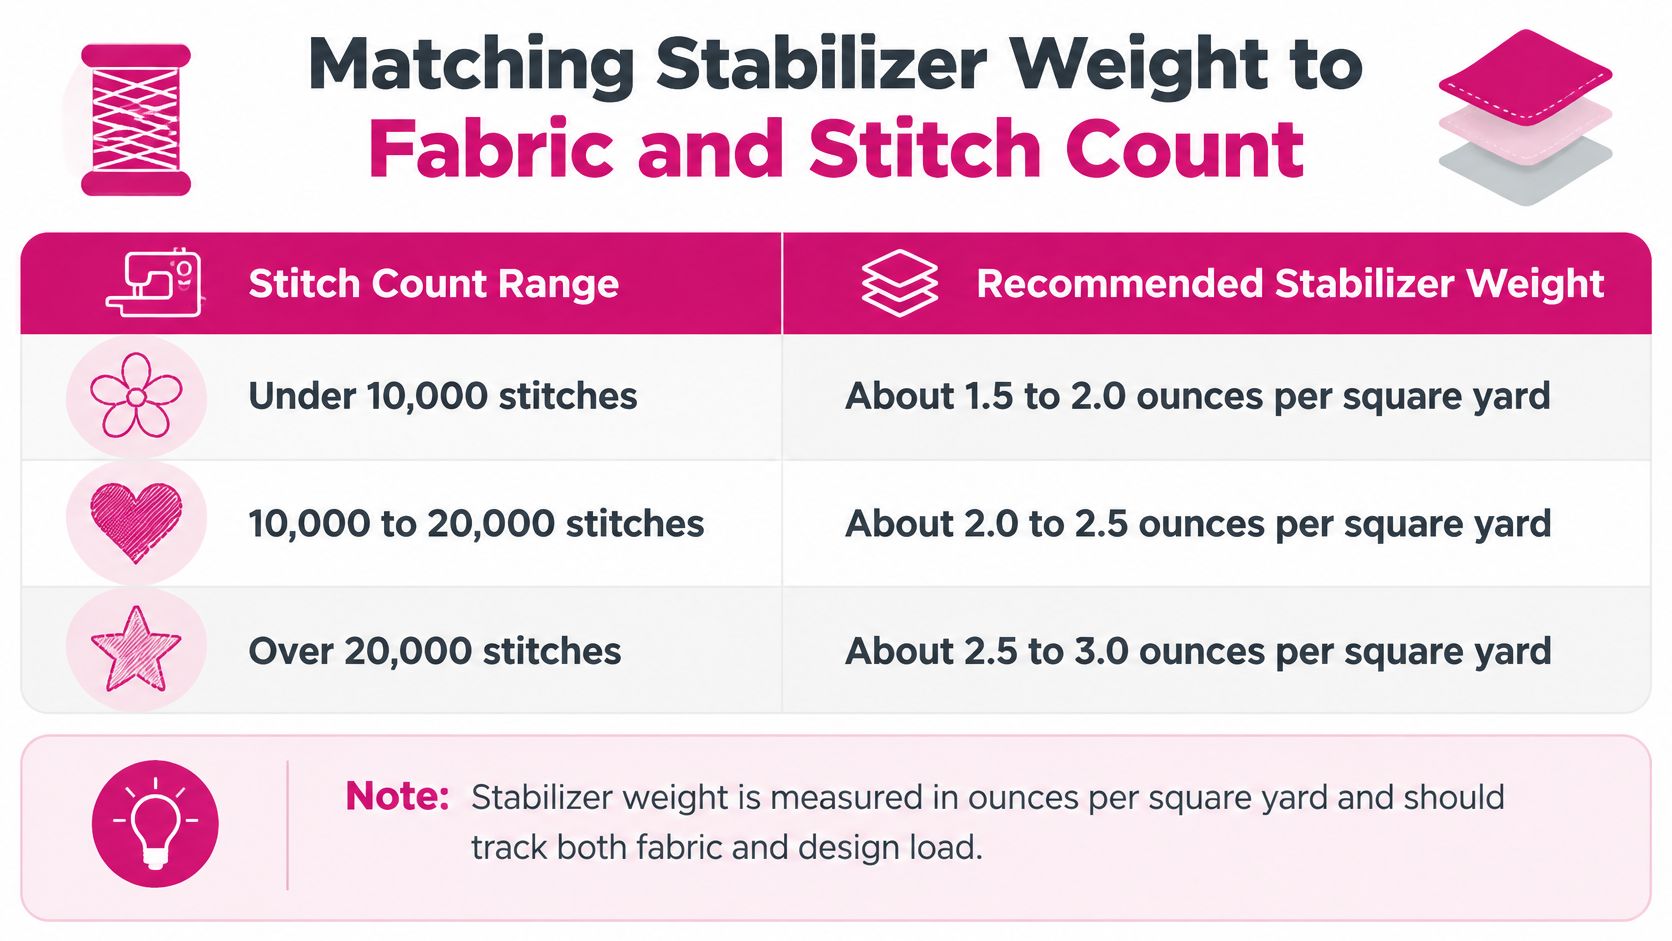
The working ranges in the SewingTrip embroidery stabilizer guide are under 10,000 stitches with approximately 1.5–2.0-ounce backing, 10,000–20,000 with 2.0–2.5 ounces, and over 20,000 with at least 2.5 ounces.
| Stitch count | Stabilizer weight | Cotton example |
|---|---|---|
| Under 10,000 stitches | 1.5 to 2.0 oz per square yard | Small quilt block motif |
| 10,000 to 20,000 stitches | 2.0 to 2.5 oz per square yard | Medium monogram on cotton tea towel |
| Over 20,000 stitches | 2.5 oz per square yard or more | Dense fill design on poplin |
| Dense design on soft cotton | Two layers of lighter backing | Monogram on lawn or voile |
Treat these ranges as screening tools, not machine settings. Total stitch count doesn't reveal how tightly the stitches are packed into a small area.
The chart makes the starting ranges easier to compare.
Does heavier cotton always need heavier backing?
Not automatically. A light running-stitch design on canvas may need less added support than a compact satin monogram on soft poplin.
AllStitch's machine embroidery stabilizer guide lists 2.0–2.75-ounce backing for cotton and moderate-density designs, while 3.0–3.5-ounce backing is associated with dense embroidery and thick materials such as denim, canvas, and leather. Don't treat those heavyweight products as the default for ordinary quilting cotton.
Say you're placing a 15,000-stitch motif on quilt sashing and considering the same motif for a cotton tunic. The sashing will be supported by the surrounding quilt construction; the tunic must move and drape on the body. The same backing may be acceptable for the quilt and uncomfortable in the garment.
Before purchasing backing, open the design information panel in your embroidery software. Check stitch count, finished dimensions, fill coverage, and overlapping elements.
- For soft garments: Consider an airier design before adding backing weight.
- For sheer cotton: Hold the sample against light to check show-through.
- For concentrated fills: Consider a patch or second fabric layer when the construction allows it.
Add suitable sample backing to your Linda's shopping list rather than buying a large quantity before testing. Over-stabilizing wastes material and can leave the garment with a boardy hand.
Hooping and Needle Choices That Protect Cotton
A stabilizer can't compensate for stretched hooping or a damaged needle. Before changing backing, inspect the setup that controls fabric movement and needle penetration.
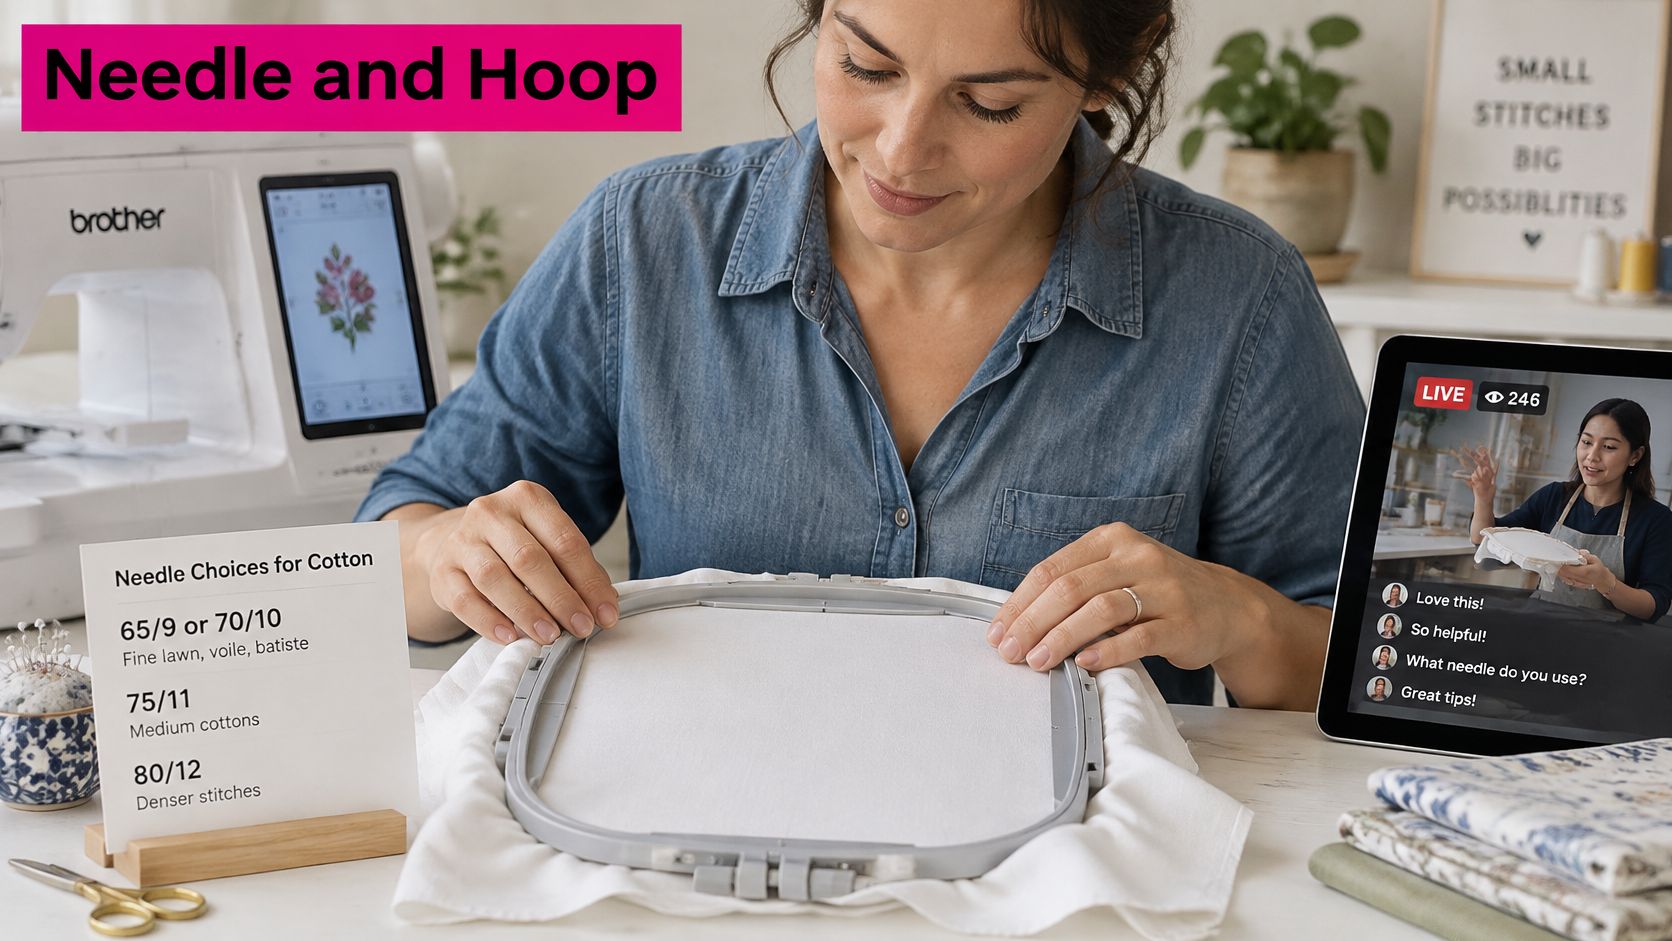
This demonstration image shows the hoop-and-machine setup involved in cotton embroidery.
What needle size works for woven cotton?
Use these starting choices, then confirm that the needle accommodates your thread and machine:
- Fine lawn, voile, and batiste: Try a 65/9 or 70/10 embroidery needle to limit visible holes.
- Quilting cotton and poplin: A 75/11 embroidery needle is a useful starting point.
- Canvas-weight cotton and duck: Consider an 80/12 or 90/14 needle for clean penetration.
These are woven-fabric choices. Cotton jersey requires a knit-appropriate point, and a heavier thread may require a larger eye than a delicate fabric would otherwise suggest.
Replace a dull or burred needle before the final project. Persistent thread pulls or enlarged holes aren't always evidence that the stabilizer is wrong.
How tightly should cotton be hooped?
Hoop fabric and stabilizer together whenever practical. Smooth them flat and tighten the hoop until they're secure, but don't pull the cotton into a stretched drumhead.
Mark the grainline and design center before hooping. Keep the stitching field comfortably inside the usable hoop area, clear of clamps and the presser foot's travel.
Floating can protect delicate cloth from hoop marks, but it sacrifices some control. Secure floated fabric with a suitable temporary adhesive or basting outline, and watch dense fills closely for lifting or creeping.
Setup check: If the cotton changes shape when released from the hoop, correct the hooping before blaming the backing.
Test top and bobbin tension on the actual cotton-and-stabilizer combination. Rethread first if loops form, and inspect the bobbin casing for lint before adjusting tension screws.
Bobbin thread showing on the face may indicate tension imbalance rather than insufficient backing. Pick up fresh needles with your Linda's project supplies, then test the complete setup before stitching the final piece.
How to Test and Remove Stabilizer Without Distortion
A sample needs to survive removal and laundering, not merely look flat while clamped in the hoop. OESD's machine embroidery stabilizer basics explains that support should match fabric and design load, and that tear-away should be removed while supporting the stitched area.
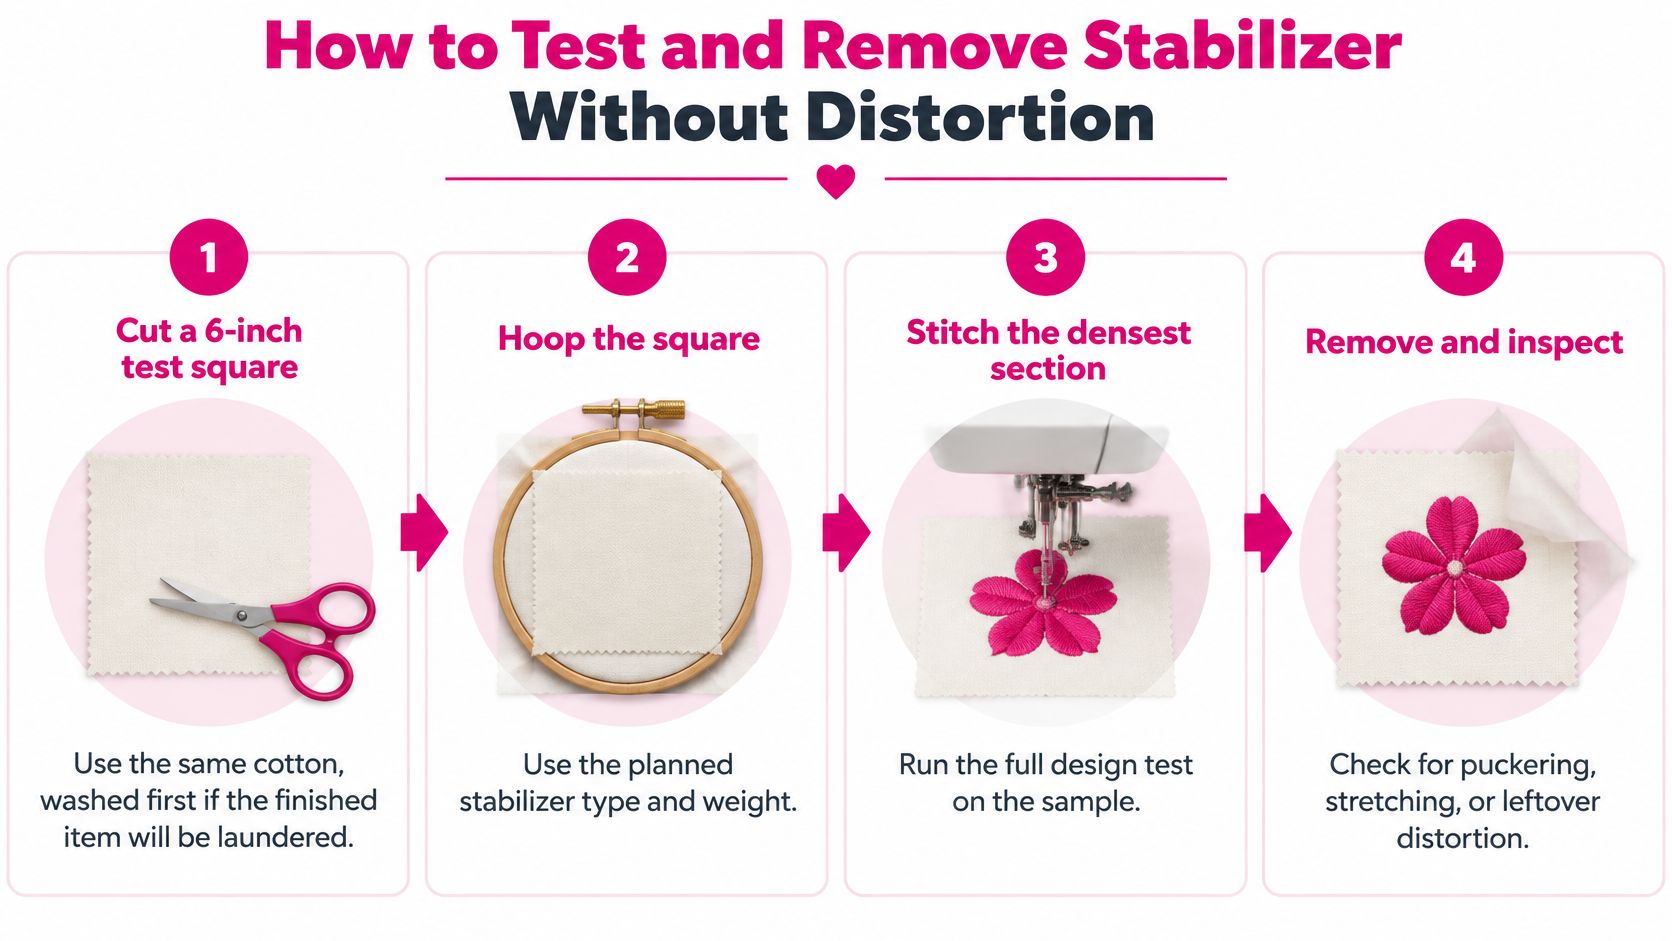
Use this process before committing a garment, quilt panel, or batch of napkins.
- Cut a 6-inch test square. Use the actual project cotton, prewashed if the finished item will be laundered. For a large design, cut a larger sample that fits the hoop securely.
- Hoop the planned combination. Keep the fabric, backing, thread, needle, and hooping method consistent with the final project.
- Stitch the densest section. Include overlapping fills, satin columns, and registration-sensitive outlines rather than testing only a light border.
- Inspect under good light. Release the hoop and look for puckering, gaps, needle holes, and pulling around fill edges.
- Remove tear-away gradually. Separate layers and support the stitches from the front so removal doesn't drag the weave out of square.
- Trim cut-away carefully. Use small, sharp embroidery scissors and leave a safe margin around the stitching. Don't cut flush against the thread.
- Wash and dry as intended. Assess puckering, edge distortion, softness, show-through, and whether the backing remains intact or leaves residue.
- Change one variable and retest. Record what changed so an improved sample becomes a repeatable setup.
The visual below summarizes the preparation and removal sequence.
Why does the wash test matter?
Cotton and linen can shrink during laundering. When fabric contracts around relatively stable embroidery, puckers may appear even if the freshly stitched sample looked smooth.
Don't press the washed sample flat before judging it. Check it first in the condition the recipient will see after normal care.
Pro tip: Tear backing in short sections, following the easier tear direction near the weave rather than pulling diagonally across the whole motif. Hold the fabric immediately beside the stitches to keep removal force out of the embroidered edge.
Keep a small supply of test materials with your Linda's notions purchases. The linked stabilizer references help narrow choices, but skipping the sample can turn a minor setup problem into a full batch of distorted pieces.
Fusible and Lightweight Cotton Options Explained
Permanent fusible support is useful when cotton needs added body and the finished construction can accept it. Patches, structured labels, and decorative panels are better candidates than a flowing blouse front.
The best embroidery stabilizer for cotton fabric may be fusible when softness isn't the priority. However, iron-on doesn't automatically mean permanent: check whether the particular product tears away, washes away, or remains.
How should you apply fusible support?
The Madeira Iron-On Cotton Stable product listing specifies a weight of 50 g/m² and a 30 cm × 5 m format. Those specifications identify the material and roll size, but don't by themselves establish that every iron-on backing behaves like permanent interfacing.
For a permanent fusible patch support, use this sequence:
- Cut the fusible slightly smaller than the patch so adhesive doesn't extend onto the pressing surface.
- Place the adhesive side against the reverse. Cover with a pressing cloth and press without sliding, using a dry cotton setting only if both product and fabric permit it.
- Let the piece cool flat for several minutes before checking the bond.
- Hoop the prepared patch with added embroidery backing if the design requires it.
Use the product's specified pressing temperature and dwell time when they differ from that starting method. Too little heat can leave lifting corners; excessive heat can damage adhesive or mark delicate cloth.
Is fusible better for sheer cotton?
Not necessarily. A bonded support can create a visible rectangle, alter the hand, or make the embroidered area hang differently from the surrounding garment.
- Choose water-soluble backing when the item can be thoroughly rinsed and permanent support would show.
- Choose heat-away when the fabric and thread tolerate the removal process.
- Choose lighter tear-away when the weave is stable enough and the remaining fibers won't be conspicuous.
Compare samples over your hand and against a window before cutting the final blouse panel. For drape-critical garments, choose a compatible removable backing rather than assuming a permanent fusible will soften enough later.
Frequently Asked Questions About Cotton Stabilizers
Can I skip stabilizer on quilting cotton?
Not reliably for machine embroidery. Firm quilting cotton can still pull out of shape beneath concentrated stitching, so medium tear-away is a sensible starting support. A light outline may need less reinforcement than a filled motif, but test it rather than assuming the weave alone will hold.
Should I pre-wash cotton before embroidering?
Yes, when the finished project will be laundered and its construction allows prewashing. Prepare the sample using the intended care method, then embroider and launder it again to evaluate the finished combination. For coordinated quilt fabrics, plan preparation consistently rather than washing only the embroidered piece.
When do I need two layers of stabilizer?
Layering is useful when the fabric or stitch load is uncertain, or when a lighter backing doesn't control movement. Check the released sample for gaps, irregular outlines, and unwanted firmness before approving that setup. Extra layers aren't a cure for stretched hooping, poor digitizing, or excessive tension.
Can I use cut-away on a cotton tee?
Yes, cut-away is generally the more dependable choice for a stretchy cotton tee because it continues supporting the design during wear. Choose a soft garment-appropriate version and trim it smoothly so the edges don't feel harsh against skin. A dense design can still make a lightweight tee uncomfortable, even with suitable backing.
Choose and Test Your Cotton Stabilizer Today
The best embroidery stabilizer for cotton fabric is the combination you can reproduce with confidence. A neat front matters, but so do a comfortable reverse, stable outlines, and a finish that survives the care label.
Before stitching the final piece, run this checklist:
- Identify the substrate. Check fabric weight, weave, stretch, and transparency. Handle the cotton as a finished item, not just a flat scrap.
- Inspect the design. Read the stitch count in your software and evaluate how tightly the fills and satin columns are concentrated.
- Approve a washed sample. Use the final thread, needle, backing, and hooping method, then assess the result after normal laundering.
Keep the approved sample with a setup card. Record stabilizer type, weight, layer count, needle, thread, hoop, and any tension changes so repeat runs don't depend on memory.
What should you look for in a video demonstration?
Linda's instructional videos and live shopping events can complement written guidance. For this project, look for a demonstration that shows fabric placement, hoop tensioning, and backing removal, not just the finished embroidery.
A useful tutorial should let you see whether the cotton stays relaxed as it's hooped and how the stitched area is supported during removal. Ask Linda's team in McKinney, Texas, for a relevant hooping or sample-testing resource when choosing supplies; machine-specific guidance matters more than a generic demonstration.
Use Linda's Notions category to organize your project shopping around the approved sample. Buy the backing, needles, and cutting tools that match that setup rather than collecting heavier products in the hope that more support will solve every problem.
Linda's Electric Quilters offers thread, fabrics, batting, and sewing notions to help you complete cotton embroidery projects. Visit Linda's Electric Quilters to shop stabilizers and notions before your next cotton project, using your tested sample as your buying guide.


