
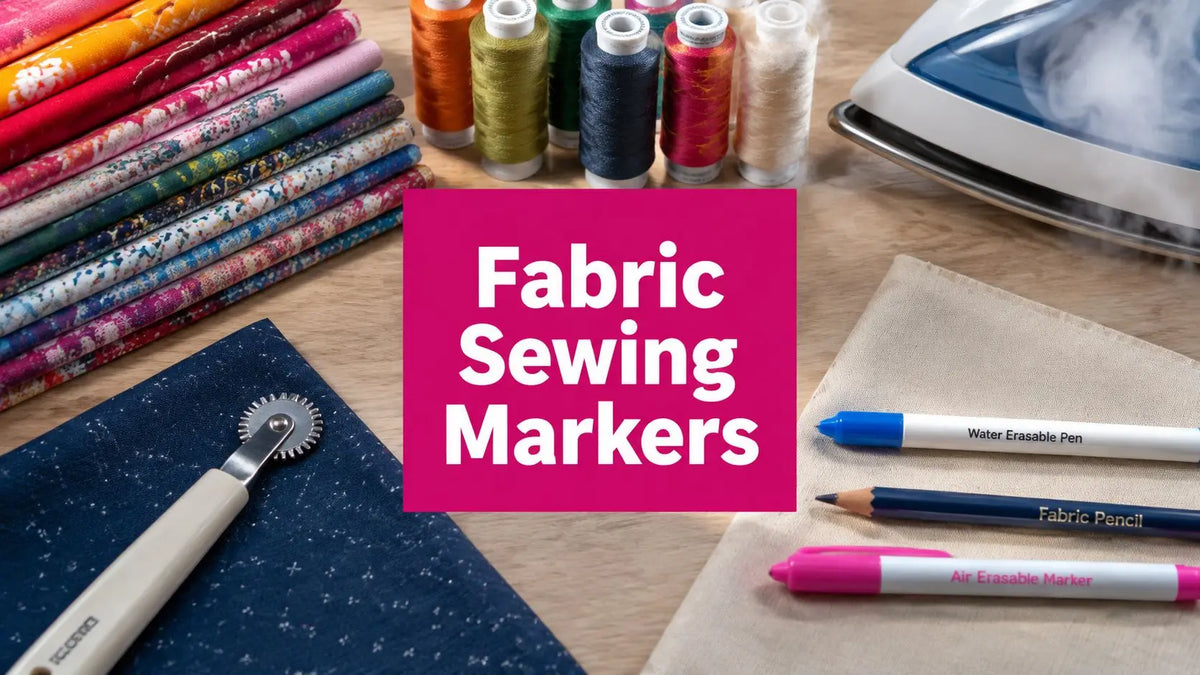
You've spent hours piecing a quilt block or fitting a garment, then notice the marking line has vanished, bled, or returned after pressing. That failure usually isn't caused by poor technique. It comes from using the wrong fabric sewing marker for the fabric, the project timeline, or the conditions in your sewing room.
The reliable approach is compatibility testing. A mark that behaves beautifully on quilting cotton may fail on a polyester blend, disappear too soon on a longarm frame, or become difficult to remove from a delicate fiber. The sections below focus on what happens in real projects, including handling, humidity, pressing, and washing, so you can choose a marker before expensive fabric is at risk.
Why Your Fabric Sewing Marker Choice Can Make or Break a Project
A blue line can look perfect when you draw it and still become a problem later. On a quilt top that sits on a frame, repeated handling can soften a chalk mark until the quilting path is no longer clear. On a garment, a line that survives pattern placement may remain visible after a fitting or react badly when the fabric is pressed. With heirloom work, even faint residue deserves attention because the finished piece may be washed, stored, folded, and exposed to changing temperatures.
Our team in McKinney, Texas, has tested fabric sewing markers on an Innova longarm and during garment construction. The recurring lesson is simple: visibility and removability are separate requirements. A marker must show clearly enough for accurate stitching, but it also needs a removal method that matches the fiber content, fabric hand, surface texture, and project schedule.

Timeline matters as much as fabric
A chalk wheel is useful when you'll sew immediately, but it may not be dependable for a multi-day project. An air-erasable pen can be convenient for a short fitting session, yet humidity and handling can change how long the line remains visible. A water-soluble pen generally offers a longer working window, but it needs careful removal before heat reaches the fabric.
Longarm quilters face a particular challenge. A quilt top may be rolled, advanced, unrolled, and touched repeatedly while tensioning and stitch placement are adjusted. A line that rubs away before the machine reaches it creates more than inconvenience. It can alter spacing, distort a feather, or force you to reconstruct a design from memory.
Studio rule: Choose the marker for the longest and roughest part of the workflow, not the moment when the line first looks crisp.
The category itself has grown from improvised solutions into specialized tools. Historical accounts describe makers using soft clay, soapstone, charcoal, and soap before specialist suppliers produced tailor's chalk for the trade by the mid-19th century. Later developments included vanishing and fluorescent markers, creating the wider family of fabric marking tools used today (historical overview of tailor's chalk and textile marking).
That evolution explains why there's no universal winner. Market reports place the global fabric marker category at approximately USD 80 million in 2023, with projected growth at a 5.8% CAGR from 2024 to 2032, while another study estimates US$543 million in 2024 and projects US$718 million by 2031 at a 4.6% CAGR. The variation reflects different category definitions, but both reports describe an established market serving sewing, tailoring, and textile arts (fabric marker market report).
Types of Fabric Sewing Markers and How They Work
Fabric sewing markers fall into several practical groups. Some leave a powder on the surface, some use a dye designed to dissolve or fade, and some create a physical indentation without adding color. Understanding the mechanism helps you predict how a mark will behave under pressure, moisture, heat, and time.

Powdered and surface marking tools
Tailor's chalk and chalk pencils deposit a soft mineral or wax-based line on the surface. Traditional tailor's chalk developed from materials such as talc and gypsum, selected for softness and removability. It's especially useful on dark fabrics, heavier cloth, and garment alterations such as seam adjustments, pleats, and hem placement. Removal may involve brushing, lint rolling, washing, or low-heat ironing without steam over a protective layer, depending on the chalk formulation (tailor's chalk removal guidance).
A chalk wheel lays down a narrower powdered line as its wheel rolls across a ruler or template. It's fast and accurate for straight quilting lines, but the mark can disappear with handling. Use it when the work will move directly from marking to stitching.
Tailor's tacks use temporary thread instead of ink or powder. They're valuable for notches, darts, pocket placement, and areas where a visible thread marker can remain through several fittings. They take longer than drawing a line, but they avoid the residue concerns associated with some inks.
Ink and dye-based tools
A water-soluble pen places hydrophilic dye on the fabric surface rather than forming a permanent chemical bond with the fibers. Water disrupts the relevant hydrogen bonding and dissolves the dye, but the mark should be rinsed or washed promptly because ghosting or reappearance can occur after drying (water-soluble and heat-erase marker science).
An air-erasable pen fades as the mark interacts with air and moisture. It suits short sessions, but it isn't the choice I'd make for a quilt that will sit unattended or for a garment requiring repeated fittings.
A heat-erasable pen disappears when warmed. Some textile markers are designed to become wash-resistant after ironing without steam, so heat can change the mark from temporary to difficult or impossible to remove. That makes the dry iron a removal tool only after you've confirmed the product's behavior and completed your test.
For adjacent inspiration, sewists who combine marking with appliqué or surface decoration may also enjoy these fabric sticker ideas. They're a separate embellishment method, not a substitute for a removable construction mark.
| Marker Type | Best For | Mark Duration | Removal Method |
|---|---|---|---|
| Tailor's chalk | Dark fabrics, alterations, heavier cloth | Short to moderate, depending on handling | Brush, lint roll, wash, or carefully use low heat when appropriate |
| Chalk wheel | Straight quilting and placement lines | Short, especially with handling | Brush or lint roll |
| Water-soluble pen | Light quilting cotton and marks needing visibility | Through the active work period, subject to moisture and fabric | Rinse, wash, or dampen according to the product guidance |
| Air-erasable pen | Quick placements and short fittings | Temporary and environment-dependent | Allow to fade or dampen lightly |
| Heat-erasable pen | Precise lines where heat removal is appropriate | Until heat is applied | Dry heat, followed by testing and washing when permanent removal matters |
| Fabric pencil | Fine seam, embroidery, and piecing lines | Moderate, depending on formulation | Eraser, brush, damp cloth, or wash as directed |
| Tailor's tack | Notches, darts, and fitting references | Through handling and fittings | Pull or cut the temporary thread |
For a real cotton test swatch, the 082 Maraschino Cherry Moda Grunge - Fat Quarter is a 100% cotton Moda Fabrics Grunge Basics fabric by BasicGrey, sized 18" x 22". Its textured print also helps reveal whether a line is visible without relying only on a plain surface.
How to Test Fabric Markers Before Committing to Your Project
A test swatch is cheap insurance. Cut it from the actual fabric, not a similar-looking substitute, because fiber content, weave, dye, finish, loft, and surface texture all affect the result.
Use a repeatable studio protocol
- Cut the swatch. Use the project fabric and, for quilting, include the same layers or batting-adjacent surface you'll mark. Keep the swatch beside the project so you can compare it later.
- Apply several marks. Draw the line you need, whether that's a seam allowance, crosshair, stencil curve, or longarm quilting path. Use light and firm pressure where relevant.
- Handle it normally. Fold, move, and touch the swatch as you would during construction. If the project will remain on a frame, simulate rolling and repositioning rather than leaving the sample flat.
- Expose it to heat. Press a portion with the iron setting and steam conditions you expect to use. Don't assume a marker labeled erasable will respond safely to every form of heat.
- Try the intended removal method. Dampen, wash, brush, erase, or use dry heat according to the marker type. Let the swatch dry fully, then inspect it again.
Look for ghosting, color transfer, haloing, stiffness, distortion, and loss of contrast. A mark that disappears while wet but returns after drying needs another removal pass. Water-soluble markers are intended for fabrics that won't water spot or distort when dampened, and a faint return after pressing or drying may require re-wetting (water-soluble marker guidance).
Keep a quick checklist
- Visibility: Can you follow the line under your normal lighting?
- Durability: Does it survive handling for the expected project timeline?
- Heat response: Does pressing erase, spread, or set the mark?
- Moisture response: Does dampening create a water ring or color migration?
- Removal: Does the fabric look and feel unchanged when dry?
- Final inspection: Does residue remain on the face, reverse, seam allowance, or batting?
Pro-tip: Test the mark after the swatch has dried completely. A clean wet sample can still reveal a shadow or reappearing line once moisture leaves the fabric.
Choosing the Right Marker for Different Fabric Types
The fabric should choose the marker more often than the packaging does. Start with the surface, then consider how long the project will sit before the mark is removed.

Quilting cotton
Tightly woven quilting cotton usually gives chalk pencils, chalk wheels, water-soluble pens, and heat-erasable pens a clear surface. For a design that will be stitched during the same session, a chalk wheel is efficient. For a quilt top that may remain in progress across multiple days, a water-soluble pen or carefully tested heat-erasable pen can provide more dependable visibility.
Don't press over a water-soluble mark just because the line is in the seam allowance. Heat can change removal behavior, and a mark hidden inside a construction area can still migrate or become visible later.
Polyester blends
Polyester blends vary widely in surface finish and moisture response. Chalk is a sensible first test because it sits on the surface rather than relying on water penetration. Air-erasable pens may work for short garment fittings, but they're a poor fit when the fabric must be handled repeatedly or stored before sewing.
For a blend with a smooth hand, draw lightly. Excess pressure can create a visible line from the tool itself, especially on fabrics with a delicate finish.
Dark fabrics
Dark cloth needs contrast. White or silver chalk, chalk pencils, and chalk wheels are usually the practical starting points because they show without depending on a dye that may be difficult to see. A light mark can be brushed away after stitching, but test the fabric first for chalk shadowing.
Heat-erasable pens can provide contrast on some dark materials, yet heat sensitivity and residue make them a test-first option rather than a default.
Silk and delicate fibers
Silk and other delicate fabrics need low pressure and minimal handling. A light chalk line, a carefully tested air-erasable mark for a short task, or tailor's tacks may be safer than a firm pencil stroke. Avoid assuming that a convenient iron-removal method is safe, because heat can affect both the marking compound and the fiber.
Use tailor's tacks when the mark must survive a fitting but the fabric shouldn't be repeatedly drawn on. The extra thread work is often preferable to a stain or indentation.
Textured surfaces and batting-adjacent areas
Texture, nap, and loft can interrupt a smooth line. A chalk wheel may skip across raised areas, while a fine pen can disappear into a textured weave. On a quilt sandwich, use a marker or indentation method that remains visible without compressing the surface unevenly.
Longarm quilters should also separate the marking decision from machine setup. Correct tensioning, a properly seated bobbin casing, and an unobstructed line all matter, but the marker still has to survive the time between marking and stitching.
How to Safely Remove Fabric Marks Without Damaging Your Work
Removal begins before the first line is drawn. Read the marker's intended method, test it on the project fabric, and remove marks before the fabric reaches a stage where pressing or moisture can change the result.

Water-soluble marks
Dampen a clean cloth with the appropriate water, then dab rather than scrub. Work from the outside of the line toward the center to avoid spreading dye into a wider halo. Rinse or wash promptly when the fabric allows it, then inspect after drying.
If a faint line returns, wet the area again. Water-soluble dyes can remain on or near the surface after the first drying cycle, so a mark that looks gone while damp isn't necessarily gone permanently.
Chalk and chalk wheels
Start with a soft brush, lint roller, or clean cloth. Remove loose powder before adding water, especially on a light fabric where a damp cloth can move residue instead of lifting it.
Wax-based chalk needs more care. A low-heat iron without steam over a protective layer can help lift suitable marks, but only after a swatch test confirms that the fabric and chalk respond safely. Don't use high heat to solve a mark you haven't identified.
Air- and heat-erasable pens
Air-erasable marks may disappear on their own, but fading isn't proof that the compound has been removed. If the project is valuable, use the tested dampening method and inspect it after drying.
Heat-erasable marks require the most caution. Press with a dry iron only when the product is designed for that process, and never apply heat early to a mark you planned to remove with water. Edding's textile marker guidance describes ironing without steam as a way to make certain marks wash-resistant on most materials up to 140°F, so heat can set rather than remove some textile inks (textile marker manufacturer guidance).
If you see ghosting, stop rubbing. Compare the area with the tested swatch, use the original removal method, and let the fabric dry before deciding whether another pass is needed.
Use this removal demonstration as a visual companion while you work:
Building Your Ideal Fabric Marking Kit for Quilting and Sewing
Most sewists need a compact kit, not every marker on the wall. A useful kit covers the main combinations of fabric color, line precision, and project duration without forcing one tool to perform every job.
For the longarm quilter
Keep a white or silver chalk pencil for dark tops, a water-soluble pen for light quilting cotton, and a chalk wheel or Hera-style indentation tool for lines you'll stitch promptly. The longarm workflow rewards predictable visibility because the quilt may be advanced before the design is complete.
A marker that disappears during rolling is a poor choice even if it removes beautifully. Your machine can maintain stitch quality only when the path remains readable.
For the garment sewer
A garment kit benefits from a fine fabric pencil, tailor's chalk, and tailor's tacks. Use the pencil for seam and placement lines, chalk for quick alteration marks, and thread tacks for darts or points that must survive fittings.
This combination also supports different fabric hands. Chalk can sit lightly on a smooth woven, while thread marks avoid adding a drawn line to a delicate surface.
For the hobbyist
Start with one versatile chalk pencil, one water-soluble pen, and a small ruler. Add an air-erasable marker only if your projects are completed quickly, or add a heat-erasable pen after testing it on the fabrics you use most.
Linda's Electric Quilters offers quilting fabrics, batting, threads, notions, and educational resources through its online store and community content. For a calmer workspace, pair a small marker kit with these tidy craft space tips, then keep each tool with the removal method it requires.
Label the storage pouch by function rather than brand. “Dark fabric,” “wash out,” and “short session” are more useful at the cutting table than a collection of pen names.
Common Fabric Marking Mistakes and How to Avoid Them
Experienced sewists still make marking errors when a project gets busy. The most expensive mistakes usually come from trusting the tool instead of testing the combination.
- Pressing over an erasable line: Remove water-soluble or air-erasable marks before pressing. Heat can change how some inks behave.
- Using low-contrast tools: Switch to white or silver chalk on dark fabric instead of forcing a blue or purple pen to show.
- Assuming one rinse is enough: Let the fabric dry and inspect it. Re-wet a water-soluble mark if a shadow returns.
- Skipping the actual swatch: Test the exact fiber, weave, color, and finish. A similar fabric isn't a reliable substitute.
- Ignoring the project timeline: Match a short-lived chalk wheel or air-erasable pen to immediate sewing, not a multi-day frame project.
- Applying too much pressure: Heavy lines create more residue and can distort delicate cloth. Mark lightly, then reinforce only if the test supports it.
For tools, fabrics, and notions that support your next project, Linda's Electric Quilters carries a broad quilting and sewing selection alongside instructional videos and live shopping opportunities. Visit Linda's Electric Quilters to choose fabric sewing markers that match your fabric type and timeline, then test them before marking the finished piece.


