
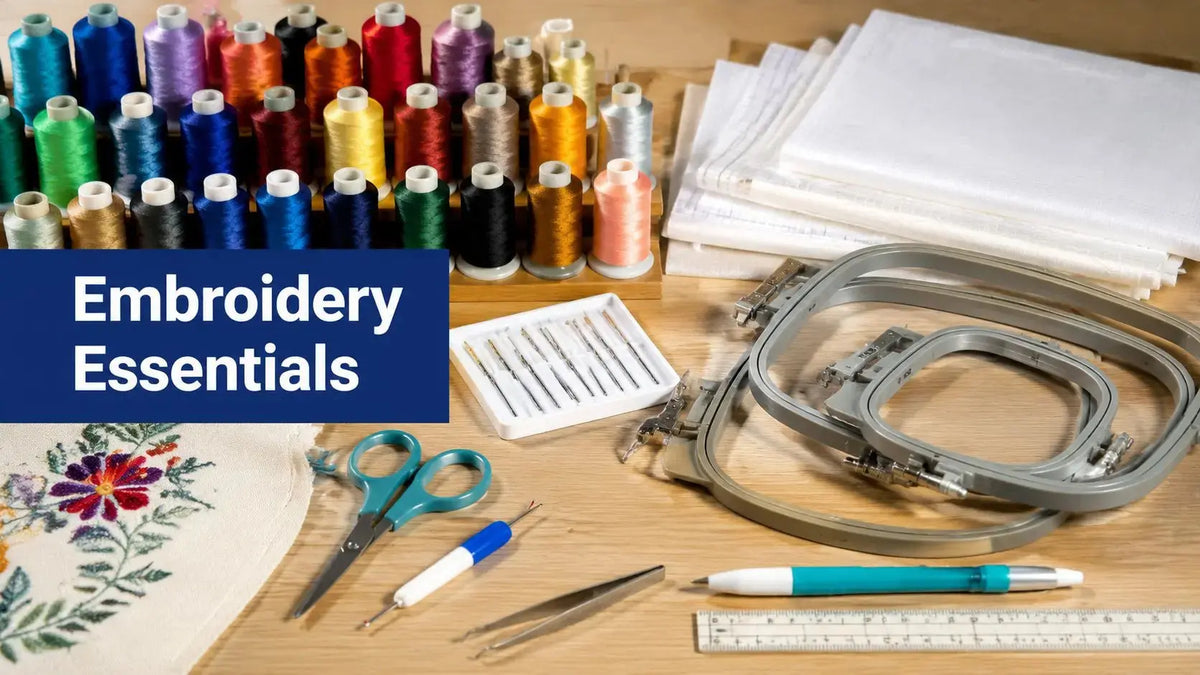
You've finished a beautiful monogram, removed the hoop, and found puckering around the lettering. Or the thread keeps fraying on a towel, even after you adjust tensioning and rethread the machine. These failures usually don't begin with the design file. They begin with the wrong combination of thread, stabilizer, and needle, the three machine embroidery supplies that control stitch formation, fabric support, and durability.
The reliable approach is to choose supplies around fabric type, design density, and end use. A lightweight lawn, a stretchy knit, and a dense towel design shouldn't share the same setup. This guide applies practical selection rules to thread, backing, needles, hoops, notions, and maintenance so you can test less, waste fewer blanks, and finish projects with cleaner stitches.
Introduction to Essential Machine Embroidery Supplies
A cotton-lawn monogram can fail in a completely different way from a logo stitched on a sweatshirt. Lawn may ripple under a dense satin column, while a sweatshirt can shift inside the hoop or stretch after the design is removed. Towels create another problem, because their nap can swallow details even when the thread tension is correct.
The first troubleshooting question should be simple: which supply is mismatched to the material or design? A 40-weight thread paired with the wrong needle can shred. A stretchy garment supported only by tear-away can lose shape after washing. A stable woven fabric over-supported with a permanent backing can feel stiff and show unwanted bulk.
Pro-Tip: Test the complete setup on a scrap from the actual project, including the same fabric direction, stabilizer layers, needle, thread, and design density. A successful test tells you more than adjusting one variable at a time on the finished item.
The basic supply system has three parts:
- Thread: Controls color, sheen, surface coverage, and wear resistance.
- Stabilizer: Supports the fabric so stitching doesn't stretch, pucker, or distort it.
- Needle: Carries the thread through the material while limiting friction, skipped stitches, and damage.
Hoops, bobbins, thread snips, seam rippers, marking tools, and cleaning supplies complete the workstation. They don't replace good tensioning or digitizing, but they make consistent preparation possible. Our team in McKinney, Texas, sees the same preventable mistakes repeatedly: embroiderers change machine settings before checking the needle, reuse a torn stabilizer, or choose backing by habit instead of fabric behavior.
A dependable supply kit isn't the largest one. It's the one that lets you make a reasoned choice before the machine starts.
Understanding Machine Embroidery Threads and Their Uses
Thread is the visible part of every embroidered project, but appearance isn't the only selection factor. The intended use determines whether you should prioritize wash resistance, UV stability, tensile strength, heat tolerance, or decorative sheen.
Polyester is the practical default for projects that will be washed often, exposed to sunlight, or expected to withstand active use — it fits the majority of garment decoration and commercial work.
Rayon earns its place when surface appearance matters most. Its lustrous finish can make lettering, formalwear details, and decorative motifs look richer than a typical polyester equivalent. The trade-off is lower heat tolerance and only moderate UV resistance, so it's less suitable for pieces exposed to repeated sunlight or high-heat laundering. Polyester offers excellent washing and UV colorfastness, along with higher strength.
Polyester and rayon compared
| Thread Type | Sheen | Strength | UV Resistance | Best For |
|---|---|---|---|---|
| Polyester | Clean sheen, usually less glossy than rayon | High | Excellent | Uniforms, frequently washed garments, outdoor-use items |
| Rayon | Brilliant decorative luster | Lower than polyester | Moderate | Formalwear, decorative pieces, presentation-focused designs |
| Cotton | Soft, natural surface | Depends on construction and application | Not the primary advantage | Selected textile and quilting applications where a cotton look is wanted |
For general machine embroidery, 40-weight thread is widely treated as the standard. A 75/11 needle is the most common pairing for that thread weight. The thread should feed smoothly from the cone, pass through the tension path without snagging, and form balanced stitches on the reverse side. Browse the full thread collection at Linda's to compare weights and fibers side by side.
For a vivid decorative accent, 005 NEON ORANGE - Floriani Thread 40 weight 5000M is a high-sheen, high-tensile-strength, lubricated embroidery thread. The product information also notes in-house manufacturing and lot identification, details that can matter when you need to reproduce a color across multiple projects.
A bright thread still needs a compatible needle and stabilizer. If the thread breaks, don't assume the color or brand is the problem. Check the needle eye, thread path, spool cap, design density, and bobbin casing before changing the entire setup.
Choosing the Right Stabilizers and Backing Materials
Stabilizer is the foundation beneath the visible embroidery. Its job is to resist the fabric's movement while the needle makes repeated penetrations. Without adequate support, the material can stretch between stitches, producing puckering, registration problems, distorted outlines, and uneven satin columns. You can compare the full range of options in Linda's interfacing and stabilizer collection.
Match the stabilizer to fabric behavior
The familiar categories are tear-away, wash-away, and cut-away, with heat-away sometimes counted as a fourth. The removal method matters, but it's only the starting point. Fabric stretch, surface texture, design density, and washability determine whether the support should disappear completely or remain part of the finished item.
| Project condition | Starting choice | Why it works | Main trade-off |
|---|---|---|---|
| Stable woven fabric | Tear-away | Supports a firm base and removes cleanly around suitable designs | Can provide insufficient long-term support for unstable materials |
| Stretchy knit or garment | Cut-away | Remains in place to support fabric through laundering and wear | Must be trimmed carefully and may feel less soft |
| Towel, velvet, or napped surface | Wash-away topping or support | Helps prevent stitches from sinking into the nap | Requires careful removal and may not replace foundation backing |
| Thin or heirloom fabric | Wash-away or carefully tested specialty support | Can reduce visible residue and preserve a delicate surface | Needs testing because fabric and design density vary |
| Permanent support application | Stabilizer left in place | Maintains structure after stitching and washing | Adds body, which may be undesirable in soft garments |
Stable woven cotton often works well with tear-away, particularly when the design isn't excessively dense. A knit, performance fabric, or stretchy sweatshirt generally needs cut-away because the garment continues to move after stitching. Removing all support from a stretchy item can leave the design looking acceptable at first, then distorted after wear or washing.
Towels need a different strategy. Their loops can obscure small details and pull against dense fills. A water-soluble topping placed above the nap can keep stitches near the surface, while the backing beneath the towel handles stabilization. The correct combination depends on the towel's weight and the design, so test both the topping and the foundation.
Density changes the decision
A light outline and a heavily filled emblem place different demands on the fabric. Dense designs need stronger support, more controlled hooping, and closer attention to needle penetration. If the fabric is delicate, adding more layers isn't automatically better. Too much backing can make the area rigid, create show-through, or alter the drape.
Choose stabilizer with the finished item in mind. A permanent backing may be appropriate where long-term stability matters, but it can be uncomfortable against skin. A wash-away product may leave a softer result, yet it may not offer enough support for a design that must survive repeated laundering.
The practical sequence is:
- Identify whether the fabric stretches, shifts, has a nap, or remains stable.
- Estimate whether the design is light, moderate, or dense.
- Decide whether support should remain after washing.
- Test the full stack on a matching scrap.
- Inspect both the front and the reverse before committing to the finished piece.
Generic tear-away versus cut-away definitions aren't enough for towels, knits, lawn, corduroy, or heirloom work. The right question is always, what will this fabric and design need after the hoop comes off?
Selecting Needles for Flawless Machine Embroidery Stitches
Needle choice affects more than penetration. The wrong size can increase friction, shred thread, damage lightweight fabric, or produce skipped stitches that look like a tension problem.
For standard embroidery, 40-weight thread commonly pairs with a 75/11 needle. The practical machine embroidery needle range runs from 60/8 to 110/18, moving from fine work on lightweight materials toward heavier applications. Browse Linda's machine needle collection to match your thread and fabric.
Use thread weight as the first filter
| Thread weight | Recommended needle size |
|---|---|
| 30-weight | 90/14 to 100/16 |
| 40-weight | 75/11 to 80/12 |
| 50-weight | 70/10 to 80/12 |
The principle is straightforward. Heavier thread needs an eye large enough to reduce friction and shredding, while finer thread and lightweight fabrics usually benefit from a smaller needle.
Fabric density is the second filter. A lightweight lawn may need a finer needle even with a standard thread, while denim, canvas, or a dense design may require a stronger shaft and larger eye. Metallic thread often needs extra clearance because it can be less forgiving as it travels through the eye and tension path.
Diagnose the defect before changing settings
- Thread fraying: Inspect the needle eye, thread path, and spool feed. A burr or undersized eye can damage thread.
- Skipped stitches: Check that the needle is correctly installed and appropriate for the machine movement, fabric, and design.
- Fabric holes: Reduce needle size or reassess the point style for delicate material.
- Repeated breaks: Confirm that the thread isn't catching on the cone, then check tensioning and the bobbin casing.
Longarm and multi-directional equipment may require specialized needles. The Groz-Beckert MR 3.5 R-Point Regular Sharp 134MR is designed with flexibility and a deep scarf to help accommodate movement in multiple directions. Linda's catalog also includes 134 R-Point Regular Round 134 needles for machines such as Handi Quilter, Viking Platinum, and A-1 Platinum Elite models.
Install a fresh needle when troubleshooting a persistent defect. A needle can look straight and still have a damaged point or worn eye. If the test improves immediately, the supply was part of the problem.
Hoop Systems and Frame Accessories for Embroidery
Hooping determines whether the fabric and stabilizer move as one controlled unit. A small monogram on a shirt cuff doesn't need the same frame strategy as a large garment panel, towel, or production run.
Single hoops suit focused designs and many home-machine projects. They're straightforward to position, but you'll need to maintain even tension without stretching the fabric too tightly. Over-tightening can distort the material before stitching begins, while loose hooping allows shifting and registration errors.

Larger designs may call for multi-hoop systems or dynamic frames. These allow embroiderers to cover a wider area, but repositioning introduces another opportunity for alignment errors. Mark the placement carefully and confirm that the design field remains supported at every stage.
For thick sweatshirts, towels, and layered goods, magnetic systems can reduce the physical effort required to secure the project. Compatibility still matters. Check the machine model, available field, frame clearance, and the thickness of the material before purchasing.
A useful hoop collection usually reflects the work you make:
- Small hoop: Monograms, labels, cuffs, and compact motifs.
- Medium hoop: Chest designs, towels, bags, and home décor accents.
- Large or specialty frame: Garment panels, extended layouts, and production workflows.
The stabilizer must fit inside the hoop securely, and the fabric should remain flat without being stretched beyond its natural shape. If the design looks correct in the center but shifts toward the edge, review hoop tension and frame compatibility before adjusting digitizing settings.
Essential Tools and Notion Items for Every Embroidery Kit
A machine embroidery station works better when small interruptions don't become long delays. Thread snips should cut cleanly close to the surface, while a seam ripper helps remove an accidental jump stitch without dragging nearby embroidery. Linda's sewing notions collection covers the small tools below.
Keep a magnifying glass near the machine for inspecting dense areas, especially when the defect is too small to see from a normal working distance. Hoop padding can protect delicate fabrics, and stiffening sprays can temporarily reinforce unstable materials before stitching. Use them sparingly, because added body can change how the fabric feeds and how the finished design feels.
Build the workstation around preparation
Marking tools help with placement. A water-soluble pen or chalk wheel can establish a centerline, top edge, or alignment point before hooping. Always confirm that the marking method is suitable for the material and removable under the project's care instructions.
Cleanliness also affects consistency. Lint brushes and compressed air help clear debris from the machine area, bobbin zone, and thread path. Don't force lint deeper into the mechanism, and follow the machine manufacturer's cleaning guidance rather than spraying indiscriminately.
Useful supporting machine embroidery supplies include:
- Thread organizers: Keep color changes orderly and reduce tangles.
- Bobbin storage: Separate wound bobbins by thread type and intended machine.
- Tweezers: Lift stray fibers and remove small thread tails.
- Needle container: Keep new and used needles apart so worn needles don't return to service.
- Placement ruler: Check design alignment before you commit to the hoop.
- Spare spool caps: Maintain smooth feeding when cones or spools have different shapes.
The strongest kit is organized around repeatable actions. Prepare the fabric, mark placement, hoop evenly, inspect the bobbin casing, and keep cutting tools within reach. That routine saves more time than accumulating specialty gadgets you rarely use.
Maintaining and Replacing Consumable Embroidery Supplies
Consumables don't fail all at once. Needles become less reliable, thread collects dust or moisture, and stabilizer loses value after it has already been pierced and torn. Small quality changes can look like random tension problems until you inspect the supplies themselves.
A practical maintenance schedule should be tied to use, fabric abrasiveness, and project demands. Needles should be replaced regularly, especially after dense designs or abrasive materials. Dull or bent needles can cause skipped stitches, fraying, and fabric damage.
The maintenance checklist below provides a dependable baseline:
- Needles: Replace after regular use and immediately after a visible bend, burr, or persistent stitch defect.
- Bobbins: Check the winding, casing tension, lint, and physical wear before a demanding project.
- Stabilizer: Use fresh material for each project. Stitched stabilizer has compromised structure, and torn fibers or adhesive residue can interfere with new work.
- Thread: Store cones covered and away from dust, moisture, and direct sunlight. Inspect for snags before loading.
- Hoops: Check for warping, damaged edges, and hardware that no longer holds even tension.
- Machine area: Remove lint according to the machine's care instructions before buildup affects feeding or bobbin movement.

Replace the needle before you start changing tension settings. A worn needle can imitate several other problems at once.
Linda's Electric Quilters offers flat-rate shipping and promotions such as BOGO offers on consumables, which can make planned restocking easier. Treat those offers as an inventory tool, not a reason to buy supplies that don't match your machine or project mix. Keep a short list of the thread colors, needle sizes, bobbin styles, and stabilizer types you use.
Smart Shopping Strategies for Quality Embroidery Supplies
Buy quality first in the supplies that directly touch stitch formation. Thread, needles, stabilizer, and bobbins can create wasted blanks and repeated troubleshooting when their performance varies from project to project.
A broad catalog helps only when you know how to evaluate specifications. Check fiber type, thread weight, cone size, needle system, point style, stabilizer removal method, and compatibility with your machine. Product descriptions should give enough information to compare options without relying on color names alone.
Shop by project, not by category
Before ordering, write down:
- Fabric: Woven, knit, napped, lightweight, or heavy.
- Design: Outline, lettering, satin work, or dense fill.
- End use: Decorative, frequently washed, sun-exposed, or worn against skin.
- Workflow: One-off project, repeated orders, or multi-color production.
Linda's Electric Quilters carries more than 30,000 craft products, including thread, batting, fabrics, and notions, and provides educational resources such as live shopping events, instructional videos, and a dedicated blog. Those resources can help you compare a supply's intended use before adding it to your workstation.
Don't buy large quantities of blanks before you know which projects your customers or household needs. Build a focused core inventory, test it, and expand colors or specialty products in response to real work. Clearance sales and consumable promotions can be useful when the item already fits your setup.
Quick Reference Selection Guide for Common Projects
Use this table as a workstation reference, then test every combination on a scrap of the same fabric. The table doesn't replace a sample because design density and garment construction can change the result.
| Project type | Thread starting point | Stabilizer direction | Needle starting point |
|---|---|---|---|
| Cotton-lawn monogram | 40-weight thread for standard embroidery | Light, carefully tested support, often wash-away for delicate work | 75/11 or a finer size when fabric requires it |
| Stable woven cotton logo | Polyester for laundering and durability | Tear-away for suitable stable fabric | 75/11 with 40-weight thread |
| Stretchy knit garment | Polyester for repeated wear and washing | Cut-away to retain support | 75/11 to 80/12, adjusted for fabric density |
| Towel lettering | Polyester for laundering | Foundation backing plus water-soluble topping for the nap | Needle selected for thread and towel thickness |
| Metallic or dense design | Specialty thread matched to the design | Stronger support based on fabric movement | Larger eye or stronger shaft when needed |
| Decorative formalwear | Rayon when sheen is the priority | Test for minimal show-through and suitable removal | Fine needle matched to the thread and fabric |
Write the final setup on a project card. Record thread type, needle size, stabilizer layers, hoop, design file, and any tensioning adjustment. That turns a successful test into a repeatable process.
Frequently Asked Questions About Machine Embroidery Supplies
What machine embroidery supplies are essential for a beginner?
Start with 40-weight embroidery thread, compatible bobbins, needles matched to the thread and fabric, tear-away stabilizer, cut-away stabilizer, and water-soluble support. Add thread snips, a seam ripper, marking tools, and a lint brush. You don't need every specialty supply before you've stitched a range of fabrics.
Which stabilizer should I use for stretchy fabric?
A cut-away stabilizer is generally the safer starting point because it remains in the garment and supports the design after stitching and washing. Test the complete setup first, especially with thin knits or dense designs.
Is polyester or rayon better for machine embroidery?
Choose polyester for frequently laundered, sun-exposed, or workwear projects because it offers strong washing and UV performance. Choose rayon when decorative sheen matters more than maximum heat and UV tolerance. The fabric, care instructions, and design purpose should decide the final choice.
What needle should I use with 40-weight thread?
A 75/11 needle is the common starting point for 40-weight embroidery thread. Move toward 80/12 when the fabric or design needs more clearance, and test a smaller needle for delicate lightweight materials.
Can I reuse stabilizer?
Fresh stabilizer should be used for each project. Once it has been pierced, torn, stretched, or exposed to adhesive, its support may no longer be consistent.
Linda's Electric Quilters offers thread, stabilizers, needles, hoops, bobbins, and embroidery notions for projects ranging from delicate monograms to durable apparel. Visit Linda's Electric Quilters to choose the machine embroidery supplies that match your fabric, design density, and finished-use requirements.


