
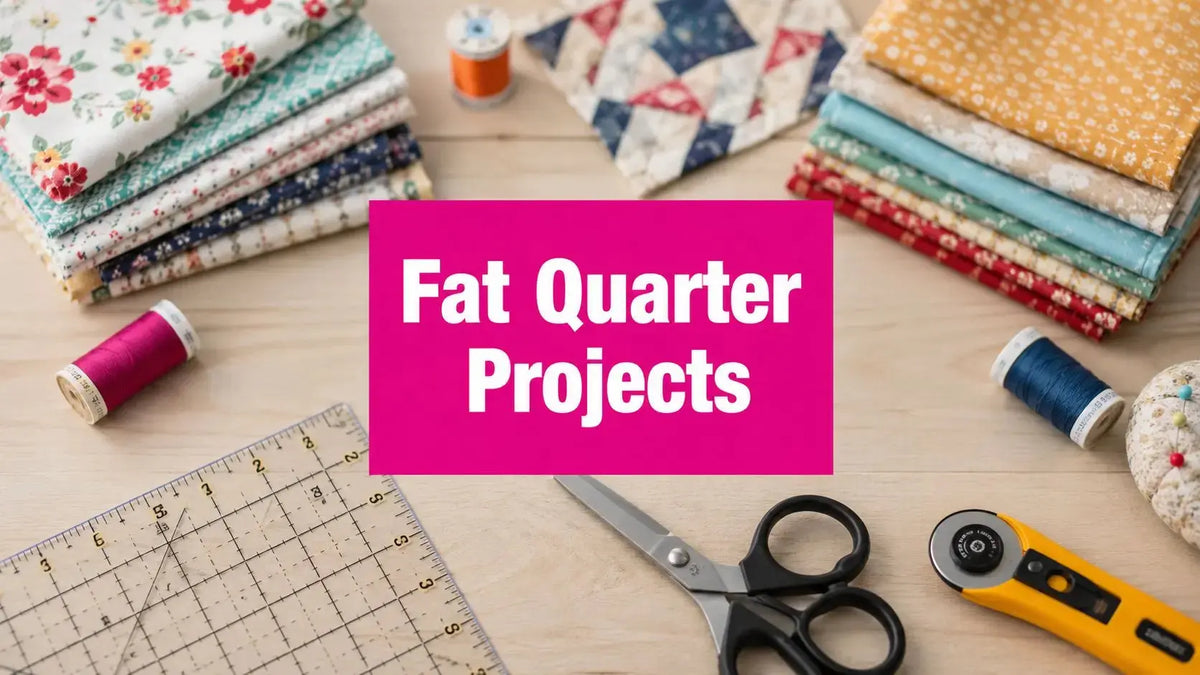
Fat quarter project ideas become much easier to choose when you compare skill level, fabric count, finished size, technique, and time before cutting. A fat quarter measures about 18 by 22 inches, giving you a broader working shape than a traditional quarter-yard cut. Use this roundup to choose a quick mug rug, a scrap bunting project, a useful tote, a quilted wall hanging, or a larger statement accent. Prepare cotton carefully, test your 1/4-inch seam, press consistently, and match batting loft, stabilizer, interfacing, and installation hardware to the project. Linda's Fat Quarter collection is a practical starting point, including 013 Rum Raisin Moda Grunge, a 100% cotton fat quarter measuring 18 by 22 inches.
1. Fat Quarter Bundle Quilt Squares
A bundle quilt is one of the most approachable ways to learn patchwork. Pre-cut pieces give you coordinated color and print choices, so you can focus on accurate cutting, fabric value, pressing, and consistent seam allowances instead of beginning with a full bolt of yardage. A fat quarter is functionally one-quarter yard, and four fat quarters equal roughly one yard, but the wider shape makes it more useful for compact quilt blocks and small-scale cutting.
Start with a coordinated group of fabrics and arrange them by light, medium, and dark value before sewing. A simple square-block layout teaches the discipline that supports more advanced quilts. Chain piecing keeps the machine moving and reduces repeated thread starts, while pressing seams consistently helps blocks lie flat.
The 073 Charmed Moda Grunge fat quarter comes from Moda Fabrics' Grunge Basics collection by BasicGrey and is made from 100% cotton in an 18 by 22 inch cut. It can sit comfortably in a tonal or low-volume bundle, depending on the surrounding fabrics.
Skills and materials
Use a rotary cutter, a square ruler, a cutting mat, a quarter-inch foot, quality piecing thread, and an iron with a firm pressing surface. A 6.5-inch square ruler helps you trim units accurately, especially when repeated blocks must match at the corners.
- Fabric preparation: Pre-wash cotton when shrinkage variation could affect the finished quilt.
- Piecing control: Test thread tension and keep the quarter-inch seam consistent.
- Pressing: Press toward the darker fabric when that reduces bulk, or press seams open when the pattern requires flatter intersections.
- Layout: Photograph the planned arrangement before stacking blocks for the sewing machine.
A free pattern can make the fabric math concrete: one popular throw design finishes at about 52 inches square, uses 9 fat quarters, and contains 36 blocks finishing at 8.5 inches each. Treat those dimensions as pattern-specific, not universal. Shop Linda's fabric and thread options before cutting so your bundle, bobbin, and top thread work together.

Pro-Tip: Sew a test block before cutting the entire bundle. A small error in the seam allowance becomes a visible shift when several blocks meet.
2. Scrap-Busting Crazy Patchwork Pillows
Crazy patchwork rewards judgment more than geometric precision. Instead of matching a repeating block, you build an irregular composition from fabric pieces, often starting near the center and sewing outward over a foundation. The result can combine large prints, small motifs, textured cloth, lace, embroidery, or buttons without requiring every seam to align.
Use a sturdy muslin foundation to keep the pillow front stable. Place one piece face up, add the next piece face down along an edge, sew the seam, and press the new piece open before adding another. A shorter stitch helps secure irregular seams, but test your machine first because dense stitching can draw the foundation inward.
Design and construction choices
A single fat quarter can provide a useful supply of pieces for a small pillow front, while two coordinating pieces give you more control over the front, back, binding, or contrasting sections. The exact yield depends on the finished pillow dimensions and the size of your irregular cuts, so keep a paper template nearby before trimming.
Choose the decorative treatment after the patchwork is stable. Hand embroidery, couching, buttons, and lace can add personality, but bulky embellishments may affect washing and shouldn't sit where a zipper or closure must lie flat. If the pillow will receive regular use, secure every embellishment firmly and consider whether the finished cover needs gentle laundering.
- Color planning: Mix large, medium, and small-scale prints so the surface has visual rhythm.
- Foundation support: Use muslin when multiple seams or embellishments could distort the face.
- Edge control: Trim the completed panel with a square ruler before adding the back.
- Thread choice: Coordinate the piecing thread with the dominant colors, then choose decorative thread separately.
For a beginner, this is a forgiving introduction to improvisational piecing. For an experienced maker, it becomes a textile-art surface where stitch direction and embellishment carry as much weight as the fabric. Linda's threads and notions can help you finish the seamwork and closure cleanly.
3. Strip Piecing Table Runners
Strip piecing turns several fat quarters into long, graphic bands. It teaches rotary-cutting accuracy and straight-line piecing while producing useful home décor without the scale of a bed quilt. Depending on the pattern, the finished runner may suit a dining table, console, shelf, or wall.
Cut strips to the width required by your pattern, then keep the cut edges aligned as you sew. A small difference in strip width can compound across a long panel, so measure the first group before cutting the rest. Press each joined strip set immediately. The iron isn't a finishing tool here, it's part of the construction process.
Build the runner with controlled repetition
Two to four fat quarters can support a compact runner, but the exact quantity depends on strip width, direction, borders, and finished length. A pattern with narrow strips may use the fabric differently from one with wide bands or angled segments. Read the cut list before deciding whether your stash is sufficient.
Arrange colors in an ombré progression, alternate high-contrast prints, or create a directional layout that makes the eye travel along the table. If the prints have a strong direction, mark the orientation on the wrong side before sewing. A complementary backing can provide contrast without competing with the pieced face.
- Cutting: Use a long ruler and rotary cutter, keeping the ruler square to the fold.
- Pressing: Alternate seam direction between strip sets to reduce ridge buildup.
- Quilting: Stitch parallel lines to reinforce the linear design, or use diagonals for movement.
- Finishing: Measure the runner before cutting binding because quilting can change the final edge.
A neutral thread can make the piecing recede, while a contrasting quilting thread turns straight lines into a design feature. Test tension on a layered sample that includes the actual batting and backing. Linda's fabric, thread, rulers, and batting selections can help you assemble the complete project rather than solving each material choice separately.
4. Appliqué Wall Hangings
Appliqué lets a small fabric cut become the focal point of a finished textile. Layer shapes over a background, secure them with fusible web or stitching, then add quilting or embroidery to define the design. Fat quarters work well for botanical motifs, abstract geometry, scenic views, and other compositions where each print needs only a controlled section.
Fusible web is approachable because it holds the shape during stitching, but the adhesive can make the fabric hand stiffer. Raw-edge appliqué leaves the cut edge visible and suits a modern look. Turned-edge appliqué hides the raw edge and demands more preparation. Test both methods on scraps before committing to the final background.
Stabilize before you stitch
A wall hanging needs a flat surface. Press the background fabric first, use a pressing cloth when shine is a concern, and choose tear-away or wash-away stabilizer from Linda's stabilizer collection according to the desired hand and stitch density. Machine appliqué over thick intersections can cause skipped stitches, so slow down and adjust needle positioning rather than forcing the fabric.
Two to six fat quarters may cover the background and appliqué shapes, depending on the finished dimensions and design. A pattern's cut list matters more than a generic bundle count.
- Shape control: Fuse paper templates or traced shapes to the wrong side before cutting.
- Thread selection: Match the thread for quiet edges, or contrast it for visible satin or blanket stitching.
- Layering: Keep bulky overlaps away from the outer binding area.
- Display: Add batting and backing for depth, or mount a flat textile for a cleaner modern effect.
5. Fat Quarter Bundle Tote Bags
A tote turns quilting cotton into something you can carry. Two to four coordinated fat quarters can divide naturally into an exterior, lining, pockets, handles, or contrast panels, but the pattern determines whether the cut size is enough. Unlike a decorative block, a tote must tolerate handling, so interfacing, seam reinforcement, and handle attachment deserve as much attention as color.
Choose woven interfacing when you want body without making the fabric brittle. Fuse it evenly, allow the fabric to cool flat, and check that the grain remains straight before cutting. If the tote has a boxed bottom, mark the corners carefully so both sides finish at the same depth.
Build strength into the stress points
Handles transfer the bag's load to a small area. Reinforce their attachment with a rectangle and diagonal stitching, then add topstitching that secures the layers and creates a deliberate finish. A lining can hide seam allowances, but it doesn't replace reinforcement at the handle anchors.
A small interior pocket is a useful way to use a remaining piece of a fat quarter. Add it before closing the lining, and test the pocket placement with the objects you expect to carry. If the bag will hold heavy groceries or books, make a sample and test the load before producing several.
- Structure: Match interfacing weight to the fabric. Too little leaves a collapsed tote, while too much can make turning difficult.
- Durability: Use a strong thread and reinforce corners and handle ends.
- Clean finish: Press body seams open where bulk builds, then topstitch to stabilize them.
- Prototype: Confirm the opening, depth, and handle drop before cutting a second bag.
Linda's interfacing, thread, fabric, and bag-making notions can support this project from the first fuse to the final bar tack.
6. Quilted Mug Rugs and Coasters
If you want the fastest complete quilting experience, start with a mug rug. A single fat quarter can supply the top or pieced accents, while batting and backing complete the quilt sandwich. The small format lets you practice piecing, basting, quilting, trimming, and binding without committing to a large project.
A mug rug can be a simple rectangle with straight-line quilting, or a pieced design with an appliqué detail. Coasters require tighter edge control because their finished size is small. Low-loft batting keeps the edges manageable and makes binding less bulky, especially when several layers meet at the corners.
Make the small scale work for you
Press the top before layering, baste evenly, and test tension on the same combination of top fabric, batting, and backing. A dense quilt sandwich can reveal needle or bobbin problems that weren't visible during piecing. Straight quilting lines parallel to the edge are a reliable starting point, while free-motion loops can come later.
- Batting: Choose thin or low-loft batting for a flatter edge and easier binding.
- Binding: Measure the quilted piece after quilting, not before, because the layers may draw inward.
- Backing: Use a washable fabric backing, or select a suitable waterproof material for a coaster application.
- Production: Make several tops first, then quilt and bind them as a small assembly line.
This project makes a thoughtful teacher gift, hostess gift, or test piece for a new quilting thread. Coordinate the top and bobbin thread so the tension remains balanced.
7. Fabric Scrap Bunting and Garland
Bunting is the best choice when your stash contains fragments rather than complete fat quarters. Sort the scraps by color, print scale, or season, then cut consistent triangles with a cardboard or plastic template. Pair two triangles right sides together, sew around the edges, turn them carefully, and press before attaching them to twill tape, ribbon, or cord.
The construction is simple, but sharp points require patience. A tube turner or blunt chopstick can help push the point outward without damaging the fabric. Keep the turning tool away from the tip seam, and don't pull so hard that the seam opens.
Keep the flags even
Scrap availability determines the final length, so design the garland around what you have rather than forcing a fixed count. Double-sided flags use more fabric but give you a reversible decoration. Single-sided flags conserve scraps and work well against a wall, shelf, or backdrop.
- Template: Use one repeatable triangle so the flags share a visual rhythm.
- Seam allowance: Keep it narrow enough to reduce bulk, but wide enough to hold during turning.
- Attachment: Whipstitch flags to cord, or fold the cord into the top edge and topstitch.
- Pressing: Flatten every flag before assembly so the finished garland hangs cleanly.
Cotton scraps from a quilt, tote, or pillow can give the bunting a coordinated look without requiring a new bundle. Linda's thread is useful here because the finished flags may be handled repeatedly during storage and display.
8. Fat Quarter Fabric Patchwork Headboard Accent
A patchwork headboard accent takes fat quarter design beyond the sewing table. Mount coordinated fabric pieces to a prepared panel or suitable wall surface, then finish the perimeter with trim, binding, or upholstery-weight fabric. This is an advanced project because composition, fabric grain, adhesive choice, wall condition, and hardware all affect the result.
Eight to sixteen fat quarters can provide a starting palette for a large accent, but the finished coverage depends on the headboard dimensions and the size of each patch. Lay the design out full-size on paper or on the floor before cutting. Photograph the arrangement so you can reconstruct it during installation.
Treat installation as part of the project
Similar value across the fabric group can make the design feel intentional. A strong contrast may create graphic impact, while fabrics with similar value can produce a quieter gradient or botanical effect. Avoid placing busy motifs where they compete with trim, outlets, hardware, or the visual center of the bed.
Use an adhesive suitable for both the fabric and the mounting surface, and follow its curing instructions — typically allowing adhesive to dry completely for 24 hours before wall installation, though the correct cure time depends on the specific product, surface, and temperature. Never hang a heavy panel until the mounting system is rated for its weight.
- Surface preparation: Clean and smooth the wall or panel before applying fabric.
- Fabric handling: Keep the grain straight and smooth wrinkles from the center outward.
- Edge finishing: Use upholstery or heavy cotton trim to frame the patchwork.
- Safety: Hire a professional if you're uncomfortable with wall anchors, hardware, or load-bearing installation.
- Protection: Consider a clear protective covering where dust, pets, or frequent contact may affect the fabric.
Turn One Fat Quarter Into Your Next Finished Make
The right project depends on your available fabric, confidence, tools, and desired finish. Choose mug rugs when you want a complete quilting cycle in a compact format. Use scraps for bunting or crazy patchwork when you want to clear a remnant box without committing to a new bundle. Select two to four fat quarters for a tote, and use a larger coordinated group for a runner, appliqué composition, quilt, or headboard accent.
Fabric math matters because a fat quarter gives you a fixed cutting area. Common quilt planning ranges run 6 to 9 fat quarters for a baby quilt, 12 to 16 for a lap quilt, 20 to 30 for a twin quilt, and 32 to 42 for a queen quilt, depending on block size, borders, background fabric, layout, and whether the design is scrappy. For large quilts, standard yardage may sometimes be simpler and create less waste than forcing the entire design around pre-cut bundle counts. Browse fat quarters, jelly rolls, and precuts and kits at Linda's to compare formats.
A practical finishing checklist
- Prepare the fabric: Pre-wash when the fabric content or future shrinkage needs to be controlled, then press and square the grain.
- Test the machine: Sew a sample with the actual thread, needle, batting, backing, stabilizer, or interfacing.
- Check tension: Look at both sides of the sample. Balanced tension should not pull bobbin thread to the top or create loose loops underneath.
- Match the structure: Use low-loft batting for small quilted items and suitable interfacing for bags or mounted fabric.
- Press accurately: Press seams without stretching bias edges, and use a pressing cloth when heat could create shine.
- Confirm installation needs: For wall accents, verify the adhesive, cure time, hardware, surface, and finished weight before mounting.
Frequently asked questions
How many fat quarters does a project need?
A small mug rug may begin with one fat quarter, while bunting can use scraps. Totes and runners often need a small coordinated group, but the pattern's cut list is the final authority. Quilts require more planning because finished size, background fabric, borders, and block layout change the yield.
What can you make from one fat quarter?
One fat quarter can contribute to a mug rug, coaster, pillow, bunting, small pouch, or appliqué design. The usable yield depends on the pattern pieces and directional print placement. Before cutting, place the templates on the 18 by 22 inch fabric area to check orientation and leftover space.
Which project is best for beginners?
Mug rugs and simple bundle quilt squares offer the clearest skill progression. Mug rugs introduce the full quilt sandwich and binding process, while quilt squares teach rotary cutting, quarter-inch seams, chain piecing, and pressing. Bunting is another gentle starting point if you prefer décor over quilting.
Do fat quarters need to be pre-washed?
Not always. Pre-washing can help control shrinkage differences in cotton projects, but some makers prefer to preserve the manufacturer's finish and handle the completed project carefully. Follow the pattern and consider how the finished item will be washed.
Should batting or interfacing be used?
Use batting when you want a quilted surface, warmth, or stitched texture. Use interfacing when you need body and stability, especially in totes. Small projects usually benefit from lower loft, while bags need an interfacing weight that supports the fabric without making construction unmanageable.
Linda's Electric Quilters offers the fabric, batting, thread, stabilizers, interfacing, and notions needed to turn fat quarter project ideas into finished gifts and home accents. Visit Linda's Electric Quilters to choose your project materials and begin your next make with a clear cutting plan.


