
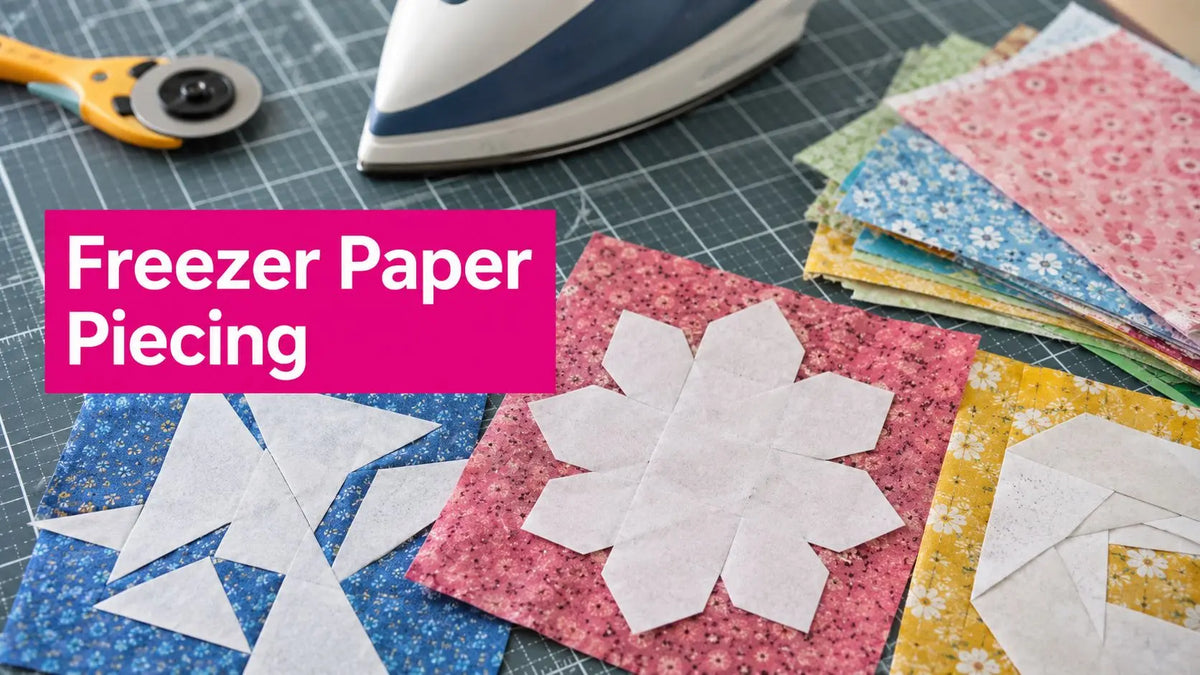
You've spent an afternoon assembling a sharp star or a narrow flying-geese unit, only to find that the points don't meet and the finished block has twisted out of square. Freezer paper piecing offers a practical way to regain control. Instead of sewing through a disposable paper foundation, you press fabric to a reusable, plastic-coated template, fold on each marked seam, and stitch directly beside that fold. The method supports accurate points, clean intersections, and repeat units, but its real efficiency depends on knowing when the template is still reliable and when it's costing you precision.
Why Freezer Paper Piecing Transforms Quilt Precision
A mismatched point usually starts before the needle reaches the fabric. A seam allowance shifts, a stretchy piece grows while you press it, or a paper foundation tears as you remove it. By the time the block reaches your cutting mat, several small errors have combined into a visible distortion.
Freezer paper piecing changes the foundation itself. The paper's plastic-coated side temporarily adheres to fabric under heat, so the template holds the fabric without glue residue. You fold the paper on a seam line, place the next fabric piece right sides together, and sew beside the fold rather than through the paper. The fabric stays guided while the template remains available for another unit.

From appliqué workaround to precision method
The technique has a documented teaching milestone in 1979, when Anne Oliver began teaching freezer-paper appliqué. An article about the technique appeared in Quilt magazine in 1981, placing freezer paper within the wider development of modern foundation-based techniques. The historical record also describes the method moving beyond appliqué into English paper piecing, foundation piecing, quilting stencils, and tear-away stabilizer applications. Quilting Daily's history of freezer paper places that evolution in context.
Traditional foundation piecing used muslin or scrap fabric before freezer paper became a reusable pattern foundation. That distinction matters. Freezer paper piecing isn't standard foundation paper piecing with a different sheet. The machine needle generally doesn't perforate the template, so removal is gentler and the same pattern can support repeated construction.
Instructor's observation: Precision comes from controlling the fold, not from forcing the machine to sew through a foundation.
By the end of this guide, you'll know how to orient the paper, prepare oversized fabric, sew beside the fold, evaluate adhesive wear, and decide when a fresh template will save more time than another reuse. You'll also see where the technique makes sense for slippery, stretchy, curved, and unusually small pieces.
Essential Tools and Materials for Success
Set up your pressing and cutting area before you print or trace a template. Freezer paper piecing works best when each movement is deliberate, especially because the paper must remain aligned while you handle the fabric.

Build a reliable workstation
You'll need freezer paper, a sharp pencil, printed pattern pieces or a printer-compatible sheet, fabric, a rotary cutter, a quilting ruler, a cutting mat, an iron, and an ironing surface. Pre-cut freezer paper sheets can be convenient for printer work, while rolls allow you to prepare templates in custom sizes. Some quilt shops sell freezer paper already cut to printer-sheet dimensions, which makes repeated templates easier to produce. This freezer paper tutorial describes both tracing and direct-printing options.
Choose a hot, dry iron. Steam can stretch or distort fabric before the adhesive has secured the section. Press with the iron held in place or lifted and repositioned. Sliding it across the piece can pull the grain and change the shape you worked to establish.
- Cutting tools: Use a sharp rotary cutter and a stable mat to cut each fabric section oversized. Dull blades encourage dragging, while a narrow ruler edge can make trimming inconsistent.
- Thread: Select a quality piecing thread for a domestic machine, and keep your longarm thread and bobbin thread suited to the quilt's later tensioning and quilting plan. A clean seam begins with a balanced needle, thread path, and bobbin casing.
- Pressing tools: A small iron can help with tight units, but any iron that delivers steady cotton heat without steam can set the temporary bond.
- Fabric: Pre-washed cotton is a dependable starting point. For unstable cloth, test the bond on a scrap before cutting the complete project.
Freezer paper is available through grocery stores and quilt shops. A quilting history account notes that Reynolds freezer paper moved from seasonal deer-hunting availability into grocery-store distribution, with quilting listed among the uses on the packaging. This quilting tutorial explains the iron-on property.
For cutting support, compare the rulers, mats, specialty threads, and quilting batting collection available from Linda's Electric Quilters before you begin. Matching your piecing supplies to the eventual quilted finish prevents a rushed supply run halfway through the project.
Preparing Templates and Pressing Fabric
Template orientation causes more failures than most beginners expect. Freezer paper has a dull side and a shiny, coated side, and they serve different purposes.
Trace or print the design onto the dull side. If you're tracing from a regular paper pattern, place the freezer paper over the pattern and copy the solid sewing lines, labels, and fabric indications. If your printer accepts freezer paper sheets, print directly onto the matte side and verify that the pattern has printed at the intended scale before cutting fabric.
Confirm the fabric side before pressing
Place the shiny side against the wrong side of the fabric. The coated surface needs to touch the cloth. If you press the dull side to the fabric, the template may not adhere, and you'll blame the fabric or iron for a placement mistake.
Before applying heat, hold the paper and fabric together under good light. Check these points:
- The pattern is facing the intended direction.
- The fabric's wrong side touches the shiny paper.
- The fabric extends beyond every required seam edge.
- Labels and directional motifs face correctly.
- The paper won't cover an area that needs to remain free for the next patch.
Cut generously, then trim accurately
Cut every fabric section at least 1/4 inch oversized, as advised in this freezer paper foundation piecing guide. Some sewists prefer 1/2 inch on small units because the extra margin gives their fingers more control and protects against a narrow placement error.
Place the shiny side down and press with a hot, dry iron. Lift and set the iron rather than pushing it across the fabric. Give the adhesive a moment to cool before handling the section. That short pause helps the bond set instead of allowing the fabric to drift while it's still warm.
If your template has several seam lines, pre-mark matching notches and fold each line carefully. A Hera marker, blunt creaser, or fingernail can define the fold without cutting the paper. Don't crease randomly. Every fold must correspond to a marked sewing line, because that fold becomes your physical seam guide.
Sewing Accurate Seams Next to the Fold
The defining movement in freezer paper piecing is simple, but it demands close attention. You sew next to the folded paper edge, not through the paper. The fold creates a raised guide that replaces the printed foundation line used in standard foundation paper piecing.
Begin with the first fabric section bonded to the template. Fold the paper back along the next seam line. Place the next fabric piece underneath, right sides together, so it covers the intended area and extends beyond the fold. The standard seam allowance remains 1/4 inch, while the paper itself marks the exact line to follow.
Stitch directly beside the paper fold. Your needle should come close enough to preserve the intended unit size, but it shouldn't regularly pierce the template. Because the machine isn't sewing through the paper, you generally don't need the shortened stitch length associated with conventional paper foundation piecing. Use the stitch setting that gives you a smooth, controlled seam on your machine.
Press each patch before adding the next
Open the fabric and press the new seam with a dry iron. Press without sliding. The new patch should also adhere to the appropriate portion of the freezer paper, which keeps the growing unit stable as you fold the next line.
Accuracy check: If the sewn line sits too far away from the fold, the finished unit grows. That small enlargement can move points, alter angles, and make later intersections miss.
Repeat the rhythm for each patch:
- Fold: Crease the paper exactly on the next seam line.
- Place: Position the next fabric piece right sides together with enough coverage beyond the fold.
- Stitch: Sew immediately beside the paper edge.
- Press: Open the seam, then set the fabric with a dry iron.
- Inspect: Confirm that the paper still adheres before folding again.
If the template starts lifting, stop before the next seam. Press the area again with dry heat and allow it to cool. Insufficient contact creates shifting, and shifting at this stage becomes a crooked seam later.

After the final patch, trim the completed unit using the template as your reference. Peel the paper gently, supporting the fabric near the seam allowances so the edges don't fray. Set the template aside flat rather than leaving it crumpled beside the machine.
Template Reusability and Durability Limits
The useful question isn't whether freezer paper templates are reusable. They are. The useful question is when reuse stops saving time and starts damaging accuracy.
Published guidance varies. One current tutorial says templates may last only a few uses, while another suggests 6 to 20 reuses, as described in this freezer paper durability tutorial. Those figures aren't a universal specification. They reflect different papers, irons, fabrics, handling habits, and pattern demands.
The paper's bond weakens through repeated heat exposure and handling. A simple unit with broad patches may remain stable longer than a complex section with many folds and pressing cycles. Slippery fabrics can also expose a weak bond sooner because even slight movement becomes visible at the seam.
Use a decision test instead of a reuse promise
Before starting the next repeat unit, inspect the template:
- Bond: Press a small edge onto scrap fabric. If it lifts during ordinary handling, accuracy is already at risk.
- Shape: Lay the template flat. Warped folds or softened corners can change the unit.
- Surface: Look for battered areas where the coating no longer grips consistently.
- Seam guide: Fold the next line and check whether the edge remains crisp.
- Result: Compare the latest unit with an earlier one. If points or intersections begin drifting, replace the paper.
A fresh template is cheaper than unpicking a distorted block. Track each template with a pencil mark on an unused margin if you're producing repeated units. The mark won't predict its life, but it will help you identify patterns in your own fabric, iron, and pressing routine.
Compare the two foundation choices
| Factor | Freezer Paper | Standard Foundation Paper |
|---|---|---|
| Cost per use | Reusable, but the practical life varies with paper, heat, fabric, and complexity | Typically used for one construction cycle, then removed |
| Setup time | Requires tracing or printing, folding, and pressing the template | Requires printing or copying the foundation pattern |
| Precision retention | Strong while the bond and folds remain stable | Consistent during sewing, but the paper can shift or tear during removal |
| Best use cases | Repeated units, difficult fabrics, and designs where gentle removal matters | Conventional foundation piecing through printed sewing lines |
The method's efficiency is therefore conditional. Freezer paper piecing is a sensible choice for repeat sections when the template stays flat, adheres securely, and preserves the fold. Standard paper remains practical when you need a disposable foundation or when sewing directly through printed lines suits the pattern better.
Common Mistakes and How to Fix Them
Most freezer paper piecing errors have a visible symptom. Stop and diagnose the symptom before sewing the next seam.

Troubleshooting at the pressing station
The paper won't stick. You may have placed the dull side against the fabric, used steam, or lifted the iron before the surface bonded. Turn the template so the shiny side touches the wrong side of the fabric, press with dry heat, and let it cool before moving it.
The fabric looks stretched. Sliding the iron can distort the grain, especially on a bias edge or unstable material. Lift and reposition the iron instead of dragging it.
The piece shifts while you sew. The adhesive contact may be incomplete, or the section may not have cooled before handling. Repress the area, check the orientation, and avoid moving the unit until the bond has set.
Troubleshooting at the machine
The finished unit is larger than the pattern. Your stitch line probably sat too far from the folded paper edge. Fold again, place the presser foot so the needle runs immediately beside the paper, and check the seam before pressing it open.
The seam allowance is too narrow. The fabric may not have been cut with enough margin, or trimming happened before the seam was secured. Cut future pieces at least 1/4 inch oversized, with 1/2 inch useful for small units where handling is difficult.
The paper falls away during construction. Don't keep sewing and hope the next press will correct it. Reattach the paper with dry heat, then test the fold before adding another patch.
A worn template is not a badge of efficiency. If the waxy bond has degraded or the fold has warped, replace the template before the block's geometry changes.
Abandon the paper when repeated pressing no longer creates reliable adhesion, when the folds no longer align, or when the latest unit shows visible drift. Saving a sheet of freezer paper isn't worthwhile if it leads to resewing, tension corrections, or a block that no longer matches its neighbors. For a longarm project, accurate piecing also protects later quilting decisions, including thread path, tensioning, and how the quilt's loft responds under the needle.
Advanced Applications and Pattern Variations
Freezer paper piecing becomes especially useful when the fabric itself refuses to behave. Slippery cloth, stretchier textiles, irregular shapes, curved lines, and small sharp pieces can shift under a conventional approach. A published study on freezer paper quilt technique reports that freezer paper helped join irregular patterns, complex straight and curved lines, and small sharp pieces more quickly and accurately, while reducing shifting and distortion with stretchier fabrics.
That makes the method relevant beyond classic cotton block construction. Consider it for bias-heavy modern designs, garment-fabric experiments, machine-embroidery-adjacent template work, and appliqué shapes that need temporary placement without adhesive residue. Test the fabric first, because a reliable result depends on how the textile responds to heat and pressure.
Pattern variations can include repeated geometric units, alternating directional motifs, curved sections, and color studies built from pre-cut fabric bundles. English paper piecing supplies can complement projects that mix hand-pieced portions with freezer-paper-guided machine seams. Specialty threads can then carry the finished top through domestic or longarm quilting without distracting from the precise piecing.
A useful companion reference is The Quilt Show's explanation of freezer paper piecing, which distinguishes this method from standard foundation paper piecing and reinforces the folded-edge approach. Before cutting an entire project, make one test unit with the actual fabric, thread, iron setting, and pressing surface you'll use.
For the next project, choose materials that support accuracy from template through quilting. Build your kit with dependable paper, fabric, thread, batting, and notions, then replace a worn template before it compromises the design.
Linda's Electric Quilters offers fabrics, batting, threads, notions, and English paper piecing supplies for precision-focused projects like freezer paper piecing. Visit Linda's Electric Quilters to choose the materials you need, then start your next repeat block with a fresh template and a stable pressing setup.


