
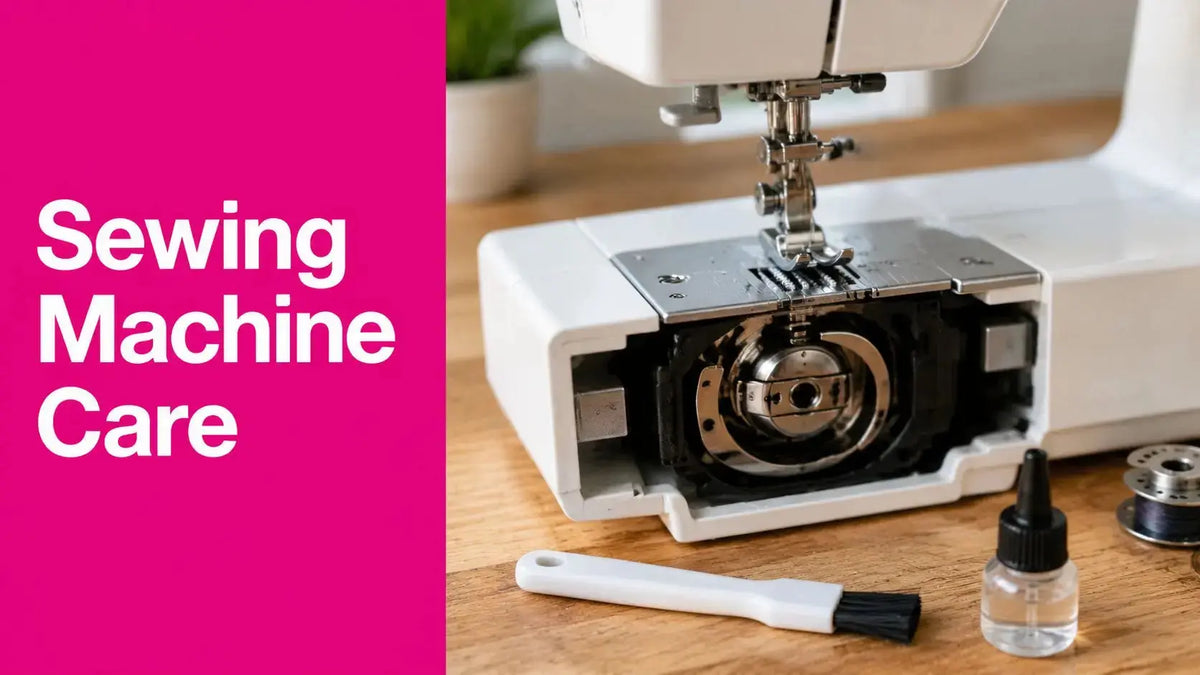
Your machine was sewing fine yesterday. Today it's skipping stitches, packing lint under the plate, or making a thread nest the size of a golf ball. Most of the time, that doesn't mean the machine is worn out. It means it's dirty.
In our shop in McKinney, Texas, we see this constantly, especially on hard-working quilting machines and well-loved domestic models. If you want to know how to clean sewing machine parts the right way, start with the basics: unplug it, open only the areas meant for regular cleaning, remove lint from the bobbin area and feed dogs, and oil only where your manual allows. If you like learning visually, pair this guide with a maintenance video and your favorite needle guide so your stitch system stays in balance from top thread to bobbin.
Why a Clean Machine is Your Best Kept Sewing Secret
Your machine can run fine on Friday, then start clattering, skipping, or making ugly nests by Saturday morning. In the shop, that kind of swing usually points to lint, old oil, or stray thread packed into the places that control stitch formation. It mimics tension trouble, needle trouble, and timing trouble, which is why so many sewists start adjusting the wrong thing.
I see it on both ends of the market. A hard-working longarm can keep sewing through a surprising amount of fuzz before the stitch quality falls off. A computerized domestic machine often gives you less warning and less room for error. That difference matters. Generic cleaning advice treats every machine the same, and that is how people turn a simple service task into a repair visit.

What buildup does
Lint crowds the hook area. Thread bits wrap around moving parts. Old oil thickens and starts dragging instead of lubricating. Once that happens, the machine has to work harder to form each stitch, feed fabric evenly, and hold steady tension.
The symptoms are easy to misread. You hear extra noise, feel roughness in the handwheel, or watch the top thread pull inconsistently even after rethreading. Quilters often blame the cone, the batting, or the needle first. Sometimes they are right. Many times, the machine just needs to be cleaned before any diagnosis means much.
This is also where machine type matters. On a strong, shop-built longarm like an Innova, a technician may use controlled compressed air in specific areas during service because the machine is open, accessible, and built to handle regular maintenance. On many home machines, especially sealed or computerized models, blasting air can drive lint deeper into sensors, tension assemblies, or bearings. Same debris problem. Different risk.
Shop rule: Clean first. Diagnose second. You will solve a lot of stitch problems before touching any adjustment beyond normal user access.
A clean machine is easier to read. If the trouble disappears after cleanup, you avoided wasted time and unnecessary tinkering. If it stays, you have a clearer signal that the problem is a worn needle, damaged part, timing issue, or something that belongs on a technician's bench.
Gathering Your Essential Cleaning Toolkit
A good cleaning kit prevents careless damage. I have seen more scratched needle plates and stripped screws from improvised tools than from actual wear. Keep the setup simple, but keep it correct.

What to keep at the machine
Set aside a small tray or zip case and leave it near the machine. If you have to hunt for tools, routine cleaning gets skipped.
Here's the basic kit I recommend for cleaning sewing machine parts safely and thoroughly:
- Soft lint brush. Use it to loosen lint in the bobbin area, feed dogs, and around the hook race.
- Small screwdriver set. Match the driver to the screw head on your stitch plate. A poor fit chews up screws fast.
- Tweezers. Use them to lift clipped threads and fuzz packed into corners.
- Microfiber cloth. Best for exterior wipe-downs, light dust, and oily fingerprints.
- Small vacuum attachment. Useful for lifting loosened lint out of open areas without pushing it farther inside.
- Approved sewing machine oil. Use it only where the manual says owner oiling is allowed.
- Parts tray or magnetic dish. Tiny screws disappear fast on a sewing table.
If you need to replace worn-out supplies, a maintenance category like Notions and Tools gives you a straightforward place to compare brushes, tweezers, cloths, and oil.
Tools that are safe, and tools that cause trouble
Tool choice matters because machine design matters. An open, heavy-duty longarm gives you more access and more room to work. A computerized domestic machine often packs sensors, wiring, and tight assemblies into the same small space. The wrong tool on the wrong machine turns routine cleaning into an avoidable service call.
A few shop rules save a lot of grief:
- Choose soft bristles. Nylon is fine. Stiff picks and metal brushes belong in trained hands and very specific service situations.
- Use sewing machine oil only. Household oils leave residue and attract grime.
- Skip cotton swabs in tight moving parts. They shed fibers, especially around the hook area.
- Use the correct screwdriver once. Forcing the wrong bit is how stitch plate screws get damaged.
Compressed air deserves a plain answer. For routine home cleaning, I do not recommend canned air. It often drives lint deeper into tension parts, bearings, and sensor areas. On some sturdy longarms, a technician may use controlled compressed air during service because the machine is more open and the operator knows exactly where that debris will go. That is a service-bench choice, not a default at-home habit.
Pro tip
Brush first, then lift debris out with a small vacuum attachment if needed. A cleaning demonstration in this sewing machine cleaning video on safe lint removal and oil use also cautions against blasting lint inward and against over-oiling, which can transfer oil to thread and fabric.
One more point from years around quilting machines. Keep your cleaning kit separate from general household tools. The brush that touched glue, sandpaper dust, or garage grime has no business near a hook assembly or tension area.
If you like a ready-made option, the Oh Sew Clean Brush and Cloth Set is a practical choice for regular dusting and wipe-downs.
Your Routine Cleaning Ritual for Perfect Stitches
Routine cleaning is where the primary payoff lives. Not the once-a-year deep service. The habit. The short reset that keeps lint from becoming drag, drag from becoming noise, and noise from becoming bad stitches.

The fast clean that prevents most trouble
One practical guide recommends de-linting every 2–3 bobbins and cleaning immediately after sewing high-lint materials such as flannel, minky, batting, or fleece. Its workflow is simple: remove the thread, bobbin, presser foot, needle, and stitch plate, then brush out the bobbin area and feed dogs, as described in Diary of a Quilter's step-by-step cleaning guide.
That schedule makes sense in a real sewing room. Batting fuzz and plush fabrics don't wait for an annual service date.
My standard routine on a domestic or quilting machine
Do this in order so you don't miss hidden lint.
-
Power down first
Unplug the machine and clear your workspace. -
Strip the sewing area
Remove the thread path, bobbin, presser foot, and needle so nothing blocks access. -
Take off the stitch plate
Set screws aside where they won't disappear. -
Brush, don't blast
Sweep lint from the feed dogs, hook race, bobbin case area, and corners under the plate. -
Lift out thread tails
Use tweezers for wrapped strands, especially near the hook. -
Reassemble carefully
Put the plate, needle, and presser foot back on without rushing. -
Test on scrap fabric
Never assume you're done until the machine sews cleanly.
A simple video walkthrough helps if you prefer to see the hand positions and order of removal before trying it on your own machine.
Where people go wrong
Most rushed cleanings miss one of three spots:
- Under the feed dogs where fuzz cakes into a felted layer
- The hook race where tiny threads collect oil and become sticky
- The edge of the bobbin case area where clipped ends tuck themselves out of sight
If the machine sounds harsher after a project full of batting or fleece, don't keep sewing through it. Stop and clean before you start adjusting tension.
This is also a good time to keep a dedicated maintenance kit at your table so the job takes minutes instead of becoming a hunt through drawers. If you prefer a bundled option, a shop-grade maintenance kit can save time by keeping the right brush, driver, and cloth together.
The Annual Deep Clean and Lubrication Process
You notice it on a busy sewing day. The machine still stitches, but it sounds sharper, runs warmer, or starts leaving the occasional ugly loop that was not there last month. That is usually the point where a quick brush-out is no longer enough. A yearly deep clean is for checking wear, clearing packed lint from places you do not reach during routine care, and oiling only the points your manufacturer puts in the user-maintenance column.

What a deep clean includes
A proper annual service starts with inspection, not oil.
Look closely at the stitch-forming parts and every lint path you can safely reach. On many machines, that means the bobbin area, hook race, feed system, needle bar area, and any vents or outer covers that collect room dust. On longarms, I also pay attention to places where speed and vibration tend to pull in fine batting lint. On computerized domestic machines, I stay inside the limits of the manual and stop well before sealed covers, boards, or sensor assemblies.
Focus on these areas:
- Bobbin area and hook race where old oil and lint turn into sticky residue
- Feed dogs and the space around them where packed fuzz starts affecting fabric movement
- Approved thread path access points where stray fibers can interfere with tension
- Exterior covers, vents, and crevices where dust builds up before it works inward
If a cover is not clearly marked as owner-removable in the manual, leave it alone. Guesswork gets expensive fast.
The one-drop rule
Over-oiling causes as many problems as neglect. I see it in the shop all the time. Oil gets added to a dirty hook area, lint grabs it, and the machine starts sewing like it has a tension problem when the problem is sludge in the moving parts.
Use oil only if your manual says the machine has user lubrication points. Then keep it tight and deliberate:
- Clean first so fresh oil is not mixing with lint
- Apply one drop only at the specified point
- Turn the handwheel by hand to spread the oil before power sewing
- Stitch on scrap fabric until you are sure no residue is transferring
That last step matters on quilts. A single smear of oil on a customer top will ruin your afternoon.
How I handle lubrication by machine type
One-size-fits-all advice becomes unworkable. A strong longarm and a delicate computerized sewing machine do not tolerate the same maintenance choices.
On many longarms, including machines built for sustained high-speed quilting, the hook assembly may have clear owner-service instructions and regular lubrication points. Precision still matters. Too much oil will sling into the hook area, collect lint, and show up in noise, drag, or oil marks on fabric. On domestic computerized models, the safer call is often less owner oil, not more. Many are designed to be cleaned by the user in a few specific spots and lubricated during technician service.
Compressed air is another point where generic advice causes trouble. On a longarm with an open, accessible assembly, a technician may use controlled air as part of service because they know where debris will go and what needs to be protected. On a computerized domestic machine, blasting air into the case can push lint deeper toward sensors, boards, and places you cannot clean back out. For home maintenance, brushing and careful lifting with tweezers is the safer default unless the manufacturer says otherwise.
What to leave alone
Leave sealed bearings, motor areas, electronics housings, timing-related parts, and any adjustment screw you cannot identify with confidence. Cleaning does not mean recalibrating.
A machine that is clean and slightly overdue for professional service is usually in better shape than a machine that has been opened, over-oiled, and adjusted by trial and error.
Annual deep cleaning is also the right time to check for burrs on the bobbin case, needle plate scratches, tired needles, and thread debris wrapped around moving shafts. If the machine still sounds rough or stitches inconsistently after careful cleaning and correct oiling, stop there and book bench service. That is maintenance discipline, not defeat.
Comparing Cleaning Techniques by Machine Type
Most articles on how to clean sewing machine parts give one-size-fits-all advice. That's where people get into trouble. A sturdy longarm, a basic mechanical domestic, and a computerized embroidery machine don't all tolerate the same cleaning methods.
One of the biggest gaps in sewing maintenance advice is the compressed air versus vacuum debate. Bernina's discussion of sewing machine cleaning practices points out that sources conflict, and that what's really needed is machine-specific decision rules, especially for longarm and embroidery users. That's exactly the right lens.
Machine cleaning needs at a glance
| Machine Type | Key Cleaning Focus | Compressed Air Risk | Recommended Tools |
|---|---|---|---|
| Mechanical domestic | Bobbin area, feed dogs, stitch plate underside, visible thread path | Moderate risk. It can still push lint deeper where you can't reach it | Soft brush, tweezers, microfiber cloth, correct screwdriver |
| Computerized or embroidery | Bobbin zone, plate area, exterior dust, only clearly user-serviceable access points | High risk. Electronics and sensors make aggressive air a poor gamble | Soft brush, microfiber cloth, careful vacuum attachment if needed |
| Serger or longarm | Loopers or hook area, lint-heavy pathways, thread debris around moving assemblies | Varies by model. More robust builds still don't justify casual blasting | Model-approved brush set, tweezers, cloth, technician guidance for deeper service |
The risk-based rule I use in the shop
For computerized and embroidery machines, avoid canned air for normal maintenance. The downside is too high, and the lint often ends up deeper inside than where it started.
For mechanical domestic machines, a brush-first approach is still the safest default. If debris is loose, a small vacuum attachment can help lift it out instead of driving it inward.
For longarms, especially durable models with more open access, some owners assume anything goes. It doesn't. These machines may be tougher, but the goal is still controlled lint removal, not forcing debris toward bearings, sensors, or inaccessible corners. On expensive quilting systems, I'd much rather see careful brushing and technician-level service than a quick blast that creates a hidden problem.
When to stop and call a technician
Stop DIY cleaning if you notice any of these:
- Persistent grinding or knocking after lint removal
- Thread snarls returning immediately after rethreading and testing
- Visible oil spread where it shouldn't be
- Electronic error behavior on a computerized model
- Resistance in the handwheel that doesn't clear after cleaning
That's especially true on embroidery units and longarms. The higher the machine investment, the lower your tolerance should be for guesswork.
Troubleshooting Common Issues and Your Maintenance Schedule
A customer will often tell me, "It was sewing fine yesterday, and today it sounds wrong." In the shop, that usually means one of two things. Lint has packed into a working area, or a small problem got ignored until the stitch quality changed enough to notice.
What the symptom usually means
Unplug the machine first. Remove the needle and presser foot so you can see clearly and work without scraping your hands on sharp parts.
Then troubleshoot by symptom, not by guesswork:
- Skipped stitches usually start with the needle, but if a fresh, correctly installed needle does not fix it, inspect the hook and bobbin area for lint, stray thread, or a nick that is catching thread.
- Thread nests under the fabric often trace back to trapped thread bits under the needle plate, poor top threading, or debris interfering with smooth thread pickup.
- A rough, raspy, or knocking sound points to buildup in moving parts, a thread fragment wrapped where you cannot see it at first glance, or lubrication that is overdue if your manual calls for user oiling.
- Fabric that stops feeding well usually means lint packed around the feed dogs or under the plate, where it lifts fabric unevenly and reduces traction.
Clean one likely area at a time. Rethread completely. Test on scrap fabric. That sequence saves time because you know which change solved the problem.
On longarms, I also listen before I touch anything. A good machine has a familiar sound. If that tone changes, especially on an Innova or another high-end system, I check for thread caught in the hook path, lint buildup around moving assemblies, and any sign that oiling intervals were stretched too far. On a computerized domestic model, I stay more conservative and stop sooner if the problem looks electronic instead of mechanical.
A maintenance schedule you can actually follow
A simple schedule beats an ambitious one you never keep.
| Timing | What to Do | Focus |
|---|---|---|
| After lint-heavy projects | Brush out visible debris from the standard cleaning area | Bobbin area, feed dogs, underside of the stitch plate |
| After regular sewing sessions | Wipe the exterior and remove loose thread tails | Machine bed, needle area, spool path |
| During heavy use periods | Check the hook area and plate more often | Any spot where lint collects fast |
| Yearly, or sooner if performance changes | Do a deeper user-level clean and book service if needed | Approved lubrication points, wear inspection, technician check |
That last line matters more than the calendar. A machine used for quilt piecing every day needs attention sooner than one used twice a month for mending.
I tell longarm owners to schedule by hours and behavior, not just dates. Big open machines can handle serious workloads, but they also hide developing problems behind smooth power until the stitch quality drops. Delicate computerized machines have the opposite trade-off. They may need lighter cleaning done more carefully, with less owner disassembly and less tolerance for improvising.
When home care is enough and when it isn't
Home care is enough when the machine goes back to normal after cleaning, correct reassembly, fresh threading, and a test sew.
Stop and hand it off if the same issue returns right away, the handwheel still feels resistant, the machine keeps making abnormal noise, or a computerized model starts throwing errors or behaving inconsistently. That is where risk-based judgment matters. I am comfortable asking a longarm owner to inspect accessible areas thoroughly. I am much quicker to send an embroidery or computerized domestic machine to a technician before a simple lint issue turns into a sensor, timing, or board problem.
Good maintenance lowers repair bills because the technician starts with a cleaner machine and a shorter list of likely faults. That is the main payoff.
Frequently Asked Questions About Sewing Machine Care
Can I use household oil to lubricate my sewing machine
No. Use only sewing machine oil approved for your model. Household oils can leave residue, attract more debris, and create the gummy buildup that interferes with stitch-forming parts.
Should I clean my machine even if it still seems to sew fine
Yes. A lot of machines keep stitching while lint is building in the hook area and feed system. Cleaning before problems show up is easier than correcting skipped stitches and thread nests after they start.
How do I know it's time for professional service instead of home cleaning
If careful cleaning, correct reassembly, and a test sew on scrap don't solve the issue, it's time to hand it off. That's especially true for computerized and embroidery machines, and for longarms with persistent noise, drag, or inconsistent stitch formation.
Is a vacuum always better than compressed air
For routine care, a brush-first approach is the safest baseline. A small vacuum attachment can help lift loosened debris. Compressed air is the controversial option because it may push lint deeper, and the risk increases on delicate or electronic machines.
Do I need to remove the needle and presser foot every time I clean
For a proper cleaning, yes. It gives you better access and reduces the chance of scraping your hands or working around parts that are in the way.
If your machine needs more than a standard lint clean, or you want the right supplies on hand before the next project, visit Linda's Electric Quilters for machine-care tools, quilting essentials, and expert help from a team that works with serious sewing and longarm equipment every day.


