
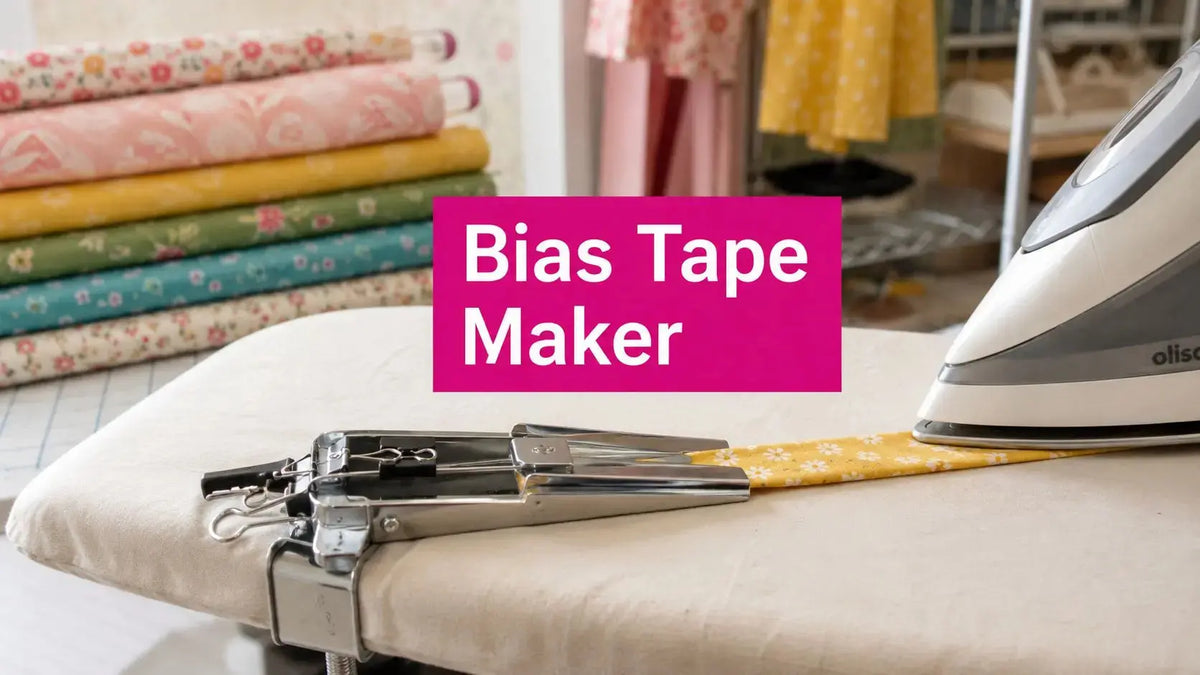
How to use a bias tape maker — the short version:
- Cut your fabric into bias strips at the width the maker calls for (twice the finished tape width).
- Feed the strip into the wide end of the bias tape maker, wrong side up, and coax the tip out the narrow end with a pin.
- Pin the tip to your ironing board so the maker can slide away from it under light tension.
- Slide the maker along slowly while following right behind it with a hot iron — the tool folds both edges evenly and the iron sets the creases.
- For double-fold tape, fold the strip in half lengthwise and press again.
Sizing, strip prep, and the fixes for uneven folds are all in the guide below.
You've got a stack of fabric strips on the table, your iron is hot, and that little bias tape maker still feels more mysterious than useful. That's normal. In a quilting studio, the tool stops looking confusing once you treat it as part of a workflow, not a magic gadget, because the job is simple, fold a strip evenly, keep it centered, and set the crease before it cools. If you're working on quilt binding, neckline finishing, or a decorative edge, how to use bias tape maker starts with understanding what size to buy, how to prep the strip, and how to keep your hands and iron moving together.
What a Bias Tape Maker Actually Does
At the cutting table in McKinney, I usually see students pick up the tool, turn it over twice, and ask the same question, “So what's it doing?” The answer is more practical than it looks. A bias tape maker takes a flat strip and folds it into two equal edges as you pull it through, then the iron sets those folds at the exit. The strip needs to stay centered, because if it drifts toward the top or bottom, the fold comes out uneven and you have to recenter it.
The strip's bias matters because it gives the fabric more give around curves, which helps it lay smoothly instead of puckering. One tutorial notes that the strip is usually fed into the wider end wrong side up, and that the starting end is often cut on the bias or at a diagonal so it feeds cleanly. That tiny bit of preparation makes the first pull much easier, especially when you're working with a long binding run and don't want the tape to twist before it even starts.
A bias tape maker is also sized to the finished width you want, so the tool you buy should match the output you're aiming for, such as 1/2 inch, 3/4 inch, or 1 inch output depending on the maker. That makes it a workflow choice, not just a convenience purchase. Some sewists only need a short trim, others want yards of binding for quilts, garments, and home projects, and the maker helps create that repeatable result faster than hand-folding.
For a quick visual reference while you're deciding what this tool can replace on your table, WearView has a useful look at how bias-like finishing choices can affect the way a project sits and drapes, which can help when you're comparing edge treatments on garments and quilts: WearView.

Practical rule: if the strip isn't feeding centered, stop and reset it before you press more length.
Choosing Fabric, Size, and Fold Type Before You Cut
The first mistake I see is cutting fabric before the maker decision is settled. That turns a simple binding job into trial and error. Start with the fabric weight, because a lightweight woven behaves far better than a thick, bulky cloth when it has to fold through a narrow tool, and the finished tape should suit the project instead of fighting it.
Match the maker to the finish you want
A single-fold strip lies flat and works well when you want a clean edge or a decorative band. Double-fold tape is folded again in half, which makes it better for enclosing raw edges like quilt binding or a neckline. Modern tutorials also point out that maker sizes are chosen by the output width you want, so the tool and the project need to agree before you cut.
| Bias Tape Maker Sizes at a Glance | ||
|---|---|---|
| Maker Output | Strip to Cut | Best For |
| 1/2 inch | Wider input strip than the finished tape | Small bindings and narrow trims |
| 3/4 inch | Wider input strip than the finished tape | General garment edges and medium bindings |
| 1 inch | Wider input strip than the finished tape | Bold trims and fuller edge finishes |
The other thing that trips people up is the cut width. The strip you cut is not the same as the finished width that comes out of the maker. That's why a pre-cut checklist helps. Before you touch the rotary cutter, confirm the fabric type, the maker size, and whether you want single-fold or double-fold tape. If you want a nice crisp result on a quilting cotton project, a little preparation goes a long way, and a #80/12 Titanium-Coated Topstitch Needle can be a sensible machine setup choice when you're stitching fine thread through pressed folds.
Shop-floor note: if the edge finish is decorative, single-fold is usually enough. If the edge must cover raw fabric, double-fold is the safer choice.
Cutting and Joining Strips for Continuous Binding
Once the size decision is made, the prep work begins. Bias strips are cut on a 45° angle because that diagonal direction gives the tape the stretch it needs to move around curves without fighting the fabric. A common teaching method is to cut true strips, then join them before the pressing stage so the final binding behaves like one long piece instead of a stack of short ones.
Why the diagonal join matters
The cleanest join places the strips at a 90° angle and sews the seam on a 45° line. Another commonly taught method for continuous binding is to cut a perfect square fabric piece diagonally, sew the ends together at a 90° angle with about 1/4 inch of fabric extending from each end, press the seams open, and then feed the strip through the maker. That keeps the join flatter and reduces bulky spots that would show up later on the quilt edge. The goal is simple, less bulk, cleaner feeding, smoother stitching.

A cleaner strip starts before pressing
A high-quality join also depends on pressing the seam open after trimming. That step matters because bulk at the join is one of the fastest ways to make the strip feed unevenly through the tool. Tutorials also note that starch or light moisture can help the fabric hold a crisp crease, and a straight, flat strip is easier to guide than one that wants to curl.
If you're doing a first binding project and want thread that glides cleanly through those joins, this is a good place to think about your needle choice before you reach for the iron. For the actual stitching, the right needle helps reduce breakage and keeps the work moving at the machine.
Pro tip: press the seam open before you join more strips. A flatter strip feeds better, and the maker rewards that discipline immediately.
Feeding the Strip and Pressing in One Steady Motion
This is the moment where the tool starts to feel useful. Pin the leading end to the ironing board if that helps you control the strip, then feed the strip into the wider end of the maker with the wrong side facing up. Keep the iron waiting at the exit, because the folds need heat right away to set cleanly. If the strip cools before the crease is pressed, the tape starts to relax and the shape gets sloppier.
Hand position matters more than speed
One hand controls the maker, the other hand guides the pressed tape. The important part is that both movements happen at the same pace. Many instructors recommend keeping the iron close to the exit and moving the iron and maker together so the folds set before the fabric cools. That steady rhythm is what keeps the tape centered and uniform.
Starching or lightly dampening the strip can help the crease hold, and one tutorial specifically notes that a starched strip produces a crisper crease than an unstarched one. That doesn't mean every strip needs heavy starch, but it does mean the fabric should have enough body to keep the fold once it leaves the tool.
The biggest mistake here is stopping and starting. Every pause gives the strip a chance to twist or widen at the exit. If you need to stop, stop early, not in the middle of a pull. The tape should feel like one continuous motion, not a tug-of-war between the iron and the tool.
Here's the rhythm I teach in the studio:
- Start cleanly by feeding the strip straight into the wider end.
- Keep the folds centered as the strip emerges.
- Press immediately so the heat locks the fold.
- Move at one pace so the maker and iron stay matched.
When the motion is right, you'll see the tape leave the tool with both edges folded evenly and the middle crease holding tight.

Keep the iron close to the exit. If the tape cools before the crease sets, the fold gets soft and the edges wander.
Troubleshooting Common Bias Tape Maker Problems
Most problems with a bias tape maker come from control, not from the tool itself. If the strip drifts, the fold stops looking even. If the iron gets ahead of the feed, the crease doesn't set. If the strip twists or frays, the join or the fabric prep usually needs attention.
What the symptom usually tells you
If the tape is off-center, the cause is often uneven finger pressure while feeding. The fix is to guide the strip straighter and recenter it before the next pull. If the folds look soft or spring open, the maker is moving faster than the iron can press. Slow the feed so the iron stays right at the exit.
Fraying and twisting usually point back to prep. A rough join, a fabric that wasn't pressed open, or a strip that didn't get enough starch can all make the tape harder to control. One source also notes that some sewists skip the maker entirely for very short runs and use a cardboard template or hand folding instead, which is a smart choice when the run is tiny and setting up the tool takes longer than the work itself. That isn't a failure, it's a workflow decision.
When to skip the maker
You don't need the tool for every job. If the project only needs a short bit of binding, hand folding can be faster. If the strip is too short to justify threading the tool, or if the fabric is already behaving well under pins and press, a template may be simpler. The point is to choose the method that fits the job, not the method that looks the most technical.
Straight answer: use the maker when you need length and consistency. Skip it when the run is so short that setup becomes the slowest part.

Using Finished Bias Tape on Quilts and Beyond
A finished strip can do more than bind a quilt edge, and that's where the maker starts paying off. On a quilt, double-fold bias tape encloses the raw edge and gives you a clean binding line. On a neckline or armhole, it finishes the opening without adding too much bulk. On a mini wall hanging, single-fold tape works like a flat trim and can frame the design without overpowering it.
Which fold fits which project
| Single-Fold vs Double-Fold Bias Tape | ||
|---|---|---|
| Use Case | Best Fold Type | Why It Works |
| Quilt edge binding | Double-fold | It encloses the raw edge and holds up well |
| Neckline or armhole finish | Double-fold | It gives a clean inside and outside finish |
| Decorative mini project edge | Single-fold | It lies flat and stays visually light |
For a more decorative finish, some sewists also reach for trim instead of making tape by hand. A holiday stocking or pillow edge can use something like the 1-inch Faux Velvet and Rhinestone Trim from a notions aisle when the goal is sparkle rather than a fabric match. And if you're washing finished home projects after the sewing is done, a practical care guide such as wash chair covers as a family is a good reminder that the finished edge should make sense in the life the project will live in.
The key is matching the finish to the job. If the edge needs strength and enclosure, use the bias tape you made. If it needs a decorative accent, the tape can stay visible and flat.
Wrap-Up and Quick Answers for Beginners
A bias tape maker works best when you treat it like part of the whole binding workflow, not a shortcut you use after skipping prep. Choose the right width, cut on the bias, join strips cleanly, then feed and press in one steady motion so the folds stay centered and crisp. If the strip is short, hand folding can still make sense, and that flexibility is part of being efficient at the cutting table.
If you're ready to finish your first project, shop the notions, fabric, and trim you need at Linda's Electric Quilters in McKinney and build the rest of your binding kit from there.
FAQ
Can a bias tape maker work on knits?
It can, but woven fabrics usually behave more predictably through the tool and hold the crease better.
How do I store finished bias tape?
Keep it flat or lightly wound so the crease doesn't relax and the tape doesn't pick up new twists.
What's the fastest way to starch a long strip without tangling it?
Work in manageable lengths, mist or starch lightly, and press as you feed so the strip stays under control.
Is store-bought binding ever the better choice?
Yes, if time matters more than custom color or width, pre-made binding can be the faster choice for a large quilt.
A CTA for Linda's Electric Quilters.


