
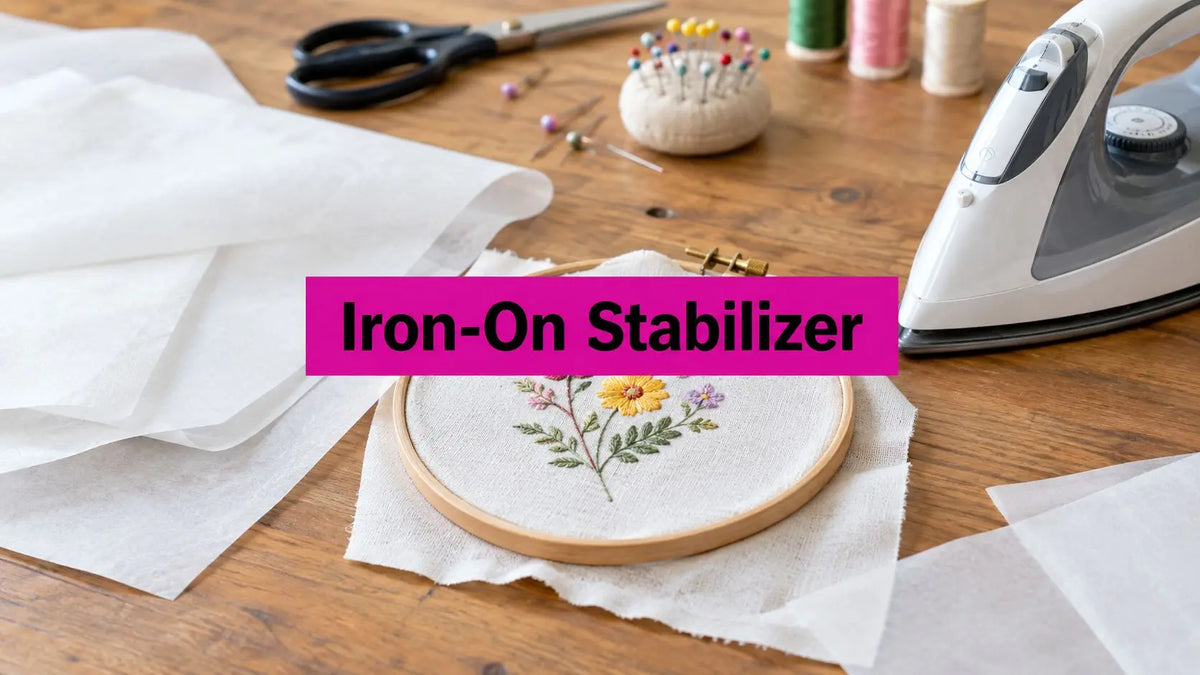
You've hooped a stretchy shirt, started the design, and watched the fabric pull into small waves around the first few rows of stitches. Maybe the hoop shifted, the lettering drifted, or spray adhesive left a tacky film on the needle. These problems usually aren't caused by poor tensioning alone. They often mean the fabric needs a more stable foundation.
Iron on stabilizer adds temporary support by bonding to the wrong side of the fabric before embroidery. Used with the right weight, heat, and removal method, it can reduce shifting, puckering, and stitch distortion. Used carelessly, it can leave residue, affect the fabric's hand, or make cleanup harder. This guide shows how to choose, apply, hoop, and remove it with the practical judgment I use when testing supplies in a McKinney, Texas sewing studio.
When a Hooped Project Starts to Fight Back
A cotton knit shirt can look perfectly flat on the cutting table, then become difficult the moment the hoop tightens. The fabric stretches in one direction, the grain shifts in another, and the embroidery area no longer sits square beneath the needle. As the design builds, the stitches may tunnel, the lettering can lose its shape, and the shirt may pucker around the hoop.
That's the point where many stitchers reach for more spray adhesive. It may hold the layers temporarily, but overspray can make the needle tacky and leave residue on the fabric or machine. The better fix is often a stable layer attached to the wrong side before the fabric enters the hoop.
Why the first few stitches reveal the problem
An iron on stabilizer creates a temporary adhesive bond between the backing and fabric. That bond helps limit movement before the first stitch forms, which matters most when the substrate is thin, stretchy, coarse, or loosely woven. Brother recommends stabilizer for fabrics that are more likely to shift, shrink, or misalign under stitch tension, while also noting that the same backing may be unnecessary on a firm woven fabric. Brother's embroidery guidance explains how fabric type affects stabilizer choice.
In practical terms, the backing becomes the missing layer between a fabric that fights the hoop and one that stays under control. It doesn't replace correct hooping, needle selection, bobbin casing adjustment, or embroidery tension. It gives those settings a more predictable surface to work against.
A setup detail that saves finished designs
For cap work and other difficult hooping jobs, the relationship between the fabric, backing, and frame matters even more. This cap hooping and stabilizer setup is useful when you need to compare how the stabilizer sits beneath a curved or restricted sewing area.
Brother also advises making the stabilizer larger than the embroidery frame and clamping it on all edges. That extra coverage helps prevent wrinkles and keeps the fabric tension more consistent during stitching.
Shop-floor rule: If the fabric can stretch in your hands, assume the embroidery design can stretch under the needle. Stabilize the fabric before you troubleshoot machine tension.
If your next project is a knit polo, baby garment, or personalized gift, start by checking the fabric from the wrong side. A smooth, well-bonded backing may solve the problem before you change a single machine setting.
What Iron On Stabilizer Actually Is
A knit shirt can look flat on the cutting table, then shift under the needle as soon as stitching begins. Iron on stabilizer helps control that movement by adding a temporary or lasting backing layer before the design is sewn.
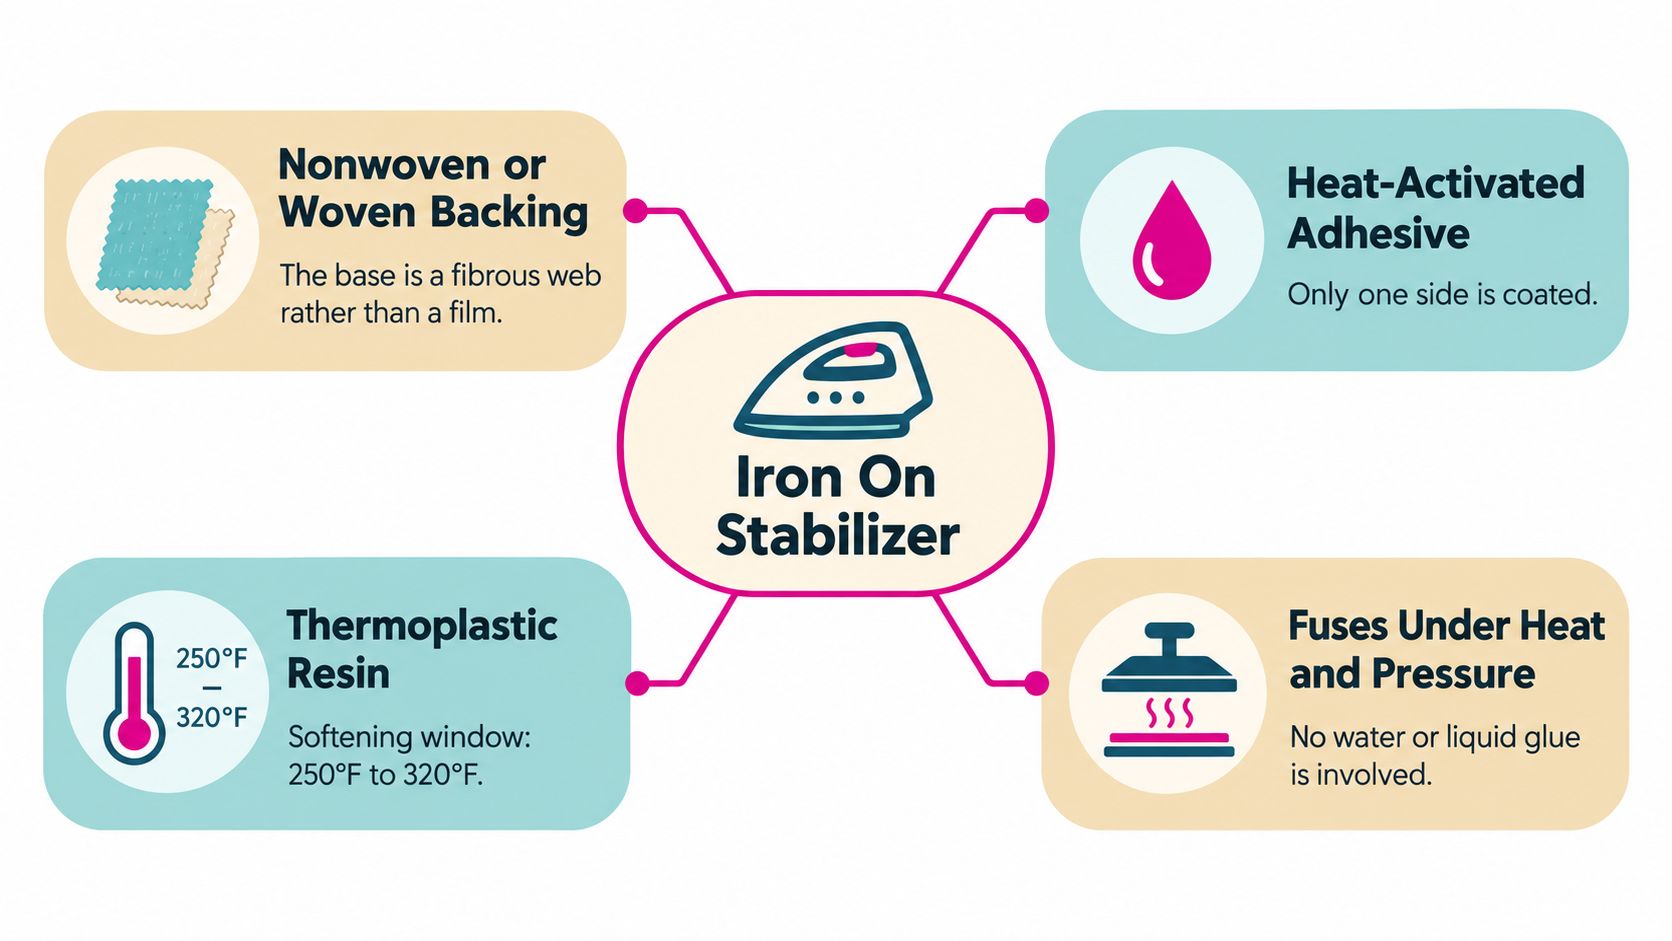
It has two parts: a base and an adhesive coating. The base may be woven or nonwoven. Heat softens the adhesive, while pressure brings it into contact with the fabric. After cooling, the layers work together as a more stable sewing surface.
The adhesive describes how the backing attaches. It does not define what happens after embroidery. A cut-away can be fusible, and a tear-away can be fusible as well. Some wash-away products also use adhesive. The base determines whether the backing stays, tears, or dissolves after stitching.
How the bond changes fabric behavior
Once bonded, the fabric and stabilizer behave more like one layer. That reduces independent sliding inside the hoop, but it does not make every fabric behave the same way.
A high-loft knit may absorb or spread adhesive differently from a smooth synthetic. A coated or slick material may resist bonding. Delicate fabric may tolerate only limited heat and pressure. Test first, because a bond that feels strong can still leave shine, stiffness, or residue on the face of the fabric.
Weight matters too. A light fusible layer can steady a stable fabric without changing its hand much. A heavier layer gives a soft or stretchy fabric more resistance, but it can make the finished area stiff. Dense designs also place more stress on the fabric, so a light backing may allow shifting even when the bond looks complete.
Fused and non-fused hooping create different results. With fused hooping, the backing is attached to the fabric before the frame is tightened, which can reduce shifting between layers. With non-fused hooping, the fabric and backing are held together by the hoop, making it easier to adjust or avoid heat-sensitive adhesive. The choice depends on fabric stability, design density, and whether adhesive residue would create a problem.
What to keep in your sewing drawer
Prepare:
- A press cloth for sensitive surfaces.
- A dry iron, since steam can affect some adhesive systems.
- Sharp embroidery scissors suited to the backing.
- A fabric scrap for testing bond, residue, and hand.
- A hoop that fits the design area without forcing the fabric to stretch.
A well-stocked notion drawer keeps testing and trimming orderly. This guide to must-have sewing tools and notions can help identify missing supplies.
Cut-Away, Tear-Away, and Wash-Away Compared
The most common beginner mistake is treating iron on stabilizer as a fourth category. It isn't. Iron on describes the attachment method, while cut-away, tear-away, and wash-away describe what happens after the embroidery is complete.
Cut-away remains beneath the design. It's the strongest choice when a knit or stretch garment needs continuing support after stitching. Trim the excess close to the embroidery, but don't pull it away from the stitches.
Tear-away is designed to separate along the grain. It suits stable woven fabric and projects where you want the bulk removed soon after stitching. Fusible tear-away can stay aligned while you hoop, which is useful when the fabric shifts easily.
Wash-away dissolves in water. It's useful for lace, freestanding embroidery, and situations where no permanent backing should remain. Always test the washout process on a scrap because thread, fabric finish, and adhesive can respond differently.
| Stabilizer Type | Best For | Removal Method | Iron On Advantage |
|---|---|---|---|
| Cut-away | Stretch garments and dense designs | Trim around the embroidery | Keeps the backing aligned during hooping |
| Tear-away | Stable wovens and lighter designs | Tear away from the stitched area | Reduces shifting before the first stitches |
| Wash-away | Lace and freestanding work | Dissolve with water | Holds the base in position without spray adhesive |
| Iron on variant | Any compatible base type | Follows the base type | Creates a temporary bond to the fabric |
Choosing by the finished item
A polo shirt usually benefits from continuing support because the knit can move during wear and washing. A firm quilting cotton may need only a tear-away backing, especially for a simple monogram. A lace motif may require wash-away support, with the iron on feature used only if both the fabric and adhesive can tolerate the process.
If you're unsure, compare three questions:
- Should the backing remain after stitching? Choose cut-away when continued support matters.
- Should the backing disappear with tearing or water? Choose tear-away or wash-away.
- Can the face or wrong side tolerate heat? If not, use traditional hooping, spray basting, or a non-fused backing.
The adhesive can make hooping easier, but it doesn't change the base's removal behavior. That distinction keeps you from choosing a fusible tear-away when the design really needs permanent cut-away support.
Matching Stabilizer Weight to Fabric and Thread
Weight should follow fabric behavior, not a vague rule that heavier is always safer. A stiff backing beneath a delicate knit can affect drape and hand, while a light backing beneath dense satin stitches may allow the fabric to buckle.
Independent embroidery guidance describes lightweight fusible options around 1 oz, a common 2 oz weight for standard applications, and heavyweight options up to 3.75 oz for thick fleece and jackets. The same guidance discusses layering 1.5 oz tear-away for extra control in detailed work. This embroidery backing guide compares stabilizer weights and layering approaches.
| Stabilizer Weight | Best Fabric Match | Recommended Thread |
|---|---|---|
| Around 1 oz | Delicate knits and light fabrics | Fine embroidery thread and light lettering |
| Around 2 oz | Quilting cotton, stable knits, and general projects | Standard machine-embroidery thread |
| Up to 3.75 oz | Thick fleece, jackets, and demanding outerwear | Dense designs and heavier decorative stitching |
Read the fabric before reading the label
Hold the fabric and backing together. Stretch them gently in the direction the design will pull. If the fabric moves freely while the stabilizer stays rigid, the combination may feel board-like. If both layers move together and the backing limits distortion without overwhelming the fabric, you're closer to a useful match.
Thread density matters as much as thread weight. Fine lettering concentrates stitches into a small area, while open line work distributes tension. Metallic and decorative threads can also create a different drag pattern through the needle and bobbin casing, so a scrap test is more valuable than choosing by ounces alone.
When two layers make sense
For a highly unstable knit, some embroiderers combine a cut-away layer with a tear-away layer. The cut-away provides lasting support, while the tear-away helps maintain a crisp stitching surface during the design. Don't stack layers because you can. Each added backing changes the thickness, needle penetration, hoop pressure, and finished hand.
Pro tip: Stitch a small section on scrap fabric, then remove the backing before committing to the garment. Check the front for puckering, the back for excess bulk, and the needle for adhesive buildup. A clean test tells you more than a product label alone.
If your design feels dense, first check hoop tension and needle condition. Then increase support only as needed. Over-stabilizing can create a stiff patch that looks tidy on the machine but feels uncomfortable when worn.
How to Apply Iron On Stabilizer the Right Way
A shirt can look perfectly smooth on the cutting table and still pucker under the needle. The usual cause is movement between fabric and backing, or adhesive that was pressed unevenly. Apply iron on stabilizer in a controlled sequence so the bond supports the design without making the fabric stiff.
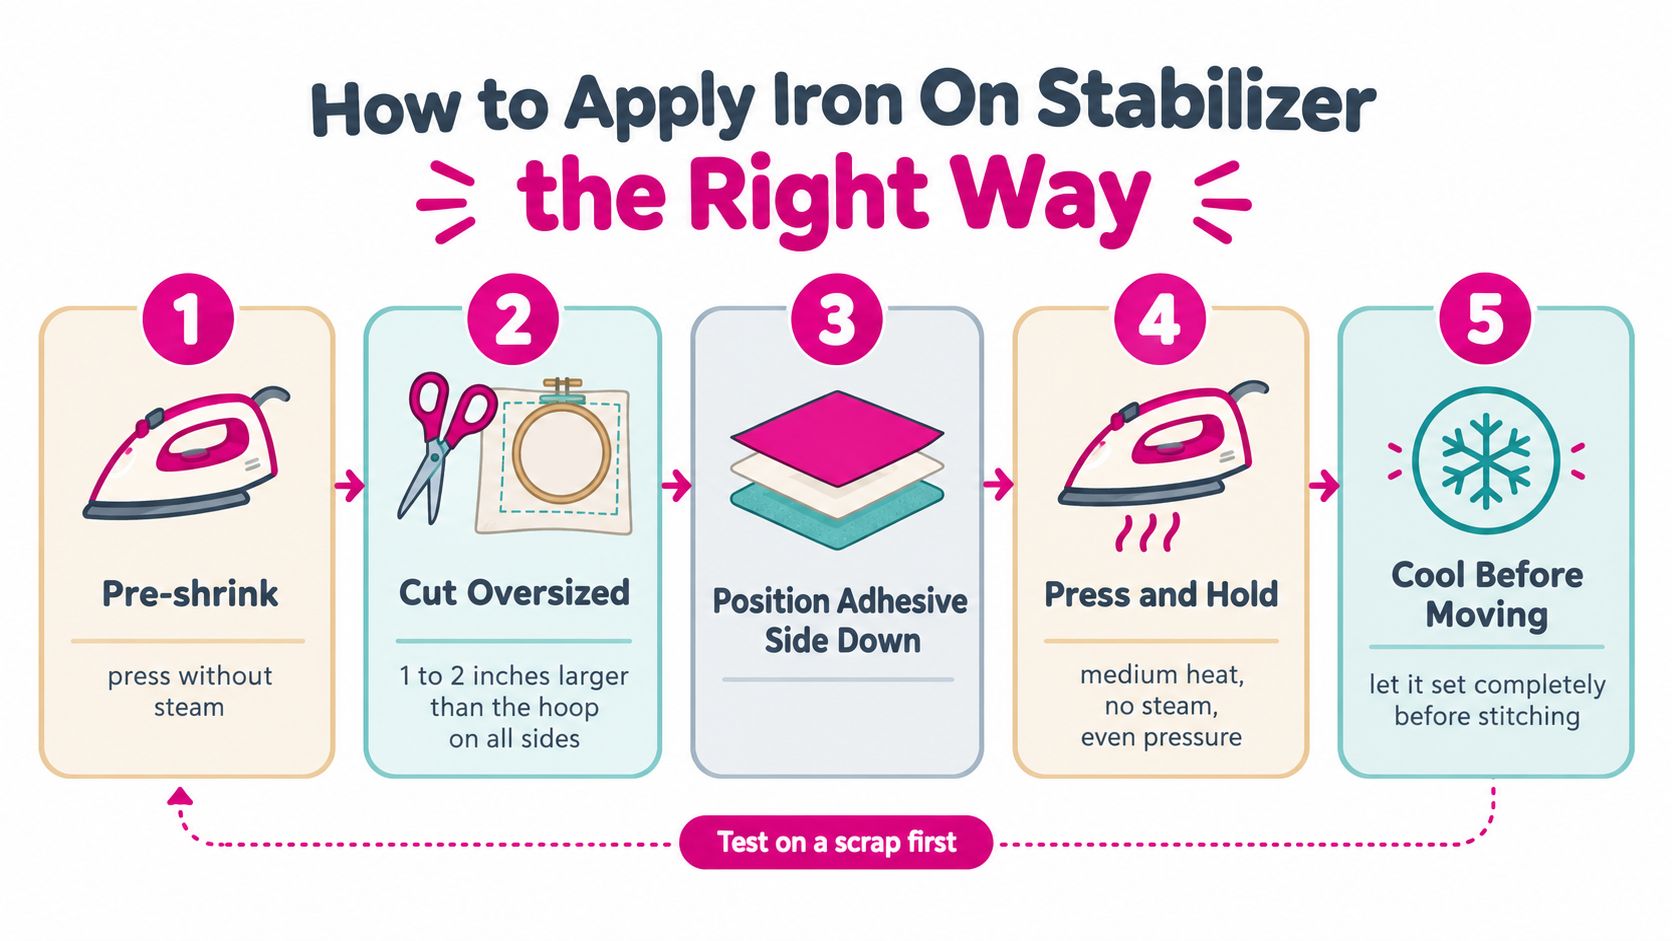
Start with clean, pre-washed fabric whenever the project can safely be laundered. This limits later shrinkage pulling against the embroidery. Cut the stabilizer larger than the hoop, leaving backing beyond the area that will be clamped.
Place the adhesive side against the fabric's wrong side. If the stabilizer has a paper cover, follow the product directions for removing or positioning it. A press cloth protects textured, delicate, or shine-prone fabrics from direct contact with the iron.
Press in sections instead of sliding
Set the iron to a temperature safe for both the textile and stabilizer. Keep it dry unless the manufacturer specifically permits steam. Some fusible products activate around 135°C to 150°C, but product instructions control. Gunold's application instructions emphasize controlled heat and testing on scrap fabric. Gunold's application instructions emphasize controlled heat and testing on scrap fabric.
Press firmly for 10 to 15 seconds per section, lifting and repositioning the iron rather than sliding it. Overlap each section so no area is missed. Too much heat or dwell time can change the fabric's hand, weaken the bond, leave residue, or make removal difficult.
Allow the piece to cool flat and undisturbed for at least 30 minutes before hooping. This practical iron-on stabilizer application guide recommends pressing for 10 to 15 seconds and cooling for at least 30 minutes. Cooling gives the adhesive time to set instead of shifting when hoop pressure is applied.
Use a non-fused setup when heat is unsafe
For heat-sensitive fabric, place the stabilizer beneath the material and hoop both layers without activating the adhesive. The layers must then be tensioned carefully because they can shift independently. This fused versus non-fused choice affects registration, surface stability, and the risk of heat damage.
Let the video play beside your machine while you practice the press-and-cool sequence:
Before stitching the garment, test a small sample with the same fabric, thread, needle, and design density. Check the bond, fabric hand, stitch surface, and needle for adhesive buildup. If the sample fails, use a non-fused tear-away or another stabilizer family.
When Iron On Is the Wrong Choice
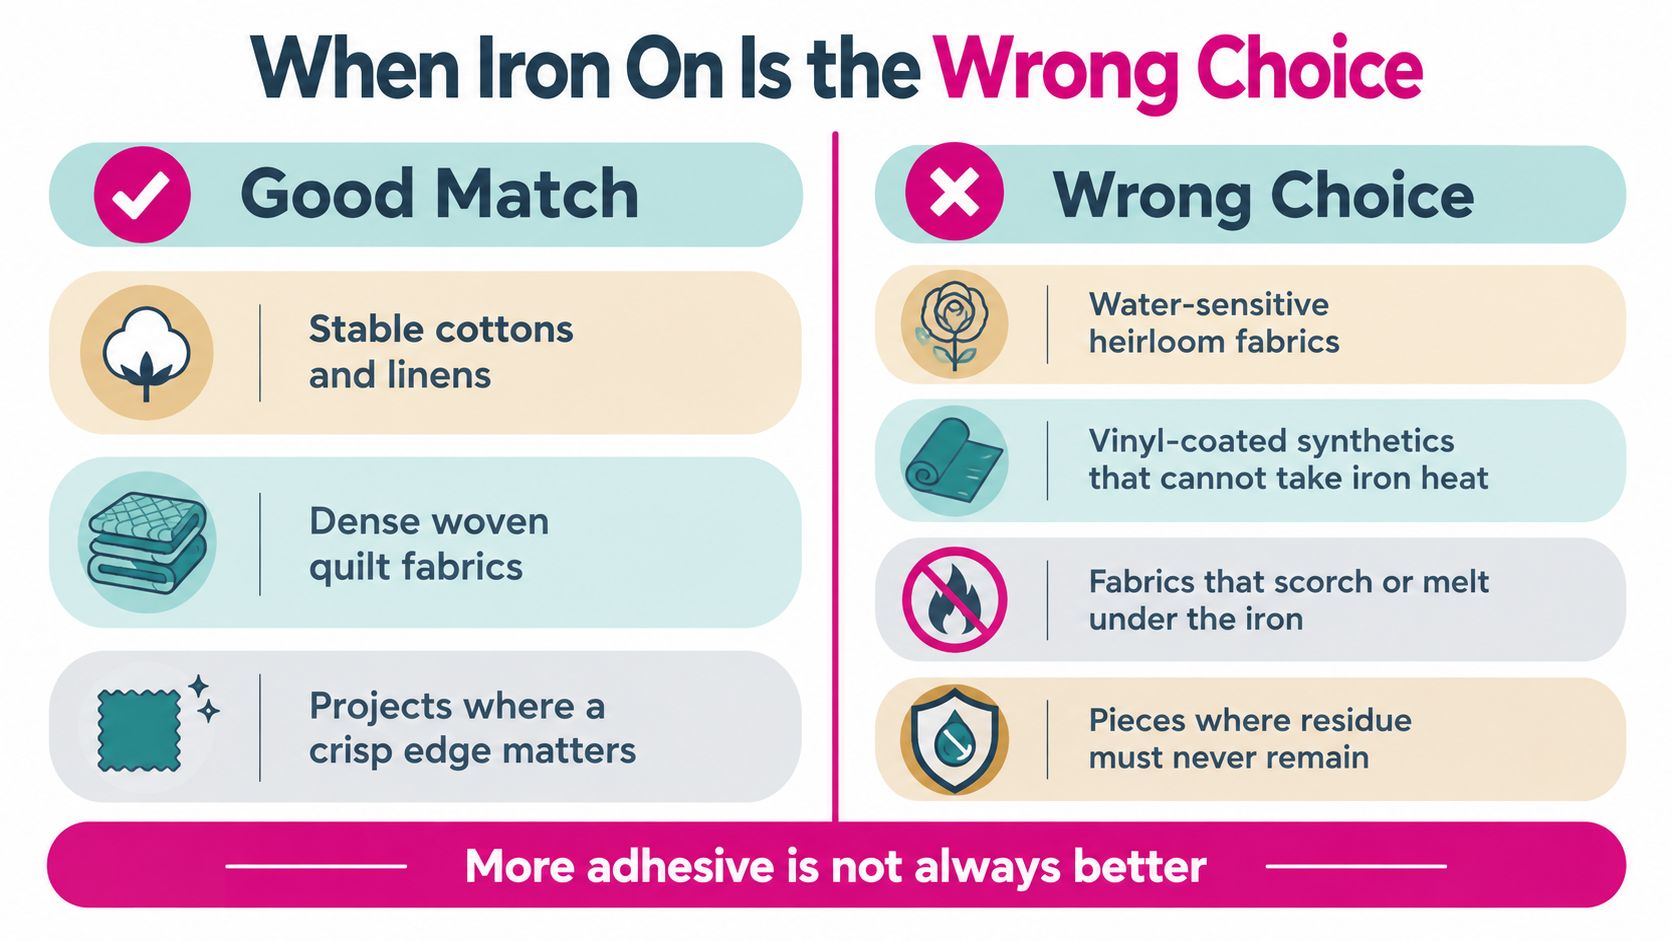
More adhesive isn't automatically better. Iron on stabilizer is a poor match for fabrics that cannot tolerate heat, surfaces where residue is unacceptable, or heirloom materials that may react badly to pressure and moisture.
Vinyl-coated synthetics, coated ripstop, and some performance fabrics can melt, distort, or develop a permanent shine. Silk chiffon and other lightweight fabrics can scorch under an iron. Water-sensitive heirloom textiles may also require a completely different support method.
Density creates a different kind of risk
A dense design sends the needle through the same area repeatedly. If the adhesive softens from heat and friction, it can transfer to the needle, bobbin casing, or throat plate. That buildup may increase drag and make the machine feel rough during a long run.
The problem isn't always a defective stabilizer. Heat, press time, fabric composition, steam, and stitch density can change how cleanly the product performs. An official product guide also warns that excess heat can make stabilizer difficult to remove, which is why scrap testing matters for specialty fabrics such as batiks. The manufacturer guide includes handling and removal cautions for fusible stabilizer.
Better alternatives for sensitive projects
Choose traditional hooped tear-away when the fabric can't be pressed. Use spray adhesive sparingly when you need temporary positioning without fusing. A water-soluble topping can help control stitches on textured fabrics, but it isn't a replacement for structural backing beneath the fabric.
Read the care label before committing to heat. If you can't confidently identify the fabric's heat tolerance, test a hidden area or choose a non-fused method. It's easier to change the stabilizer on a scrap than to repair a shiny, melted, or permanently marked garment.
Removal, Residue, and Post-Stitch Care
The stabilizer's job continues after the final stitch. Removal changes the way the embroidery feels, and rough handling can distort satin columns, loosen edge stitches, or pull the fabric out of shape.
Cut-away backing should be trimmed close to the embroidery with sharp scissors. Leave enough support beneath the design to protect the stitches, but don't cut into the thread. Tear-away should be removed gradually while supporting the fabric, especially around small lettering and tight curves.
Clean up according to the base
Wash-away backing requires water, but the fabric and thread still determine the safest method. Rinse gently and test the finished hand before treating the entire project. If fibers remain, remove them carefully rather than pulling directly against the embroidery.
Iron on residue usually points to a mismatch between heat, dwell time, fabric tolerance, and stitch density. The adhesive may soften and move during repeated needle penetration, especially beneath dense designs. If the needle becomes tacky, stop the machine and inspect it before continuing.
Cleaning insight: A stabilizer that removes cleanly in one sample may behave differently beneath a dense design. Test the removal process, not just the initial bond.
Inspect the machine as well as the fabric
After stitching, check the needle, presser foot, bobbin area, and throat plate for visible buildup. Follow your machine manufacturer's cleaning instructions, and don't wait until residue affects thread tension. A clean bobbin casing helps you distinguish adhesive drag from a true bobbin or upper-thread adjustment problem.
Store leftover fusible stabilizer with the adhesive protected from dust and heat. Roll it rather than crushing it into a drawer, and mark the product name and base type on the outside. Good storage makes it easier to repeat a successful fabric and stabilizer combination later.
Frequently Asked Questions
Can iron on stabilizer be used on stretch fabric
Yes, if the fabric tolerates heat and the stabilizer suits its stretch and stitch density. On a thin or unstable knit, the adhesive helps hold the layers steady during hooping. Heat-sensitive fabric needs a different setup. Hoop the stabilizer underneath without fusing it, or choose non-fused support.
Should the stabilizer be larger than the hoop
Yes. Brother recommends extending it past the embroidery frame so every edge can be clamped. That extra margin helps prevent shifting and maintains more even tension across the design.
Can iron on stabilizer replace cut-away or tear-away
Iron on describes the attachment method, not the stabilizer's base. A fusible product can still be cut-away, tear-away, or wash-away. Choose the removal method according to the base and the fabric.
Why is adhesive sticking to my needle
Too much heat, a long press, steam, or dense stitching can soften adhesive and transfer it to the needle. Stop, inspect the needle, and test the product on scrap fabric. Persistent buildup calls for non-fused backing or a product suited to the fabric and design density.
How do I know if the backing is too heavy
Judge both stitch performance and the finished hand. Puckering during stitching can mean the backing is too light, or the hoop is loose. A stiff or bulky embroidered area points to support that is too heavy or layers that are unnecessary. Test a small sample before stitching the full design.
Shop the Right Backing for Your Next Project
The right stabilizer starts with the project, not the bolt. Before pulling a package from the shelf, identify the base fabric, the thread and design density, and whether the finished piece will be washed. Those three details narrow the choice quickly.
A lightweight tear-away can suit quilting cotton and a simple monogram. A medium fusible cut-away is more appropriate when a polo knit or stretch denim needs continuing support. Thick terry, canvas, fleece, and dense fill designs may require heavier support or carefully tested layers, but the finished hand should still feel intentional.
| Project | Fabric | Stitch Density | Recommended Stabilizer |
|---|---|---|---|
| Simple monogram | Quilting cotton or stable woven | Light to moderate | Lightweight tear-away |
| Garment logo | Polo knit or stretch denim | Moderate to dense | Medium fusible cut-away |
| Towel or tote embellishment | Terry cloth or canvas | Dense fill stitching | Heavy cut-away, possibly with a tested topper |
| Lace or freestanding motif | Stabilizer-supported thread structure | Dense and open areas | Wash-away suitable for the design |
| Delicate heirloom detail | Heat-sensitive or fragile fabric | Variable | Non-fused backing selected after testing |
Shop by fabric behavior, not by the promise that one product works everywhere. If you're working with an unfamiliar blend, order a swatch or test a small offcut. Compare the front, the back, the hand, and the machine cleanup before cutting into the finished project.
You can browse Pellon 808 Craft-Fuse Stabilizer as one fusible option, compare it with tear-away and water-soluble products, and use the store's embroidery and sewing tutorial resources while planning the project. Linda's Electric Quilters offers stabilizers, threads, fabrics, batting, and notions for quilting, embroidery, and sewing, with online ordering and in-store support for McKinney and North Texas shoppers.
The best backing is the one that supports the stitches without taking over the project. A calm test on scrap fabric can prevent hours of unpicking, residue cleanup, and tension correction.
Visit Linda's Electric Quilters to compare fusible, tear-away, cut-away, and water-soluble stabilizers for your next embroidery or quilting project. Bring your fabric sample or project details, and choose the backing that gives your design a clean finish without unnecessary bulk or residue.


