
Don't start longarm quilting for beginners on your finished quilt top. That's the most common advice to ignore, and it's the fastest way to turn a fixable tension problem into hours of unpicking. Start with space, a square practice sandwich, and a test line you can repeat. By the end, you'll be able to measure a workable setup, load layers evenly, set a stitch baseline, read loops, and pick a first project small enough to finish.
Why Longarm Quilting Feels Different at First
A longarm isn't a bigger domestic machine. On a domestic machine, you push a bunched quilt under a fixed needle. On a longarm, the quilt stays supported on the frame while the sewing head travels over it. That single difference changes everything. Your hands learn to move the head, not wrestle the quilt, and the extended throat gives you room to work without compressing and repositioning layers every few inches.
That operating idea goes back a long way. The history of longarm quilting machines and moving heads traces a quilting machine to 1871, a design where the machine moved across the fabric by about 1877, and Fred Nolting's rebuilt machine with a 24-inch throat in the early 1960s. You're not learning a trick. You're learning a workflow built around machine movement, workspace, and stitch control.
It also helps to know you're joining a large, active craft. The 2024 Quilting Trends Survey of active quilters reported approximately 9 million to 11 million active participants annually, based on more than 37,000 responses. The same survey found the average quilter started 11 projects and completed 9 projects per year, spending about 6 hours weekly on quilting, with 65% spending more than 6 hours per week.
What That Start and Finish Gap Means for You
Two unfinished projects a year isn't a character flaw. It's usually a setup problem. Quilts stall when loading is uneven, tensioning is guessed at, stitch regulation feels mysterious, or the first design is too complex to follow without stopping.
- Accurate loading: Square, evenly tensioned layers prevent problems you can't stitch your way out of later.
- A test baseline: One saved combination of thread, needle, and settings beats constant dial turning.
- A manageable design: A path your hands can follow calmly teaches control faster than a dense custom plan.
Watch a video walk-through of a load-and-test routine alongside this guide if you can. Seeing the head move while the quilt stays put makes the difference click faster than text alone.
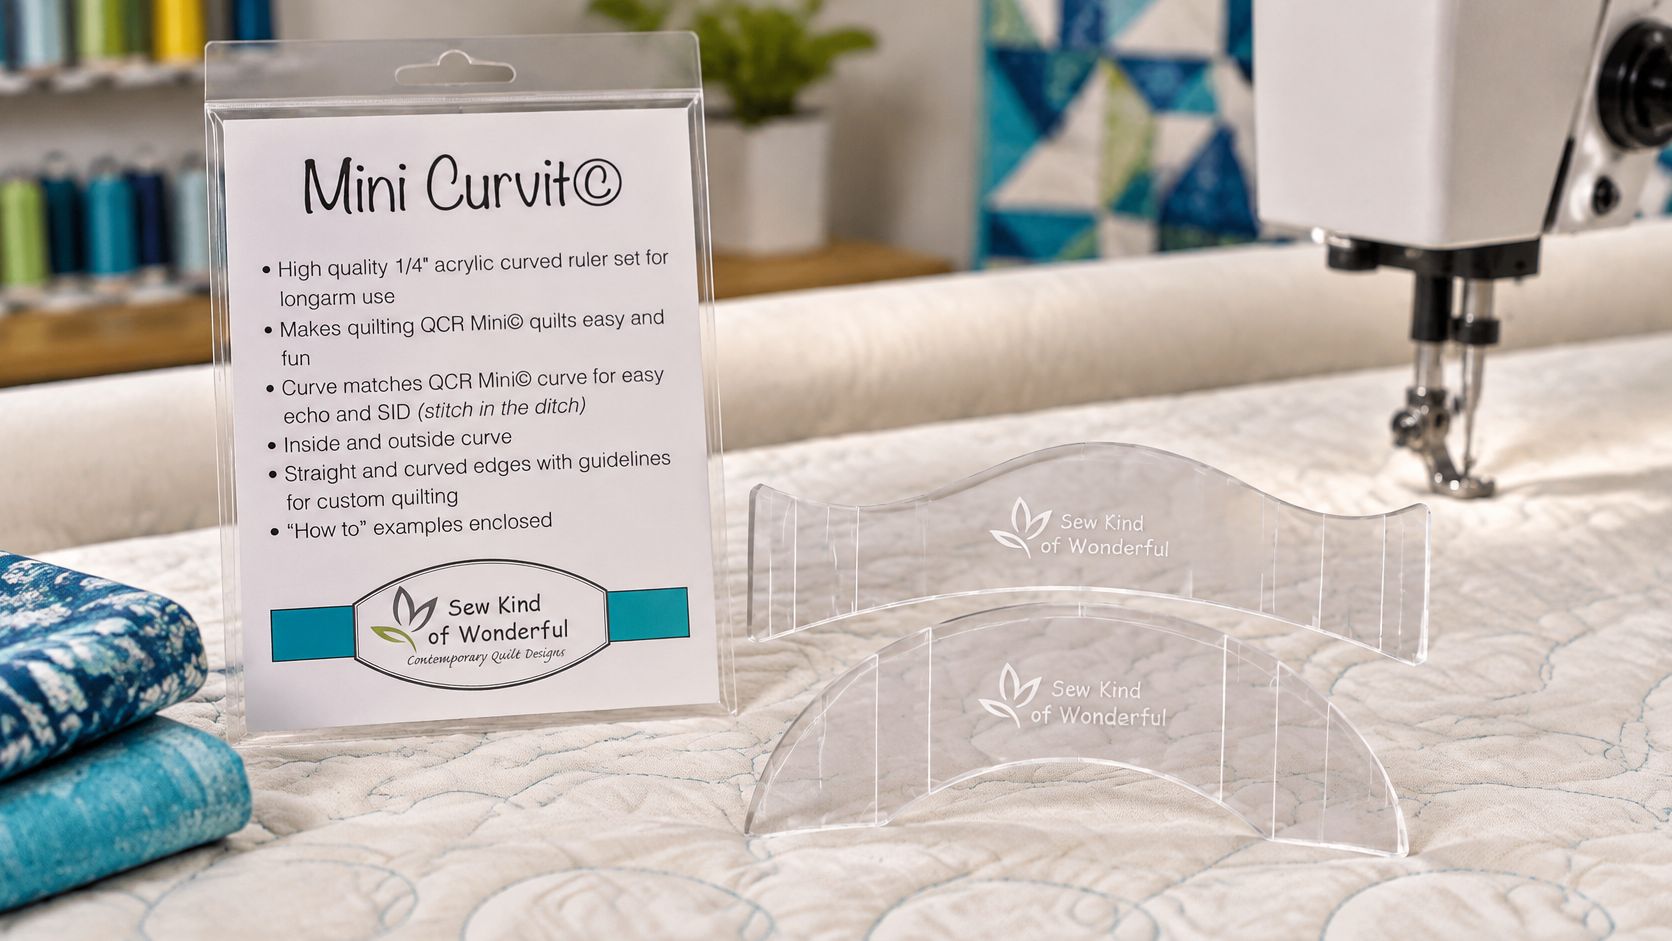
Keep a small ruler in mind for later practice once your test stitches look even.
Your first goal isn't a show quilt. It's a repeatable routine you trust. Measure the room, load a practice sandwich, prove your stitches on scrap, then quilt. That order protects every real top that follows.
Planning Space Before You Buy a Longarm
Measure the room before you fall for a frame. Beginners shop for throat size and forget walkways, then discover they can't reach the back of the frame to follow a pantograph or adjust clamps. A cramped setup makes backing alignment, tensioning, and hand-guided quilting harder, and a longarm sandwich needs more careful squaring than domestic-machine quilting.
Longarm University gives a concrete starting point. Its beginner guidance on longarm table size and clearance states that most longarm machines use a 12-foot table and require an additional 2 to 3 feet of clearance on three sides. That clearance lets you move around the frame, reach quilt edges, access controls, and load or maintain the machine without squeezing past it.
Beginner Longarm Setups Compared
| Setup | Space demand | Skills it still teaches | Main trade-off |
|---|---|---|---|
| Permanent full-size frame | The frame plus clearance on three sides, dedicated full time | Full loading, tensioning, regulated stitching, pantographs | Largest footprint, noise, and storage commitment |
| Smaller or collapsible setup | Less floor space, can share a multipurpose room | Loading, tension testing, stitch regulation on smaller work | Smaller quilting area and setup time each session |
| Renting or sharing a machine | No home footprint beyond storing your quilt and supplies | The same loading, tension, and stitch control fundamentals | Scheduling limits and travel, but lowest financial risk |
You don't have to buy a full-size system to learn. A smaller or shared setup still teaches the core skills while you find out how often you'll quilt. That's a sensible entry path, not a compromise.
Plan storage at the same time as the frame. Batting rolls, leaders, clamps, and thread need a home that doesn't block your walkways, and these sewing room storage and organization tips can help you think through shelving and layout before boxes start stacking up in your clearance zone. Lighting matters too. You need to see the underside test stitches and the edge of the backing clearly.
Pro tip: Tape the full footprint on the floor with painter's tape, including the clearance on three sides, then walk it with a quilt top in your arms. If you can't turn, reach, and open doors comfortably, the room is telling you the answer.
Our team in McKinney, Texas, walks this floor check with first-time buyers before talking models, because the right machine in the wrong room still frustrates. Bring your room measurements, in both directions, plus electrical outlet locations, when you ask for advice. That turns a sales conversation into a planning one.
Loading a Quilt on a Longarm Frame
Loading is a controlled sequence, not stretching fabric until it looks flat. Even loading prevents puckering, distortion, and apparent tension problems that are really loose or over-tight backing. Work through it the same way every time, and don't start design stitching until the sandwich is secure.
Attach and Roll the Backing First
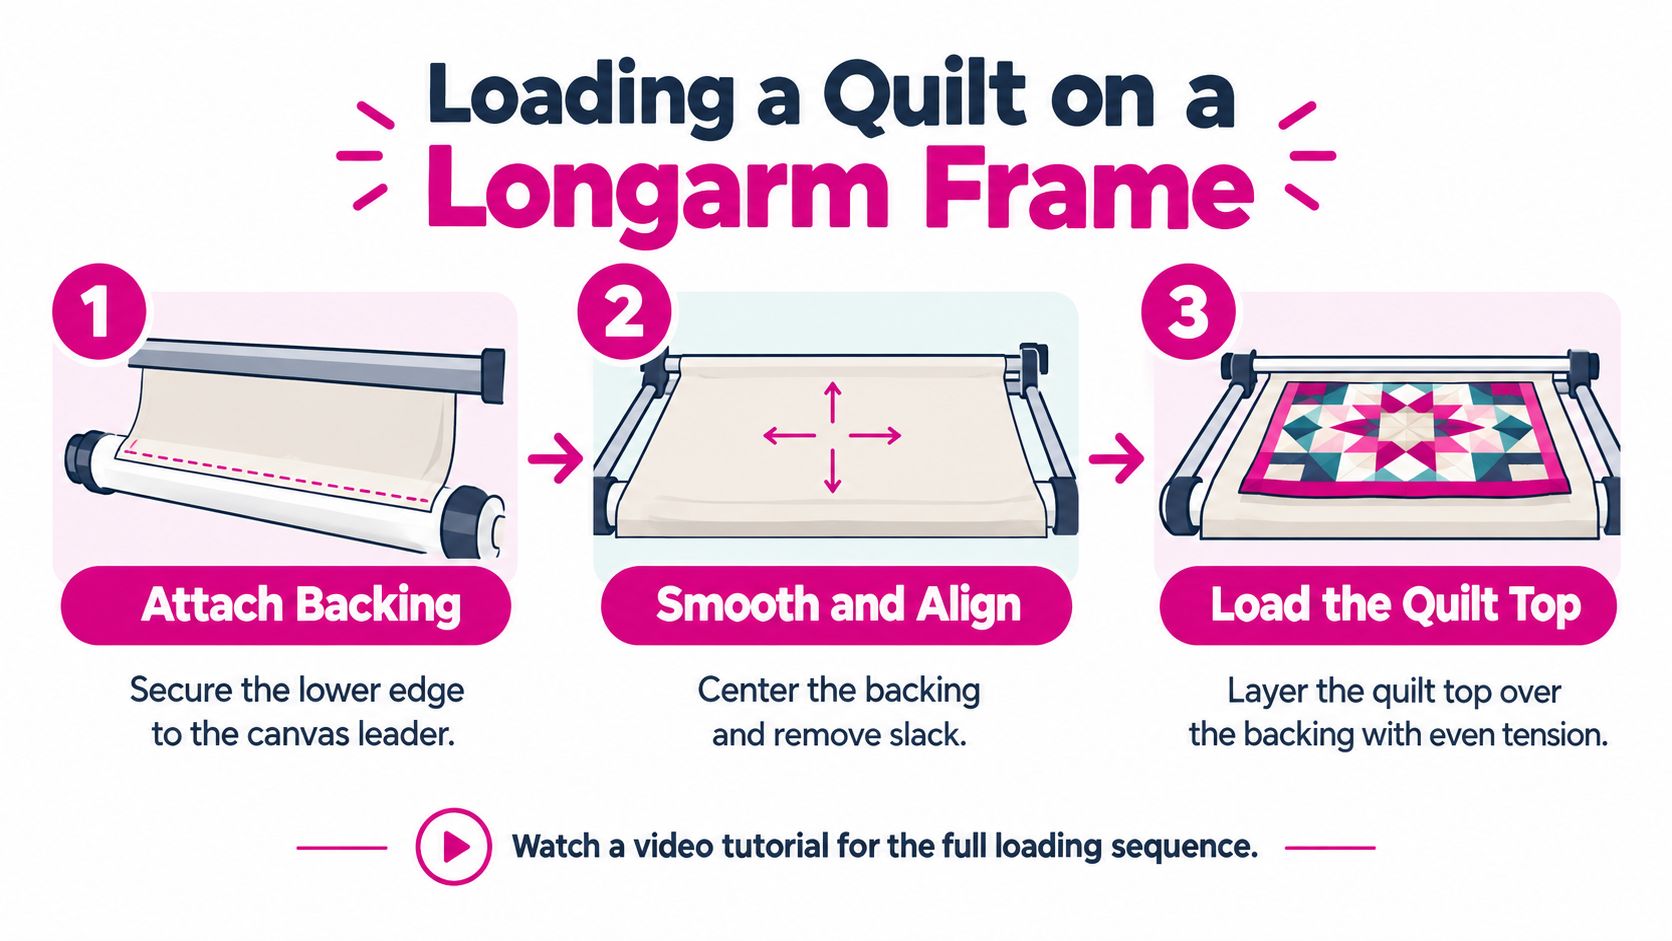
Start with the backing alone. One step-by-step guide to loading a quilt backing on leaders describes attaching the lower edge to the canvas leader on the backing roller, then the upper edge to the canvas leader on the take-up roller. Roll the backing on while it stays smooth and evenly tensioned.
Use this habit as you roll:
- One revolution at a time: Rotate the belly bar slowly instead of winding the whole backing in one go.
- Smooth from the center outward: Push slack toward the edges with your hands after each turn.
- Check the edges: Both sides should track evenly, with no diagonal creep building up.
The infographic below summarizes the order so you can glance at it beside the frame.
Stack the Sandwich Square
With the backing rolled on, build the layers. Place the backing wrong side facing upward, align the batting so its top edge is parallel to the backing, and lay the quilt top squarely over both layers. Smooth wrinkles by hand, working outward so you don't trap a fold in the middle.
Then baste the top and both sides as close to the quilt edge as practical. Basting near the edge keeps stitches inside the eventual border area and stops the layers drifting sideways as you quilt and advance the frame. Skipping this step is a quiet cause of shifted layers later.
Your batting choice belongs to this step, since loft changes how the sandwich feeds and how stitches sit. Browse the batting category at lindas.com when you're ready to match batting to your first project, and keep a related loading tutorial open for your first few practice loads.
For later ruler practice on a loaded practice piece, the Mini Curvit Ruler for Longarm Quilting is a clear 1/4in thick acrylic two-piece set, with pieces measuring 2-5/8in (center) and 1-1/2in (sides) x 6in and 1-7/8in (center) and 3in (sides) x 6in, with inside and outside curves and guidelines for stitch in the ditch, scallops, and curved crosshatching.
Run this checklist before you touch a design. Leaders attached, backing rolled evenly, batting parallel, top square, edges basted. If one item fails, fix it now while it's cheap.
Building Even Stitches with Pantographs
Your sandwich is loaded. Still don't quilt the project yet. Even stitches come from a test routine on matching materials, and the test is what turns tensioning from guesswork into a setting you can repeat.
Set One Baseline and Stop Chasing the Dial
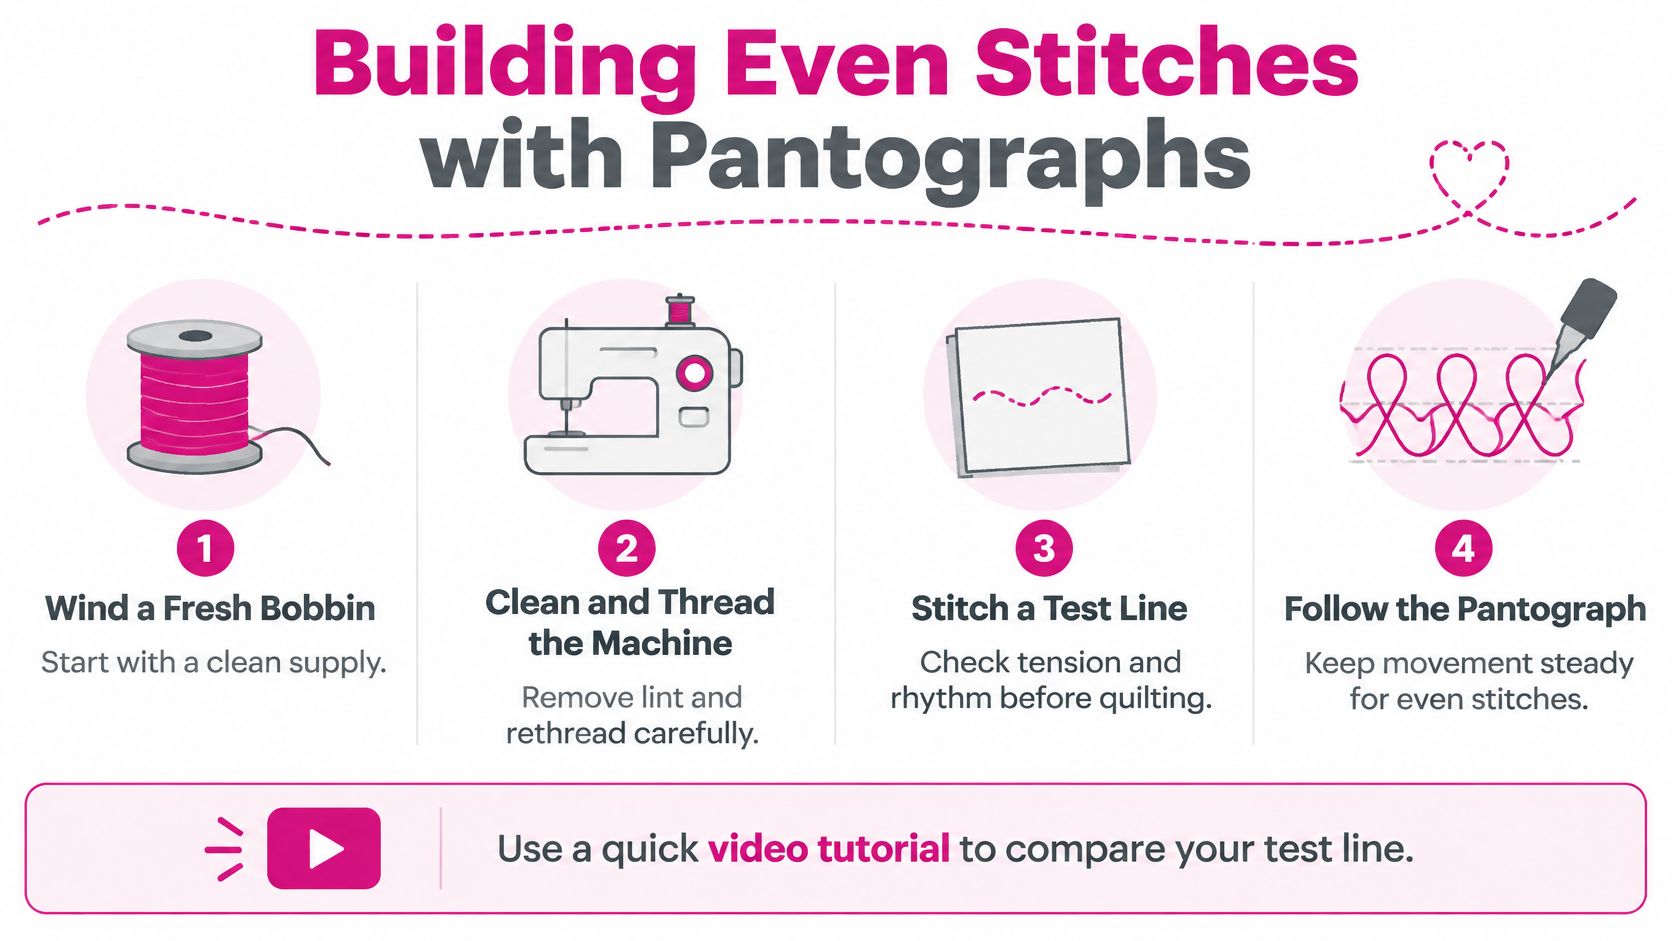
Wind a fresh bobbin, clean the machine, and thread it carefully. Then stitch a test line on excess batting or a practice sandwich built from the same fabric, batting, and thread as your project. A balanced stitch means the knot formed by the upper thread and bobbin thread stays inside the quilt sandwich, not showing on either surface.
The Grace Company's guide gives a calm sequence. Its Quilter's Survival Guide method for setting top thread tension recommends starting the top-thread tensioner at its lowest setting, stitching on a matching scrap sandwich, and slowly increasing tension while checking the underside. Small increases keep you from overshooting.
For stitch length, pick one controlled baseline. A BERNINA Q-Series on-frame manual covering setup and stitch practice supports using 10 to 11 stitches per inch for free-motion practice or 16 SPI where the machine and design support finer quilting. Hold that baseline and work on consistent hand movement and speed instead of changing settings every pass.
The four steps below keep the routine in order.
Why Pantographs Calm Your Hands Down
A pantograph is a paper pattern you follow from the back of the frame, guiding the head along a printed path with a laser or stylus. Your hands trace a line that already exists. That removes design decisions mid-quilt, so you can focus on steady movement while stitch regulation helps keep stitch length even.
Compare paths before you commit:
- Pantograph, edge to edge: Best first choice, since the path is decided and repeatable across the whole quilt.
- Simple ruler curves: Good for stitch in the ditch and border scallops once your baseline stitches look even.
- Freehand fills: Save these until speed control feels boring, because every wobble shows.
Test straight lines, circles, and sharp turns, not just a straight seam. Turns expose looping and uneven length that straight stitching hides.
Compare your sample against a recorded stitching clip if you're unsure what balanced looks like. When both sides look clean, write down the needle, thread, bobbin, tension setting, and SPI. That note card is your baseline. Tape it to the frame.
Reading Loops Before You Blame the Machine
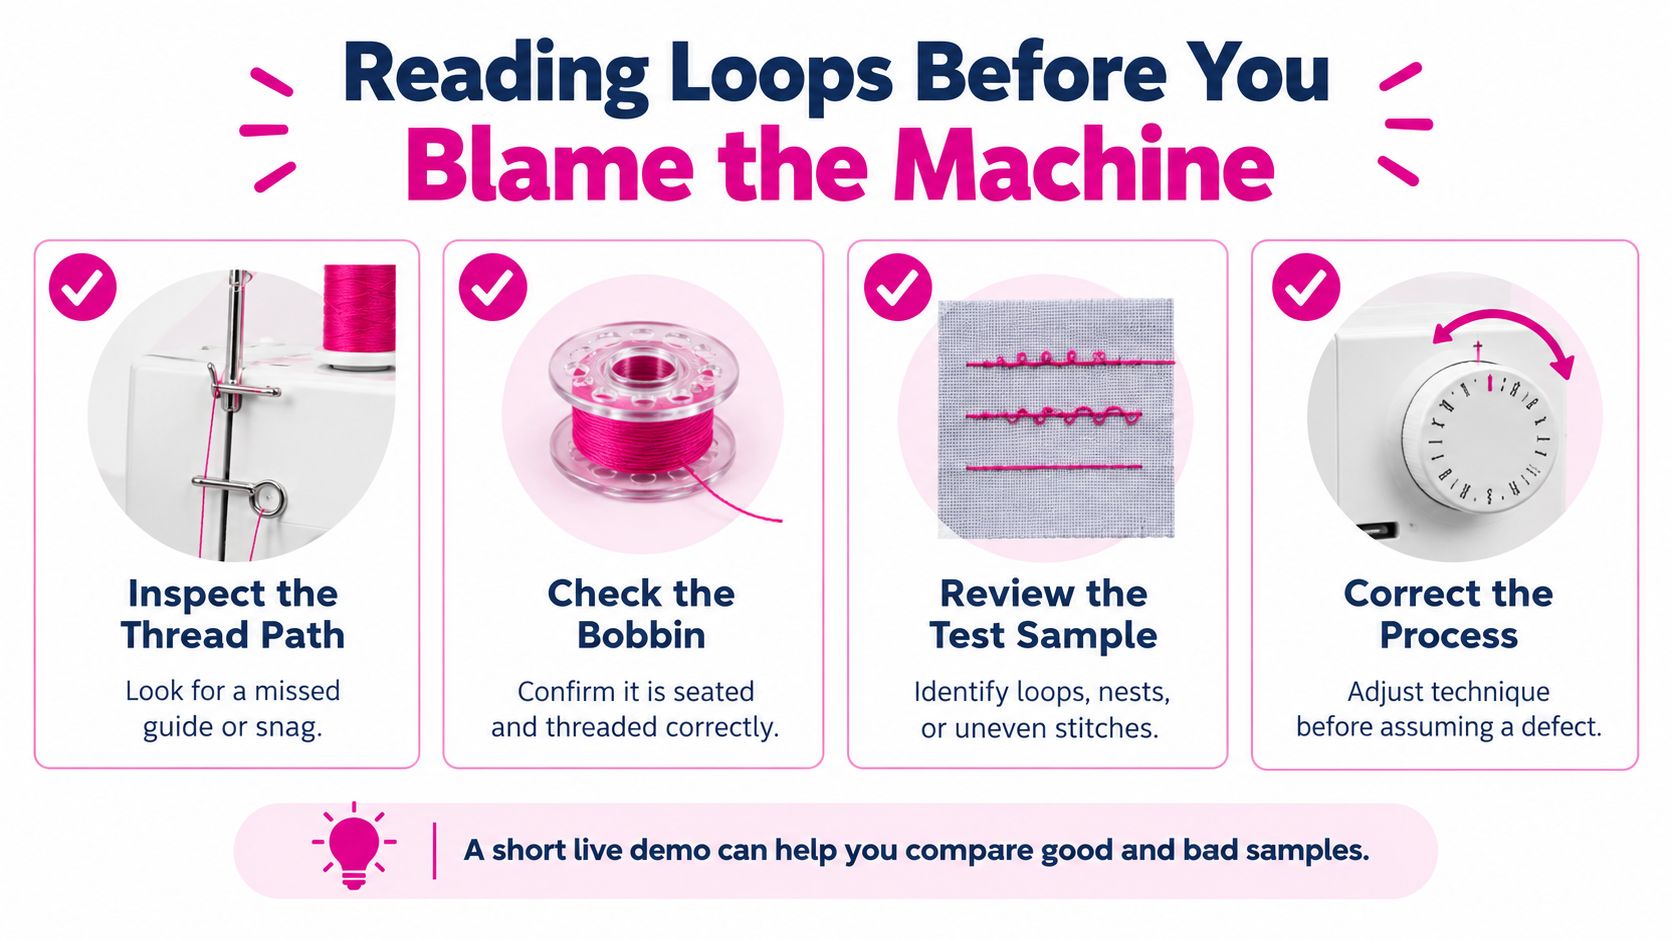
Loops, nests, and uneven stitches are usually process failures, not a defective machine. The mistake is changing three settings at once, then having no idea which one helped. Diagnose in a fixed order, change one variable, stitch a short test, and look at both sides.
Work the Checklist in Order
Start with the path the thread travels, not the tension dial:
- Threading path and tension discs: Rethread fully and confirm the thread is seated in the discs, with no skipped guides.
- Bobbin and bobbin casing: Confirm the bobbin is inserted correctly and the casing is clean and seated.
- Needle condition: Replace a bent, dull, or damaged needle before judging stitch quality.
- Foot height: Check hopping foot or presser foot height against your sandwich thickness.
- Fabric security: Confirm the sandwich is basted and can't shift as you move the head.
Only then adjust tension. The visual split is reliable. Guidance on reading longarm tension symptoms on the top and underside explains that loops or eyelashes on the underside usually mean upper tension is too loose, while bobbin thread pulled to the quilt top usually means upper tension is too tight. Testing circles and sharp turns matters here too, since directional movement exposes problems straight lines hide.
This checklist graphic puts the order where you can see it mid-problem.
Don't copy someone else's dial number. Support guidance collected in the APQS longarm FAQ on tension and test samples notes that one BERNINA Q-Series manual specifies checking bobbin thread tension at 220 mN each time the bobbin is replaced, which shows why settings are machine specific. Test with the exact thread, needle, batting, backing, and top you'll quilt with, since changing one variable changes the stitch.
Your success check is simple. A saved sample with no visible looping on either side and consistent SPI across straight and curved movement beats any claimed universal success rate. Record the winning setup.
Keep maintenance short and separate. Clean before threading, replace damaged needles promptly, and follow your own machine's oiling points rather than a schedule from a different model. A related troubleshooting tutorial is worth bookmarking for the day a nest appears mid-quilt.
Choosing a First Project and the Right Tools
Pick work small enough to finish. Your early goal is repetition of the same baseline, not variety. Each project below reuses the load-and-test routine and gives you a clear picture of done.
Three Starter Projects That Build in Order
Start with a practice sandwich and a simple pantograph. Done means square layers, buried knots, and a full pass without stopping to rethink the path. Nothing about it has to be giftable.
Move to a small quilt or table runner with an edge-to-edge design. The size keeps advancing simple, and you practice starting, stopping, and rolling the quilt on real seams. Before choosing fabrics, it helps to compare quilt fabric fibers and weaves so your top, backing, and batting behave predictably together under the needle.
Finish with a border-only custom pass using curves. You're adding one new skill, ruler guidance, to a routine your hands already know.
The product page view below shows the smaller ruler set used for that third step.
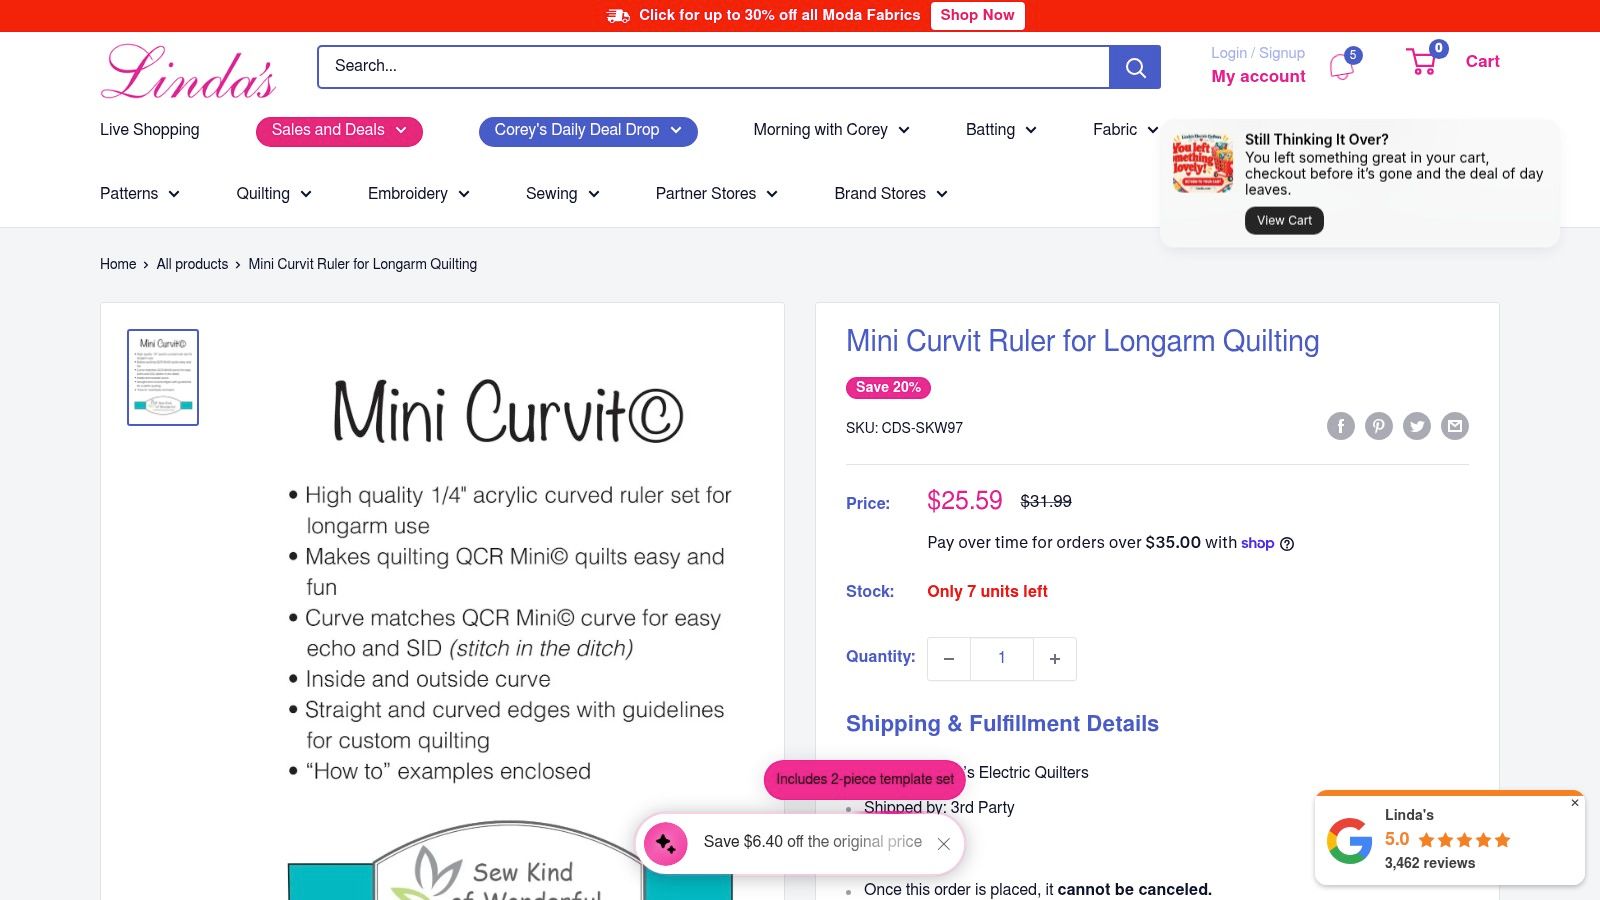
For a longer border curve, the QCR Curvit Ruler for Longarm Quilting is a clear 1/4in thick acrylic two-piece set with pieces measuring 3-1/2in (center) and 1-1/2in (sides) x 10in and 1-1/4in (center) and 3-1/4in (sides) x 10in, with inside and outside curves matching the Quick Curve Ruler curve for stitch in the ditch, border scallops, and curved crosshatching. Choose by border size, not by collecting both at once. One project, one tool.
A shop helps more than a search box. Linda's Electric Quilters stocks batting, thread, and longarm rulers in one place, and the McKinney team can sanity-check your thread, needle, and batting loft against your test sandwich before you commit to a full quilt.
Watch the clip below before your border pass to see ruler placement at working speed.
Order your steps clearly. Pick batting first, then the ruler that matches your border, then watch a related tutorial. Save the larger frame decision until finished projects, not frustration, are pushing you.
Questions Beginners Ask After the First Quilt
Do I Need Stitch Regulation Before My First Pantograph
No. Regulation helps, but steady hands and a marked practice path can carry your first pantograph if you keep your speed consistent and your baseline fixed. What you can't skip is the test sample. If your stitches stay even through curves on scrap, your setup is ready, regulated or not.
How Should I Leave a Shared or Folding Frame Between Sessions
Leave it ready to load, not ready to store. Keep leaders clean and rolled evenly, clamps parked where you can reach them, and your baseline note card with the machine. If the frame folds, note the leg and rail positions that kept it level. Your next session should start with loading, not with renegotiating the room.
Why Does a Balanced Stitch Look Different on Another Batting
Because loft and the hand of the quilt change how stitches sink and show. A thicker batting lets the knot bury deeper and softens definition. A flatter batting shows every stitch crisply, including small length changes. That's why you test with your batting instead of copying another quilter's dial setting from a different sandwich.
When Is It Time to Move to a Permanent Frame
When finished projects say so. If you're completing small quilts on a rented or compact setup and turning away larger tops you genuinely want to quilt, the work has outgrown the setup. If practice pieces are still stalling at the test stage, a bigger frame won't fix that. Finish first, upgrade second.
Your next step is one decision. Choose the practice sandwich project, order the batting that matches it, and add the ruler that fits the border you plan to quilt, the smaller set for short curves or the larger QCR set for long ones. Then watch a video or live shopping clip of the load-and-test routine once more, load your scrap sandwich, and prove your baseline before a real top ever touches the leaders.
Start your first practice sandwich this week with batting, thread, and the Mini Curvit or QCR Curvit ruler matched to your border from Linda's Electric Quilters, and bring your room measurements or a photo of a problem test sample if you'd like the McKinney team to sanity-check your setup. You'll leave with one project, one tool, and a baseline you can repeat, which is exactly how longarm confidence gets built.


