
Your quilt top is finished, but it's still folded beside the sewing machine because pushing all those layers through a small opening feels like the hardest part. Longarm quilting machines can make that work more manageable, but the right purchase isn't necessarily the fastest model. Choose the machine type that fits your quilt size, available floor space, total ownership budget, and physical comfort. Then test it with the batting, backing, and thread you plan to use.
Longarm Quilting Machine Types and Throat Depth
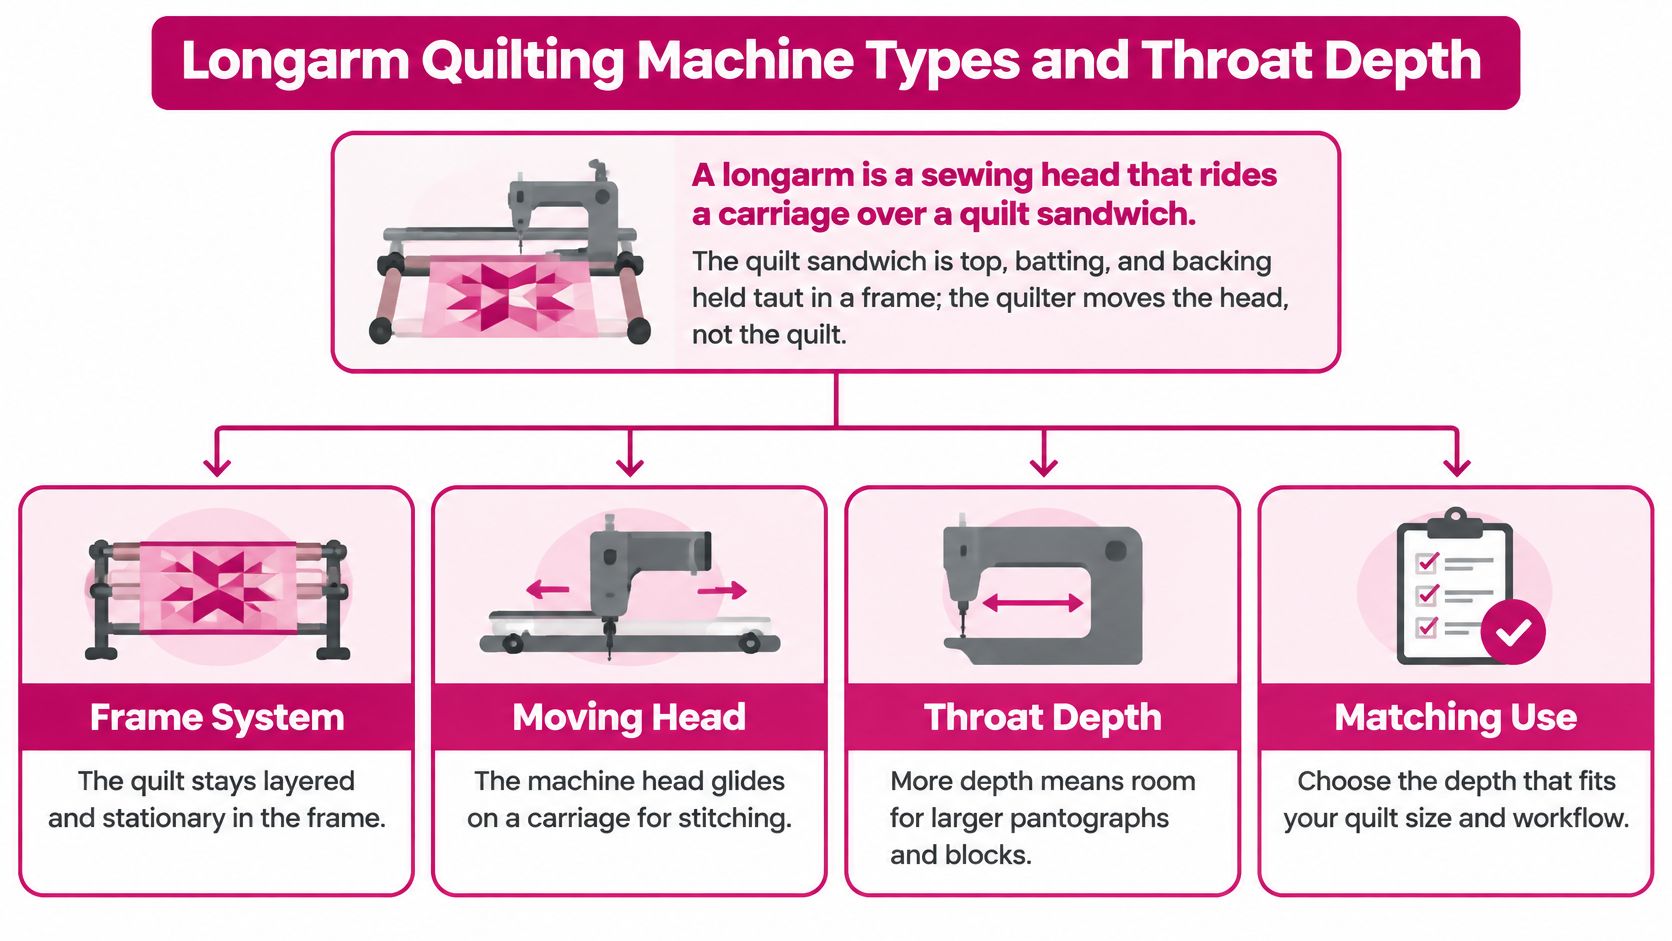
A frame-mounted longarm is a sewing head that rides on a carriage over a quilt sandwich held taut in a frame. You move the head rather than pushing the quilt beneath the needle. A sit-down longarm works differently: the head stays stationary, and you guide the quilt across a supporting table.
Throat depth means the distance from the needle to the machine body. The patent background collected with this quilting-machine patent record describes typical domestic-machine throats of approximately 8–12 inches, compared with approximately 18–30 inches for enlarged-throat quilting machines.
Say you're finishing a wide queen-size quilt. Extra throat space gives you more room for a motif before you need to advance or reposition the layers, but it doesn't expose the entire quilt at once. Frame width controls how wide a quilt you can load; throat depth controls your front-to-back working reach.
Which machine type fits your quilting?
Longarm machine types at a glance
| Machine type | Working reach | Stitch control | Best fit |
|---|---|---|---|
| Domestic sewing machine on a frame | Domestic throat range described above | Manual speed and steering | Small quilts and learning |
| Enlarged-throat mid-arm | Enlarged-throat range described above; confirm the actual model | Manual or basic control | Lap and mid-size quilts |
| Sit-down longarm with stitch regulation | Model-specific longarm throat with table-supported fabric | Optical regulation with selectable stitch density | Regular production quilting |
| Computerized longarm with pattern control | Model-specific throat and compatible frame working area | Regulation plus programmed pattern execution | High-volume and custom work |
“Mid-arm” and “longarm” labels aren't substitutes for measurements. Ask to see the actual quilting area with fabric loaded, because the rolled quilt takes up working space.
Before shopping, answer these questions:
- Quilt width: What's the widest project you realistically plan to finish?
- Production volume: How often will you quilt, rather than piece or embroider?
- Purpose: Are you finishing family projects or charging for customer work?
Linda's Electric Quilters has served quilters since 1995. For a useful comparison, bring a practice sandwich to a demonstration rather than judging longarm quilting machines by an unloaded carriage alone.
Quilt Preparation Allowances for Backing and Batting
For a BERNINA Q Series frame, the Q Series frame manual requires backing to extend at least 10 cm (4 inches) beyond the quilt top on every side, with batting extending at least 5 cm (2 inches) beyond the top on every side.
These margins give you material for clamping and advancing while preserving coverage. Backing cut flush with the top leaves no allowance for small shifts during quilting. For other longarm quilting machines, confirm the loading requirements before cutting.
How should you prepare the quilt sandwich?
- Square the top. Check that the corners are rectangular without stretching the borders into shape.
- Straighten and clean the edges. Remove loose threads that could show through light fabric or catch during loading.
- Check parallel edges. The top and bottom should run parallel so the quilt loads evenly.
- Press seams flat. Flatten bulky intersections carefully rather than forcing them with the frame.
- Cut generous layers. Measure backing and batting separately, using the machine's specified allowances.
- Load evenly. Keep the sandwich smooth and taut, not stretched tight like a drum.
Batting loft, backing drag, and tensioning affect how the sandwich behaves under the needle. Prepare a scrap sample from the same materials before committing to the finished top.
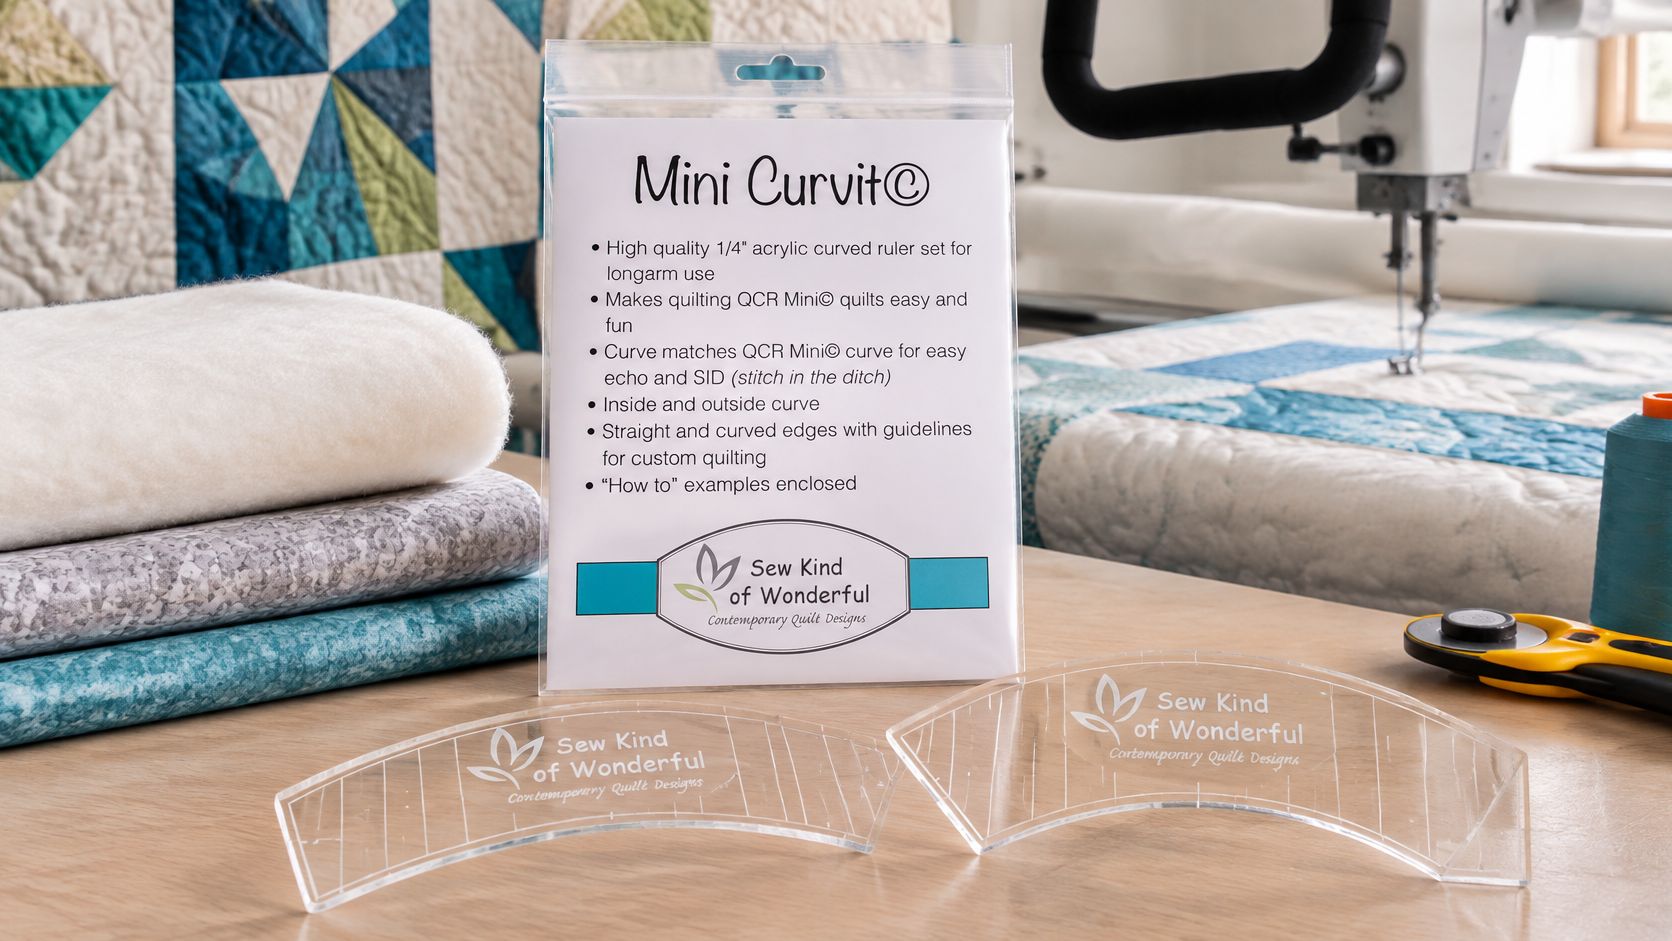
For a curved practice motif, the Mini Curvit Ruler for Longarm Quilting has straight and curved edges with guidelines for custom quilting. Its inside and outside curves support exercises such as curved crosshatching and border scallops.
Start with a practice piece, not your most intricate pieced top. You'll learn more when you're free to stop, inspect, and adjust.
Stitch Regulation and Speed Specs That Matter
Stitch regulation adjusts needle rate to match movement, helping maintain the stitch density you select. Think of it as cruise control for stitch length, not automatic steering: you still decide where the machine goes.
The BERNINA Q16 PLUS brochure describes two optical sensors, positioned on opposite sides of the needle opening, a regulation range of approximately 1–24 stitches per inch, and basting settings of 1, 2, or 4 stitches per inch.
Precision mode is useful when you want a clean stop at a point because needle motion can stop with your movement. Cruise mode maintains a minimum needle speed, which can make slow starts and rounded curves feel smoother. Neither mode fixes excessive fabric drag, incorrect presser-foot height, or unsuitable thread tension.
Which specifications deserve a demonstration?
Specs to compare before you buy
| Specification | What it controls | Published example | What to test |
|---|---|---|---|
| Stitch regulation range | Stitch density | BERNINA Q Series range described above | A sample at your intended density |
| Basting stitch settings | Temporary tacking of layers | Separate BERNINA basting settings described above | Layers remain positioned without unwanted shifting |
| Maximum speed | Available needle cycling rate | Model-specific stitches-per-minute rating | Minimum controllable speed and smooth acceleration |
| Encoder system | Motion feedback for stitch-length control | Optical sensing on regulated systems | Consistency when hand speed changes |
| Throat depth | Front-to-back working reach | Enlarged-throat category described earlier | Clearance with the quilt rolled on the frame |
The headline speed number doesn't tell you whether the machine feels predictable at a corner. Higher speed increases heat and friction, making marginal tension, damaged needles, and unsuitable thread combinations more noticeable.
Ask to sew dense motifs, a long straight run, and slow curves. Listen for changes under resistance, watch the needle-stop position, and notice whether the head glides freely in every direction.
How do you check stitch quality on a sample?
Use your intended production stitch density, then inspect both sides. Look for top thread pulled underneath, bobbin thread appearing on top, skipped penetrations, and uneven curves. Check again after changing direction, not just after sewing straight ahead.
Demo rule: A beautiful sample stitched by an experienced salesperson proves the machine can perform. Your own sample tells you whether its controls suit your hands.
Don't confuse stitch regulation with computerized quilting. Regulation responds to movement; computerization directs a programmed path. A regulated hand-guided machine still gives you full responsibility for motif placement.
Bring familiar thread and batting to the demonstration if permitted. That removes an important variable and makes comparisons between longarm quilting machines more meaningful.
Real Ownership Costs and Space Requirements
The machine price is only one line on the overall bill. A frame that occupies your cutting area, software you rarely use, or expensive service transport can matter more than an attractive purchase price.
Build an ownership worksheet before choosing accessories:
- Initial purchase: Machine, frame, compatible computerization, shipping, installation, and training.
- Working supplies: Needles, bobbins, rulers, thread, batting, and practice fabric.
- Continuing costs: Maintenance, repairs, electricity, software charges where applicable, and replacement parts.
- Workspace cost: The room you can't use for cutting, storage, guests, or other paid work.
The IndexBox quilting-machine market overview estimates that computerized or electronically controlled machines represented roughly half of global unit sales in 2026, with premium programmable and connected systems carrying approximately 35–45% price premiums over standard electromechanical models; it also reports a German estimate in which connected models cost 20–30% more than non-connected equivalents. These are broad market estimates, not quotes for a particular home longarm.
How do you calculate cost per quilt?
Compare manual, semi-automatic, and computerized options over three-year and five-year ownership periods. Use the same expense categories for each so an inexpensive machine isn't being compared with a fully equipped package.
Cost per quilt = total ownership cost over the period ÷ quilts completed during that period.
For a worked worksheet, call the total ownership cost C and the number of finished quilts Q. Your result is C ÷ Q. Enter actual written quotes and your own realistic output rather than assuming you'll quilt every available evening.
A lower cost per quilt doesn't automatically mean a better purchase. A hobbyist may reasonably pay more per project for comfort, creative freedom, and the pleasure of finishing at home.
Will the setup fit your room?
Mark the proposed footprint on the floor before ordering. Include:
- Frame length and depth: Measure the complete assembly, not just the advertised frame designation.
- Access: Leave room to load, advance, service, and move around the equipment.
- Room conditions: Check noise, lighting, electrical needs, and access through doors.
- Future changes: Confirm whether a modular frame can expand and what that requires.
For a family quilter, compare ownership with what you'd otherwise spend outsourcing those projects. For a professional, divide the additional investment by the net contribution per additional paid quilt, after materials and other variable expenses. Automation makes financial sense only when usable demand and available working time support it.
Professionals Versus Hobbyists and Which Machine Suits Each
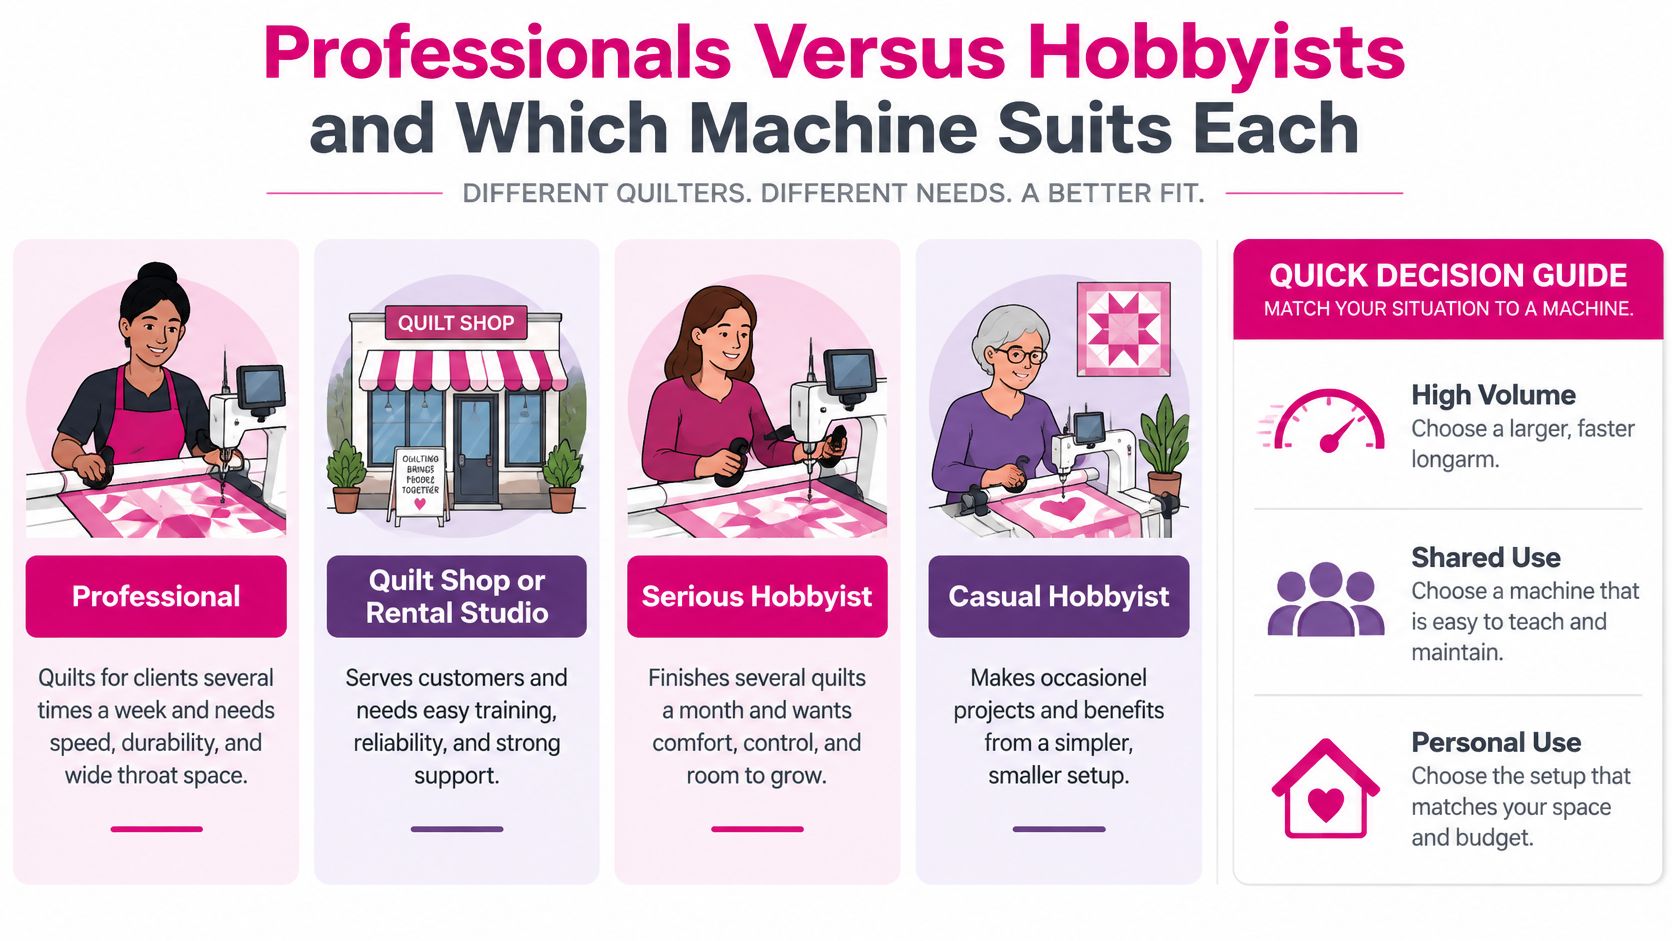
Your buying priorities change with the work you'll put on the frame. Longarm quilting machines that suit a shared studio may be unnecessarily complex for someone finishing personal quilts.
- Professional longarm business: Prioritize dependable throughput, service access, repeatable loading, and recovery from interruptions.
- Quilt shop or rental studio: Favor durable controls, easy training, straightforward loading, and clear maintenance responsibilities.
- Serious hobbyist: Put stitch quality, learning support, and enjoyable handling ahead of unused production capacity.
- Occasional quilter: Consider storage, setup effort, and whether a simpler arrangement will encourage regular use.
The main advantages are easier handling of large projects, direct control over pattern placement, and room for larger designs. The main trade-offs are dedicated floor space, a learning curve, upkeep, and ownership cost.
Does automation eliminate physical work?
Automation can reduce steering, but you still lift, spread, baste, roll, and support the quilt. Poor frame height or inadequate table support can leave the same uncomfortable reaching and shoulder tension in place.
Claims discussed in HDIN Research's market coverage, including shoulder-fatigue reductions of up to 30% from curved rails, lack transparent methodology. Treat such percentages as claims to investigate, not a promise about your body.
Use this ergonomic checklist during a hands-on trial:
- Set the bed near elbow level. Begin there, then adjust until your shoulders relax.
- Keep wrists neutral. Avoid a handle position that forces constant bending or a tight grip.
- Reach the controls comfortably. Test the farthest position you'll use.
- Light the needle area. You shouldn't need to lean forward to follow a marked line.
- Check the standing surface. Anti-fatigue flooring should be stable and free of tripping edges.
- Plan breaks. Change position before discomfort becomes the reason you stop.
- Plan large-quilt handling. Get assistance when lifting or spreading a king-size sandwich exceeds your comfortable reach.
A sit-down system may suit someone who can't stand comfortably, but it still requires moving fabric. A frame-mounted head may reduce that handling while demanding more standing and reaching.
Explore Linda's daily quilting education while learning the workflow. Understanding each loading movement helps you judge whether the setup fits your body, not merely your room.
Maintenance Schedule That Protects Stitch Quality
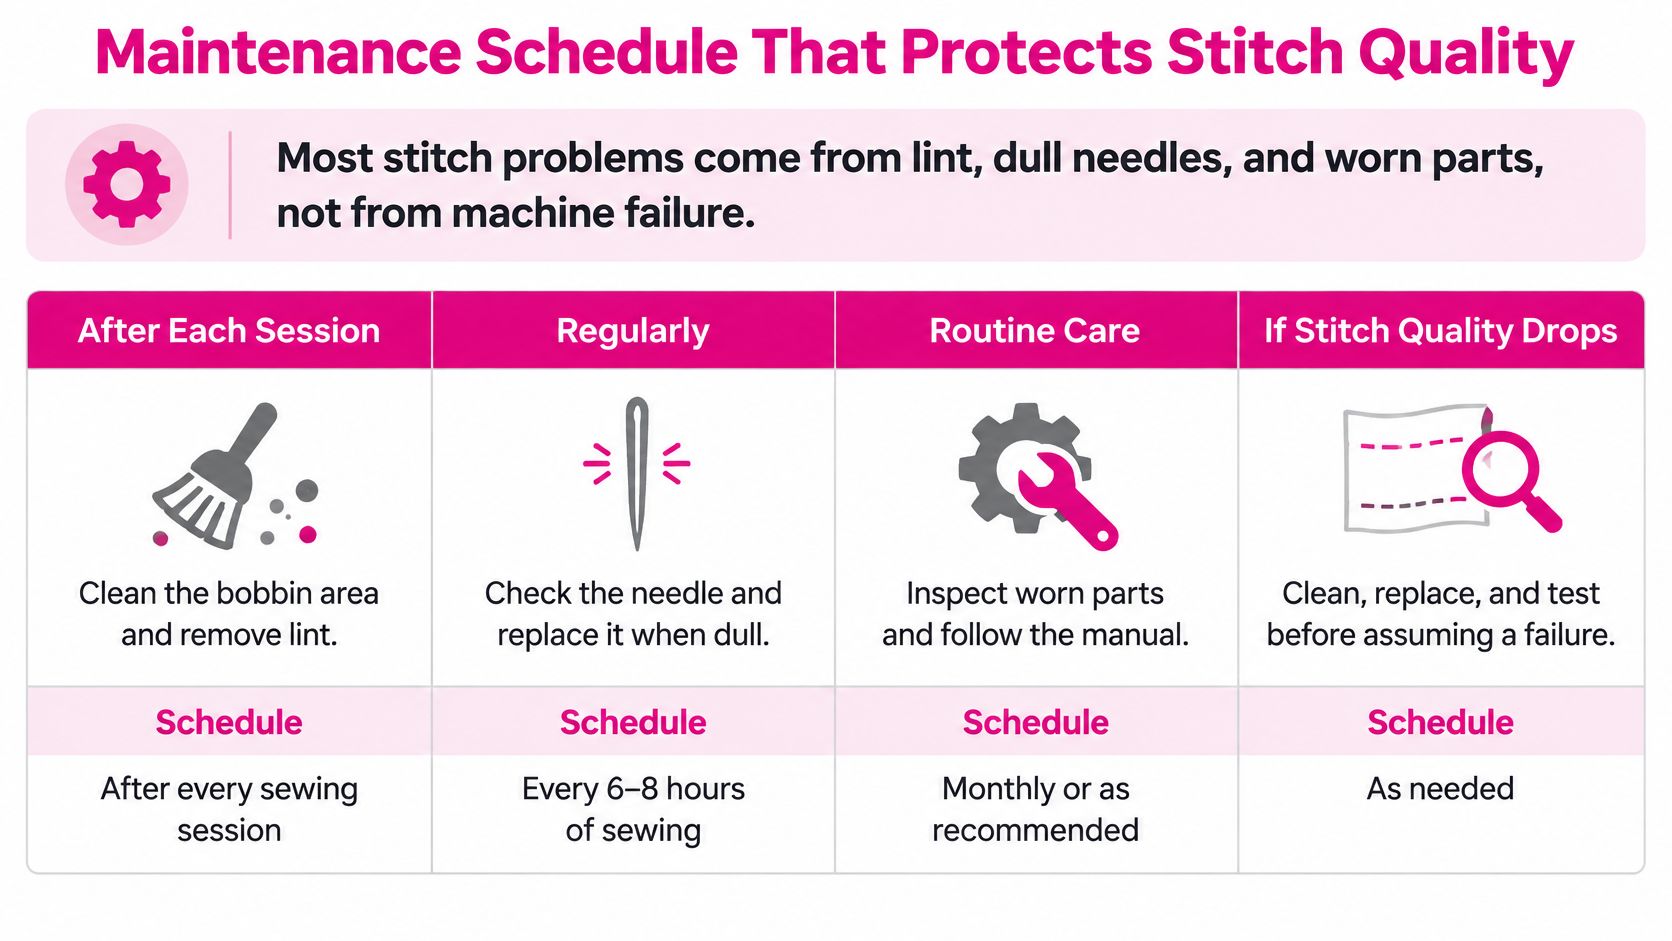
When stitch quality changes, start with lint, needle condition, threading, and worn components before assuming the machine has failed. A repeatable care routine makes troubleshooting easier because you know what's already been checked.
Longarm maintenance schedule
| Task | Frequency | Why it matters |
|---|---|---|
| Clean lint from the bobbin area and hook race | After every quilt, and sooner when lint accumulates | Debris can interfere with thread movement and stitch formation |
| Replace the needle | Follow the machine and needle guidance; replace promptly when damaged or implicated in skipped stitches | A damaged point can snag fabric and fray thread |
| Oil designated moving parts | Per the manufacturer's manual | Lubricates the specified mechanisms without contaminating other components |
| Check belts, cables, and lights | Include in a regular inspection routine | Helps identify wear, loose connections, and visibility problems |
| Test-sew a sample | Before each new batting or thread combination | Confirms tension on the intended sandwich |
| Cover and store the machine | Between sessions | Limits dust accumulation |
Don't apply a universal oiling schedule to all longarm quilting machines. Some components need lubrication; others must stay dry. The carriage, drive, hook, and electronic sensors aren't interchangeable maintenance points.
What should your cleaning routine include?
- Turn off and unplug the machine. Prevent accidental activation before putting your hands near the needle or hook.
- Remove the bobbin case. Follow the manual's removal method and place the case somewhere clean.
- Brush lint from the hook race. Use a suitable soft brush and remove debris rather than pushing it deeper. Avoid blowing lint into inaccessible mechanisms.
- Inspect the needle. Replace a bent, burred, or dull needle, then install the correct type in the specified orientation.
- Oil only the designated points. Use the specified lubricant and amount. Keep oil away from the quilt, belts, sensors, and surfaces the manual identifies as dry.
- Reassemble and test-sew. Reconnect power only after the machine is ready, then check a scrap sandwich before returning to the project.
Pro-Tip: Keep a labeled sample card for each batting and thread combination. Attach stitched swatches and record the needle, thread, regulation mode, and tension settings so you can distinguish a material change from a machine problem.
If a problem remains, change one variable at a time. Replacing the needle, rethreading, altering bobbin tension, and increasing speed simultaneously makes it hard to identify the cause.
Use model-specific visual cleaning instruction alongside the manual. The quilting video included below provides an educational resource, but confirm that any maintenance procedure shown applies to your machine before following it.
Match Your Needs to the Right Longarm Type
A quilter with a queen-size backlog and a spare bedroom often compares a long frame against a short one by looking at the price tag. The more useful comparison is the footprint you must walk around every day against the minutes each reload adds to every project.
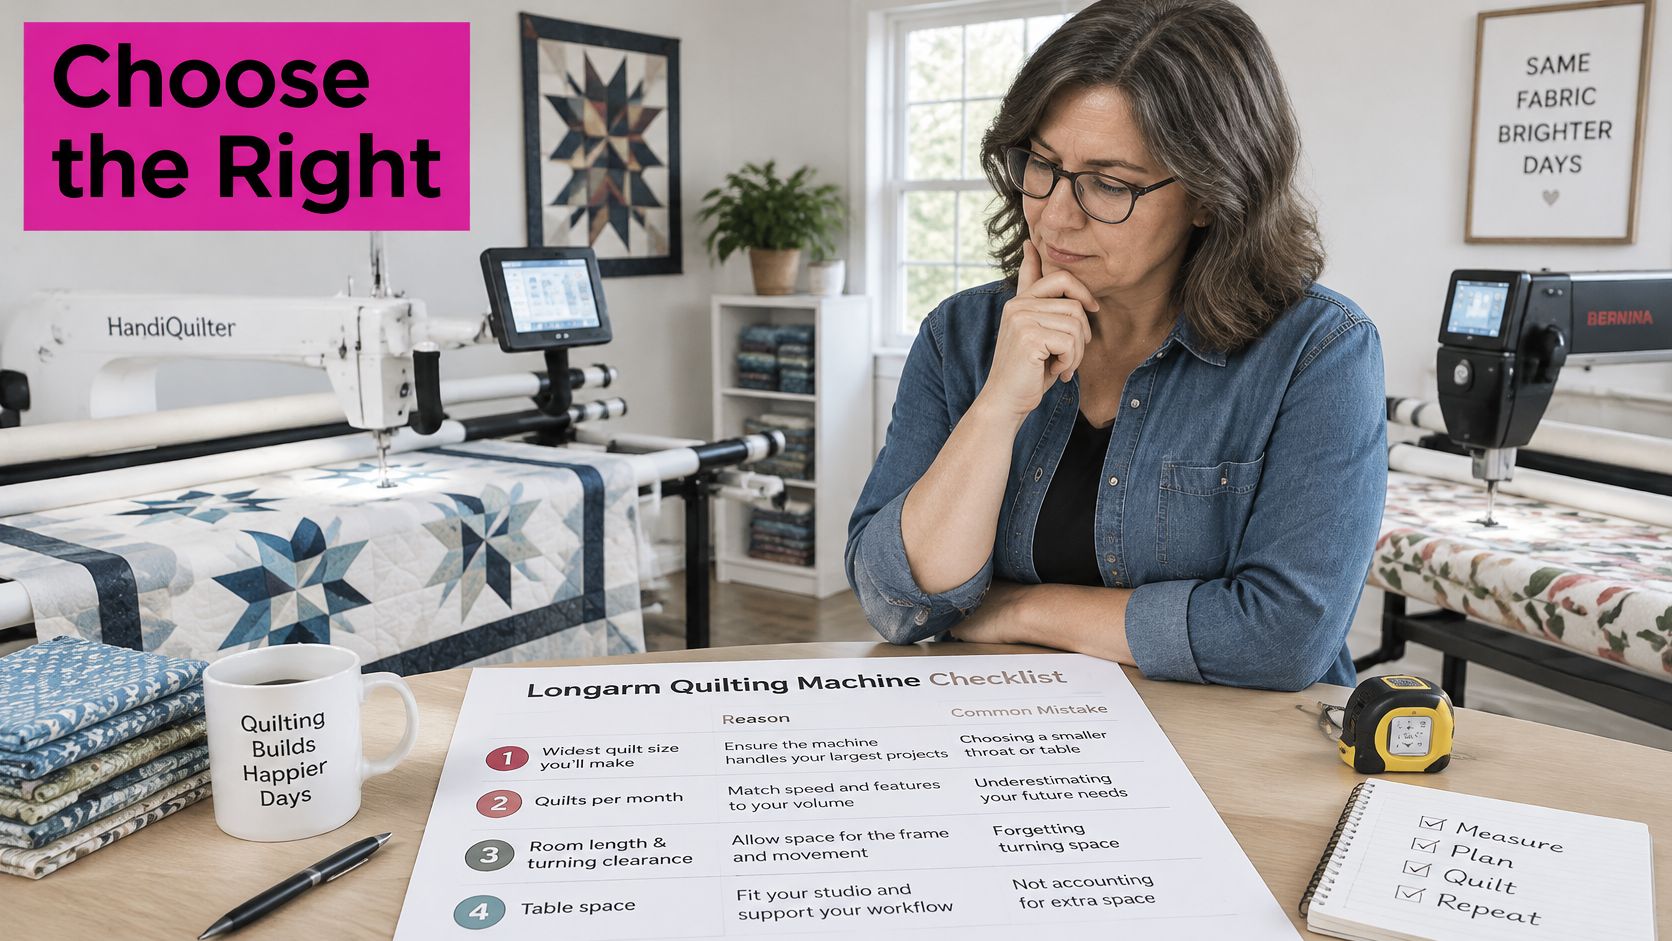
- Monthly workload and peak week: Write down the quilts you finish in an average month and the largest batch you accept before a show. The peak week sets the frame size you need, not the quiet month.
- Floor footprint plus aisle: Measure the frame, the table depth and the turning room you need to load backing without stepping over the rails. A frame that leaves no aisle turns every reload into a two-person job.
- Reload time per project: Time a backing load and a bobbin change on the machine you are considering. Short frames save floor space and add reload minutes. Wide frames save reload minutes and take floor space. Choose the side of that trade you can live with.
- Operator reach and standing tolerance: Sit or stand at the machine for the length of a real quilting session. Check reach to the far side, grip on the handles and where your hips rest against the frame.
- Stitch control by motif: Bring a dense motif, a straight run and a slow curve. Manual coordination suits some hands. Regulation helps when you want the needle to keep pace through curves.
- Service route and parts: Confirm who services the machine, how far they travel and whether common parts are stocked. A lower purchase price with a long service gap costs hours you cannot bill or quilt.
- Training fit: Ask what threading, loading and tension checks are taught before advanced pattern features. You want to leave the demonstration able to stop the machine safely and restart a clean stitch.
- Budget as hours plus cash: Compare quotes with frame, computerization, delivery and the first year of consumables in the same column. Divide the difference by the hours you expect to quilt each month. A higher sticker price can be the cheaper machine if it removes reload time you would otherwise repeat.
For scale, the BERNINA sit-down comparison information gives the Q16 PLUS rating as 2,200 stitches per minute, while the accompanying specification comparison identifies the Grace 19SD at up to 2,600 stitches per minute with dual optical encoders. Those ratings describe top speed on a straight run. A dense motif, a tight curve and a slow fill will each run at a lower speed, so use the demonstration to watch how the machine starts, stops and holds stitch length when you change direction.
The maintenance walkthrough earlier in the article shows the machine being cleaned and checked. Watch how the carriage moves before your hands-on trial, then repeat the same path yourself at the machine.
Small projects and limited commitment may point toward a domestic-on-frame setup. Personal quilting with seated fabric control suggests a sit-down longarm. Frequent frame work suggests a hand-guided regulated longarm. The final decision is the one you can operate on a tired Tuesday: the frame you can walk around, the reach you can make, and the reload you can repeat without dreading the next quilt.
Common Questions About Buying and Using a Longarm
Do I need training before buying a longarm?
You don't need to master longarm quilting before shopping, but a demonstration and guided practice will help you recognize controls you'll use comfortably. Learn threading, loading, tension checks, and safe stopping before evaluating advanced pattern features. Linda's daily quilting education can support that learning between practice sessions.
Can I try a longarm before purchasing?
Request a hands-on demonstration and confirm whether you may bring your own batting, backing, and thread. Sew the kinds of motifs you intend to quilt, then inspect both sides of the sample rather than judging only the machine's sound or screen. Also try loading and advancing, because those tasks are part of every project.
Are used longarm machines a good buy?
A used machine can be worthwhile when its condition, service history, and parts support are clear. Inspect the frame and carriage travel, ask for a stitched demonstration, and verify the computer's age, software compatibility, and transfer terms where applicable. Include dismantling, transport, reassembly, and potential repairs in the comparison with a new package.
Do I need a computerized machine to start?
No, a manual or regulated hand-guided machine can produce professional-quality quilting. Computerization adds programmed pattern execution, but you still need to understand preparation, placement, thread behavior, and troubleshooting. Buy it when the repetition or pattern options justify its cost for your work, not because you think beginners can't quilt without it.
Confirm Your Shortlist and Start Your First Quilt
First, arrange a demonstration of your shortlisted model. Run a dense sample at the stitch density you intend to use, and keep the swatch with your notes. Choose the machine you can operate confidently throughout the workflow, not the one that produces the most impressive demonstration.
Next, gather the supplies that make testing repeatable. Prepare labeled sample cards, needles matched to your thread and machine, and practice layers that resemble your project. If you plan ruler work, use an appropriate acrylic quilting ruler with the shapes you need and a compatible ruler foot.
Then, prepare a low-pressure first project. Review visual instruction for loading and model-specific cleaning before you stitch, and keep the manual nearby. Linda's Electric Quilters provides daily quilting education and has more than 700 YouTube educational videos, giving you resources for building skills beyond the initial purchase.
Your first project should teach you how the machine feels. A finished practice quilt is more useful than a treasured top left untouched while you wait for perfect confidence.
Linda's Electric Quilters offers more than 50,000 fabric, thread, batting, and notions products to help you turn a machine purchase into finished quilts. Browse batting and longarm notions at Linda's Electric Quilters, gather your practice supplies, and start your first quilt this week.


