
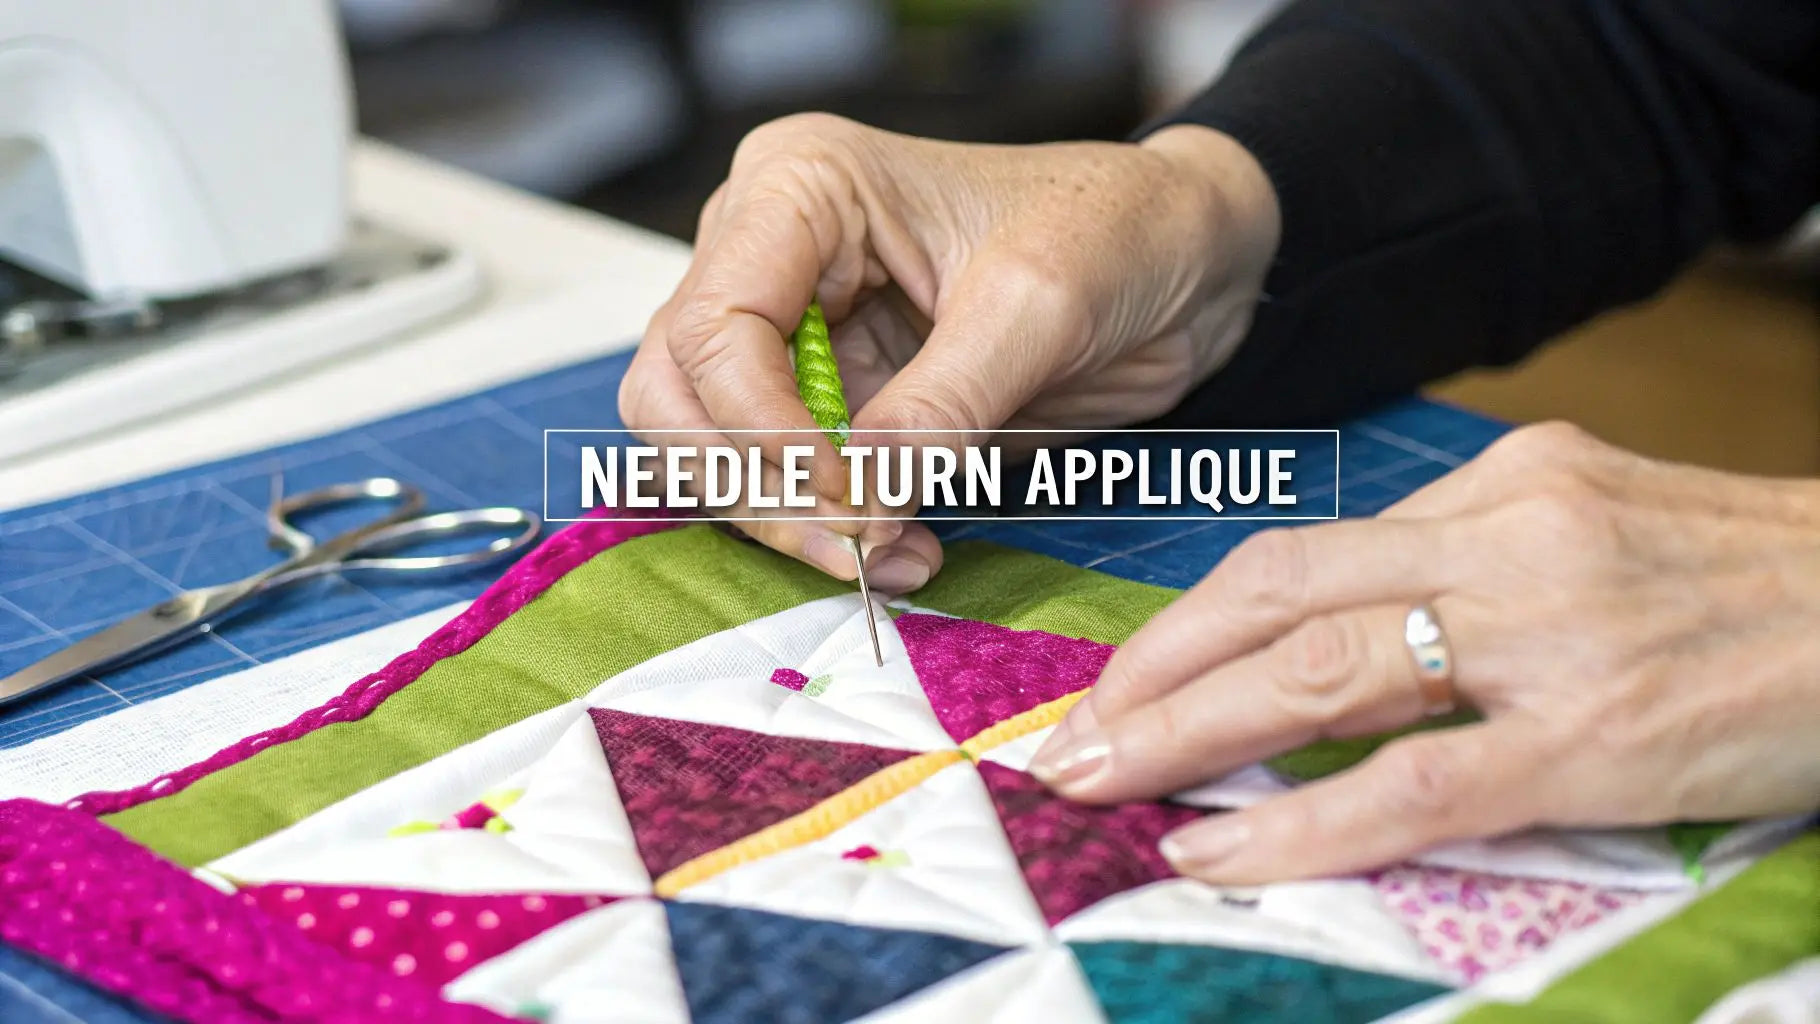
Needle-turn appliqué is a classic hand-sewing technique that just feels special. The magic happens right at the tip of your needle—you gently turn the fabric's seam allowance under just as you're about to make a stitch. This little move creates a perfectly clean, turned edge with stitches so tiny they're nearly invisible.
The result is a beautifully handcrafted finish that quilters and textile artists have cherished for centuries, perfect for adding a personal touch to your next quilting project.
Why Needle Turn Applique Is a Cherished Skill
In a world full of quick-fix crafting, needle-turn appliqué is a welcome pause. It's a thoughtful, almost meditative process that lets you connect with your work on a much deeper level. You’re not just sticking fabric down; you're sculpting it, transforming simple shapes into a true work of art with a personal touch that lasts.
Unlike fusible or raw-edge methods that rely on speed and adhesives, this technique is all about heirloom quality and creative control. You end up with a soft, pliable quilt top, free from the stiffness that fusible web can sometimes leave behind. This not only feels wonderful but makes the final quilting, whether by hand or machine, a much smoother ride.
A Legacy Stitched Through Time
This beloved technique is far from new; its rich history is part of what makes it so special. Needle-turn appliqué has roots stretching back thousands of years across countless textile traditions. In fact, some of the earliest examples, like a canopy quilt from 980 B.C., were found in ancient Egypt!
Its appeal has never really faded. Even today, with so many modern shortcuts, over 70% of traditional quiltmakers still turn to this method. Why? Because nothing else gives you such smooth, professional-looking curves and intricate details. The skills passed down are a beautiful testament to how quilting can inspire generations, linking us to a long line of artisans who valued patience and precision.
The Artistic Advantage
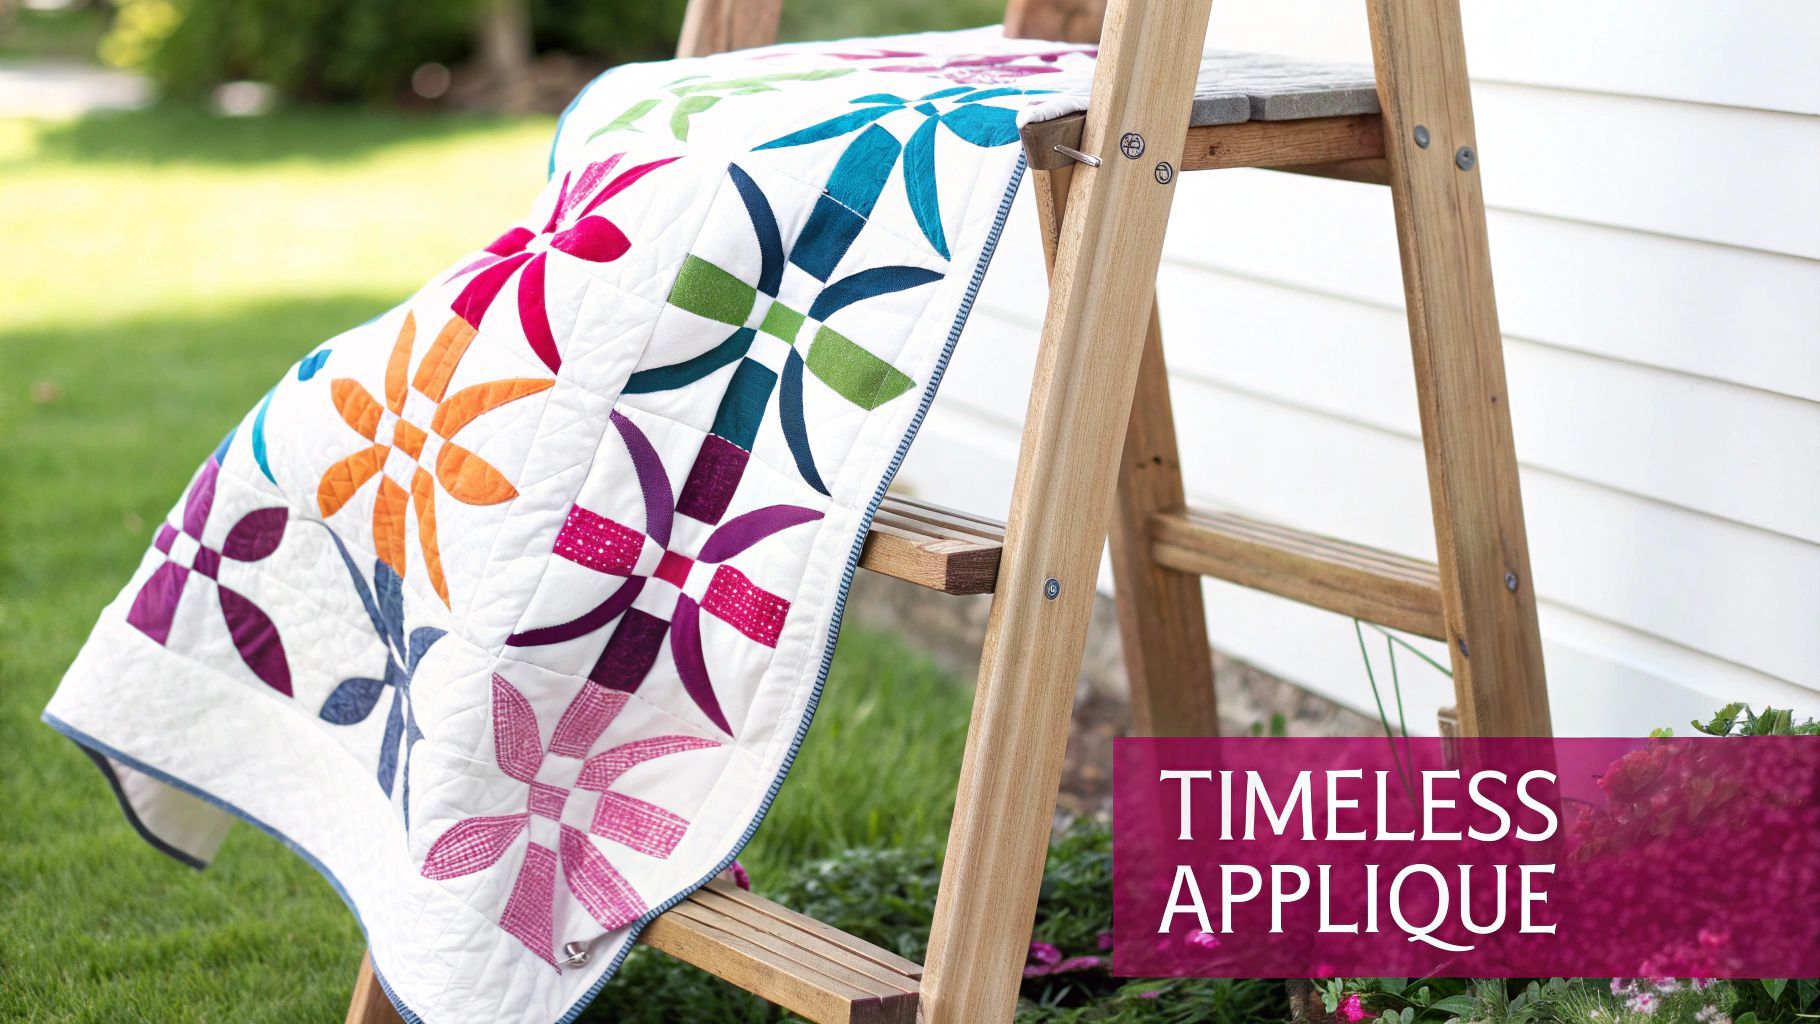
What really sets needle-turn appliqué apart is the artistic freedom it gives you. Because you're turning the edge as you go, you have total control over the final shape. It’s the gold standard for creating:
- Flowing Curves: Get those perfectly smooth, graceful curves that are so tough to achieve with other methods.
- Sharp, Crisp Points: Master the little tucks and folds needed for perfect points on leaves, stars, and other intricate shapes.
- Intricate Details: This technique lets you work with tiny, complex pieces, making it ideal for detailed pictorial quilts and elaborate floral designs.
This method empowers you to translate any design from paper to fabric with stunning accuracy. It's not just a technique; it’s a skill that elevates your creative potential, allowing you to produce work with a distinct, high-quality finish.
Ready to create your own masterpiece? The first step is gathering the right supplies. At Linda's, you can find an amazing selection of premium fabrics, fine threads, and specialized needles to begin your needle-turn appliqué journey.
Gathering Your Essential Tools and Supplies
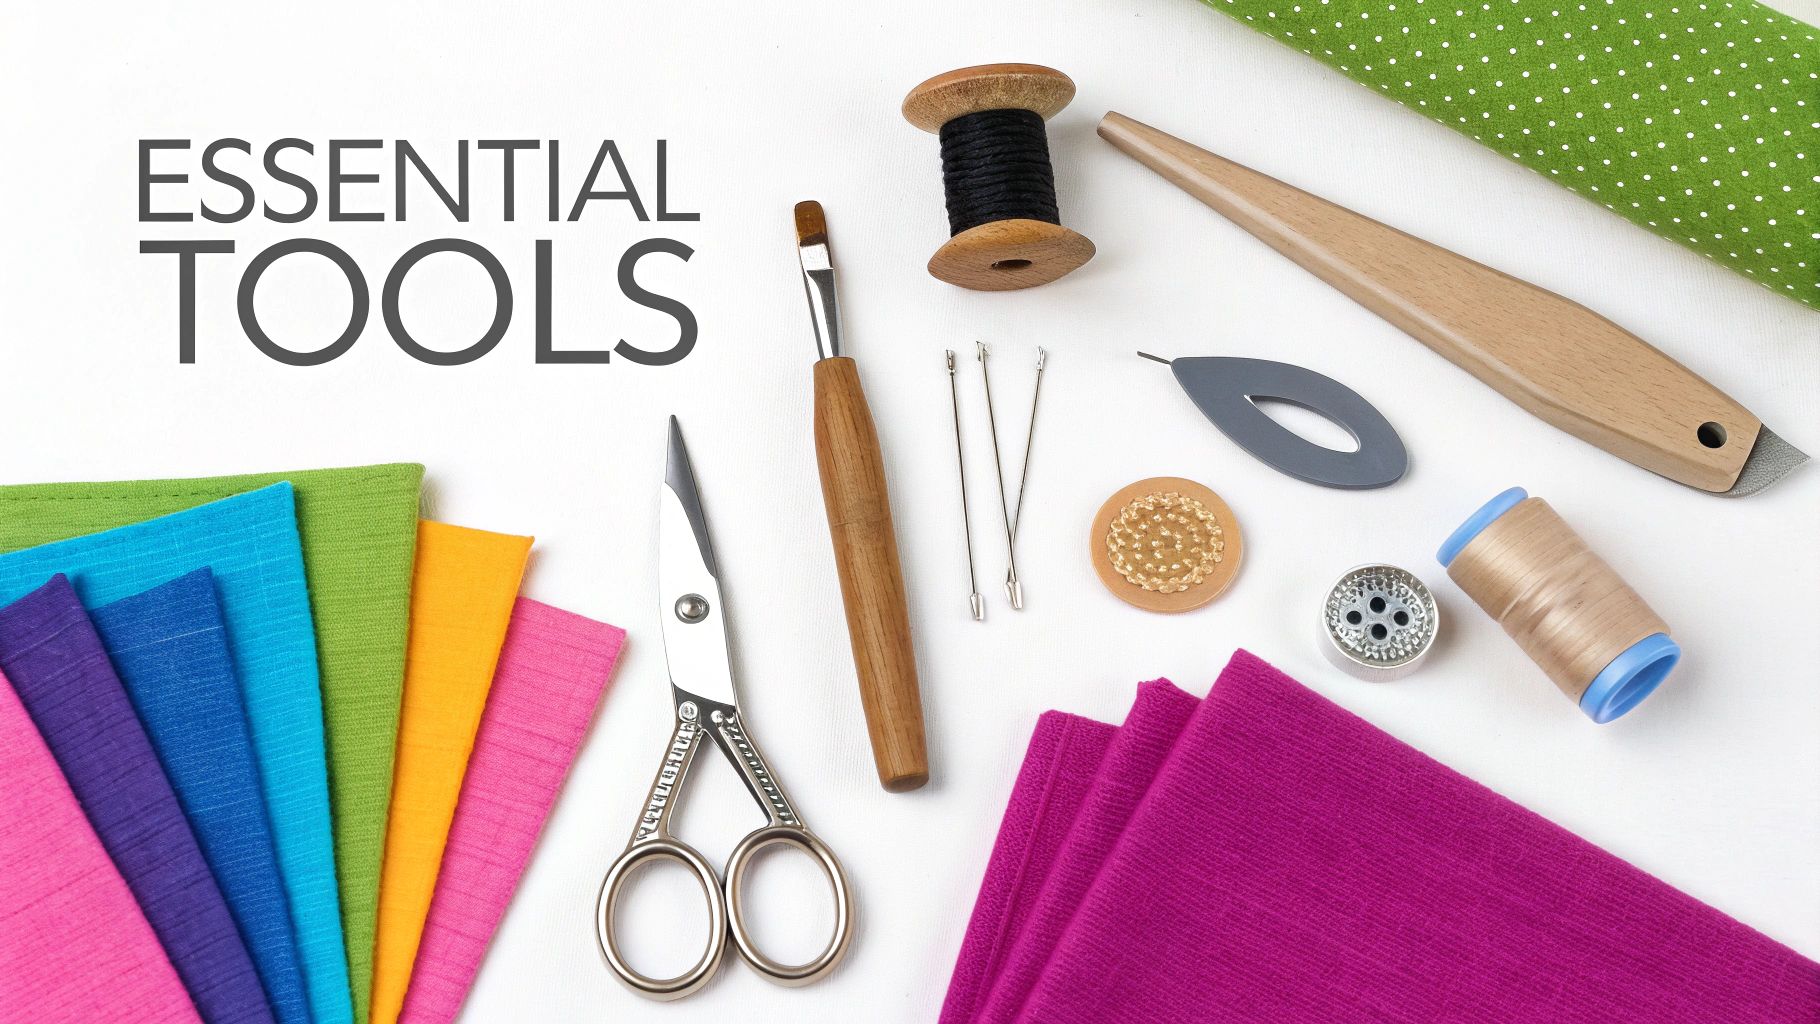
Getting set up for your needle-turn appliqué project is half the fun! Having the right tools on hand from Linda's can make all the difference, turning a technique that seems fussy into a relaxing, creative joy. The good news is you don’t need a huge, expensive list of supplies. It's more about thoughtfully curating a small, high-quality toolkit.
The foundation of any great appliqué project is, of course, the fabric. We always recommend starting with high-quality quilting cotton from our collection. Look for a nice, tight weave—it frays less and holds a beautifully crisp edge when you turn it under.
Needles and Threads: The Stars of the Show
At its heart, this entire technique comes down to just a needle and thread. But the right needle and thread are what create that magic, invisible finish.
You’re looking for a needle that’s fine, sharp, and strong. It needs to feel like an extension of your hand.
- Appliqué Needles: These are my go-to. They're shorter than your average needle (look for sizes 9 to 12), which gives you amazing control for those tiny, precise stitches.
- Milliners/Straw Needles: Some stitchers absolutely swear by these. They’re a bit longer and more flexible, which can help you smoothly sweep the fabric edge under as you go.
Many seasoned quilters, myself included, have a soft spot for #10 sharps from brands like Bohin or John James, both of which are available at Linda's.
Just as important is your thread. If your thread is too thick, your stitches will be obvious, no matter how small you make them. You want it to simply disappear.
For a truly invisible stitch, grab a fine-weight cotton thread. An 80wt is great, and a 100wt is even better. They are whisper-thin but surprisingly strong. Silk thread is another fantastic choice; its natural sheen helps it melt right into the fabric.
Don't forget about color! Always match your thread to the appliqué piece you're sewing down, not the background fabric. This is the secret to making your stitches vanish. If you want to dive deeper, we have a whole guide on choosing the best thread for quilting.
Essential Tools for Perfect Needle Turn Applique
| Tool | Recommended Type/Size | Why It's Important | Shop at Linda's |
|---|---|---|---|
| Needles | Appliqué Sharps (#10 or #11) | Short & fine for maximum control and tiny stitches. | Find the perfect needles to start your project. |
| Thread | 80wt or 100wt Cotton or Silk Thread | Incredibly fine thread sinks into the fabric, making stitches invisible. | Explore our vibrant collection of fine threads. |
| Scissors | Small, sharp-pointed embroidery scissors | Essential for precise trimming and clipping inner curves. | Get a sharp, reliable pair for detailed work. |
| Marking Tool | Fine mechanical pencil or water-soluble pen | Creates a clear, accurate line to follow without distorting the fabric. | Choose the best marking tool for your fabric. |
Having these specific tools, all available at Linda's, will set you up for success right from the start.
Essential Cutting and Marking Tools
Precise preparation is the bedrock of good appliqué. Even the most perfect stitching can't rescue a shape that's been cut or marked inaccurately.
You’ll want two pairs of scissors in your kit. First, a good pair of fabric shears for cutting your background and the initial appliqué pieces. The second, and arguably more critical, is a small pair with sharp points. These are what you'll use for all the detail work—trimming seam allowances, clipping into tight curves, and snipping threads.
For marking your shapes, you need a tool that’s easy to see but also easy to remove. We carry several fantastic options:
- A fine-tipped mechanical pencil with a soft lead is perfect for tracing on the right side of light-colored fabrics.
- Water-soluble pens are fantastic because the marks vanish with a simple dab of water after you're done.
- For dark fabrics, a chalk pencil gives a crisp line that just brushes away.
Helpful Extras for an Easier Workflow
Beyond the absolute must-haves, a few other items from Linda's can make the process flow so much more smoothly.
A good thimble is non-negotiable for many of us. It not only saves your finger from getting sore but also helps you push the needle through the fabric with confident, even pressure. They come in metal, leather, and silicone—try a few to see what you like.
Here's another trick I love: using a wooden toothpick or a stiletto. Instead of using the tip of your needle to turn the seam allowance under (which can be a bit clumsy), you can use the fine point of one of these tools to gently grab the fabric fibers and tuck the edge under right before you stitch. It’s a simple move that really speeds things up.
Preparing Your Fabric and Templates for Flawless Results
Ask any seasoned quilter, and they'll tell you the real secret to beautiful, crisp needle-turn appliqué isn't just in the final stitches—it's all in the prep work. Taking the time to get your templates and fabric just right is what sets you up for a smooth, joyful sewing session and a finish you can be proud of.
This is where your design starts to come to life, moving from a simple drawing to actual fabric. Getting this part right ensures your shapes are accurate, your edges are a dream to work with, and your finished piece looks exactly like you imagined. Think of it as drawing a perfect map for your needle to follow later.
Crafting the Perfect Appliqué Template
Your template is the foundation of your appliqué shape, so accuracy is everything. While you can certainly get by with a bit of cardstock, most of us who do this often rely on materials that are a bit more durable and easier to work with.
Here are a few of my favorite go-to options, all of which you can find at Linda's:
- Freezer Paper: This is a classic for a reason! You just iron the waxy side onto your fabric, giving you a wonderfully crisp edge to trace. It's affordable, easy to find, and perfect for simpler shapes you might not be making over and over.
- Plastic Template Sheets: If you have a design you know you'll be using again and again, plastic is a fantastic investment. It's incredibly durable, and because it's transparent, it's brilliant for fussy cutting your favorite parts of a print.
- Specialty Stabilizers: Newer products like "Totally Stable" are a game-changer. They iron on just like freezer paper but they're softer and more transparent, providing a fantastic guide for turning that seam allowance under.
No matter which material you land on, the process is the same: trace your design onto the template material and cut it out right on the line. This cut-out shape is the exact finished size of your appliqué piece.
From Template to Fabric
With your template ready, it's time to get that shape onto your fabric. Place the template on the right side of your appliqué fabric and carefully trace around it with a good, fine-tipped marking tool. Remember, this line you're drawing is your stitching line, not where you'll be cutting.
Now, you need to give yourself a seam allowance. You don't need to get a ruler out for this part. Just cut about 1/4 inch outside the line you traced. This little bit of extra fabric is what you’ll be tucking under with your needle. Don't worry about it being perfectly even—a consistent "eyeball" measurement is all you need here.
Pro Tip: When you're cutting lots of small appliqué pieces, it can sometimes feel like you're chewing through fabric faster than you'd expect. To avoid a last-minute panic, it's always a good idea to map out your needs beforehand. Our guide on how to calculate fabric yardage is a great resource to make sure you have enough for your whole project.
Prepping Your Shapes for Sewing
This is where you'll find quilters have their own tried-and-true methods. Some of us swear by pre-pressing the edges for an ultra-crisp line to follow, while others love the more organic feel of turning the raw edge under as they stitch.
- Starch Prepping: If you're chasing after razor-sharp points and flawless curves, a little starch is your best friend. Lightly spritz the seam allowance with starch and use the very tip of your iron to press the fabric over the edge of your template. This creates a pre-turned edge that is an absolute breeze to stitch down.
- Finger Pressing: For softer curves and simpler shapes, you can get a beautiful finish just with your fingers. As you prepare to stitch, gently fold the seam allowance under along your marked line and give it a firm press with your thumb.
This focus on careful preparation is deeply woven into the history of quilting itself. Needle-turn appliqué became the darling of American quilting in the 18th and 19th centuries precisely because it allowed for such elegant, intricate designs. In fact, by the mid-1800s, over 60% of quilts from the eastern U.S. featured appliqué, with needle-turn being the preferred method for the stunningly complex Baltimore Album quilts.
Basting Your Pieces Securely
Okay, one last step before you can finally pick up that needle and thread! You need to make sure your appliqué piece is secured to the background fabric so it doesn't shift or bubble up while you work.
Here are a few reliable ways to baste your pieces down:
- Thread Basting: Take a long piece of contrasting thread and make big, temporary stitches inside the seam allowance to hold the piece in place. You'll just snip and pull these out as you get close to them with your final stitches.
- Glue Basting: A few tiny dabs from a fabric-safe glue stick in the middle of your shape (staying well away from the edges!) is a super quick and easy way to hold it steady.
- Pin Basting: For larger shapes, a few small appliqué pins are perfect. They're tiny enough that they won't get in your way as you're stitching around the piece.
With your templates made, fabric cut, and pieces securely basted, you're all set to begin the wonderfully meditative process of stitching.
Mastering the Invisible Needle Turn Stitch
Alright, this is where the magic really happens. We've done all the prep work, and now we get to the wonderfully satisfying rhythm of the needle turn appliqué stitch itself. All that careful tracing and cutting is about to pay off as you watch your design come to life. Think of this less like a strict set of instructions and more like a quiet conversation between your needle, thread, and fabric.
Our goal here is a blind stitch—a tiny, nearly invisible connection that secures your appliqué piece to the background. With just a bit of practice, your stitches will melt into the fabric, creating that beautiful, seamless finish we’re all after.
This little diagram breaks down the prep process. Getting this right is what makes the sewing part so much smoother.
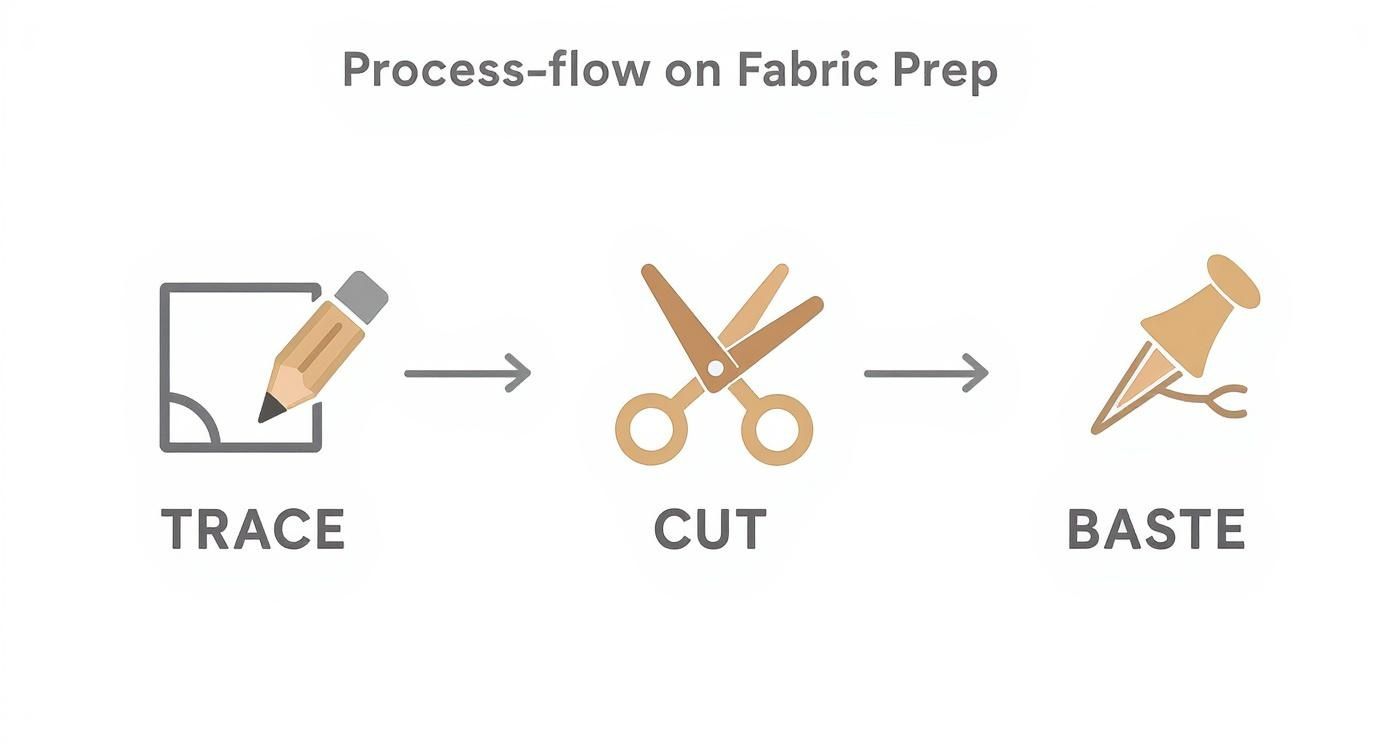
As you can see, flawless results really do start with accurate tracing and cutting long before you ever make a single stitch.
The Anatomy of the Perfect Stitch
First things first, get comfortable. Find a way to hold your work that feels natural, without making your hands cramp. I find it helpful to drape the background fabric over my non-dominant index finger; it creates a nice, stable little surface to stitch against.
To start, you’ll bring your threaded needle up from the back, hiding the knot underneath the appliqué piece. You want the needle to pop up right on the traced line of your appliqué shape.
Now for the "needle turn" part. Using the side of your needle, gently sweep or tuck about a half-inch of the seam allowance under, following your marked line. Don't get ahead of yourself and try to turn the whole thing at once. Small, manageable sections are your friend.
With that little bit of edge tucked under, you’re ready for your first stitch.
- Dip your needle down into the background fabric, right next to where your thread came up.
- Travel a tiny distance under the background—we're talking 1/8 inch or less.
- Bring the needle back up, catching just a whisper of the folded edge of your appliqué. I mean literally one or two threads.
- Pull the thread through until it's snug, but not so tight that it puckers the fabric.
And that's it! That’s one nearly invisible stitch. Now you just repeat that motion, turning a little more of the seam allowance under with your needle as you go.
The real secret is consistency. Just focus on making your stitches small and evenly spaced. Once you find your rhythm, you’ll see how meditative and relaxing it is—the perfect way to create something beautiful.
Navigating Curves and Points Like a Pro
Curves and points are where needle turn really gets to show off, but they can feel a little tricky at first. The secret is just to slow down and tweak your technique a bit. It takes a little more finesse, but this is what will make your work look truly polished.
For gentle outer curves, like the edge of a circle, your approach is pretty straightforward. You’ll just place your stitches a little closer together than you would on a straight line. This coaxes the fabric around the bend and keeps it from looking angular.
Inner curves, like the dip between two flower petals, need a different strategy.
- Clip the Seam Allowance: Before you start sewing, you have to make small snips into the seam allowance, cutting almost to your marked line. Almost! Be careful not to cut through it.
- Space Your Clips: Make these clips about 1/4 inch apart. This gives the fabric room to spread out and lie flat as you turn it, preventing any ugly bunching.
- Stitch with Care: As you sew, use the tip of your needle to turn under one tiny clipped section at a time to get that smooth, inward curve.
Once you have these foundational hand-stitching skills down, you can create so much. For more ideas, check out these lovely embroidery projects for beginners that build on similar techniques.
Conquering the Sharp Point
Getting a perfectly crisp point is one of the most satisfying moments in appliqué. It looks complicated, but it's really just a couple of neat folds.
When you're about one stitch away from the very tip of the point, pause.
- Take a tiny stitch to anchor your thread.
- Use your needle to fold the seam allowance at the very tip straight down.
- Now, fold the seam allowance from the side you were just stitching over that first fold. This creates a sharp little corner.
- Take one small stitch right at the tip, making sure you go through all those folded layers to lock them in place.
- All that's left is to fold the seam allowance on the other side under and continue stitching down the new edge.
With these tricks up your sleeve, you’ll be able to tackle any shape with confidence. Every project builds muscle memory, and soon enough, these little movements will feel completely natural. Now go enjoy the process of bringing your designs to life, one perfect stitch at a time.
Exploring Advanced Applique Techniques
https://www.youtube.com/embed/MRoc3uDmTBQ
Once you get into the rhythm of the needle-turn stitch, a whole new world of creative possibility opens up. Mastering the basics is your foundation, but learning advanced techniques is how you’ll truly make your textile art sing. This is where you can begin adding depth, texture, and complex details that turn a simple project into something really special.
Moving beyond single, flat shapes allows you to tell more intricate stories with your fabric. It's a genuinely exciting next step that builds on the skills you’ve already been practicing.
Working with Layered Designs
One of the most effective ways to create visual interest is by layering appliqué pieces. Think of a blooming flower with its overlapping petals or a landscape with rolling hills in the foreground and mountains behind. The key to making this work is simply planning your layers in the right order.
You have to stitch the bottom-most layer first. Always. For instance, in a floral design, you’d appliqué the leaves that sit behind the flower onto your background fabric first. Then, you would place the main flower shape right on top, covering the raw edges of the leaves' bases, and stitch it down. This "bottom-up" approach guarantees a clean, professional finish with no pesky raw edges peeking through.
The Art of Reverse Applique
Reverse appliqué is a stunning technique that completely flips the traditional process on its head. Instead of sewing a shape onto a background, you layer your fabrics and then cut away the top layer to reveal the beautiful color underneath. This method creates incredible depth and is perfect for bold, graphic designs.
Here's how it generally works:
- Layer Up: Start with at least two layers of fabric. The color you want to "reveal" goes on the bottom.
- Stitch the Design: Trace your design onto the top fabric and then stitch right on the line, going through all the layers.
- Cut Away: Now for the fun part. Carefully cut out the shape from the top layer only, leaving a tiny seam allowance inside your stitch line.
- Turn and Stitch: Finally, use your needle to turn that seam allowance under and stitch it down with your classic invisible stitch, revealing the fabric below.
This technique offers such a unique look that feels both traditional and modern at the same time. It’s a fantastic skill to add to your repertoire, allowing for designs that are truly embedded within the fabric itself.
Incorporating Different Fabric Textures
While quilting cotton is the old faithful for its stability, don't be afraid to play around with other textures. Bringing in materials like linen, velvet, or even a fine wool can add a wonderful tactile quality to your work. Just remember, these fabrics often require slight adjustments to your technique.
Velvets and other piled fabrics have a nap, so make sure all your pieces are facing the same direction for a consistent, professional look. Linens tend to fray more, so giving yourself a slightly wider seam allowance and handling them gently is a good idea. For even more ideas on mixing materials, check out our guide to elevate your quilting craft with advanced techniques.
This appreciation for textile artistry has deep roots all over the world. In Japan, for example, artisans have used needle-turn appliqué for centuries on everything from ceremonial clothing to elaborate campaign vests. It's amazing to think that historical records show over 30% of surviving samurai garments from the 16th century feature these detailed appliqué elements—a real testament to the technique's durability and beauty.
Common Questions About Needle Turn Appliqué
Even with the best prep work, you're bound to run into little snags when learning a new skill. Needle turn appliqué is no different! Let’s walk through some of the most common questions I hear, so you can tackle them with confidence and keep your stitching time fun.
Most of us stumble over the same few things when we're starting out. Getting a straight answer can be a game-changer and get you right back to the creative part.
Why Are My Stitches Showing on the Front?
Visible stitches are probably the number one frustration for beginners. I get it! The good news is, it's almost always a simple fix. This usually happens when your stitches are a bit too large or when your needle is catching too much of the folded edge of your appliqué piece.
Your goal is to grab just one or two threads of the appliqué fabric with each tiny stitch. Also, take a hard look at your thread. It needs to be a very fine weight, like an 80wt or 100wt cotton, and the color should match your appliqué shape, not the background fabric. Getting that combination right is the real secret to making your stitches virtually disappear.
A little pro tip: Your stitch should run almost parallel to the appliqué's edge. It travels a tiny distance under the background fabric before popping up right through the fold. This little trick minimizes how much thread ever shows on the top.
How Do I Get Sharp Points and Smooth Curves?
Nailing those beautiful, defined shapes is what makes needle turn so incredibly rewarding. For crisp, sharp points, it’s all about the fold. Just before you get to the very tip, stop and use your needle to carefully fold one seam allowance straight down. Then, fold the other side neatly right over it. It creates a perfect little mitered corner you can secure with a tiny tack stitch.
Smooth curves, on the other hand, need a slightly different touch.
- Outer Curves: On gentle outside curves, I use slightly smaller stitches and place them a little closer together. This helps you gently coax the fabric into that perfect, smooth arc. Sometimes you have to trim the seam allowance just a hair to reduce bulk.
- Inner Curves: For those tight inside curves, you absolutely have to clip the seam allowance. Make little snips into the fabric, stopping just shy of your marked line. These relief cuts are what allow the fabric to spread open and lay flat as you turn the edge under.
What Is the Best Way to Stop Fabric From Fraying?
Fighting the dreaded fray can feel like a losing battle, but you can win! The best defense is a good offense, and that starts with your fabric. Always try to work with high-quality, tightly woven quilting cotton. Giving yourself a consistent 1/4-inch seam allowance is also key—it gives you enough fabric to turn under without it shredding on you.
Some quilters (myself included) swear by giving the fabric a light mist of liquid starch before cutting. It stiffens up the fibers and makes a huge difference in how much they fray. If you're working with a particularly loose-weave fabric, a tiny drop of a product like Fray Check applied to the raw edge of the seam allowance will lock those threads right in place.
With these common questions answered, you're more than ready to tackle any needle turn appliqué project that comes your way. To get all the high-quality quilting cottons, fine threads, and perfect needles you need for your next masterpiece, come visit us at Linda's Electric Quilters. Explore our amazing selection and find everything to bring your vision to life at https://lindas.com.


