
Diving into your first quilt can feel a little like trying to cook a five-course meal without a recipe. You have to find all the right ingredients, measure everything just so, and do all the prep work before you even think about turning on the stove. But what if you could skip all that?
That's where pre cut quilt kits for beginners come in. Think of them as the quilting world's equivalent of a high-quality baking mix—they take care of the fussy parts so you can get right to the fun of creating something beautiful and finishing your project with confidence.
Why Start Quilting with a Pre Cut Kit
Let's be honest, starting a new hobby like quilting is exciting, but it can also be a bit overwhelming. For most people dipping their toes in, the biggest roadblocks are picking out fabrics that actually look good together, measuring them accurately, and then making all those tiny, precise cuts. One little slip of the rotary cutter can send a whole piece of beautiful fabric to the scrap bin. It's frustrating!
This is the magic of a pre-cut quilt kit. It’s basically your quilting cheat code. These kits completely remove the guesswork and the most stressful, error-prone tasks. You get perfectly coordinated, machine-cut fabric pieces delivered right to your door.
Skip the Stress and Start Sewing
A pre-cut kit lets you bypass all that initial setup that trips up so many newcomers. Instead of wandering the aisles of a fabric store feeling overwhelmed, or hunched over a cutting mat praying for a straight line, you just open the box and start sewing. It's a "just add thread" approach that lets you focus on what matters:
- Learning the actual craft of sewing: You get to concentrate on mastering that perfect seam allowance and piecing your blocks together like a pro.
- Building your confidence fast: There's nothing more encouraging than seeing your quilt top come together, block by beautiful block. It’s instant gratification!
- Finding your creative flow: The calming, rhythmic nature of sewing is one of its biggest perks. Kits let you tap into that therapeutic zone without the upfront stress. You can learn more about how DIY hobbies boost mental health and find your happy place at the sewing machine.
This streamlined process doesn't just make for a more successful first project; it makes quilting fun and accessible right from the start. It’s a huge reason why pre cut quilt kits for beginners have exploded in popularity.
In fact, the quilting fabric market, which includes these awesome kits, is expected to jump from USD 3.5 billion in 2023 to USD 5.7 billion by 2032, thanks to new quilters who want a simpler way to get started.
When you start your quilting journey with a kit from Linda's, you're setting yourself up for success. We've curated a collection of beautiful, high-quality kits designed to give you a joyful and rewarding first experience. We have everything you need to see your project through to its beautiful completion.
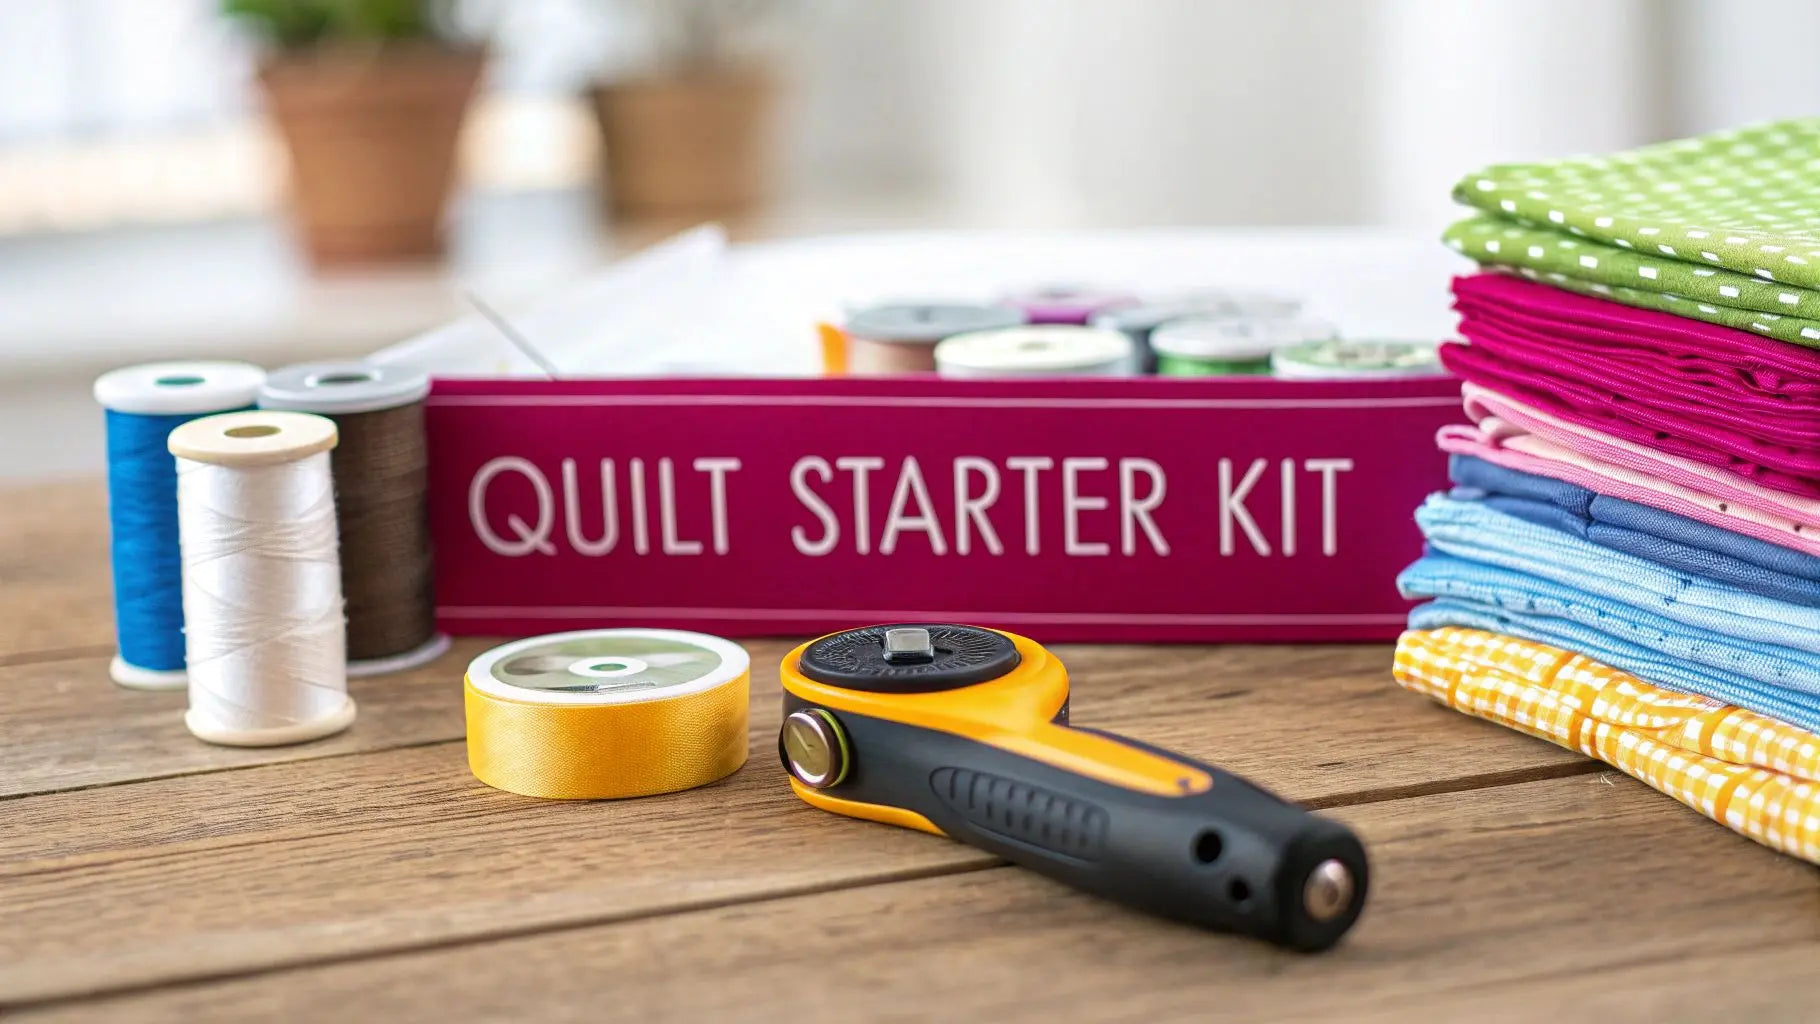
Unboxing Your First Quilt Kit
There's a special kind of magic in opening your first pre cut quilt kit for beginners. It’s like a creative present you give yourself—a box filled with beautiful colors, textures, and the promise of a project you'll be proud to show off. Let's take a little tour of what you'll find inside, so you know exactly what each piece does.
This handy infographic shows you exactly why a pre-cut kit is a beginner's best friend.

As you can see, the kit completely takes care of the trickiest parts: choosing fabrics that match, measuring perfectly, and making all those precise cuts. All that's left for you is the fun part—the sewing! When you unpack your kit from Linda's, you'll feel confident knowing what everything is for.
What’s Inside the Box
When you lift the lid, you’ll discover a collection of materials that have been thoughtfully put together. Every element is designed to coordinate, which totally removes the guesswork from your first project.
Here’s a look at what you can expect to find:
- Pre-Cut Fabric: This is the heart of your kit! All the fabric needed for your quilt top has been cut into specific shapes and sizes from a coordinated collection of patterns and colors.
- Pattern Instructions: Think of this as your roadmap to a finished quilt. It gives you step-by-step directions, diagrams, and all the measurements you need to piece your quilt top together.
- Binding Fabric: This is a long, continuous strip of fabric that you'll use at the very end to give your quilt a clean, professional-looking edge.
One of the biggest perks of a kit is the built-in fabric coordination. Designers pour their hearts into creating collections where every single print and solid works together seamlessly. This gives your quilt a polished, high-end look right out of the box.
Understanding the Language of Pre-Cuts
The world of quilting has its own lingo, especially when it comes to these pre-cut fabric bundles. They come in standard shapes and sizes, and each one has a fun, memorable name. Getting to know them will help you read your pattern and feel like a seasoned pro in no time.
For an even deeper look at fabrics, check out our guide on choosing the best quilting fabric for your projects.
To get you started, here’s a quick rundown of the most common pre-cuts you’ll find in kits and at the shop.
A Quick Guide to Common Pre-Cut Fabric Types
Understand the pre-cut fabric shapes you'll find in beginner quilt kits with this simple reference to their names, sizes, and typical uses.
| Pre-Cut Name | Typical Size | Best For |
|---|---|---|
| Charm Pack | 5" x 5" squares | Great for simple patchwork, half-square triangles, and small block designs. |
| Layer Cake | 10" x 10" squares | Perfect for larger blocks, cutting into smaller shapes, and patterns that require more fabric. |
| Jelly Roll | 2.5" x 42" strips | Ideal for strip piecing, log cabin blocks, and creating fast, dynamic patterns. |
| Fat Quarter | 18" x 21" rectangle | A versatile cut that provides enough fabric for larger blocks or multiple smaller pieces. |
Once you’re familiar with these basic terms, you'll be able to follow any pattern with ease. Now that you've "unboxed" your kit, you're ready to explore Linda's collection and pick the perfect project to start your quilting adventure.
Choosing the Perfect Beginner Quilt Kit
With so many gorgeous pre cut quilt kits for beginners out there, picking your very first one is such a thrill. It's a bit like choosing your first paint-by-numbers canvas—you want something that makes you smile but doesn't feel overwhelming. The goal here is a fun, satisfying experience, and the right kit is your ticket to getting there.
My best advice for a successful first project? Start small. I know that king-sized bed quilt is calling your name (and it's a fantastic goal to have!), but a baby quilt or a table runner is a much friendlier place to begin. You can often finish these smaller projects in a single weekend, giving you that amazing "I made this!" feeling right away. That quick win is pure gold for building your confidence.
Start with Simple Shapes
When you're new to quilting, the pattern's complexity is just as important as its size. I always recommend looking for kits built around simple geometric shapes like squares and rectangles. They're perfect for getting the hang of your seam allowance and piecing skills without the headache of tricky angles or curves.
Here's the most important thing: pick a kit with colors and fabrics you truly love. Your motivation to see a project through is directly tied to how much you enjoy looking at it. Don't ever settle for a design you're just "meh" about!
Once you feel more comfortable at the machine, you can start exploring patterns with triangles or more detailed blocks. But for now, stick with the basics and focus on nailing those fundamentals. If you need some ideas, we've put together a great list of easy quilt patterns for beginners that are perfect for this stage.
Read the Kit Description Carefully
Before you hit that "add to cart" button, take a minute to read the full description. This is where you'll find out exactly what's in the box—and, just as crucial, what's not. Most kits will give you all the fabric for the quilt top and the binding. However, you'll almost always need to buy these items on your own:
- Batting: This is the fluffy middle layer that gives a quilt its warmth and squishiness.
- Backing Fabric: The fabric that goes on the back of your quilt.
- Thread: A good-quality cotton thread is a must for strong, lasting seams.
Knowing this upfront saves you from any surprises. At Linda’s, we have a fantastic selection of high-quality batting, beautiful backing fabrics, and durable threads to perfectly complement any kit you choose, ensuring you have everything you need to cross the finish line.
It's also fun to see how fabric trends influence the kits you'll find. Shops like ours keep an eye on what's popular, stocking up on kits with sustainable fabrics, bold modern graphics, or charming vintage-inspired prints to match what today's quilters are looking for. By picking a kit that speaks to your personal style and matches your skill level, you're setting yourself up for an absolutely joyful first quilting adventure.
Your First Project: A Step-by-Step Guide
Alright, this is where the fun really begins. You've picked out one of our perfect pre cut quilt kits for beginners, and now it's time to turn that gorgeous pile of fabric into a quilt top you can't wait to show off.
Think of me as your personal quilting coach, here to walk you through every step. Let’s get that sewing machine humming!
First things first, let's get organized. Find a clean, flat surface and lay out all your pre-cut pieces. Most beginner kits stick to simple squares or rectangles, so go ahead and sort them by color or pattern. This isn't just about being neat; it’s your chance to get familiar with all the "ingredients" before you start cooking.
Next up, take a good look at your pattern. Don't let it scare you! A good beginner pattern is more like a simple recipe card than a complicated architectural blueprint. It's there to show you exactly how to arrange your fabric pieces to create a single "block." Your whole quilt will come together by making a bunch of these identical blocks and joining them up.
Laying Out Your First Quilt Block
Before you even thread your machine, do a little test run. Arrange the pre-cut pieces for one block on your workspace, following the pattern's diagram. We call this a "dry fit" in the quilting world. It’s a fantastic way to see how the colors and prints play together and, more importantly, it helps you catch any potential mistakes before you’ve made a single stitch.
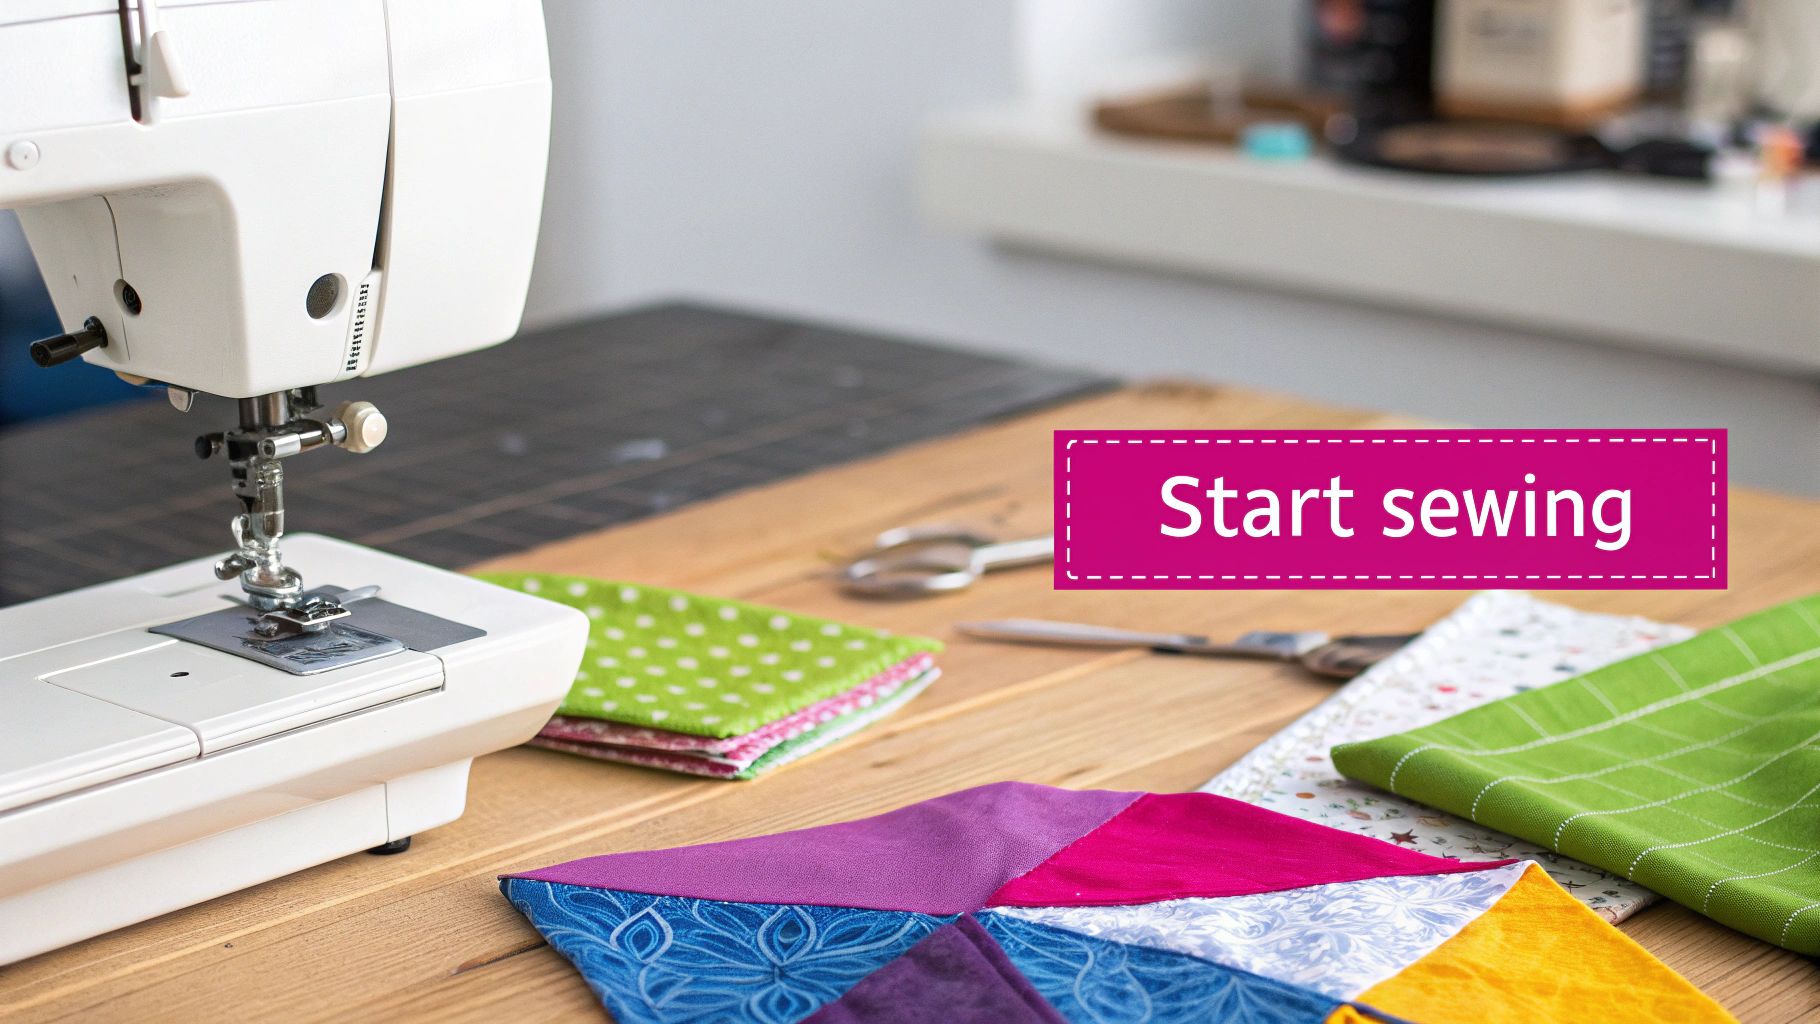
Happy with the layout? It’s time to sew. The most crucial skill you'll learn is sewing a consistent quarter-inch seam allowance. It might sound tiny, but that little measurement is the secret sauce that makes all your pieces fit together perfectly, ensuring your final quilt lies beautifully flat.
Most sewing machines have a special foot or a mark on the needle plate to help you. Just take two fabric pieces that go together, place them with their "right sides" (the pretty, printed sides) facing each other, and sew along the edge, keeping your fabric perfectly lined up with that quarter-inch guide.
Pro Tip: Pressing your seams is just as important as sewing them! After you stitch a seam, use a hot, dry iron to gently press it open or to one side. This simple step makes your blocks crisp and flat, which makes the final assembly so much easier.
Assembling Your Quilt Top
From here on out, it’s just a matter of repeating the process. Follow your pattern to sew your pre-cut pieces into individual blocks. Take it slow, keep an eye on that quarter-inch seam, and remember to press as you go. You'll have a neat stack of finished quilt blocks before you know it.
The final step is sewing those blocks into rows, and then sewing the rows together to create the finished quilt top. Your pattern will be your guide for this final layout. I promise, watching those individual squares magically form the full design is one of the most satisfying moments in quilting!
If you want a deeper dive into how quilts are put together, our article on reading a basic quilting pattern has some fantastic extra tips.
Once your quilt top is assembled, you’re ready for the home stretch—layering it with batting and backing fabric, quilting it all together, and adding the binding. Linda’s has everything you need, from high-quality batting and beautiful backing fabrics to coordinating threads to help you complete your masterpiece. You did it! You turned a box of fabric into a work of art.
Gathering Your Essential Quilting Tools
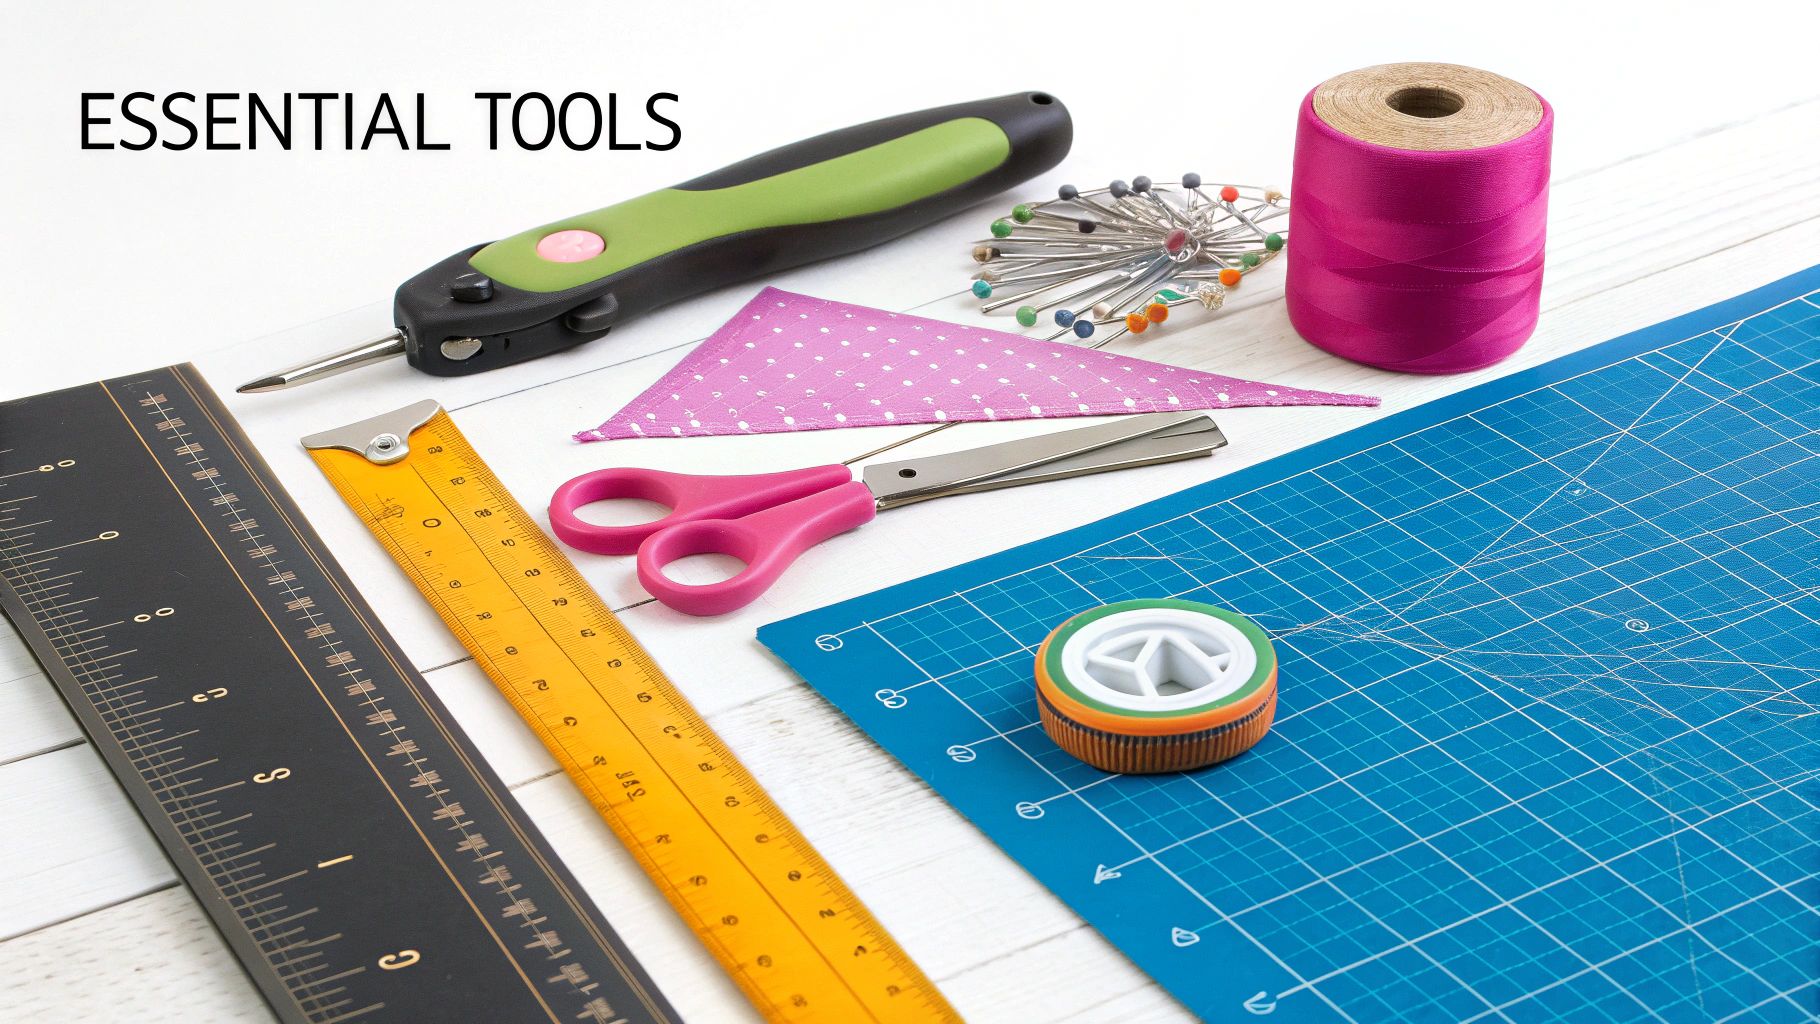
Your pre cut quilt kits for beginners take care of the heavy lifting with the fabric, which is fantastic. But think of it this way: the kit is your perfectly measured set of ingredients, and your tools are the trusty kitchen gadgets that help you follow the recipe. A few key tools will make all the difference, turning your project from a challenge into a genuine joy.
This isn't about running out and buying every shiny object in the craft store. It's about putting together a small, reliable toolbox with the core items you'll reach for on every single quilt you make. Let's walk through the absolute must-haves for turning that beautiful box of fabric into a finished masterpiece.
Your Quilting Starter Pack
Alright, let's get down to the gear. These are the tools that will help you sew straight, trim clean, and put those professional-looking final touches on your quilt.
-
Quality Cotton Thread: Please don't treat thread as an afterthought! A high-quality, 100% cotton thread is your best friend. It's strong enough to hold your quilt together for a lifetime but won't damage your delicate fabrics. Starting with a neutral color like cream, white, or light gray is a smart move, as it will blend in beautifully with almost anything.
-
Rotary Cutter and Self-Healing Mat: I know, the kit is pre-cut! But you'll still need to trim your finished quilt top before binding, and you’ll definitely need to cut those binding strips. A rotary cutter is basically a pizza cutter for fabric, giving you incredibly clean and straight cuts. When you pair it with a self-healing mat, you protect your tabletop and keep that blade nice and sharp.
-
Quilting Rulers: A clear acrylic ruler is non-negotiable for making straight cuts and squaring up your blocks as you go. For a great all-rounder, a 6" x 24" ruler is the perfect size to start with. Trust me, you'll use it constantly.
Getting these supplies is the first real step in your quilting journey, and you're in good company. A massive survey of over 30,000 quilters found that 18% now identify as beginners. These new quilters often gravitate toward kits to skip the tricky cutting phase, making these "no-fuss" options some of the best sellers in quilt shops today. You can dive deeper into the full quilting trends survey for more fascinating insights.
Having the right tools isn't just about making things easier—it's about honoring the time and love you're pouring into your project. Good tools lead to better results, and that just makes the whole experience more fun.
Finding Everything You Need
Putting together your quilting toolbox should be an exciting part of the process, not a stressful one. And the best part? You don't have to hunt all over for these items.
Every single tool we've talked about, from the perfect thread to the most reliable rulers, is right here at Linda's. We've hand-picked a collection of high-quality, beginner-friendly tools to make sure you have everything you need to finish your quilt with confidence. Come on by, and we'll help you assemble the perfect starter set for your new adventure.
Common Questions About Pre-Cut Quilt Kits
Even the most seasoned quilters had questions when they first started. It’s totally normal to have a few things you're wondering about before you dive into a new craft! Let's tackle some of the most common questions beginners have about pre-cut quilt kits for beginners so you can get started with confidence.
Getting these last few details ironed out will have you feeling ready for the creative journey ahead.
Should I Wash The Fabric Before I Start Sewing?
This is a big one, and my advice is a firm "no." It's so tempting to wash everything, but you should definitely resist the urge with pre-cut kits. These pieces have been cut with incredible precision, and washing can cause them to shrink or fray just enough to throw everything off. Even a tiny change in size can make lining up your seams a real headache.
The standard practice in the quilting world is to piece your entire quilt top first. Once the whole project is finished, then you can give it a good wash.
What Supplies Are Not Included In A Quilt Kit?
Most kits do a fantastic job of giving you what you need for the fun part: the quilt top and the binding fabric. What they usually don't include are the other parts of the "quilt sandwich" and the thread to put it all together.
You'll almost always need to pick these up separately:
- Thread for sewing all your pieces together.
- Batting, which is that lovely fluffy layer in the middle of your quilt.
- Backing fabric, the single large piece of fabric that makes up the back of your quilt.
Always double-check the kit’s description, just to be sure. At Linda's, we make it easy to find these essential finishing supplies. You can find a wide selection of threads, batting, and backing fabrics to perfectly match your kit and complete your project.
How Do I Know A Kit Is Good For Beginners?
Your best bet is to look for kits that are specifically labeled "beginner-friendly." These will usually feature simple, satisfying patterns made from basic shapes like squares and rectangles. Starting with a smaller project is also a great idea—think baby quilts, wall hangings, or table runners. They give you a wonderful sense of accomplishment without feeling overwhelming.
For now, I'd steer clear of patterns that involve a lot of triangles, curves, or tricky piecing until you have a project or two under your belt.
You're officially ready to start your quilting adventure! To find that perfect beginner kit and all the essential tools and supplies to bring it to life, come explore the incredible collection at Linda's Electric Quilters. We have everything you need to turn beautiful fabric into a masterpiece you can be proud of. Visit us at https://lindas.com to get started


