
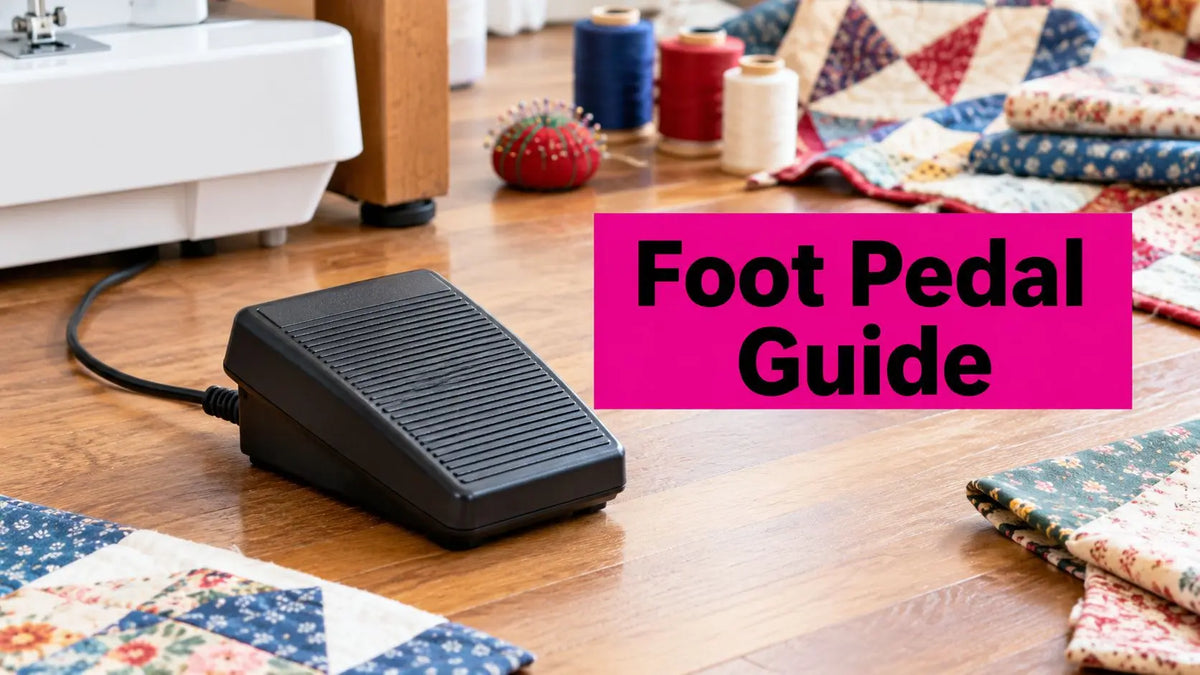
A border seam is moving smoothly when the machine suddenly races, stalls, or refuses to stop. Your first instinct may be to blame the motor, but the sewing machine foot pedal is often the better place to begin. It isn't a simple on/off switch. It's a variable-speed controller that turns foot pressure into a signal the machine uses to regulate needle movement, giving you hands-free control while both hands guide the fabric.
That control matters for straight seams, appliqué, ruler work, curves, and free-motion quilting. Before you replace a pedal, learn how it works, how to identify compatibility problems, and how to separate a failing pedal from a damaged cord, socket, or machine controller. If your current pedal slips while you sew, you can also improve control with the Get A Grip foot pedal pad.
What a Sewing Machine Foot Pedal Actually Does
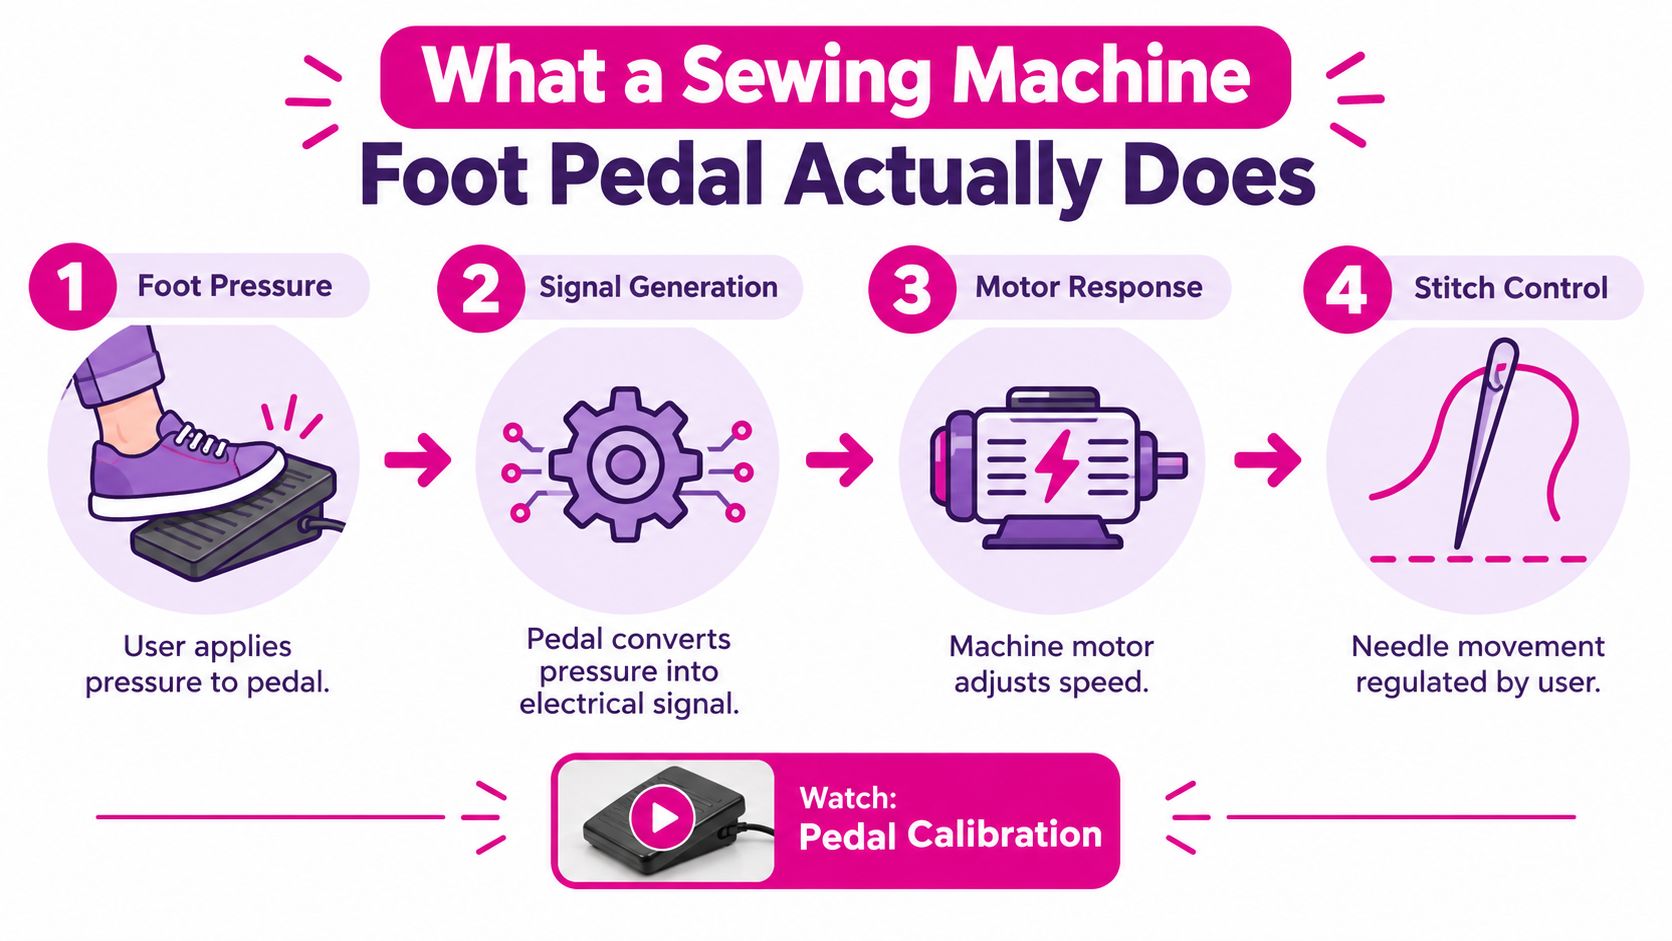
A sewing machine foot pedal works more like a dimmer switch than a light switch. Light pressure produces slow needle movement. More pressure increases the commanded speed. Release your foot, and a return mechanism brings the control toward its resting position so the machine can stop.
That variable response gives you three practical benefits:
- Speed regulation: You can slow down before a corner, seam intersection, or curve instead of relying only on the machine's maximum speed.
- Hands-free operation: Your hands remain available to guide fabric, adjust a quilt sandwich, or keep a ruler aligned.
- Stitch control: Small pressure changes help you manage stitch pace during appliqué, free-motion work, and detailed piecing.
The basic principle is described as a variable-speed control, where increased pedal pressure changes resistance and allows the machine to run faster. See this plain-language explanation of how a sewing machine foot pedal works for the electrical idea behind that response.
Mechanical and electronic control
Older treadle systems used foot power directly. The operator moved a treadle, and that motion drove the machine through a mechanical system. Modern pedals preserve the same basic hand-free idea, but they generally send an electrical signal to a motor or controller.
Older units may use a carbon-pile rheostat, while newer electronic pedals can use a potentiometer or a hall-effect sensor with a small circuit board. Those designs can feel different underfoot. One may respond gradually, while another may feel abrupt or overly sensitive.
A working pedal also contributes to safety. Removing pressure should reduce or stop needle movement, so a pedal that sticks, races, heats unusually, or responds inconsistently deserves attention before you continue quilting. Practice with your machine empty first, then visit the quilting batting selection when you're ready to match reliable control with the right quilt materials.
A Short History of the Foot Pedal in Sewing
The foot pedal became important because it solved a practical problem: sewists needed both hands to guide fabric while still controlling machine speed. The treadle placed that control under the operator's foot, leaving the hands free for alignment and feeding.
Isaac Singer's 1851 machine is widely described as the first modernized sewing machine to pair a foot pedal with up-and-down needle action. The design helped make continuous domestic and workshop sewing more practical than hand-crank operation. By 1860, U.S. production had exceeded 110,000 sewing machines, a sign of how quickly treadle-powered machines spread through an industrializing market. These historical details are summarized in this history of sewing machines and treadle development.
Historical insight: The pedal wasn't merely a convenience. It established a repeatable way to regulate sewing speed while keeping the operator's hands on the work.
Why the interface survived
Electric motors eventually changed how machines generated movement, but they didn't remove the need for foot control. Historical summaries place the emergence of electric sewing machines nearly 40 years after Singer's foot-pedal machine, while treadle machines continued to be used widely in many parts of the world. The broader transition from workable machines in 1830 to fully motorized models by the 1980s shows how long pedal control remained relevant. These milestones appear in this overview of sewing-machine development.
By the early 1900s, electrification was modernizing machines and replacing hand operation in many homes and shops. The foot pedal remained familiar because its ergonomics made sense. Your hands guide the fabric, your eyes watch the needle, and your foot adjusts pace without requiring you to reach for a separate control.
That continuity explains why the modern sewing machine foot pedal still sits on the floor, even when the mechanism inside has changed from a mechanical linkage to an electronic sensor and controller.
How a Modern Sewing Machine Foot Pedal Works
Think of the pedal as a translator. Your foot supplies movement, the pedal converts that movement into an electrical value, and the machine interprets that value as a speed command.
From pressure to resistance
Inside many pedals, a spring-loaded component moves against a resistive element. Older designs may use carbon material, while electronic designs may use a potentiometer or sensor connected to a small circuit board. As the pedal travels, the electrical characteristics change.
One engineering example describes a pedal with resistance in the approximate range of 1 kΩ to 20 kΩ. The machine reads the pedal position through an analog-to-digital converter, or ADC, and translates the result into motor control. The electrical details are shown in this technical pedal and controller reference.
The important point is that your foot usually isn't controlling motor voltage directly. Instead, you're changing an input that the machine's control system interprets.
From the controller to the motor
The controller may use pulse-width modulation, commonly called PWM, to regulate motor behavior. PWM rapidly switches power in a controlled pattern, and the resulting duty cycle tells the motor how much movement to produce. That approach can support smoother low-speed regulation than a simple series-resistor design.
This is why two pedals can feel different even when they look similar. The machine may interpret their signals differently, and a pedal with mismatched electrical characteristics may produce lag, sudden speed jumps, or no response at all.
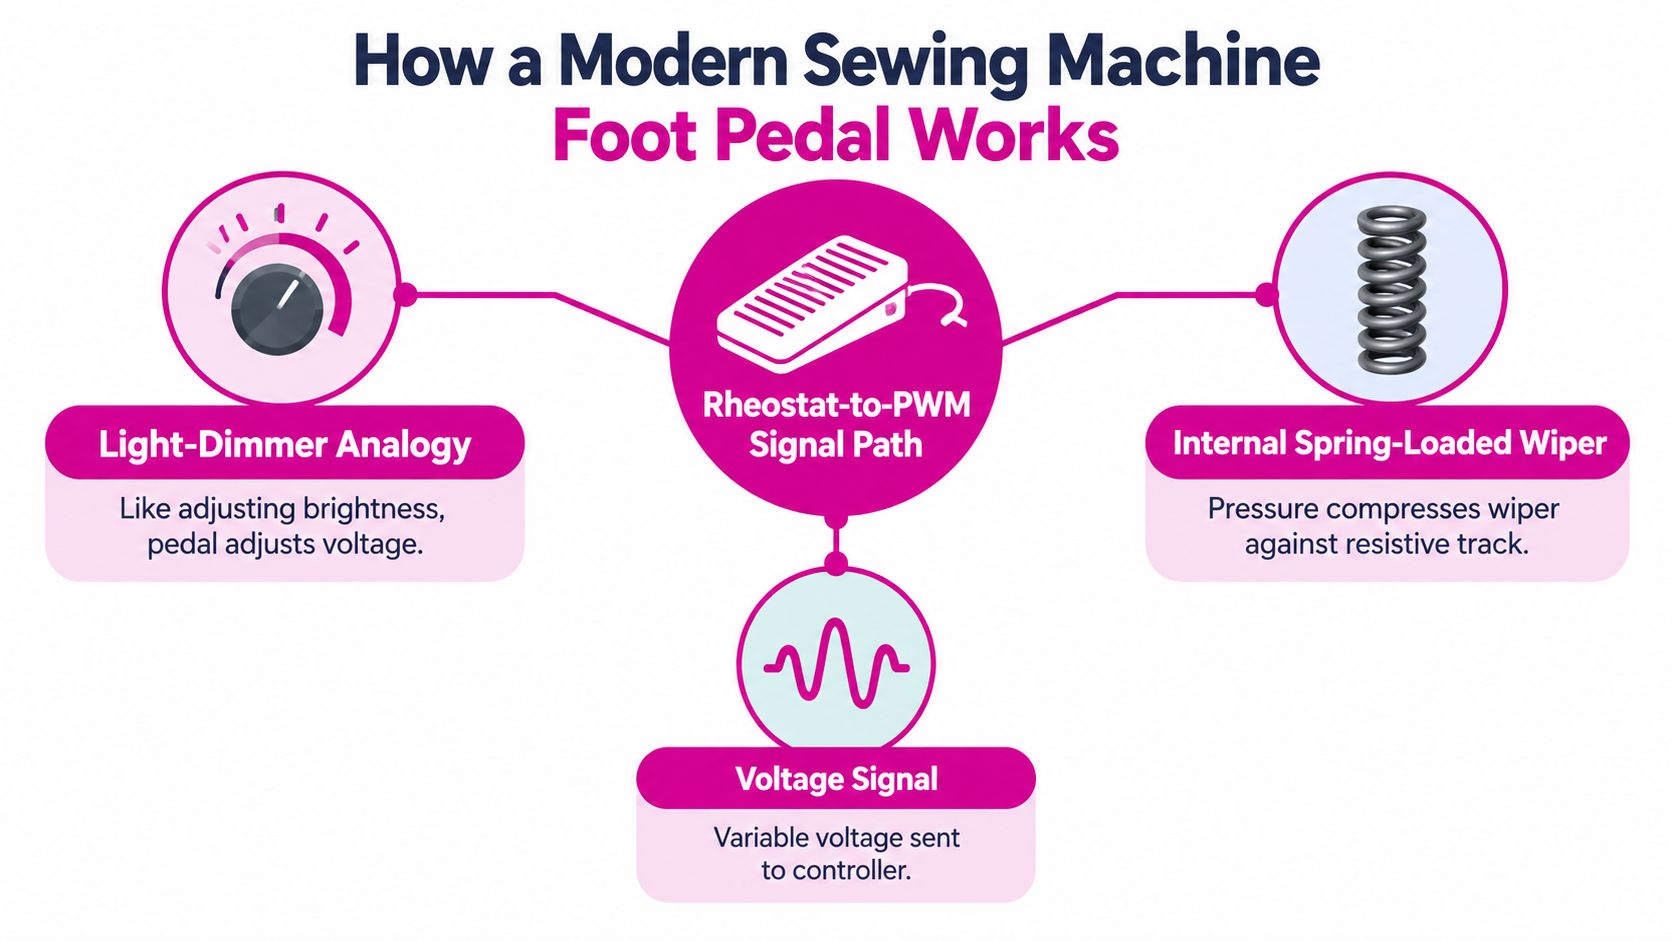
A spring or return mechanism helps bring the pedal back toward its resting position when you lift your foot. If that return action feels sticky, delayed, or incomplete, stop using the pedal until you inspect it.
For a visual explanation, watch the embedded pedal calibration video tutorial before opening the pedal housing.
Corded Wireless and Variable-Speed Pedal Types
Pedal architecture affects setup, response, maintenance, and compatibility. The label alone doesn't tell you whether a replacement will work with your machine. Treat the pedal and machine as a matched control system.
| Feature | Corded Pedal | Wireless Pedal | Variable-Speed Pedal |
|---|---|---|---|
| Connection | Uses a physical cable and machine connector | Communicates without a floor cable | Uses an electronic control method to provide a continuous speed range |
| Main advantage | Direct connection and familiar operation | Reduces cable clutter around the sewing area | Supports fine speed changes for detailed work |
| Main concern | Cable wear, connector damage, and socket fit | Power management, pairing, and machine compatibility | Correct signal interpretation by the machine |
| Useful for | Stationary sewing machines and established setups | Studios where cable placement is inconvenient | Quilting, free-motion work, curves, and precision stitching |
| Buying priority | Exact plug and machine match | Confirm the complete transmitter and receiver system | Confirm the pedal's electrical design and controller requirements |
A corded pedal is often the simplest choice when your machine already uses one. It gives you a physical connection and avoids adding another wireless component to the setup.
A wireless pedal can make a floor area feel less cluttered, but it introduces more components to identify and maintain. Don't assume that a wireless pedal can communicate with any machine that accepts a foot control.
A variable-speed design is most valuable when slow, controlled movement matters. Quilters working through layered fabric, free-motion motifs, or ruler-guided curves may notice the difference between a pedal that responds smoothly and one that jumps from stillness to speed.
If you're comparing options, save your machine model and pedal label before shopping. That small note can prevent an expensive compatibility mistake.
Compatibility Connectors and Choosing the Right Pedal
A machine can accept a plug that looks right and still respond incorrectly. Household and industrial pedals may differ in voltage rating, connector geometry, polarity, and signal behavior. Some manufacturers require an exact pedal model, while a polarized plug can help prevent certain wiring mistakes.
Replacement specifications may list 110 to 250 V AC, current limits near 2.5 A, and cord lengths around 48 to 72 inches. These figures describe particular products, not universal requirements. Check the machine documentation and the replacement label before connecting anything. This pedal compatibility reference explains why matching the model matters.
The connector carries more than power. In a variable-speed system, the pedal acts like a rheostat, changing the control signal as your foot moves. The machine's controller interprets that change, so the right plug shape alone cannot guarantee correct speed or safe operation.
Use this verification routine
- Unplug the machine. Inspect connectors only after power is disconnected.
- Read the pedal label. Record the manufacturer, model, and electrical rating.
- Inspect the plug. Bent, pushed-back, oxidized, or damaged contacts can interrupt the signal.
- Compare the part number. Use the machine manual or manufacturer parts list, rather than trusting a similar-looking connector.
- Test with a known-good pedal. If the machine responds normally, the original pedal becomes the stronger suspect.
- Stop if the response is erratic. A pedal that races or becomes unusually hot should not remain in service.
A so-called universal pedal may fit physically while sending the wrong signal range or polarity. That mismatch can produce poor speed control or prevent the machine from responding.
An ergonomic add-on
The Get A Grip foot pedal pad is an accessory, not an electronic replacement. It sits beneath the existing control and uses a non-slip surface to limit movement on carpet, tile, or wood. Its listed size is 9 inches by 9 inches, so measure the clear floor area in front of your machine before ordering. The pad needs roughly the footprint of a sheet of printer paper and may not fit between a treadle cabinet's legs.
It suits a working pedal that slides during sewing. Because it does not alter the machine's electrical system, it can improve foot placement without changing the control signal.
Troubleshooting a Dead or Erratic Foot Pedal
A dead pedal doesn't automatically mean you need a new pedal. The failure may be in the cable, the machine socket, the pedal's internal control, or the machine-side controller.
Start with the simplest branch
Disconnect power, then inspect the entire cable for cuts, crushed areas, fraying, or sharp bends. A cable can fail internally even when its outer insulation looks acceptable. If the machine works only when the cable sits in a particular position, treat that behavior as a strong warning.
Next, examine the machine socket. Look for debris, loose contacts, or signs that a contact has shifted backward into the housing. Don't force a pin into position, and don't continue testing if the connector appears damaged.
Lint and contamination can also interfere with a connection. Clean only according to the machine manufacturer's guidance, and keep liquid away from the socket.
Test the pedal's response
If you have the correct electrical information and know how to use a multimeter, check the pedal while it is disconnected from the machine. A functioning variable control should show a smooth change in resistance as the pedal moves through its travel. An open circuit, sudden jump, or dead spot can correspond to a broken connection or worn internal component.
A pedal that feels sticky, clicks without producing movement, or changes speed abruptly may have an internal rheostat or sensor problem. The foot-pedal troubleshooting guide separates common pedal, cable, socket, and machine-side causes.
Pro tip: Test one variable at a time. Changing the pedal, cable, socket, and controller settings together makes it impossible to know which part solved the problem.
Heat deserves attention too. A pedal may become warm during use, but unusual heat, a burning smell, lag, or uncontrolled speed means you should disconnect power and stop troubleshooting at the machine.
If resistance testing shows a failed or inconsistent control, replacement is reasonable. If the same pedal works correctly on another compatible machine but your machine still ignores it, the fault may be in the socket or controller board. That situation belongs with an authorized technician rather than repeated pedal purchases.
Foot Pedal Technique for Better Stitch Control
Hardware can't create precise stitching if your foot is stamping on the control. Good technique begins with a stable position.
Place the ball of your foot over the pedal's active area and keep your heel grounded. Your heel becomes a pivot, allowing your ankle to make small pressure changes instead of lifting your entire leg. Position the pedal where your foot reaches it naturally, without pulling your knee inward or stretching your ankle.
Use graduated pressure. Start with a light touch, listen to the motor, and increase pressure slowly. For a pivot corner, a brief tap can move the needle without sending the machine into a burst of speed. For an echo curve or long free-motion line, maintain steady pressure and let your hands guide the fabric at the pace the machine can handle.
Cues for long sessions
- Relax your ankle. A rigid ankle creates abrupt changes.
- Anchor your heel. This gives your foot a repeatable starting point.
- Breathe with the movement. Exhaling during a tight curve can help reduce tension in your leg and shoulders.
- Use short taps for corners. Small commands are easier to control than one deep press.
- Keep the pedal still. A sliding control changes the angle of your foot and disrupts pressure.
A non-slip pad can widen the contact area and reduce the need to chase the pedal across the floor. It may also protect the floor from scuffing. Even a basic sewing machine foot pedal can feel responsive when your heel, ankle, and pressure changes work together.
Choosing a Replacement or Upgrade and Where to Shop
Use this checklist before buying:
- Record the machine brand and model. Don't rely on appearance alone.
- Match the connector. Count contacts and compare the plug housing.
- Verify voltage and current ratings. Use the machine manual and pedal label.
- Check polarity and signal requirements. A compatible-looking plug can still send the wrong input.
- Choose the correct architecture. Decide whether your machine requires a mechanical rheostat, electronic control, or a manufacturer-specific system.
- Compare OEM and aftermarket options. An OEM pedal may preserve the expected calibration, while an aftermarket pedal may require more careful verification.
- Consider traction before replacement. If the control works but moves on the floor, an ergonomic pedal pad may resolve the actual issue.
A low-cost universal pedal isn't automatically a bargain if it creates erratic speed, damages a connector, or voids support for the machine. A machine-specific replacement is usually the safer starting point when the original pedal has failed its electrical test.
For quilting accuracy, prioritize smooth low-speed response, a reliable return to rest, secure placement, and confirmed compatibility. Browse the available pedal accessories and ask for model-specific guidance before placing an order.
Sewing machine foot pedal FAQs
Is a sewing machine foot pedal an on-off switch?
No. Most sewing machine foot pedals act as variable-speed controllers. Your pressure changes an electrical input that the machine interprets as a speed command.
Why does my machine race when I touch the pedal?
Possible causes include a damaged cable, an internal control with a dead spot, an incompatible replacement pedal, or a machine-side controller fault. Disconnect power and test the pedal and cable before sewing again.
Can I use any replacement pedal with my machine?
No. Connector shape, voltage, polarity, signal characteristics, and machine family can all affect compatibility. Match the replacement to the machine model or manufacturer's parts information.
Should I replace a pedal that gets hot?
Unusual heat, burning odor, erratic speed, or lag is a reason to stop using the pedal. The problem may involve the pedal, cord, socket, or controller, so test carefully or seek authorized service.
How can I stop my pedal from sliding?
Place it on a non-slip surface or use a dedicated pedal pad. Keeping the pedal fixed helps your heel and ankle maintain consistent pressure during detailed sewing.
Linda's Electric Quilters offers quilting and sewing supplies, including the Get A Grip foot pedal pad and compatible pedal options for selected machines. Visit Linda's Electric Quilters to browse the shop or ask for help choosing a pedal setup that supports steadier, more accurate sewing.


