

You've cut the center square, sewn the first triangle, and watched the point disappear under the seam. That frustration is common with the square within a square quilt pattern, but the block isn't difficult because it has many pieces. Its accuracy depends on three things: a stable bias edge, a reliable 1/4-inch seam, and disciplined trimming.
The basic unit has one center square surrounded by four triangular pieces. It contains five sewn pieces, created from three cut fabric units, because the corner triangles come from subdivided squares. Once you understand that structure, you can choose the right construction method, protect the bias edges, build a straight or on-point layout, and finish the quilt so small imperfections recede into the overall design.
Why the Square Within a Square Quilt Pattern Endures
At the cutting table, a lost point can make a beautiful fabric combination look careless. The usual culprit isn't the fabric or the pattern. It's a block that wasn't squared up before it joined its neighbors.
The square within a square quilt pattern is a dependable foundation because its geometry is clear. A center square creates the focal point, and four triangles build the surrounding frame. Change the center fabric, the triangle values, or the background, and the same block can look like a medallion, a nested grid, or a bold on-point composition.
A documented American quilt tradition
This design isn't a recent novelty. American quilts using the square-within-a-square pattern are documented from at least the nineteenth century through the twentieth century. The International Quilt Museum catalogs an unidentified American quilt dated approximately 1870 to 1910, measuring 68 by 80.5 inches, which shows the design functioning as a full-size bed quilt rather than only as a small decorative unit. A separate quilt-study record identifies a United States quilt made around 1860 to 1910 with the pattern listed as “Square in a Square.” The historical records and quilt examples are summarized here.
That same record notes that most of the fabrics date from 1860 to 1890, while a bottom row appears to have been added around 1900. The detail is useful for modern makers because it shows that these quilts could be expanded or modified as materials and needs changed.
The design also fits the broader development of American block quilting. Pieced blocks grew in popularity during the 1820s and 1830s, and by the mid-nineteenth century, repeated blocks arranged on a grid had become the predominant format for American-made quilts, according to the International Quilt Museum material summarized in the same historical source.
Practical rule: Treat trimming as part of piecing, not as a cosmetic step at the end. A square block gives every later seam a fair chance to line up.
Fabric, Tools, and Cutting Charts for Every Block Size
Your fabric choices determine how clearly the nested squares read. A high-contrast center and frame will make the geometry obvious, while fabrics with similar value can create a softer, woven effect. Directional prints deserve extra attention because the triangles may rotate the print in ways that change the visual balance.
Starching before cutting can help stabilize fabric and reduce movement along bias edges. Use a light, even application, press the fabric flat, and let it cool before rotary cutting. Starch won't correct an inaccurate seam, but it can make the fabric easier to handle during cutting and assembly.
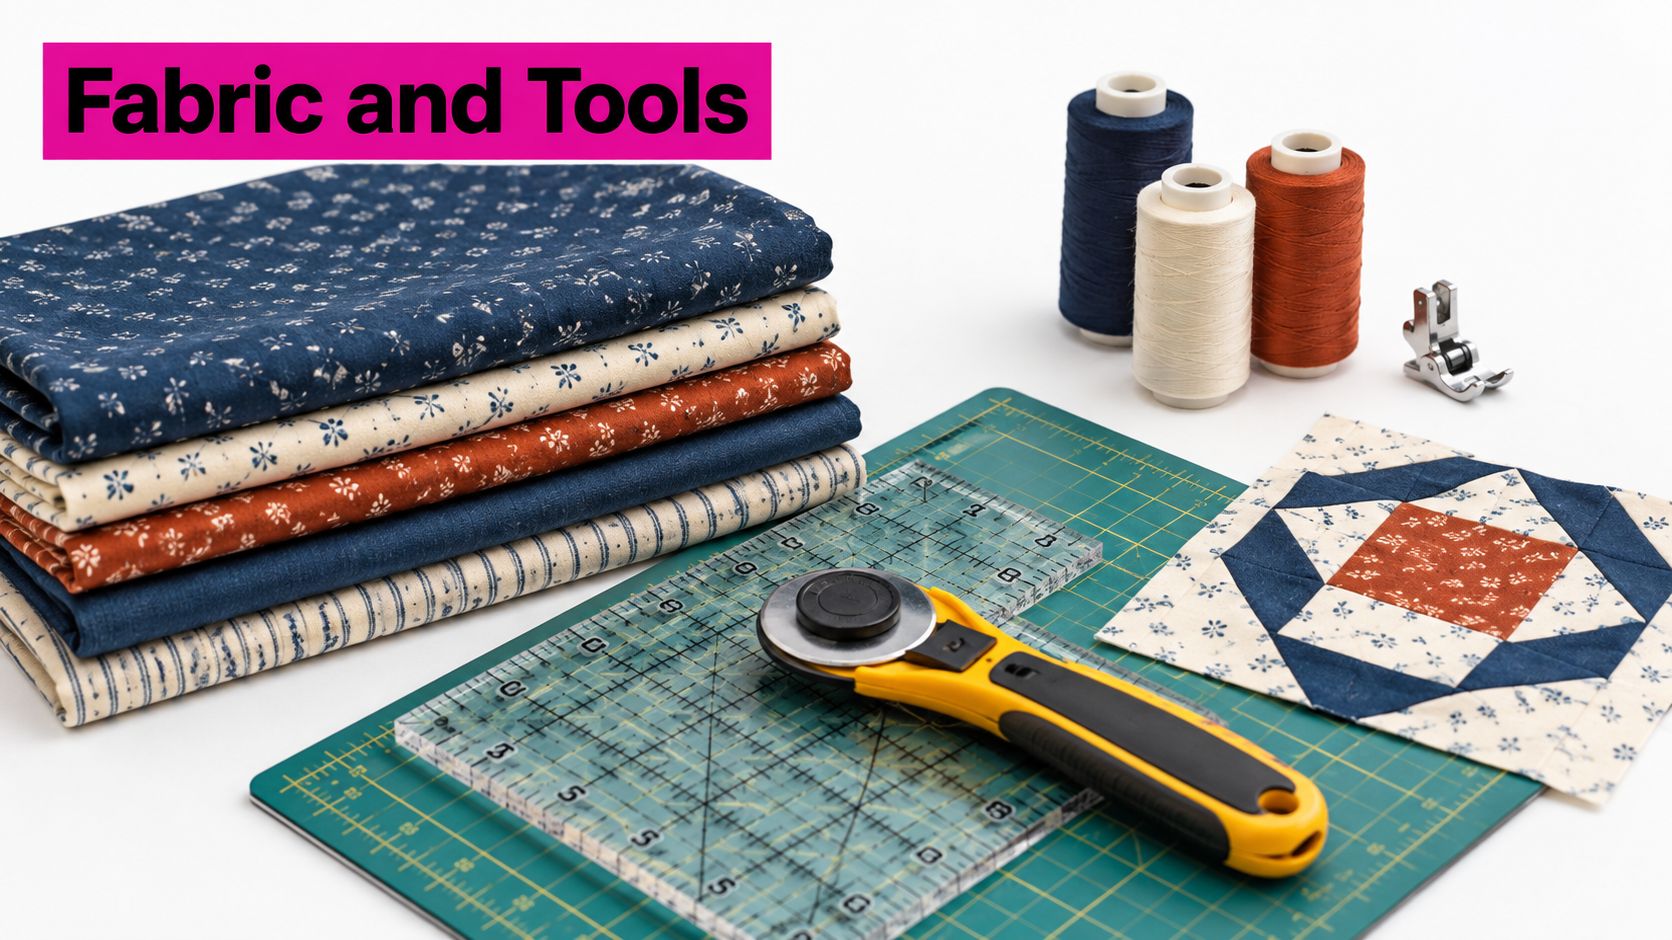
A practical supply checklist
- Fabric: Choose a center, frame, and background with enough value contrast to show the nested geometry.
- Rotary cutter and mat: A sharp blade gives cleaner edges and reduces pressure that can shift fabric.
- Accurate ruler: A square-up ruler should show center, diagonal, and 1/4-inch markings clearly.
- Quarter-inch foot: Use a foot or needle position that produces a consistent seam on your machine.
- Thread: Select a quality piecing thread with a smooth finish so the seam doesn't add unnecessary bulk.
- Pressing tools: An iron, a flat pressing surface, and a seam clapper can help set clean seams.
- Trimming rulers: The Sew Square 8 and Sew Square 10 rulers are useful choices when your finished units fit their working dimensions.
A cutting chart usually lists the finished block size, but your assembled unit is larger before it becomes part of the quilt. A block intended to finish at a particular size must include seam allowance around its unfinished perimeter. Don't trim to the finished measurement before joining. Instead, assemble the unit, then square it to the required unfinished size.
The center square is cut as one fabric unit. The surrounding triangles are made by subdividing squares, which is why the sewn structure has five pieces even though the cutting plan may use only three basic fabric units. The exact measurements depend on the intended finished block, the pattern's method, and whether you're cutting to size or cutting oversized for later trimming.
Before cutting a full batch, make one sample from the actual fabrics. Measure that sample after pressing, record its unfinished size, and use it to confirm whether your machine produces a true or scant 1/4-inch seam. If you're shopping for rulers, pre-cuts, or notions, choose tools that support the block size you'll actually make rather than relying on a ruler that's merely convenient.
Piecing and Pressing the Block Accurately
The first seam establishes the relationship between the center square and the entire outer frame. If that seam shifts, every later point has less room to land correctly.
Begin with one center square and four setting triangles cut for the intended block. Place two opposite triangles right sides together with the center square. Sew one seam, then sew the second opposite seam. Keeping the first pair opposite helps the block remain balanced while the center square is being framed.
Press the first seam before adding the remaining triangles. Pressing sets the stitches and lets you see whether the center remains centered. Add the two remaining triangles, then press those seams using the same direction or open-seam approach you selected for the first pair.
Control the seam before the iron changes the evidence
Measure the seam width before pressing. Pressing can consume part of the seam allowance, especially when fabric has loft or when the iron pushes a seam toward one side. A consistent 1/4-inch seam matters more than chasing a perfect number on the machine's stitch plate.
Set the seam by placing the iron down gently, then press. Don't drag the iron across the block. The triangle edges are on the bias, and dragging can stretch them enough to make the block bow or become difficult to trim.
For another fabric-based project that benefits from careful pressing and seam control, this guide on how to sew your own duvet cover offers a useful reference for handling larger sewn sections.
After the final seam is pressed, square the block. Align the ruler so the center-square points sit exactly 1/4 inch from the unfinished outer edges. This distance preserves the points when the block is sewn to its neighbors. The outer edge must be straight and the unit must be square, but the center points are the visual checkpoint.
A reliable adjustment: If the points finish less than 1/4 inch from the edge, sew a slightly larger seam. If they finish farther away, use a more scant seam.
Make one test block before cutting the full batch. If the test block loses points, adjusting your seam allowance and trimming routine now is far cheaper than discovering the problem after several rows are assembled.
For a visual demonstration of the construction rhythm, use this embedded tutorial as a companion while you practice on scrap fabric.
Layout and Assembly for a Full Quilt
A single square within a square block can look restrained. Several blocks create a larger conversation between color, direction, and negative space. The same five-piece unit may read as a centered medallion, a regular grid, or a more energetic field depending on how you position the colors.
Three ways to organize the geometry
A medallion center places one large or especially distinctive square within a square at the heart of the quilt. Surround it with borders, sawtooth elements, or smaller repeated blocks. The nested frames draw the eye inward and make fabric placement in the center especially important.
A straight-set grid places blocks edge to edge in rows. Consistent value placement can create stripes, checkerboard effects, or larger secondary shapes. Sashing or alternating plain blocks can separate units and give the eye a resting place.
An on-point setting rotates blocks to a 45-degree angle. This changes the apparent direction of the inner squares and creates additional triangular spaces around the quilt perimeter. On-point layouts often need setting triangles or careful border planning, so sketch the full edge before cutting those pieces.
Preserve points while joining rows
Lay the blocks out on a design wall or clean floor before sewing. Look for directional prints that have rotated unexpectedly and for centers that appear brighter or darker than planned. A small color shift can become a strong diagonal once several blocks are joined.
When assembling, nest opposing seam allowances where possible. Pin or use a small amount of fabric-safe glue if needed, then stitch with a steady 1/4-inch seam. Press each row consistently, and decide whether the row seams will alternate direction or open. Inconsistent pressing can create bulky intersections that prevent points from matching.
The pattern also combines well with sawtooth triangles, crosses, plain blocks, and narrow borders. A documented Australian quilt made from more than 70 printed fabrics used a square-within-a-square center medallion with white borders, a sawtooth-triangle inner frame, and additional square-within-a-square and cross motifs elsewhere in the composition. The block's construction and historical combinations are described in this pattern reference.
Quilting and Finishing Tips From the Longarm
Quilting decides whether the concentric squares shout, whisper, or blend into the whole surface. On an Innova longarm in McKinney, Texas, our team looks first at the relationship between fabric value, batting loft, thread contrast, and stitch density.
A higher-loft batting can give the nested frames more relief. A flatter batting may keep the quilt closer to the pieced surface. Thread that contrasts with the top can outline every point, while a closer color can let the fabric design lead.
Load for the quilt you have
A top that's slightly out of square shouldn't be forced flat by aggressive tensioning. Mark the center of the top, backing, and batting, then align those references during loading. Smooth the quilt without stretching it, and let the longarm's advance reveal where fullness needs gentle management.
For repeated square units, an edge-to-edge design can provide consistent texture across the top. Continuous curves, diagonal lines, or motifs that echo the block's nested geometry can reinforce the piecing. Denser quilting around a center can make that area recede, while more open quilting can let it rise.
Pro-Tip: Plan a quilting motif that follows the block's diagonals, but don't trace every seam automatically. A diagonal or continuous-curve path can emphasize the nested structure while allowing slightly imperfect points to disappear into the texture.
Thread selection also affects how forgiving the finish will be. A highly visible thread can make a small wobble part of the design, while a blended thread can quietly unify different fabrics. Test tensioning on a practice sandwich with the same batting, top fabric, backing, needle, and bobbin thread. Check the bobbin casing and stitch formation before beginning the quilt.
Finish with a binding that frames rather than competes with the pattern. A dark binding can contain a bright top, while a softer binding can preserve an airy edge. Keep the binding width consistent and distribute joins away from the most noticeable corners.
Choosing Your Construction Method
No single method suits every square within a square quilt pattern. Traditional rotary piecing is efficient for repeated blocks, oversized construction gives you more trimming control, and foundation paper piecing can produce dependable results when the units are small or the geometry becomes demanding.
| Method | Accuracy | Speed | Fabric Waste | Best For |
|---|---|---|---|---|
| Traditional rotary piecing | Strong when cutting and seams are consistent | Fast for repeated blocks | Low | Simple repeated blocks and confident beginners |
| Oversized-and-trim construction | Highest control over final points and square edges | Slower because trimming is required | Higher | Makers who prioritize point precision |
| Foundation paper piecing | Very repeatable for small or complex units | Slower setup and removal | Often higher | Tiny units, complex layouts, and makers comfortable with paper patterns |
Match the method to the maker
Choose traditional piecing when the center and triangles are comfortably sized, your rotary cutting is accurate, and you're making many similar blocks. It uses the fewest extra steps and keeps fabric waste manageable.
Choose oversized-and-trim construction when the points matter more than cutting economy. Sew the units larger than needed, press without stretching, and trim only after the sewn area has stabilized. This method is especially useful when fabric thickness, bias movement, or a longarm customer's exacting standards make a precise finished unit important.
Choose foundation paper piecing when the block is very small, when the triangles are difficult to control, or when repeated accuracy matters more than speed. The paper provides a stitching guide, but it adds setup, removal, and waste considerations.
Longarm customers should be transparent about the top's condition. If blocks are slightly oversized or vary from one another, tell the quilter before loading. A professional can plan tensioning, basting, and quilting density more effectively when the top's behavior is known.
Directional prints and high-value fabrics also affect perceived accuracy. A perfectly sewn block can look crooked if a stripe rotates sharply, while a low-contrast print may soften a point that is technically excellent. Make a small mock-up before committing to a full layout.
Troubleshooting, FAQ, and Your Next Quilt
Most problems in a square within a square quilt pattern have a visible cause. The bias edges stretch, the seam allowance shifts, or the block is trimmed without a stable reference. Diagnose the cause before changing every measurement.
Common failures and direct fixes
- Stretched bias edges: The triangle was pulled during sewing or pressing. Handle the unit by the stable center area, sew without stretching, and press by lifting and placing the iron instead of dragging it.
- Cut-off center points: The seam was too large, the block was trimmed without checking the 1/4-inch point position, or the center square was cut incorrectly. Test the seam on one block and align the ruler to preserve the points before trimming the batch.
- A block that finishes out of square: The seams may have varied, the fabric may have shifted, or the unit may have been pressed with sideways motion. Set the stitches, press consistently, and square the block from the center and outer edges.
- Uneven outer frame: Opposite triangles may not have been sewn in a balanced order. Add the first pair opposite one another, press, then add the remaining pair.
- Bulky intersections: Seam allowances may all point in the same direction. Alternate pressing directions or press seams open consistently across the quilt.
When should you trim
For a simple, stable block, trimming at the end can save time and preserve the full fabric area during sewing. For a bias-prone block, oversized construction, or a block that will be repeated many times, trimming after the complete unit is usually safer than trimming after every seam. Trim after each round only when the pattern specifically requires it or when a partial unit needs a known measurement before the next round.
The important distinction is between stabilizing the unit and trimming it. Press the seams first, let the block settle, then trim from clear ruler references. Cutting immediately after sewing can make a temporarily distorted unit look like the final shape.
Frequently asked questions
Should you starch before cutting a square within a square quilt pattern
Light starching can help stabilize the fabric before cutting, particularly when bias edges will be handled repeatedly. Press the fabric smoothly and allow it to cool before rotary cutting. Starch supports accuracy, but it doesn't replace a test block or a consistent seam allowance.
Which ruler markings should align with the center square
Align the ruler's center lines and diagonal markings with the center square whenever possible. Confirm that the center points sit exactly 1/4 inch from the unfinished edges, then check that the outer edges meet the required unfinished block size. Don't use only the outer fabric edge as your reference because a distorted edge can mislead you.
Should you trim after each round or only at the end
Trim at the end when the block is a straightforward single-frame unit and the fabric remains stable. Trim after a round when the next construction stage depends on a precise measurement, or when oversized units need to be brought under control before additional pieces are added.
Can slightly imperfect points be hidden with quilting
Quilting can't repair a missing seam allowance, but it can influence what the eye notices. A blended thread, a well-chosen edge-to-edge design, and thoughtful stitch density can soften minor variation. Severe distortion should be corrected during piecing or disclosed to the longarm quilter before loading.
What should you do before cutting the whole quilt
Make one complete test block from the fabrics you plan to use. Measure the seam width before pressing, press it using your intended method, trim it to the unfinished size, and inspect every point. That sample tells you more than a cutting chart alone because it reflects your machine, thread, fabric thickness, and pressing habits.
The square within a square quilt pattern rewards calm repetition. Cut deliberately, protect the bias, sew opposite triangles first, and let the ruler confirm your work. Once the blocks are accurate, you can make the design traditional, modern, quiet, dramatic, straight-set, or on point without fighting the geometry.
Linda's Electric Quilters offers the fabric, rulers, batting, thread, and longarm supplies needed to carry this project from test block to finished quilt. Visit Linda's Electric Quilters to choose your construction materials and get expert support for the next square within a square quilt pattern.


