
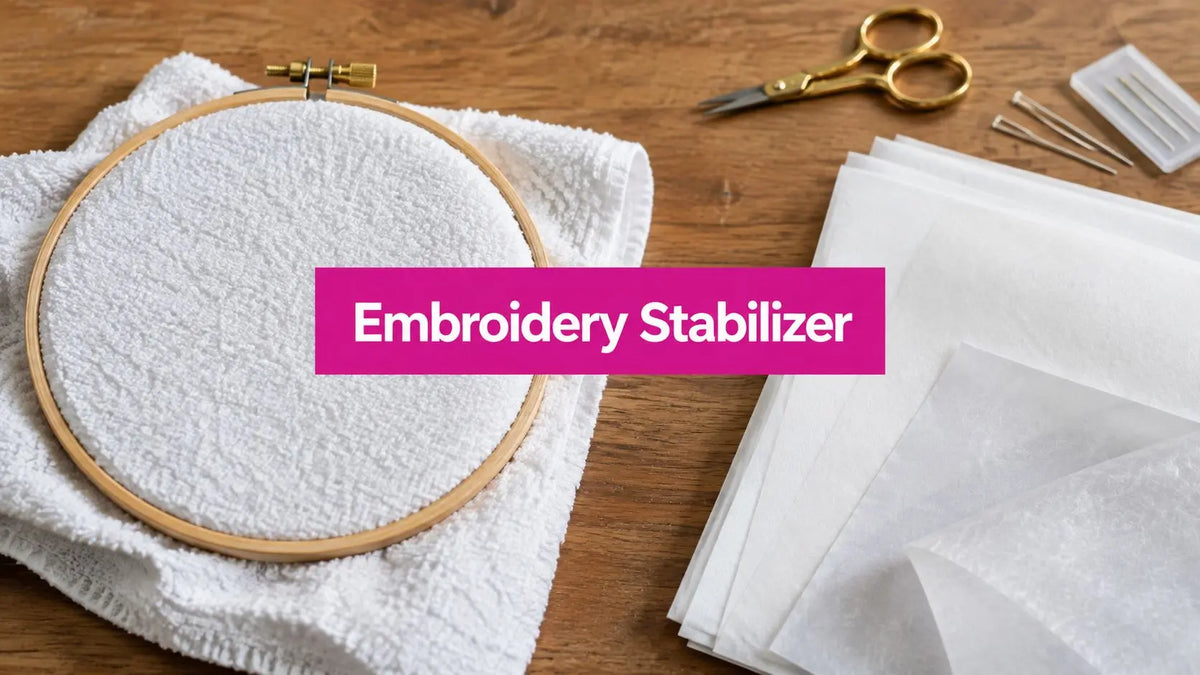
You've stitched a beautiful monogram onto a bath towel, but the letters look soft, buried, or uneven instead of crisp. That happens because terry cloth has raised loops that can swallow stitches and shift under the needle. For most towels, start with one to two layers of tear-away backing underneath and a water-soluble topper on top, then choose the backing weight according to the towel's thickness and the design's density. This two-layer support system is the foundation of reliable stabilizer for embroidery on towels.
A low-pile guest towel may tolerate gentle hooping, while a plush bath towel often behaves better when floated over hooped stabilizer. Your needle, tensioning, hoop pressure, and design also matter, but the stabilizer stack is where clean stitch formation begins.
Why Towel Embroidery Needs a Different Stabilizer Setup
A towel looks stable because it's woven, but its surface isn't flat. Terry cloth has loops standing above the ground fabric, and those loops compress, move, and spring back as the needle penetrates. A backing that performs well on a smooth cotton shirt can leave towel lettering hidden inside the pile.
The usual starting point for stabilizer for embroidery on towels is a medium-weight tear-away backing beneath the towel plus a water-soluble topper over the embroidery area. The backing resists the downward pull of the stitches. The topper creates a temporary bridge across the loops, so thread remains visible instead of dropping between them. This combination reflects practical towel guidance from long-running stabilizer manufacturer advice and Brother's towel embroidery guidance.
The three problems terry cloth creates
- Pile compression: Hoop pressure can flatten loops and leave a visible frame mark after stitching.
- Design sinking: Satin columns and small lettering can disappear into the nap when there's no topper.
- Hoop distortion: Pulling a thick towel too tightly can stretch the ground fabric, shift the grain, or create puckering around the design.
A topper solves the surface problem, but it doesn't replace backing. Think of the setup as a floor and a temporary worktable. The backing supports the stitches from below, while the topper gives the needle a more controlled surface above.
Practical rule: Choose backing by towel thickness and design density. Choose the topper by pile height.
A ballpoint or light ballpoint needle can help move between fibers rather than cutting aggressively through loops. Test on a similar towel scrap before committing to the finished project, especially if the monogram includes dense satin-stitch columns.
How Stabilizers Actually Support Towel Stitches
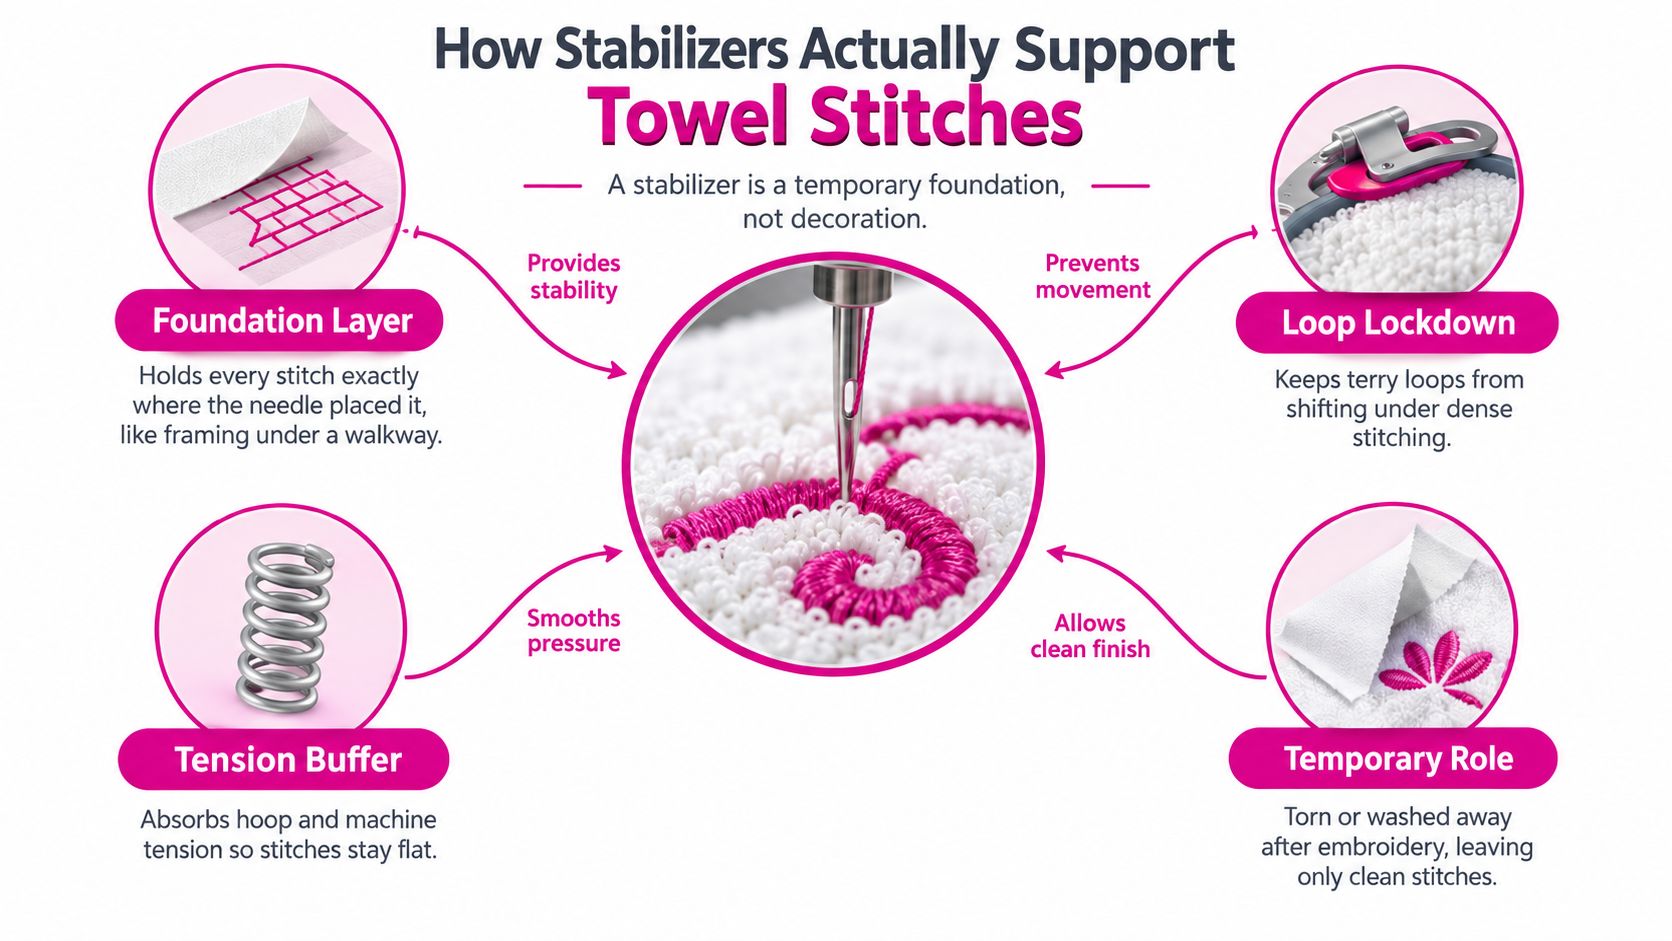
Stabilizer isn't decoration. It's a temporary foundation that keeps the fabric from moving while the needle places thousands of individual stitches. Imagine framing beneath a brick walkway. You won't see the frame when the work is finished, but without it, the surface can shift and settle unevenly.
The backing sits beneath the towel and absorbs some of the machine's tension. Tear-away stabilizer is removed after stitching, while cut-away stabilizer remains attached and continues supporting a dense design through laundering. A water-soluble topper sits above the pile and dissolves after the embroidery is complete.
What to look for on the package
Weight tells you how much resistance the sheet offers. A flimsy backing may flex beneath a dense satin column, allowing the towel to ripple. A firmer backing provides more control, but too much support can make a small towel stiff.
Fiber content and construction affect how the stabilizer tears, cuts, or dissolves. A tightly formed tear-away tends to separate along stitch lines, while a cut-away remains as a permanent foundation. Adhesive coatings add grip, which can be useful when you're floating a thick towel rather than trapping it firmly in the hoop.
The same logic applies to decorative work beyond towels. Makers exploring More Sewing decorative sewing projects will find that stabilizer selection changes whenever the fabric surface, stitch density, or removal requirements change.
Backing and topper perform different jobs
A common beginner mistake is treating a wash-away topper as a substitute for backing. It isn't. The topper protects stitch visibility from above, but it can't stop the towel from shifting beneath the embroidery field.
For towels, the best results usually come from combining the two layers rather than searching for one product that does everything. That separation of roles makes troubleshooting easier. If stitches sink, inspect the topper. If the design puckers or stretches, inspect the backing and hooping.
Tear-Away vs Cut-Away vs Wash-Away Toppers
A towel project can fail even with the right thread and needle if the support layers are chosen separately from the towel and design. Tear-away and cut-away are usually backing choices, while a wash-away product generally works as a surface topper for terry cloth. OESD's machine embroidery stabilizer basics identifies tear-away as a standard option for stable woven fabrics such as towels.
Use one decision framework: backing follows towel weight and design density, while topper choice follows pile height and the finish you want after washing. The backing supports the stitches from below. The topper holds the loops down from above, like a temporary bridge across a shaggy surface.
| Stabilizer Type | Role on Towels | Typical Weight | Removal Method | Best For |
|---|---|---|---|---|
| Tear-away | Primary underside support | Light to medium, often one to two layers | Tear away after stitching | Most stable bath towels and flexible designs |
| Cut-away | Permanent underside support | Medium to heavy | Trim around the design | Dense designs and towels needing ongoing support |
| Wash-away topper | Surface bridge over loops | Lightweight film or mesh | Dissolve with water | High-pile terry, monograms, and fine details |
When tear-away makes sense
Tear-away suits many towels because the woven ground fabric often does not need permanent stretch control. Choose one layer for a light or medium design. A thicker towel or denser motif may need two layers. Remove it carefully after stitching, since aggressive tearing can pull loops at the embroidery edge.
When cut-away earns its place
Cut-away remains beneath the design, supporting the stitches through repeated washing. It can suit a dense logo, a large filled motif, or a towel that needs continued structural support. Permanent backing can also prevent a dense design from balling up after repeated laundering.
What the wash-away topper does
The topper rests directly on the towel surface. It keeps loops from pushing into the design while the machine forms stitches, then dissolves during rinsing. Cover the complete embroidery field, particularly when the pile is tall or the lettering is small. A topper controls the surface, but it cannot replace backing or correct excessive hooping pressure.
For a separate embroidery blank, 100% Cotton Precut Fabric Smoky Blue is a cotton fabric option priced at $10.49. It reinforces the same lesson: evaluate the fabric itself rather than assuming every embroidery surface will behave like terry.
Reading Your Towel and Your Design Before You Hoop
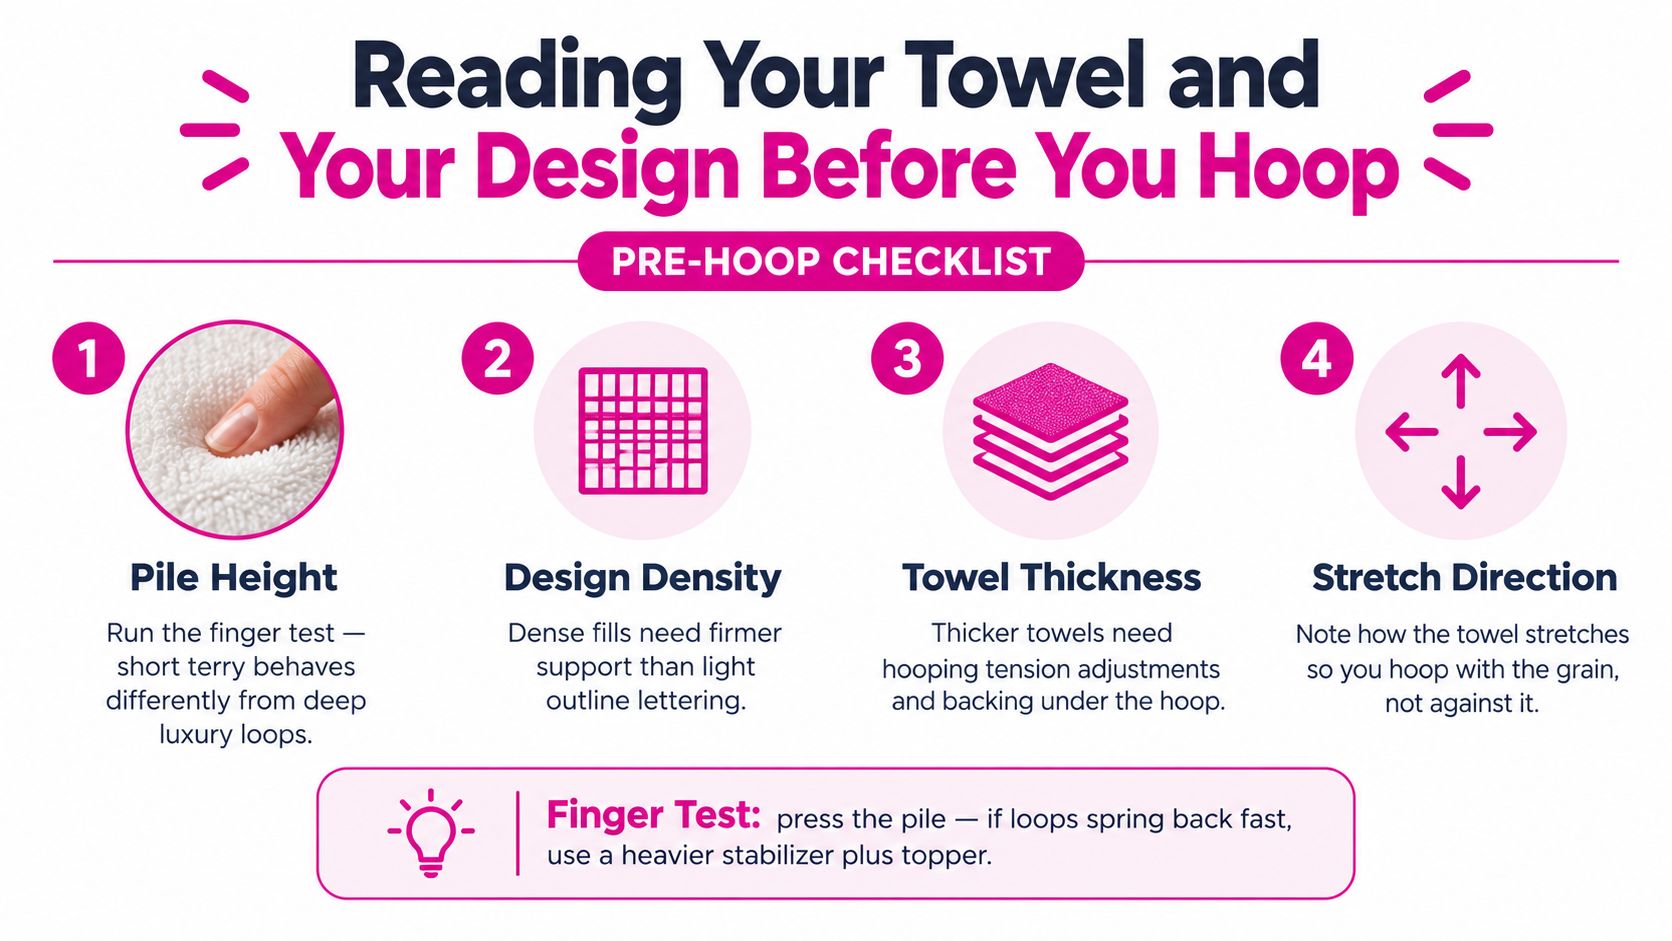
Before you select stabilizer for embroidery on towels, inspect the towel with your fingertips. Press the pile down and release it. Short terry loops recover quickly and present less resistance than deep, plush loops that spring upright around the needle.
Next, inspect the design file. Light outline lettering puts less stress on the fabric than a filled logo or broad satin columns. You don't need to memorize every stitch parameter, but you should recognize that more thread in one area requires more support.
Use the three-input test
- Pile height: Short terry may work with lighter backing, while high uncut pile generally needs stronger backing and a topper.
- Design density: Light lettering needs less support than dense fills, borders, or large logos.
- Towel thickness: A thin guest towel can show backing through the fabric, while a heavy bath towel can absorb more support without feeling stiff.
A fourth check is the towel's grain and stretch direction. Even stable woven towels can distort if you hoop across a direction that naturally yields more. Keep the design aligned with the towel's construction, and don't use hoop tension to force a thick towel flat.
Press the pile with one finger. If the loops spring back quickly and stand higher than the thread path, treat the topper as essential rather than optional.
When all three main inputs increase, move toward a firmer or layered backing. A dense design on a thick, high-pile towel is the situation most likely to need more support than a single light tear-away layer.
Step-by-Step Prep, Hooping, and Finishing Workflow
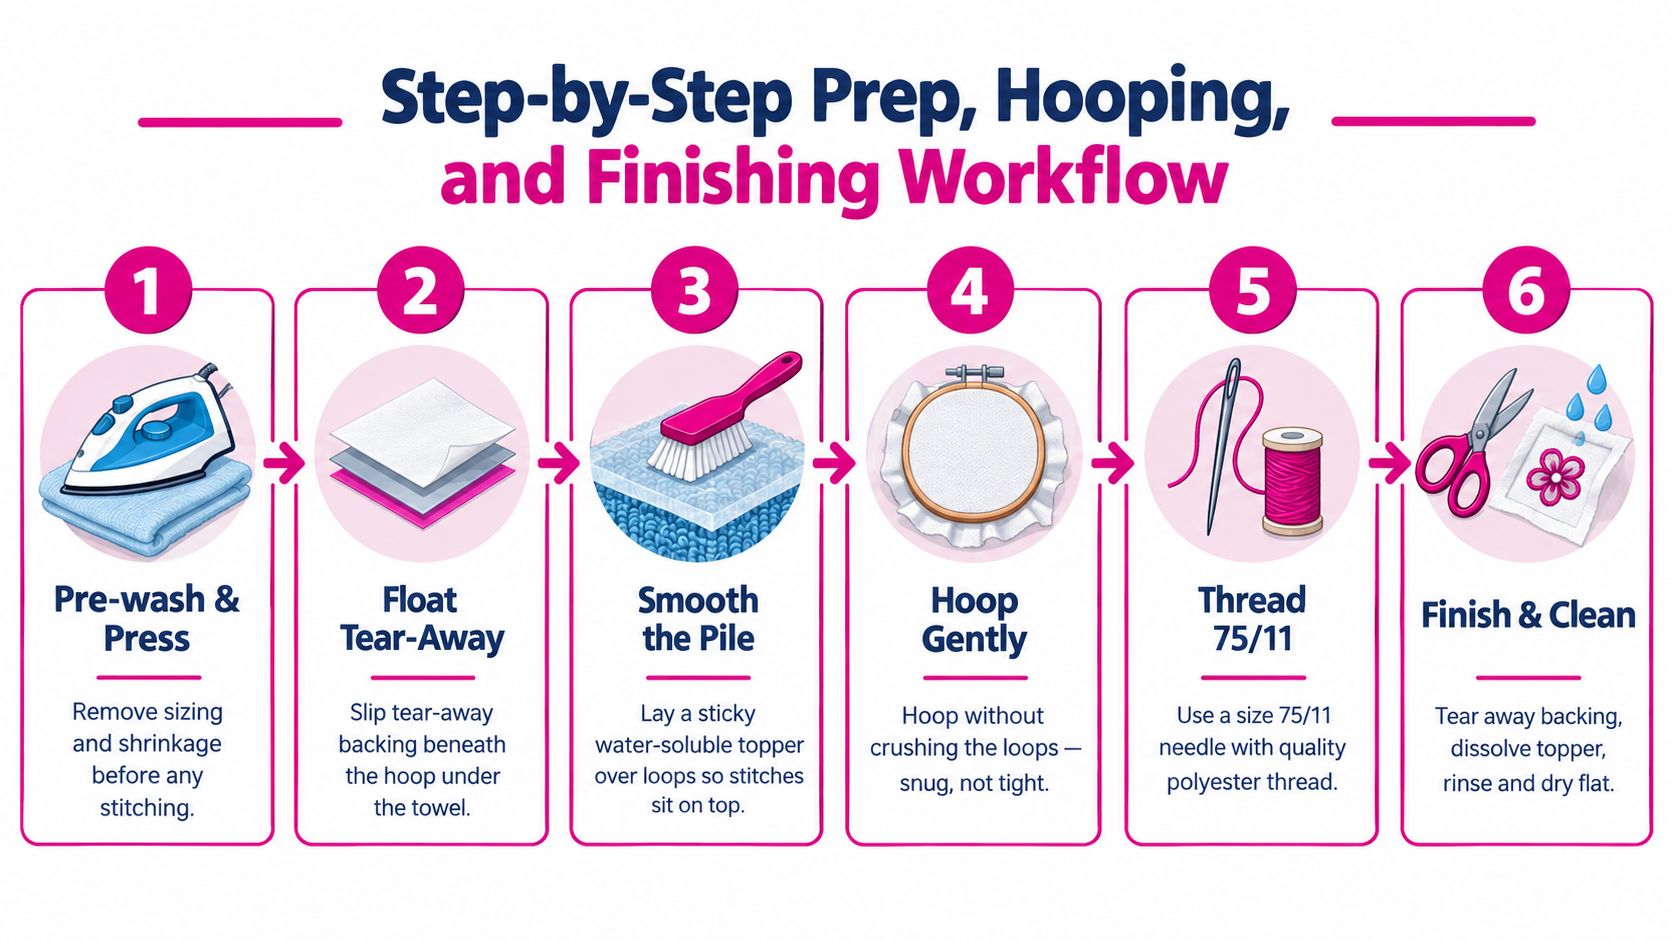
Good embroidery begins before the hoop touches the towel. Pre-wash the towel according to its care instructions, then press it flat. This removes manufacturing sizing and lets you work with the fabric in the condition it will have after laundering.
Prepare the support stack
- Mark the design position. Use a removable fabric marker and check placement from both sides.
- Float the tear-away backing. Put the backing beneath the hoop or beneath the design area, depending on your machine and frame.
- Add the topper. Smooth the water-soluble sheet over the pile. It should cover the complete stitch field without wrinkles.
- Hoop gently. If you hoop the towel, make it snug, not stretched. You want a flat embroidery field without crushing the loops.
- Check the needle. A size 75/11 ballpoint or light ballpoint needle is a sensible starting point for many towels. Replace it if the point is dull or the thread begins fraying.
- Run a test stitch-out. Use a towel scrap with the same pile and thickness whenever possible.
During stitching, watch the bobbin casing area and the thread path for sudden tension changes. Stop if you see the towel drawing inward around the design, the hoop shifting, or the thread repeatedly breaking. Trim accessible jump stitches during the run rather than allowing them to tangle around the presser foot.
When the design is finished, remove the topper first. Tear it away carefully from the stitched area, then rinse the remaining film according to the product directions. For the backing, tear toward the final few threads and clip instead of yanking. Press the towel from the back through a pressing cloth, and allow it to dry flat so the pile can recover.
For a visual demonstration of the sequence, watch this towel embroidery workflow video while preparing your own test piece.
Hooping, Floating, and Adhesive Stabilizer Methods
The habit of always hooping the towel deserves a closer look. Hooping gives a firm hold, but excessive pressure can crush terry loops and leave a rectangular mark, particularly on plush bath towels.
Floating means hooping the stabilizer while placing the towel on top of it. You secure the towel with temporary adhesive, pins outside the embroidery field, or another method compatible with your machine. The towel stays less compressed, while the stabilizer remains taut enough to support the needlework.
Adhesive-backed tear-away and spray-tack methods go further. They let you hoop only the stabilizer and attach the towel to its surface, which can reduce hoop marks on bulky or heirloom towels. Clean positioning matters because a loose corner can shift even when the center looks secure.
| Method | Hold Strength | Hoop-Mark Risk | Best Towel Type |
|---|---|---|---|
| Direct hooping | Firmest hold | Highest if tightened aggressively | Low-pile guest towels |
| Floating | Controlled hold with less compression | Lower than direct hooping | Everyday terry and medium-density monograms |
| Adhesive stabilizer | Surface grip without hooping the towel | Low, with careful application | Thick spa towels and bulky bath towels |
Match the method to the risk
Use direct hooping when the towel is low pile and the design is light enough that the frame won't crush the surface. Float medium-density work when protecting the nap matters more than maximum mechanical grip. Choose adhesive support when the towel is too thick to hoop comfortably or when visible marks would spoil the finished gift.
A practical comparison of stabilizer choices also highlights the need to balance support with residue and stiffness. Adhesive isn't automatically better. It's better when the towel's bulk makes conventional hooping more damaging or unreliable.
Example Setups for Common Towel Projects
Different towels call for different stacks. Use these recipes as starting points, then confirm the result on a matching scrap.
| Project | Backing | Topper | Method | Needle |
|---|---|---|---|---|
| Monogrammed bath towel | One medium-weight cut-away layer | Water-soluble topper | Hoop flat if the pile is moderate | 75/11 ballpoint |
| Decorative hand towel with dense motif | Two tear-away layers | Water-soluble topper | Float on adhesive backing | 75/11 ballpoint or light ballpoint |
| Baby hooded towel | One light tear-away layer | Heat-away topper | Float around the hood seam | 75/11 ballpoint |
A classic bath towel monogram
A medium-density monogram on a bath towel needs enough underside support to keep letter edges from wandering. Use the topper across the full letter area, and avoid pulling the towel tight enough to flatten the pile permanently.
A decorative hand towel
A filled floral border or holiday scene puts more thread into the fabric than a simple name. Two tear-away layers can provide flexible control, while floating helps preserve the hand towel's surface. If the design feels stiff on the test piece, reduce the backing rather than adding more tension.
A baby hooded towel
The hood seam creates a curved, uneven area, and any remaining backing may touch sensitive skin. Keep the design away from the seam, use light temporary support, and select a topper or removal method that leaves no scratchy residue against the wearer.
Linda's Electric Quilters carries embroidery and sewing supplies alongside fabrics, batting, threads, and notions, so you can assemble the stabilizer stack and test materials for a towel project in one place.
Troubleshooting Sinking Stitches and Stabilizer Troubleshooting FAQ
When stitches disappear, look at the surface first. If the thread sits below the loops, the topper is missing, too light, wrinkled, or too small for the design field. Add a more substantial water-soluble topper or improve its contact with the pile before changing thread tension.
Puckering usually feels like a tight ridge around the embroidery. It points to movement during stitching, insufficient backing, excessive hoop pressure, or a dense design placed on a towel that can't support it. Hoop with less tension, float the towel, or move to a firmer backing after testing.
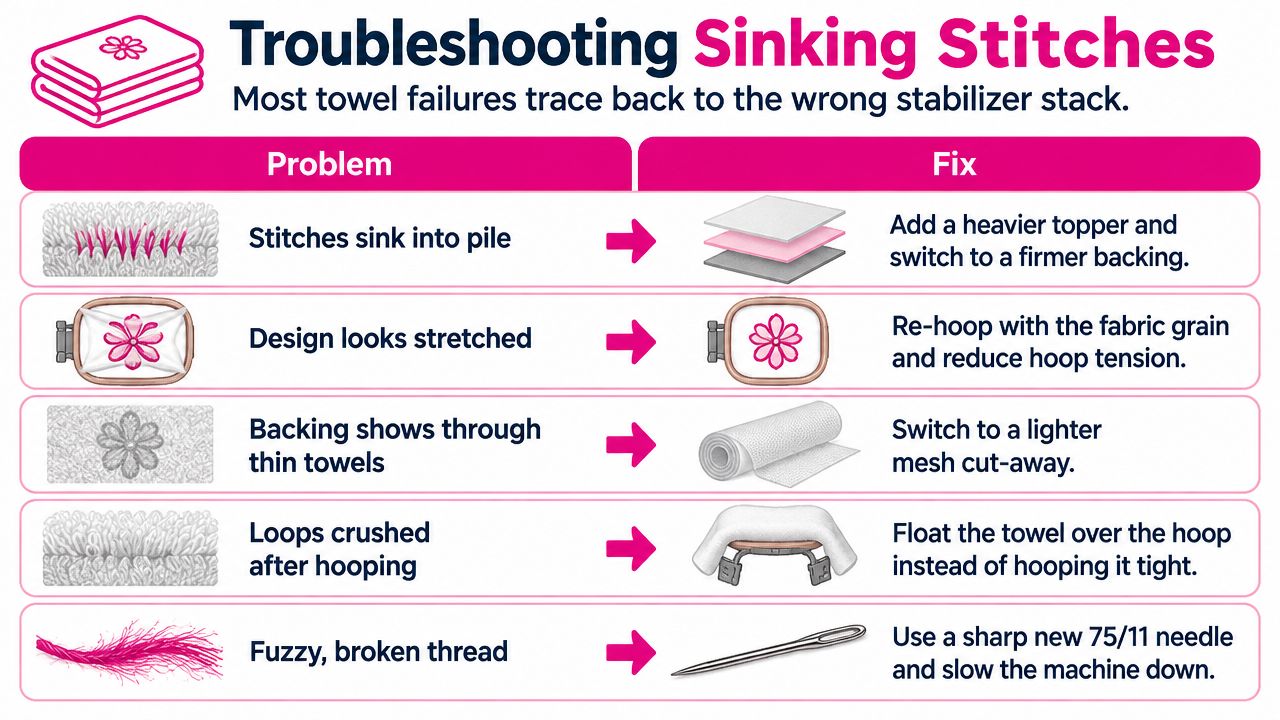
Quick diagnosis guide
- Stitches sink into the pile: Add a water-soluble topper and check that it covers the entire design.
- Design looks stretched: Re-hoop along the towel's grain and reduce pressure.
- Backing shows through: Use a lighter backing or a mesh-style option suited to the towel's thickness.
- Loops look crushed: Float the towel instead of tightening it directly in the hoop.
- Thread becomes fuzzy: Install a fresh needle, confirm the needle size, and inspect the thread path.
Frequently asked questions
What stabilizer should I use for towel embroidery?
For most towels, begin with tear-away backing underneath and a water-soluble topper above. Adjust the number of backing layers according to towel thickness and design density.
Do towel stitches always need a topper?
High-pile terry usually benefits from a topper because the loops can hide thread and reduce detail. Low-pile towels and very open lettering may need less surface support, but testing remains the safest choice.
Should I hoop the towel or float it?
Hoop a low-pile towel gently when it remains flat without compression marks. Float thicker or plush towels over hooped stabilizer when direct hooping would crush the loops.
When is cut-away backing appropriate?
Cut-away makes sense for dense designs or towels that need ongoing support through repeated washing. It remains attached behind the embroidery, so check that the finished backing will feel acceptable.
Why did the design pucker after washing?
The towel may have shifted during stitching, the backing may have been too light, or the design may be too dense for the fabric. Pre-wash the towel, test the complete stabilizer stack, and remove backing without pulling the stitched edge.
Linda's Electric Quilters offers fabrics, batting, threads, notions, and educational sewing resources for projects like towel embroidery. Visit Linda's Electric Quilters to choose the stabilizer and supporting supplies for your next towel, then test your complete stack on a scrap before stitching the final design.


