
Hey everyone, today we're making a quilted wall pocket organizer that actually tames the clutter by your sewing table.
You know the spot I mean. Scissors walk off. Seam rippers hide. Rotary cutters, marking pens, and little rulers all end up in one messy pile. This organizer gives every tool a padded home, right on the wall where you can see it. And it stays flat and crisp doing it.
Here's why. We're using batting and interfacing together, and the order matters. Interfacing goes on the fabric first. It gives you stability. Batting goes on second. It gives you loft and cushion. Quilt through both, and you get pockets with real body — soft enough to protect your tools, firm enough not to sag.
The order that makes it work
Skip the interfacing, and your pockets stretch and curl. Skip the batting, and the organizer feels thin and flimsy. Put the batting down first, and fusing gets lumpy and uneven. Interface first, folks. Every time.
For fabric, I like a medium-weight woven fusible on quilting cotton. Match the weight to your fabric, or go one step lighter. For the batting, reach for low-loft. You want padding, not puff. A fusible batting makes this even easier, because it stays put while you quilt.
Materials
- 1/2 yard quilting cotton for the back panel, about 18 by 24 inches finished
- 1/2 yard quilting cotton for the pockets, in a contrast print if you like
- 1/2 yard woven fusible interfacing
- Low-loft batting, one piece for the panel and one for the pocket strip
- 1/4 yard fabric for binding, or one package of double-fold binding
- Two D-rings, grommets, or a fabric sleeve for hanging, plus a small dowel if you use a sleeve
- Coordinating thread, a walking foot if you have one, pins or clips, and a press cloth
- Your usual tools: rotary cutter, ruler, and marking pen
How to make it
- Cut your pieces. Cut the back panel and pocket backing at 19 by 25 inches, to finish at 18 by 24. Cut one long pocket strip 19 inches wide by 10 inches tall for deep pockets, and one 19 by 7 inches for shallow pockets. Cut interfacing and batting the same sizes.
- Interface the fabric first. Lay each cotton piece wrong side up. Place the interfacing glue side down. Press and lift with a hot, dry iron, about 10 to 15 seconds per spot. Don't slide the iron. Let each piece cool flat before you move it. That cooling is when the bond sets.
- Add the batting second. Layer batting behind the interfaced panel and behind each pocket strip. If you're using fusible batting, press lightly to tack it. If not, pin well or use a few basting stitches. Now your layers move as one.
- Quilt through both layers. Set your stitch length to about 2.5 mm, roughly 10 stitches per inch. Quilt simple straight lines about 1 inch apart, or stitch in the ditch along a print. Do the panel and each pocket strip separately. Keep it simple. We're not reinventing the wheel here.
- Build the pockets. Fold the top edge of each pocket strip down 1/2 inch, press, and topstitch. Lay the shallow strip over the deep strip, then lay both over the bottom of the panel. Pin the sides and bottom.
- Divide the pockets. Mark vertical lines where you want divisions — wide slots about 4 inches for scissors and cutters, narrow slots about 2 inches for pens and seam rippers. Stitch from the top edge of the pocket down to the bottom, backstitching at the top. Slow down at that top edge, or the needle can snap on the thick layers. Ask me how I know.
- Bind and hang it. Stitch around the whole organizer with a 1/4-inch seam to lock the pockets in. Bind all four edges. Add D-rings at the top corners, or stitch a 2-inch sleeve across the back and slide in a dowel. Hang it by your machine and load it up. Just like that.
Tips and variations
Test the stack first. Fuse, layer, and quilt one small scrap sandwich. If the pockets feel too stiff, drop to a lighter interfacing. Too soft? Add your batting to the pocket strip as well as the panel. Completely up to you.
Size it to your tools. Measure your tallest tool before you cut. My tall slot holds a 28 mm and a 45 mm rotary cutter side by side, with room to grab them safely, blade closed.
Try it by the door, too. The same build works in the entryway for mail, keys, and glasses. Just swap the narrow slots for one wide pocket. Same order, same layers, different job.
Don't chase perfect. A quilting line that wanders a little will not matter once the pockets are full. Take your time. It's not a race. You're your own worst critic, and I promise nobody is measuring your pocket divisions.
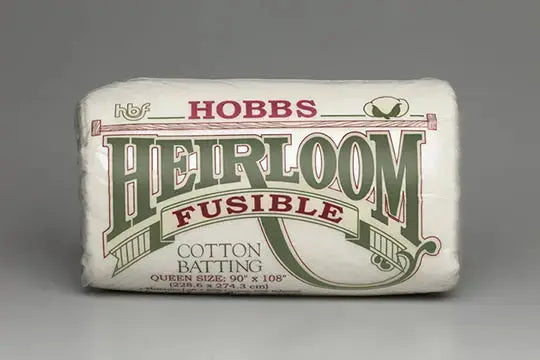
The batting I reach for on a project like this is a fusible 80/20 — it's what I use in the shop when I want batting to stay exactly where I put it while I quilt, and it's available at lindas.com. It makes the batting-plus-interfacing stack really, really easy to handle.
Thanks for sewing along with me, folks. We'll see you next time. Bye.
Shop Hobbs Heirloom 80/20 Fusible Batting Package at Linda's Electric Quilters.


