
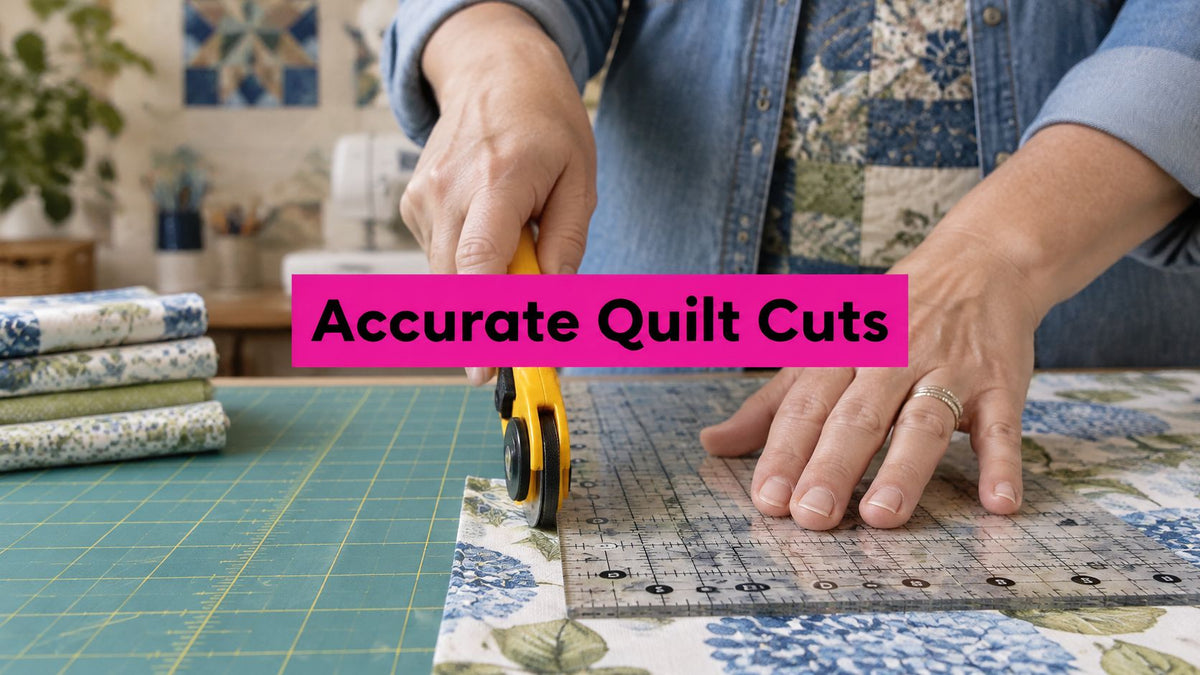
A sharper blade won't rescue a ruler that moves. Safe rotary cutting depends on controlling the ruler and cutter together, not pushing harder, as HC Quilts' rotary-cutter safety guide explains. To learn how to use quilting rulers, start with a squared fabric edge, align the correct cutting measurement, hold the ruler flat, and guide the blade alongside it away from your body.
The less obvious mistakes happen before the blade moves: confusing finished and cut sizes, reading centimeters as inches, or continuing after your guiding hand gets tired. A dependable cutting routine accounts for all three.
Match the Ruler to the Cut
The ruler's printed measurement line sets the width of your cut. Think of the ruler and the rotary cutter as one system. The mat holds the fabric steady for initial positioning, while the rigid acrylic edge guides the blade through the full pass. Switching between ruler lines and distant mat marks mid-run breaks that system and invites small drift. Use a rigid acrylic ruler made for rotary cutting, not a flexible sewing ruler or a template made only to guide a quilting foot.
For yardage, a long rectangle gives enough reach to cross folded fabric in one steady motion. A square ruler lets you see two adjacent block edges at once, which helps when the cut and the seam allowance must stay in fixed relation. Pick the tool that fits the work under your hand. A small ruler stretched past safe control will move, and the cutter follows it.
Which quilting ruler does which job?
| Ruler | Best job | Size or mark to trust | Do not use it for |
|---|---|---|---|
| Rectangle strip ruler | Straight strips and borders | For example, 6.5 x 12.5 in or 6.5 x 24.5 in with a 1/8 in grid | Curved longarm motifs |
| Square ruler | Squaring blocks and trimming units | For example, a 12.5 in square with unfinished-size marks | Long bias strips |
| 45-degree line | Bias binding strips | The labeled bias-angle line | Diamond cuts requiring other angles |
| 30- and 60-degree lines | Diamonds and equilateral triangles | The pattern's angle line, with the fabric held still | Everyday strip widths |
| Longarm curve set | Scallops, curved crosshatch, and compatible stitch-in-the-ditch work | Thick acrylic template that rides a longarm foot, including the Mini Curvit | Rotary cutting stacked layers |
Those example rectangle and square sizes describe useful formats, not a requirement to buy every size. For a starter setup, prioritize readable markings, full coverage of the cut length, and an edge your guiding hand can hold flat without strain.
Keep rotary-cutting rulers separate from longarm ruler-work templates. If a sharp rotary blade can ride the edge, it belongs in the cutting group. If the edge is shaped to steer a hopping foot around curves, store it with the machine and never place a rotary blade against it.
Does the pattern give a finished size or a cut size?
A finished measurement describes the unit after surrounding seams are sewn. A cutting measurement already includes the fabric that will disappear into those seams.
For example, a finished 4-inch square is commonly cut at 4.5 inches, allowing 1/4 inch on each side, as Patchwork Europe's rotary-cutting history explains. Do not add another allowance when a pattern already gives the cut size.
Check the wording before setting your ruler:
- Finished size: Calculate the required allowance before cutting.
- Cut size: Use the stated dimension unless the pattern says otherwise.
- Trim size: Follow the construction stage named in the instructions.
Mixed units need a deliberate choice, too. One inch equals 2.54 centimeters, a conversion discussed in this quilting-ruler help conversation on Reddit, but repeated fractional conversions wear down accuracy over a long cutting session. Keep an inch-based pattern on an inch ruler whenever practical. For metric construction, keep the pattern, ruler, and seam allowance in the same system from first cut to last block.
Cut Straight Strips in One Pass
A strip can look straight while tapering from end to end, and the taper usually shows up three strips later. Start with a clean reference edge and a repeatable hand position. Treat the ruler and the rotary cutter as one system: the ruler holds the line, the blade follows it, and your guiding hand decides whether both stay put.
This process graphic shows the basic arrangement before you begin the full routine.
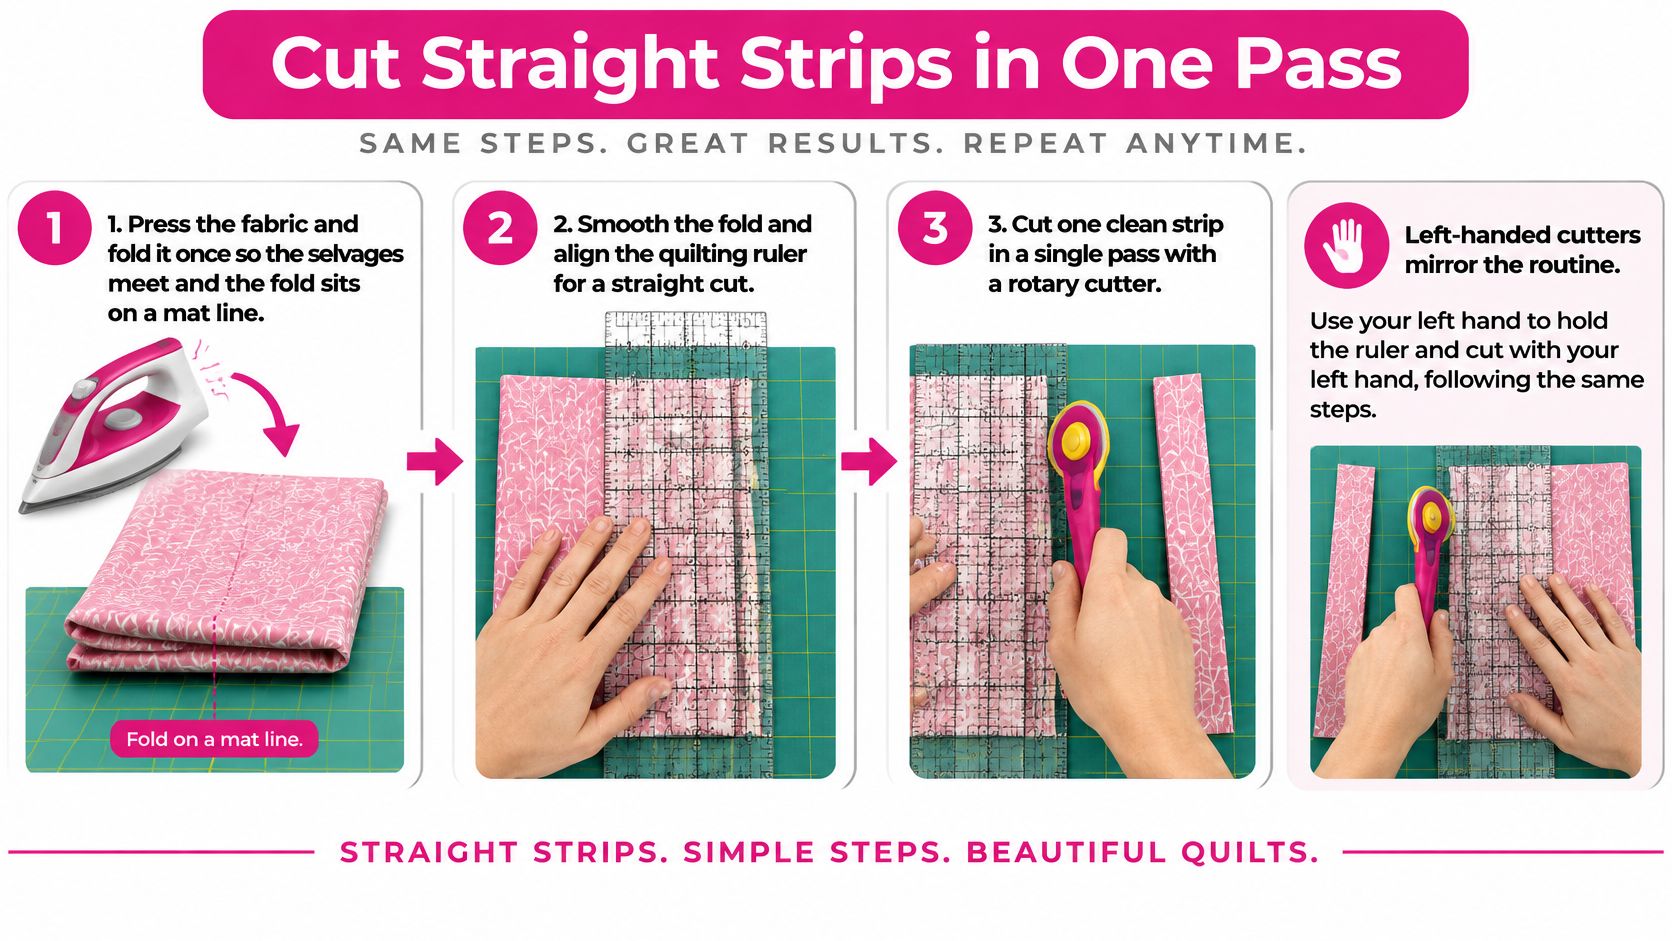
How do you cut strips without making them crooked?
Use this right-handed layout, with the ruler generally left of the blade path. Left-handed cutters mirror the arrangement rather than reaching across the cutting line.
- Press and fold the fabric. Bring the selvages together without forcing them into alignment, then place the fold along a mat line so you can spot twisting.
- Smooth the layers. Remove bubbles and wrinkles before measuring because a ridge under the ruler changes how the fabric lies after cutting.
- Trim a reference edge. Place the long ruler across the crossgrain and make a square trimming cut rather than measuring from an uneven selvage.
- Reposition for the working cut. Turn the fabric as needed, or move around the table, so the fresh edge is easy to measure without crossing your arms.
- Align the chosen width. Put the required ruler line on the fresh edge, then check another gridline against the fold to catch rotation. A ruler that sits square at one end and rotated at the other fans the strip wider with every pass, which is why the second gridline earns its place beside the first.
- Set your guiding hand. Spread your fingers behind the blade-side edge of the ruler, like a bookend holding a shelf steady, and distribute pressure near the ruler's center so it stays flat.
- Make one controlled pass. Guide a sharp rotary blade alongside the ruler, not on top of it, and cut away from your body without leaning sideways. One pass in one direction keeps the blade against the same ruler edge the whole way down.
- Inspect the first strip. Open it gently and check the ends and fold area before repeating a faulty setup across the remaining fabric.
- Use the new edge again. Measure each later strip from the current clean edge so you don't carry an old alignment error across the fabric.
B-Sew Inn's rotary-cutting guide supports this squared-edge routine, including the 90-degree reference cut and checking the first strip before continuing. Its companion explanation of how to cut straight fabric strips with rulers is useful when you want another view of ruler placement.
What should you check before cutting more layers?
Start with a manageable stack. AccuQuilt's history of fabric cutting describes cutting as many as four fabric layers simultaneously, though that figure is a capability worth working up to gradually rather than a target for every fabric or cutter.
Slippery fabric, bulky folds, and limited hand strength are reasons to cut fewer layers. If threads remain connected, stop, close or lock the blade, reset the fabric and ruler, and make a fresh pass. Don't saw back and forth beside your fingers.
Change the blade when it drags or lifts threads instead of slicing them cleanly. A dull blade pushes the ruler sideways, and that sideways push is exactly what widens a strip at the far end. Watch the hand placement and cutting sequence in the tutorial, then rehearse the movement with the cutter closed.
Read Angle Lines for Bias and Triangles
Horizontal and vertical gridlines control square corners and parallel edges. Diagonal guides establish an angle between a reference edge and the blade. The confusing part is that an angle line isn't automatically a width line.
The 45-degree line is used for bias strips, while 30- and 60-degree lines support diamond and triangle cuts, according to SewingTrip's guide to quilting-ruler markings. For angled setup, rotate the ruler while keeping the fabric settled on the mat.
What each ruler line is for
| Marking | Use it for | Example |
|---|---|---|
| 1/8 in grid | Strip and block width | A hypothetical 2.5 in cut strip for binding |
| Solid edge and square corner | Squaring the reference edge | First crossgrain trim |
| Bias-angle line | Bias strips | Binding cut parallel to the first diagonal |
| Diamond and triangle angle lines | Diamonds and equilateral triangles | Rotate the ruler, leave the fabric still |
| Diagonal to the corner | Trimming half-square triangles | Keep the seam aligned with the diagonal while trimming to the pattern's unfinished size |
Use the graphic to distinguish the ruler's sharp edge from the line that establishes the angle.
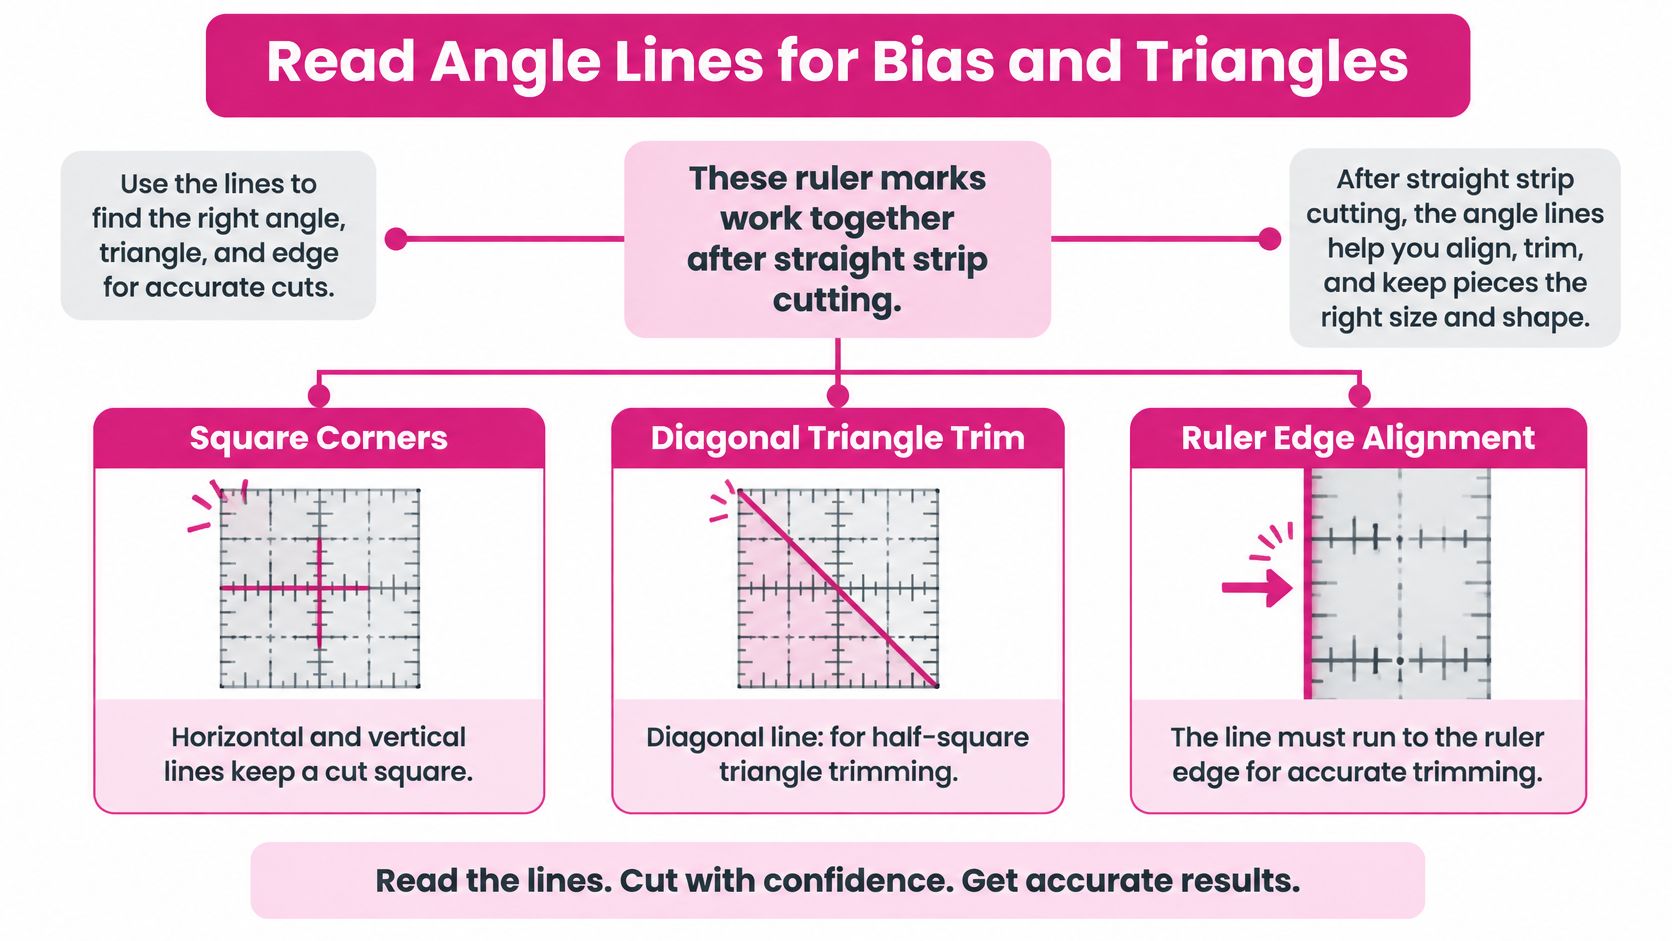
How do you set up a bias cut?
Begin with a straightened fabric edge. Place the bias-angle line on that edge and make the initial diagonal cut, keeping the fabric relaxed rather than stretching it into position.
For subsequent strips, align the required width gridline with the newly cut diagonal edge. The width line controls the distance between parallel cuts; the angle line established the direction of the first cut. Don't keep putting the angle line on the new diagonal and assume it will preserve the same strip direction.
Check the first strip before cutting the rest. For double-fold binding, the folded width and the visible width after stitching aren't the same measurement, so follow the pattern's binding specification rather than estimating from the fold.
How do you trim a half-square triangle?
Press the sewn unit without stretching its bias edges. Place the ruler's diagonal directly over the seam and confirm that the guide reaches the corner you intend to keep.
Trim to the unfinished size, not merely to a square that looks tidy. If the diagonal seam misses the ruler corner, shifting the ruler to save fabric can leave the triangle points misplaced.
Visibility check: Look straight down at the active line, not from an angle. Move the light to reduce glare before moving the fabric to make the markings easier to see.
A removable high-contrast marker, painter's tape, magnification, or a tactile reference sticker can help you locate the active measurement. Keep stickers away from the blade path and avoid anything that lifts the ruler. An overhead phone photograph can enlarge the setup for inspection, but it shouldn't replace checking the fabric before cutting.
Consider a readable ruler before a specialty ruler when building your next Linda's tool order. Clearer markings help only when you've selected the correct unit system and reference edge.
Square Blocks Without Losing Seam Allowance
A block designed to finish at 6 inches gets trimmed to 6.5 inches. The allowance sits on two opposing sides at 1/4 inch each, and both of those edges disappear into seams once the block joins its neighbors. Treat that half inch as fabric already promised to the quilt; trim it away early and every block around it pulls in with it.
The ruler's measurement lines should control the cut, and a standard sewing ruler isn't a safe substitute for a rotary-cutting ruler, as Linda's quilting templates and rulers tutorial explains. Its distinction between measuring tools and cutting guides matters just as much on small units as on yardage.
Here the ruler and the cutter work as one instrument. The ruler fixes where the edge will land, and the blade follows the line you set. When the acrylic creeps a sixteenth of an inch on a small block, the cut still looks clean and the block is still wrong.
How do you square a block without twisting it?
Lay the pressed block flat and identify a dependable internal reference. That might be a diagonal seam, a center intersection, or matching seams that should remain parallel.
- Locate the design center. Balance the ruler around the feature that needs to stay centered rather than chasing the raw edges.
- Check adjacent lines. Align more than one ruler reference with the block so a seam doesn't sit square in one direction and crooked in the other.
- Trim the exposed edges. Remove only the fabric necessary to establish clean neighboring sides.
- Rotate and realign. Place the newly trimmed edges on the required size marks before cutting the remaining sides.
Keep one unit system across all four sides. Alternating between inch and centimeter markings halfway around a block is where small measurement errors accumulate, particularly in patterns that mix the two.
Don't move the ruler to hide a construction problem. If keeping the required size puts a point too close to an edge, inspect the piecing before cutting.
Why is the block smaller than it should be?
An undersized block may come from pieces cut too small, seams sewn too wide, pressing that leaves fabric tucked into a seam, or excessive trimming. A scant seam generally makes a unit larger, so measure the seam before choosing a correction.
Check the first completed block in both directions. If you use another ruler to verify it, compare the placement of the printed lines rather than assuming different line thicknesses will look identical.
A block that measures correctly but has misplaced points isn't fully squared. Size and seam placement both need to work.
For a long batch, pause regularly to compare a newly trimmed unit with your approved sample. Don't shave every block smaller to make one mistaken block fit unless you've deliberately recalculated the whole pattern.
Squaring holds up when the unfinished size stays constant across the stack and the design center stays put. The 6.5-inch mark is what protects the block's seam allowances for the rows ahead.
Keep Control and Grip After Hundreds of Cuts
Ruler creep is a hand-injury risk and an accuracy problem. When the acrylic moves, your blade guide moves with it. Trying to finish the cut before correcting the setup puts speed ahead of control.
A long cutting session changes how you work. You may begin reaching farther, leaning on the ruler edge, or gripping the cutter harder without noticing. Treat those changes as reasons to stop, not as a normal cost of finishing the stack.
How should your hand position change on a long ruler?
Keep your guiding fingers spread and fully behind the cutting path. For a long cut, stabilize the ruler progressively instead of stretching your arm to its limit. Stop the blade's forward movement before repositioning your guiding hand, and don't let the blade travel beyond the section you can securely hold.
- Center the pressure. Press down rather than pushing sideways toward the blade.
- Move your body. Reposition at the table instead of reaching across the cutting path.
- Reduce the stack. More layers require dependable contact, not more force.
- Respect handedness. Mirror the whole layout if you cut left-handed.
This safety graphic illustrates pressure distribution. Its utility-knife illustration is not a recommendation to substitute that tool for a fabric rotary cutter.
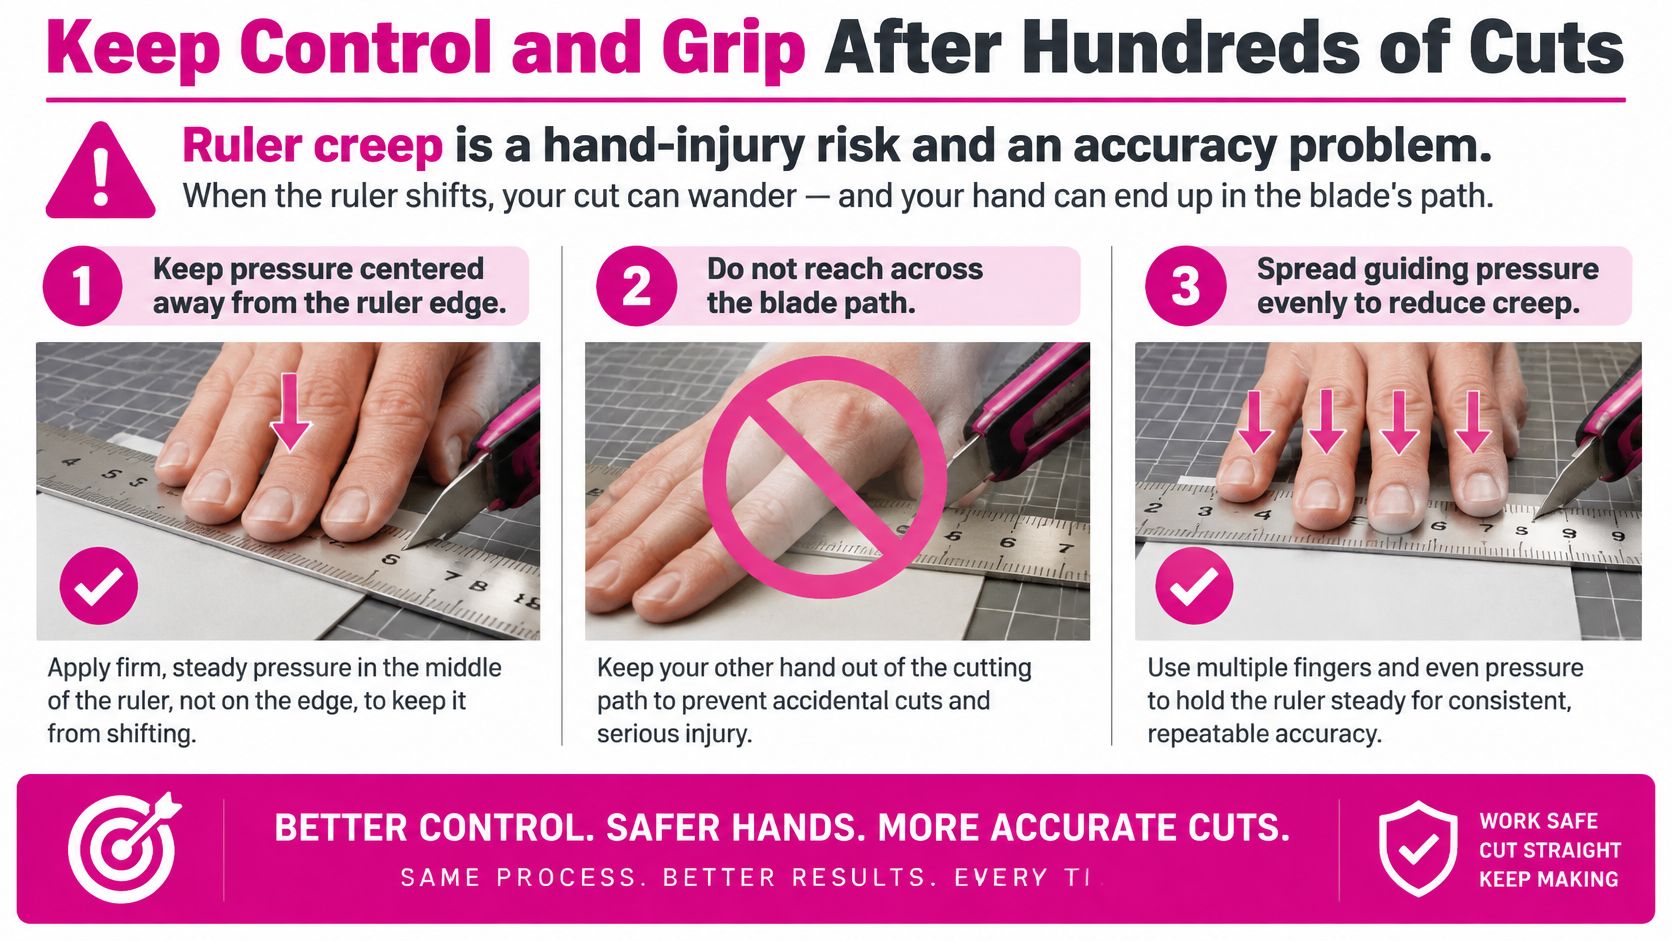
When should you pause?
Build a break into the work before your hand becomes unreliable. As a personal practice schedule, you might set a timer for about 20 minutes, then close the cutter, relax your hands, and inspect a strip before continuing. That's a suggested routine, not a universal safety threshold.
Pro tip: If the ruler creeps, the cut is already wrong. Stop and reset before advancing the blade farther.
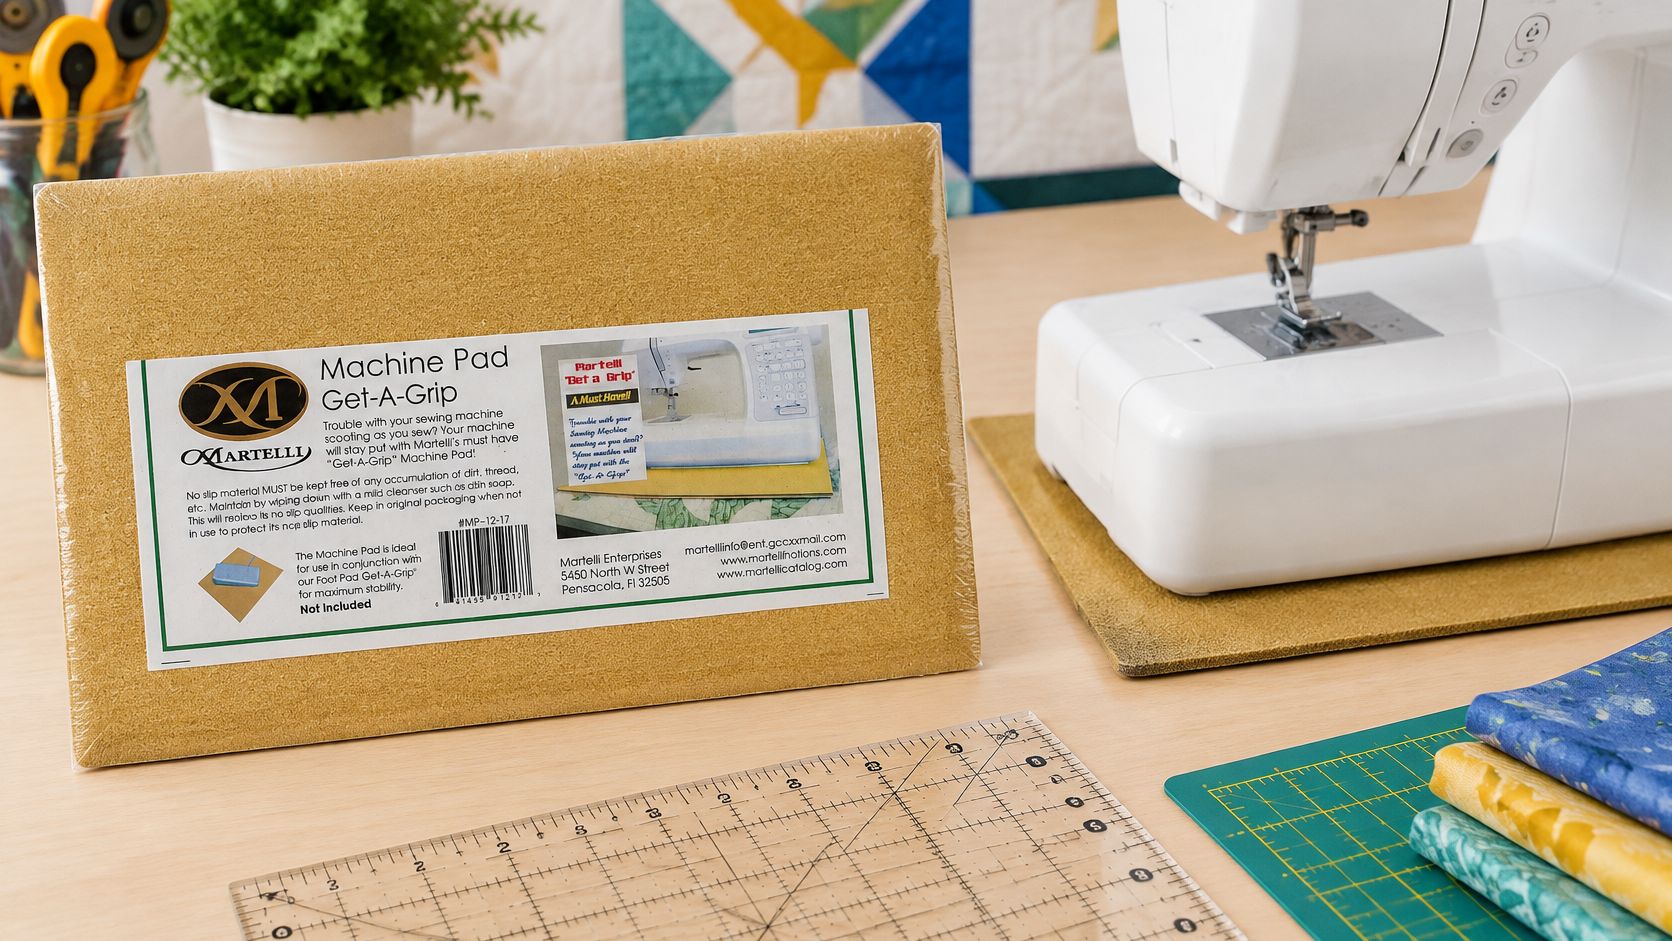
Non-slip dots or a suitable ruler handle can help, but don't treat every non-slip sewing accessory as a cutting aid. The Get A Grip Machine Pad is designed to reduce sewing-machine vibration; it isn't a ruler grip or a replacement cutting mat.
Choose purpose-made grips and replacement blades from Linda's notions selection rather than adapting an unrelated pad. Longarm curve templates likewise belong with a compatible ruler foot, not under a rotary blade because they're acrylic.
Practice Drills That Catch Drift
A stack of scraps turns your ruler and cutter into a test system. Repeat the motion to see whether the same measurement holds. Treat each pass as a calibration run: the blade should travel against the same ruler edge, with the same hand pressure, from the first strip to the last.
How can you test strip accuracy?
Straight test: On a suitable scrap, square the reference edge and cut five strips at 2.5 inches. Compare both ends and keep them within 1/16 inch as a practice target, both along a strip and between strips.
If the strips taper, watch for ruler rotation or sideways pressure from your guiding hand. If the width changes from strip to strip, check whether you are using the same side of the printed measurement line each time. That line has thickness, and switching sides adds a small, repeatable error to every strip.
Square test: Cut four 4.5-inch squares as a worked exercise. Stack them without stretching the edges and inspect the corners. A mismatch means you should remeasure each piece before blaming the sewing.
Then sew them into a 2-by-2 block using the standard seam allowance. The calculated unfinished result is 8.5 inches square, so this exercise checks cutting and piecing together.
How can you test bias handling and visibility?
For a bias exercise, cut four strips at 2.5 inches using the bias-angle setup. Join a pair with a 1/4-inch seam, press gently, and inspect whether the joined edges continue smoothly without a notch or V.
For visibility, mark the active line with removable tape or a tactile reference sticker. Photograph the setup directly overhead, enlarge it, and compare what you thought you aligned with what the picture shows.
Snuggles Quilts' ruler-care guidance recommends painter's tape as a visual measurement checkpoint and consistent ruler brands to reduce confusion from line-thickness differences. Neither measure excuses a misaligned reference edge.
- If the blade drags: Replace it before repeating the test.
- If the ruler turns: Change hand placement or reduce the stack.
- If the line is hard to read: Improve lighting and contrast before buying another tool.
A short practice session exposes a repeatable error before fatigue hides it. Close the cutter before recording measurements or taking photographs.
Pick the Ruler for Your Project and Shop
Buy for the next operation in your project, and treat the ruler and the rotary cutter as one system while you shop. Patchwork yardage needs a rectangle that spans the folded fabric while staying easy to control. Pieced blocks need a square ruler that matches their unfinished dimensions and has reference lines you can read against the seams.
Check the pattern's units before you commit. A pattern that mixes inch and centimeter measurements asks the ruler's grid to do double duty, and markings that match the pattern keep you from converting at the cutting table. Binding calls for reliable width markings and the appropriate angle guide when bias is required. Follow the pattern's cut width, especially when the binding must accommodate bulky seams or batting loft.
Comfort belongs in the decision too. A ruler you hold securely with a flat, spread hand stays steadier late in a session, after the same grip has repeated through stack after stack of strips.
Which tools belong beside a longarm?
Custom quilting on a frame uses a different tool system. The template guides a compatible ruler foot while the needle forms the stitching; it doesn't guide a cutting blade.
For smaller curved motifs, the Mini Curvit Ruler for Longarm Quilting gives the ruler foot inside and outside curves to follow, along with straight edges and guidelines for custom quilting.
Keep cutting accuracy separate from machine setup. Correct tensioning, bobbin casing checks, and the hand and loft of the quilt sandwich affect stitching, but they can't restore seam allowance removed during trimming.
Frequently asked questions
Should you cut borders from the pattern length alone?
Check the assembled quilt top before cutting final border lengths. Measure without stretching, follow the pattern's border method, and resolve an out-of-square top before using the ruler to trim it.
Can a chipped ruler still guide a rotary cutter?
Don't cut along a damaged edge. A chip or crack can interrupt blade guidance, so replace the ruler rather than trying to steer around the defect.
Should you stretch fabric until it matches the ruler grid?
No. Let the fabric lie relaxed and adjust its position without pulling. If the fold and reference edge won't align naturally, unfold, press, and reset rather than cutting tension into the piece.
Linda's Electric Quilters offers quilting notions and longarm templates to support both accurate patchwork preparation and custom quilting. Visit Linda's Electric Quilters, shop the notions selection for your project's cutting tools, and watch the templates-and-rulers tutorial before cutting your first squared edge today.


