
Table of Contents
- Start With a Weekly Lint Routine
- Signs of Lint Buildup in Quilting Machines
- Best Tools for Cleaning Sewing Machine Lint
- A Sewing Machine Maintenance Schedule That Works
- How Thread and Fabric Choices Feed Lint Buildup
- Water Hardness, Detergent Dosage, and Residue Buildup
- Common Mistakes That Make Lint Buildup Worse
- Conclusion
- Frequently Asked Questions
Last Updated: September 14, 2026
Start With a Weekly Lint Routine
If you want to know how to avoid lint buildup in machines, the answer starts with frequency, not intensity. Consumer Reports recommends cleaning hoses and ducts at least once a year, and the same principle applies inside the machine: small, regular passes beat one deep clean every six months (How to Clean Your Dryer Vent).
Lint buildup is the accumulation of fiber fragments, thread snippets, and dust that shed from fabric and thread during normal sewing, then compact into felt-like deposits inside the machine. Left alone, those deposits migrate into the bobbin case, feed dogs, and tension discs.
A weekly routine takes about five minutes:
- Brush out the bobbin area after every project
- Vacuum the feed dogs with a small nozzle
- Wipe the bed and presser foot with a dry cloth
- Check the needle plate for thread nests
Consistency matters more than thoroughness: a quick weekly pass keeps the machine running cooler and quieter than an occasional deep clean.
Signs of Lint Buildup in Quilting Machines
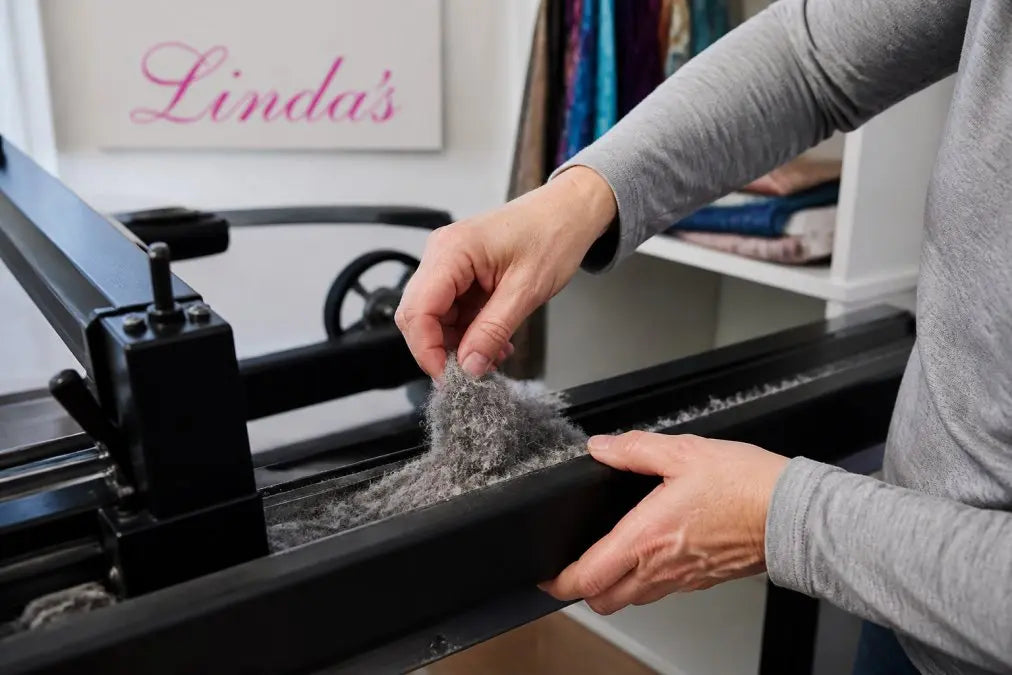
The clearest sign of lint buildup in quilting machines is a change in stitch quality: skipped stitches, uneven tension, or thread that shreds mid-seam. When lint compacts around the hook area, it interferes with the rotary motion that forms each stitch.
Other warning signs worth watching:
- A grinding or raspy sound during slow stitching
- Fabric feeding unevenly despite correct presser foot pressure
- Visible gray fuzz behind the hook or under the needle plate
- Thread breaking in the same spot repeatedly
- The machine running noticeably warmer than usual
What most guides miss is that lint hides in two places you rarely check: underneath the feed dogs and behind the hook. Experts recommend cleaning both specifically, because compacted lint and shredded thread collect there faster than anywhere else.
Best Tools for Cleaning Sewing Machine Lint
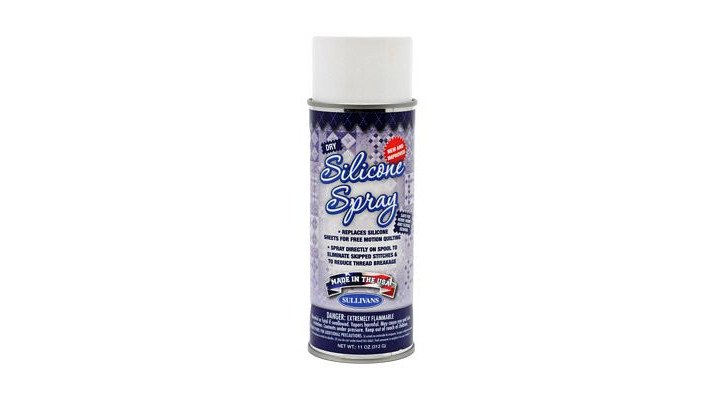
The best tools for cleaning sewing machine lint are a soft bristle brush, a small vacuum attachment, and a dry silicone spray. Skip the compressed air, which pushes lint deeper into the mechanism rather than removing it (Dos and Don'ts of Cleaning Lint from Your Sewing Machine).

Here's what actually earns a spot in your cleaning kit:
- Soft bristle brush: reaches into the bobbin case and around the hook without scratching metal
- Small vacuum nozzle: pulls loose fiber out instead of redistributing it
- Tweezers: lifts thread nests that a brush just pushes around
- Dry silicone spray: reduces friction and static so fabric glides and lint sheds less
That last item deserves a closer look. Sullivans Dry Silicone Spray from Linda's Electric Quilters creates a tacky anti-static finish that dries fast with no greasy residue, making tables and machine surfaces slippery so fabric sails over them smoothly. Less friction means less fiber shedding, which means less lint to clean in the first place.
A Sewing Machine Maintenance Schedule That Works
A workable maintenance schedule breaks down into daily, weekly, monthly, and yearly tasks, but the tasks change depending on the machine. A front-loading washer, a top-loading washer, a dryer, and a sewing machine each hide lint in different places, so a generic checklist leaves the worst offenders untouched. Match each task to how often the machine runs and to its specific access points.
| Frequency | Task | Time Needed |
|---|---|---|
| After each use | Empty bobbin area, wipe needle plate (sewing); clean dryer lint trap | 2 minutes |
| Weekly | Vacuum feed dogs, brush under needle plate (sewing); wipe washer door gasket | 5 minutes |
| Monthly | Clean behind the hook, oil per manual (sewing); run empty hot cycle (washer) | 15 minutes |
| Quarterly | Clean drain pump filter (front-load washer); inspect dryer exhaust | 20-30 minutes |
| Yearly | Full inspection, check ventilation and belts; clean full dryer duct run | 30-60 minutes |
Front-load vs. top-load filter access. This is the step most guides skip. On a front-loading washer, the drain pump filter sits behind a small access panel near the bottom front, usually a hinged door or removable kick plate. Place a shallow pan and towel underneath before opening it, because the housing holds standing water. Twist the cap counterclockwise, pull the filter, and rinse off the mat of fiber and hair. On a top-loading washer, there is typically no user-accessible drain pump filter; lint is caught by a self-cleaning filter in the agitator or a lint trap under the wash plate, so the task becomes running a monthly empty hot cycle with a washer cleaner. Knowing which design you own prevents you from prying at a panel that was never meant to open.
Dryer exhaust path. The lint trap catches only part of what a dryer produces; the rest travels through the exhaust duct, which matters for both performance and safety. Disconnect the duct from the back of the dryer once a year, vacuum the interior with a long flexible brush, and check the exterior vent flap for a mat of compacted fiber. A duct longer than about 25 feet, with multiple elbows, or made of flexible foil instead of rigid metal accumulates lint faster and should be checked more often. The U.S. Fire Administration and NFPA both identify failure to clean dryers as a leading contributor to dryer fires, which is why this is a yearly task, not an optional one (usfa.fema.gov).
Sewing machine ventilation. On a sewing machine, the yearly item is where most quilters fall short. If the vents are clogged with lint, heat builds up inside the motor housing and shortens its life. An annual inspection also catches worn belts and loose connections before they become expensive repairs.
How Thread and Fabric Choices Feed Lint Buildup
Thread and fabric choice drives lint production more than most quilters realize, and the reason comes down to fiber length. Staple length, how long individual fibers are before they're spun into yarn, determines how much material breaks free during stitching, washing, and drying. Short-staple cotton and bargain thread use fibers only a fraction of an inch long, so the ends work loose easily and shed. Long-staple and combed cotton, and quality polyester, use longer fibers that interlock with fewer exposed ends and shed far less. That single variable explains most of the difference between a clean machine and a fuzzy one.
Every time fabric flexes, tiny fibers break free. Natural fibers like cotton shed short fragments that compact into felt-like deposits; synthetic fibers like polyester generate finer particles that float and settle deep inside the machine, often past the parts you can reach with a brush. Blends produce both kinds of debris at once, which is why a cotton-poly blend can leave a machine dirtier than either fiber alone.
A few choices that cut lint at the source:
- Buy long-staple or combed cotton thread, which sheds less than bargain thread
- Pre-wash and air dry new fabric to remove loose fibers before it ever touches the machine
- Avoid mixing a heavily shedding fabric with a delicate one in the same project
- Turn garments and quilt backs inside out before washing to reduce surface friction
The detergent-dosage problem nobody explains. Over-sudsing is one of the most common causes of residue that traps lint, and it happens because detergent is dosed by habit rather than by load. Detergent molecules surround dirt and fiber in a suspension that rinses away, but there is a saturation point. Past it, the excess detergent has nothing left to bind to, so it stays in the drum as a sticky film. Lint sticks to that film the way dust sticks to a wet countertop, and over months it builds into a layer that holds fiber against the drum, the gasket, and the filter housing.
The fix is to dose by load size, soil level, and water hardness rather than by the cap line. High-efficiency (HE) machines need HE detergent specifically, because standard detergent produces far more suds than a low-water wash can rinse out. Hard water may need slightly more detergent to reach the cleaning threshold; soft water can leave residue with the same scoop that works for a neighbor. Try half the recommended amount for a lightly soiled load and see whether clothes still come out clean, most people find they were using more than they needed.
Water Hardness, Detergent Dosage, and Residue Buildup
Water hardness and detergent dosage are the two most overlooked causes of residue buildup in any machine that uses water. Hard water leaves mineral deposits; too much detergent leaves a sticky film that traps lint.
In hard-water areas, minerals settle on heating elements, drums, and filters over time, and that scale gives lint something to cling to. Detergent residue does the same: when you dose by habit instead of by load size and water hardness, the excess never rinses away clean, and over months that film becomes a magnet for fiber.
What to do about it:
- Test your water hardness, or check your utility's annual water quality report
- Use the detergent amount the label specifies for your load size and water type
- Run an empty maintenance cycle monthly to flush residue from the drum and lines
- Clean the drain pump filter on front-loading machines every few months
That empty cycle is the single most effective habit for washing machines, just as the weekly brush-out is for sewing machines, both remove buildup before it hardens.
Common Mistakes That Make Lint Buildup Worse
The biggest mistake with lint removal is using the wrong method and making the problem worse. DIY approaches like baking soda and vinegar on machine parts can jam lint further into the mechanism rather than lifting it out.
Other habits that backfire:
- Compressed air: blows lint past the parts you can reach and into the motor housing
- Over-oiling: creates a sticky surface that catches every fiber that passes
- Skipping the filter: a clogged lint trap forces the machine to work harder and run hotter
- Ignoring the exhaust path: on dryers, a blocked duct is a genuine fire hazard, not just a performance issue
- Cleaning only what you can see: the hook area and feed dogs hide the worst of it
The pattern behind all of these is the same: lint removal rewards gentleness and repetition. Brushes and suction lift fiber out. Air pressure and wet solutions push it in.
Conclusion
Lint is patient. It accumulates in the spaces you never look at, and by the time your stitches show the damage, the buildup has been compounding for months. A weekly brush-out, a monthly empty cycle, and the right thread and fabric choices will keep any machine running cooler and cleaner for years longer than neglect will.
Linda's Electric Quilters stocks the tools that make that routine easy, from Sullivans Dry Silicone Spray to the notions and threads that shed less in the first place. With more than 50,000 products, 700+ educational videos, and free shipping on all batting rolls, we're built for quilters who'd rather spend their time stitching than troubleshooting.
Get started with Linda's Electric Quilters and keep your machine running the way it did on day one.
Frequently Asked Questions
How often should I clean lint out of my sewing machine?
Clean the bobbin case and feed dog area after every project, or every 8 to 10 hours of sewing. Consumer Reports recommends cleaning hoses and ducts at least once a year for dryers. For quilting machines, brush out compacted lint weekly, and schedule a full deep clean monthly. If you quilt daily, shorten that interval. A consistent routine prevents lint from hardening into felt-like clumps that jam the mechanism.
What happens if lint builds up in a sewing machine?
Lint buildup causes skipped stitches, thread nesting, and tension problems. It also blocks the bobbin area, causing the machine to run hot and work harder. In quilting machines, compacted lint under the feed dogs changes fabric feed height, which throws off stitch length on long seams.
What is the best tool for removing lint from a sewing machine?
A stiff-bristled lint brush reaches under the feed dogs and behind the hook area where compacted lint hides. Dry Silicone Spray from Sullivans, available at Linda's Electric Quilters for $15.19, creates a super tacky anti-static finish that dries fast with no greasy mess or oily residue. It makes tables and other surfaces slippery allowing your fabric to sail over the surface smoothly with no friction or lint buildup. Safe for use on sewing machines and sergers. Keep difficult to work with fabrics from sticking to the presser foot or work surface when sewing or free motion.
Does thread quality affect how much lint my machine produces?
Yes. Lower-quality threads shed more fibers, and those fibers collect in the bobbin case and tension discs. Switching to a tighter-wound, long-staple thread reduces fiber shedding and keeps your machine cleaner between deep cleans.


