
Quick Summary
To stabilize stretchy fabric for machine embroidery, put a cut-away stabilizer underneath it, since it stays in the garment and supports the stitches through washing and wear. Hoop the fabric flat and unstretched, and match the stabilizer weight to the stitch count of your design.
- Choose cut-away stabilizer for knits and t-shirts, since it stays in the garment.
- Cut the stabilizer at least one inch larger than your hoop.
- Hoop the fabric flat and unstretched; do not pull it tight.
- Use a ballpoint or stretch needle, and 40-weight polyester thread for most stretchy garments.
- Test-stitch on a scrap of the same fabric before stitching the finished garment.
Table of Contents
- How to Stabilize Stretchy Fabric for Machine Embroidery
- Why Stretchy Fabric Distorts During Machine Embroidery
- Choosing the Right Stabilizer for Stretchy Fabric
- Step-by-Step: Hooping Stretchy Fabric Without Stretching It
- Machine Settings: Needle, Thread and Stitch Density
- How to Prevent Puckering When Embroidering on Stretchy Fabric
- Can You Skip the Stabilizer? Embroidering Stretchy Fabric Without It
- Troubleshooting Stretchy Fabric Embroidery by Symptom and Booking Your First Test Stitch-Out
- Frequently Asked Questions
How to Stabilize Stretchy Fabric for Machine Embroidery
Last Updated: November 5, 2026
Why Stretchy Fabric Distorts During Machine Embroidery
Stretchy fabric moves under the needle, and that movement ruins the design, which is why you need to stabilize stretchy fabric before stitching.
Here's the core problem. Each stitch pulls the fabric, and the fabric pulls back. When the fabric stretches and then relaxes, the stitches end up in slightly different places than the digitized design intended.
Stabilizer solves this by giving the fabric something firm to rest on. The stabilizer holds the stitches in place while the garment moves underneath.
Choosing the Right Stabilizer for Stretchy Fabric
The right stabilizer depends on the fabric and the design. For most stretchy fabrics, a cut-away stabilizer is the safest choice. It stays in the garment, so it supports the stitches through washing and wearing.
A common approach is to match the stabilizer weight to the stitch count. Lighter designs need less support. Dense designs need more. A few quick rules:
- Knits and t-shirts: Choose cut-away.
- Fleece and sweatshirts: Choose a soft cut-away with extra support.
- Lightweight performance fabric: Test a tear-away or performance backing first.
- Baby garments: Choose a soft, skin-friendly cut-away.
Polymesh cut-away stabilizer is a good fit for knits and stretchy fabrics. It is soft but strong, and it holds stitches through repeated washing. , from Polymesh Cut Wht 1.5oz 10 in x 10 yd and Polymesh CutAway 10 in x 10 yd Black.

For a heavier option, Floriani Cutaway Medium is a 2.0 oz non-stretch stabilizer. You can compare the Floriani Cutaway Medium 15-inch non-fusible option from our catalog.

Cut-Away Embroidery Stabilizer vs. Tear-Away and Topper
Cut-away stays in the fabric and gives lasting support. Tear-away removes cleanly, but it offers less support on stretchy fabric. A topper sits on top of the fabric to keep stitches from sinking into a fuzzy or textured surface.
Cut-away goes underneath, and a topper goes on top for fleece or towels. Use tear-away only when the fabric is stable enough to hold its shape.
Step-by-Step: Hooping Stretchy Fabric Without Stretching It
Hooping is where most stretch problems start. Follow these steps:
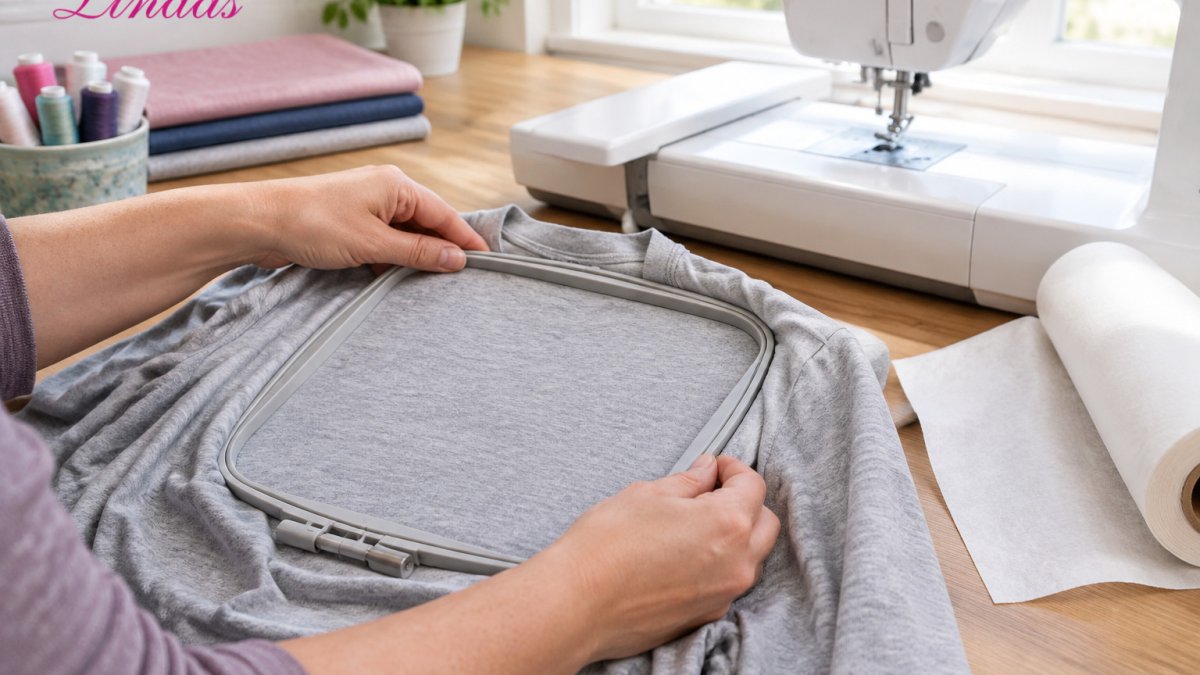
- Cut the stabilizer at least one inch larger than your hoop.
- Place the stabilizer on the wrong side of the garment.
- Loosen the hoop screw and set the outer ring on the table.
- Lay the fabric over the inner ring, then press the outer ring down.
- Pull the fabric gently so it lies flat, but do not stretch it.
- Tighten the screw so the fabric holds without pulling.
- Check that the grain of the fabric runs straight through the hoop.
Watch for shine marks or hoop burn on delicate knits. If the hoop leaves marks, loosen it slightly and add more stabilizer underneath.
Machine Settings: Needle, Thread and Stitch Density
Stabilizer does most of the work, but the needle, thread, and stitch density determine how much the fabric is disturbed while the machine runs. The goal is to move fiber aside rather than cut or drag it, and to keep the stitch formation from pulling the knit out of shape.
Needle choice for stretchy fabric
Use a ballpoint or stretch needle. A ballpoint needle has a rounded tip that pushes between the loops of a knit instead of piercing the yarn, which reduces runs and skipped stitches. A stretch needle has a slightly sharper point and a scarf shaped to protect the thread when the needle deflects through elastic fabric.
Watch out: a universal needle can cut knit loops and leave small holes that grow after washing, so do not default to whatever needle is already in the machine.
Thread choice and tension
Use a 40-weight polyester embroidery thread for most stretchy garments. Polyester has some give, so it tolerates the fabric's movement better than a stiff rayon or a cotton thread that has little stretch.
A common pattern is to loosen the top tension one or two increments from the setting you use on woven cotton, then stitch a test and check that the bobbin thread does not show on the top and the top thread does not loop on the back.
Stitch density and underlay
Stitch density is the number of stitches packed into a given area, and dense designs pull harder on stretchy fabric.
Underlay matters as much as density. A good digitized design for knits uses a center-run underlay plus an edge-run underlay before the cover stitches. The underlay gives the top stitches a base and reduces the amount the fabric is pulled as the fill builds.
Machine speed and hooping tension
Slow the machine to about 600 to 750 stitches per minute for the first test on a new fabric. Lower speed reduces needle deflection and gives the stabilizer time to hold the fabric. Once the test is clean, you can raise speed in steps and watch for shifting.
Hoop tension should be firm but not drum-tight. The fabric should lie flat with no wrinkles and no stretch. If you can see the fabric domed above the hoop ring, it is stretched and will relax after stitching, which causes puckering.
A quick test sequence
- Thread with 40-weight polyester and a fresh ballpoint or stretch needle.
- Hoop the fabric with the chosen stabilizer, flat and unstretched.
- Stitch the design at reduced speed on a scrap of the same fabric.
- Check the back for bobbin show-through and the front for puckering or gaps.
- Adjust one variable at a time: tension first, then stabilizer layers, then density if the design allows.
For thread selection beyond the basics, see How to Choose Thread for Embroidery: A 2026 Guide. For metallic thread, read Prevent Metallic Thread Breakage: 7 Essential Steps.
The article's machine settings come down to a few key choices, summarised below.
| Setting | Value | Note |
|---|---|---|
| Ballpoint needle, cotton jersey | 75/11 or 80/12 | Starting point for most knits |
| Ballpoint needle, fleece | 90/14 | For heavier sweatshirt knit |
| Stretch needle, performance polyester | 70/10 or 75/11 | Finer point disturbs less fiber |
| Top thread | 40-weight polyester | Tolerates fabric movement |
| Bobbin thread | 60-weight polyester | Keep bobbin tension light |
| Test stitch speed | 600-750 stitches per minute | Slow first run on new fabric |
| Lower-density design | 4,000-8,000 stitches | Manageable with one cut-away layer |
| Higher-density design | Above 10,000 stitches | Benefits from second cut-away layer |
How to Prevent Puckering When Embroidering on Stretchy Fabric
Puckering happens when the fabric gathers around the stitches. It usually comes from too little stabilizer, a hoop that pulls the fabric too tight, or a dense design on a light knit.
Polymsh Cut Wht 1.5oz 10 in x 10 yd →
To prevent it:
- Use enough cut-away underneath the fabric.
- Hoop the fabric flat, not stretched.
- Reduce stitch density when the design allows.
- Add a topper for textured fabrics.
Puckering is easier to avoid than to fix. Steam can help after the fact on some fabrics, but test on a scrap first.
Can You Skip the Stabilizer? Embroidering Stretchy Fabric Without It
You can sometimes skip stabilizer on very firm, stable fabric. Stretchy fabric is a different story. Without support, the design will almost always distort.
If you plan to digitize your own design for a stretchy garment, our beginner guide How to Digitize Embroidery Designs for Beginners covers stitch density basics.
Troubleshooting Stretchy Fabric Embroidery by Symptom and Booking Your First Test Stitch-Out
When a stitch-out goes wrong on stretchy fabric, the symptom points to a cause. Work through the symptom list below before changing the design or the garment.
Design shifts or drifts
Cause: the fabric moved under the needle because the stabilizer was too light or the hoop was too loose.
Fix: add a second layer of cut-away, rehoop with firm but unstretched tension, and check that the stabilizer extends at least one inch beyond the hoop on all sides. If the garment is a finished item you cannot rehoop easily, use a sticky backing to hold the fabric to the stabilizer.
Puckering around stitches
Cause: too little stabilizer, hoop tension too tight, or stitch density too high for the fabric.
Fix: add stabilizer first, then loosen the hoop, then reduce density if the design allows. Steam can relax some puckering after the fact, but test on a scrap because heat can distort performance fabrics.
Tunneling or ridges between stitch columns
Cause: the fabric is being pulled into the gap between satin-stitch columns, usually because the underlay is missing or the fill is too dense for the knit.
Fix: add a center-run underlay, widen column spacing slightly, or add a layer of cut-away. A topper can also help by giving the stitches a surface to compress against instead of pulling the fabric up.
Fabric waves or ripples at the design edge
Cause: the stabilizer is not supporting the edge of the design, or the fabric relaxed after hooping because it was stretched.
Fix: extend the stabilizer beyond the design edge, rehoop without stretching, and consider a heavier cut-away for dense borders.
Holes, runs, or skipped stitches
Cause: the needle is cutting the knit or deflecting, or the thread is wrong for the fabric.
Fix: switch to a ballpoint or stretch needle in the correct size, replace a dull needle, and use 40-weight polyester thread. Check that the needle is seated correctly and that the bobbin tension is not too tight.
Stitches sink into the fabric
Cause: the fabric surface is textured or pile, so the stitches disappear into it.
Fix: add a water-soluble topper on top of the fabric before stitching. The topper holds the stitches on the surface and washes away after.
Stabilizer removal problems
Cause: cut-away left too large, or tear-away pulled too aggressively.
Fix: trim cut-away to about 1/4 inch beyond the design after stitching, rounding corners so the edge does not curl. For tear-away, support the fabric on both sides of the stitch line and tear slowly. If the garment will be worn against skin, choose a soft cut-away or polymesh so the trimmed edge does not scratch.
Book your first test stitch-out
Before you stitch the finished garment, run a test on a scrap of the same fabric with the same stabilizer, needle, thread, and settings. Check the front and back for shifting, puckering, tunneling, and stabilizer show-through. Our Crafters Roundtable podcast features quilters, sewists, and industry experts, and our library of more than 700 educational videos can help you check each step.
Frequently Asked Questions
How do you machine embroider on stretchy fabric?
Start by backing the fabric with a cut-away stabilizer, since it stays in place through washing and wear. Hoop the stabilizer and fabric together without pulling the knit tight, because stretching during hooping is the most common cause of distortion. Use a lighter stitch density than you would on woven cotton, and run a test stitch-out on a scrap of the same fabric before embroidering the garment. Trim the excess stabilizer close to the design once stitching is finished.
Should you use cut-away stabilizer on knit fabric?
In most cases, yes. Cut-away stabilizer provides lasting support that helps the design keep its shape after repeated washing, which tear-away backing cannot reliably do on stretchy material. Polymesh Cut-Away stabilizer, sold by Linda's Electric Quilters in 10-inch and 20-inch widths, is soft enough for baby garments and skin-contact areas.
Can you embroider stretchy fabric without stabilizer?
Embroidering stretchy fabric without any stabilizer usually leads to puckering, shifting stitches and a design that warps once the garment is washed. Some heavier knits with a stable weave can handle a light backing, but a lightweight or highly elastic fabric needs support on the back. Skipping stabilizer is rarely worth the risk on a garment you intend to wear or wash regularly.
What stabilizer should you use for stretchy fabric?
For most stretchy fabrics, a cut-away stabilizer is the reliable choice because it keeps stitches stable through stretching and washing. Floriani Cutaway Medium 15-inch non-fusible stabilizer, priced at $19.99, is described in its listing as suited to fleece, t-shirts, sweatshirts and polo knits. Add an extra layer of tear-away under the hoop for denser or poorly digitized designs.



