For rayon challis, start with a fresh Microtex (sharp) needle in 70/10 and a standard all-purpose polyester thread, and shorten your stitch length to about 2.0–2.2 mm. Challis is a light, semi-sheer woven with very good drape and no stretch, so the needle has to pierce cleanly between fine yarns instead of pushing them aside, and the thread has to hold seams that are stressed by the garment's own fluid weight. Go down to 60/8 for the sheerest challis or a finer thread, and up to 80/12 only when you are sewing several layers, facings or topstitching. Judge every change on a folded offcut of the actual fabric before it touches the garment.

Why challis is unforgiving about needles and thread
The challis verified for this guide is 100% rayon or viscose, Light, Semi-Sheer, with no stretch and a soft, fluid hand. Three consequences follow:
- Every needle hole shows. In a semi-sheer weave, an oversized or dulled needle leaves visible perforations and can pull yarns into tiny runs along the seam line.
- The fabric is weaker than the seam wants it to be. Challis frays readily and its yarns can slip away from a stitching line. Short, closely spaced stitches in a sound thread distribute that stress; a heavy thread in a big needle saws at the yarns instead.
- Nothing stretches to forgive a bad setting. With no elastane to recover, puckering from a too-long stitch or a too-heavy thread stays in the garment.
Step 1: choose the needle point — Microtex/sharp first
Needle type is chosen for the fabric, needle size for the fabric weight and the thread. For a woven like challis, the right point is a sharp one. SCHMETZ describes its Microtex needle as having a very slim, acute point made for precision stitching in fine, high-thread-count fabrics. That point slips between challis's fine yarns and pierces cleanly, so stitches sit straight and the yarns close back around the thread.
A Universal needle is the fallback, not the first choice: its point is slightly rounded, so on a fine woven it can push yarns aside rather than passing cleanly between them, which shows up as skipped stitches, slight puckering or tiny runs. A ballpoint is the wrong tool entirely — it is made to slide between the loops of a knit, and challis has no loops. Never use a leather, denim or topstitch needle on challis: they are built for far heavier materials.
Step 2: choose the needle size
- 60/8 — the sheerest challis, single layers, fine thread. For when even a 70/10 leaves visible holes, or with a very fine 60-weight thread.
- 70/10 — the default starting point. The right match for most challis garment seams in all-purpose thread. Independent rayon-sewing guidance and the standard fabric references agree on a size 10 Microtex for rayon challis.
- 80/12 — layers and construction points. Waistband and facing intersections, flat-felled or topstitched details, and any place the machine must pass through three or more layers.
Start with a new needle, whichever size you choose. A needle that has sewn a previous project has a worn point, and on challis a worn point does the damage of a needle one size larger. SCHMETZ's own rule for choosing is the one to follow: the finer the thread and the finer the fabric, the finer the needle should be — and the thread must sit comfortably in the needle's groove and eye, or it will shred.

Step 3: choose the thread — all-purpose polyester by default
Fibre first. All-purpose polyester is the default thread for challis garment seams. It is slightly stronger and more elastic than cotton thread of the same weight, which matters in a fabric whose seams are stressed by the garment's own fluid drape, and it keeps that strength through repeated gentle washing. Match the colour in daylight; on a semi-sheer cloth, a thread one shade darker usually disappears better than one shade lighter.
Weight second. A standard all-purpose sewing thread is the correct weight for 70/10–80/12 needles and ⅝-inch garment seams. A fine 50-weight cotton is the legitimate alternative when you want the flattest, mattest seam — its thinness gives remarkably flat seams — on a gently used, gently washed garment. Avoid heavy topstitching and buttonhole-twist threads in challis seams: they need a 90/14 or larger needle, and the holes that needle leaves are permanent. Use the same thread in the bobbin as on top, so tension balances evenly where both faces can show.
One mix-up to avoid: rayon thread is not the thread for rayon fabric. Rayon embroidery thread is a decorative, high-sheen thread that loses strength when wet; it belongs in surface embroidery, not construction seams. Sew the garment in polyester first and add rayon embroidery afterwards — Linda's rayon thread for embroidery guide covers where it belongs.
The paired settings to start from
- Needle: new Microtex/sharp 70/10 (60/8 for the sheerest fabric, 80/12 for layered points).
- Thread: all-purpose polyester, same thread in the bobbin, evenly wound.
- Stitch length: 2.0–2.2 mm for construction seams — shorter than the 2.5 mm default, so more stitches share the stress and the yarns are less free to slip.
- Presser-foot pressure: reduce it if your machine allows; a light fabric needs less pressure, and too much drags the layer and puckers the seam.
- Before the garment: sew 6 inches of seam on a folded offcut, inspect both sides, flex it gently, and hold it to the light. Holes, runs or puckers are problems to solve on the offcut, not on the blouse.
If something looks wrong, check in this order
- Tiny runs or ladders along the seam: the needle point is damaged or too large. Fit a new needle one size smaller before touching anything else.
- Skipped stitches: usually the same cause — a worn or rounded point deflecting off the yarns. New Microtex first; then check the needle is fully seated and the machine is threaded with the presser foot raised.
- Puckered seams: shorten the stitch toward 2.0 mm, reduce presser-foot pressure, and check you have not stepped up to a heavier thread than the fabric can carry.
- Thread shredding or snapping: the thread is too heavy for the needle's eye, or the needle is damaged. Move up one needle size for that thread, or back to all-purpose weight — and replace the needle if shredding continues.
- Seam grinning open when flexed: the stitch is too long or the thread too fine for a stressed seam. Shorten the stitch; if it still grins, that seam needs the construction fix in the seams guide below, not a different spool.
Verified options at Linda's
The main collection for this module is the rayon challis collection. Every needle, thread and fabric below was verified live in the store for this guide — active and available — with the specification that decides its place:
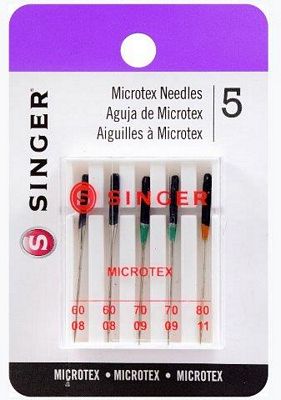
- Needles Sgr Mach Microtex 5 pk — a 5-needle assortment with a thin sharp point for perfectly straight stitches: two 60/8 for lightweight fabrics, two 70/9 for sheer, lightweight fabrics, and one 80/11 for lightweight wovens, in a size-marked case. One pack covers every size this guide calls for.
- Needles Singer Universal Red Band 80/12 5pack — the Universal fallback at the layered-construction size, for facings and intersections if you have no 80/12 Microtex.
- Metrosene Thread Set 4 Spools Black and White — Mettler's all-purpose Metrosene, described by its maker as the tearproof all-rounder for a great variety of fabrics and stitches; four 164-yard spools (two black, two white). The beige set covers four beige shades for pale challis prints.
- 2024 White Aurifil Cotton 50wt Large Spool — the fine-cotton alternative: 50-weight 2-ply cotton, 1,422 yards, for the flattest seams on gently handled garments.
- The fabric itself: Light Green Rayon Solid Challis (100% rayon, 55 inches wide) and Aegean Blue Rayon Solid Challis (100% rayon, 54 inches wide), both Light and Semi-Sheer — the specification this whole guide is calibrated to.
Care and limitations
Treat needles as consumables: fit a new one for each garment, and replace one immediately if stitching starts to make a popping sound, which is a dulled point punching rather than piercing. Keep the removed size identifiable — the size is marked on the shank and, on SCHMETZ needles, in the lower colour band — so a part-used 70/10 is never mistaken for a new one. Wash the finished garment the way the fabric's care line directs (machine wash cold, air dry on the challis verified above) and the way you pre-washed the cut. Limitations: this guide is a selection procedure written from manufacturer guidance — SCHMETZ's needle-selection and Mettler's thread descriptions — and construction standards for fluid woven fabrics. No needle was sewn into a challis sample for it, and no photographed test seam is claimed. Confirm your machine's needle system (most home machines use 130/705 H) in its manual; where the manual differs on fitting, the manual governs.
Keep reading
More from Apparel Fabric School. The prerequisite steps are how to prepare rayon challis before cutting and cutting rayon challis: grain, layout and handling; the foundation piece is how to choose rayon challis by weight, opacity and season. With needle and thread settled, go next to seams and edge finishes for rayon challis, which puts exactly these settings to work.