Cut rayon challis in a single layer, on grain, and fully supported: wash and rest the fabric first, lay it flat so no part hangs off the table, line each pattern grainline up parallel to the selvedge and check that distance at both ends of the arrow, pin or weight the piece so it cannot creep, then cut with sharp shears or a rotary cutter in long, steady strokes without lifting the fabric. Challis is light, smooth and semi-sheer, so it shifts more readily than a stable cotton — most twisted hems, mismatched stripes and pieces that do not match at the seams were decided here, at the cutting table, not at the sewing machine.

Why challis needs a different cutting routine
Three properties of the challis verified for this guide — 100% rayon or viscose, Light, Semi-Sheer, no stretch, very good drape — explain the routine:
- It moves. A smooth, lightweight plain weave slides over a table, over a second layer of itself, and under a pattern piece. A folded double layer that looks aligned at the fold can be several millimetres out at the far edge.
- It has no stretch to hide a mistake, and plenty of drape to show one. In a fluid fabric an off-grain cut shows as a garment that twists, a hem that will not hang level, or a stripe that drifts across a seam.
- It frays and distorts at the edges. Rough handling, blunt blades and snipped notches cut into the seam allowance weaken exactly the edges you will sew and finish later.
What you need
- Your challis, already washed, dried, rested and pressed as in the preparation guide linked at the end — never cut challis straight off the bolt and hope to wash the shrinkage out later.
- A large, flat surface big enough for the whole layout. If a piece would hang off the edge, roll or fold the excess onto the table instead; fabric hanging under its own weight stretches on the bias while you cut.
- Pattern pieces with the grainline arrow marked on every piece, and the pattern's layout for your fabric width — the challis in this module runs 54 to 58 inches wide, so check which width column you are following.
- Sharp dressmaker's shears, or a rotary cutter, a fresh blade and a mat large enough for the piece. Blunt blades chew a light weave instead of cutting it.
- Fine, sharp pins, pattern weights, a tape measure or clear ruler, and chalk or a removable fabric marker.
- Optional: plain tissue paper under the fabric, pinned and cut through with it, to steady a very slippery cut.
Step 1: Re-true the grain before layout
Start where the preparation guide ended. Fold the fabric lengthwise, selvedges together. If the crosswise end hangs at an angle instead of lining up, the fabric is off grain. Lay it flat, ease it back gently on the bias — a short diagonal tug in the direction that squares the fold — then press lightly along the length with a press cloth and check again. Do not lay out fabric that will not fold straight.
Lengthwise grain runs parallel to the selvedges, crosswise grain runs selvedge to selvedge, and true bias sits at 45 degrees between them. Only cut on the bias when the pattern says so — a bias challis piece drapes, stretches and grows in length as it hangs, very differently from an on-grain one.
Step 2: Lay out a single layer by default
For challis, single-layer layout is the default, not the slow option. Spread the fabric in one layer, right side up if the print or a stripe must be placed, with the whole piece supported on the table. Work through the pattern's single-layer layout if it gives one; if it only shows a folded layout, cut each piece once, then flip the pattern piece over and cut its mirror image, marking which is left and which is right as you go.
Use a folded layout only for small pieces with no print to place, and re-check the lower layer after pinning. If the layers have drifted, open it out and cut single-layer.
Keep every grainline arrow pointing the same way on a one-way print or directional stripe, even if that uses more yardage. Turning a piece 180 degrees to save fabric is how one panel ends up with the print upside down.
Step 3: Set every grainline by measuring both ends
- Position a pattern piece roughly where the layout puts it.
- Pin one end of the grainline arrow. Measure from that point to the selvedge and note the distance.
- Measure from the other end of the arrow to the selvedge. The two distances must be equal. If they differ, pivot the unpinned end until they match — do not pull the fabric to meet the pattern; move the pattern to sit true on the fabric.
- Pin the second end, then measure once more at both ends before pinning the rest of the piece.
This two-end check is the most important step in this guide. For challis, repeat it for every piece, including small ones, because a light fabric can shift while you pin the piece next to it.
Step 4: Secure the piece so it cannot creep
Pin inside the seam allowance, every 4 to 6 inches and closer on curves, with fine pins that do not drag the fabric. Or use pattern weights at corners and centres — weights suit challis because they hold without pin holes in a semi-sheer weave — or both. If cutting through tissue, pin through all layers in the seam allowance and peel the tissue away after cutting.
After securing, run the grainline check once more. Catching a shift now costs a minute; catching it after cutting costs a panel.
Step 5: Cut without lifting the fabric
- With shears: keep the lower blade flat on the table and gliding along it, open the blades wide, and close in long, smooth strokes, stopping just short of fully closed before advancing. Never lift the fabric up into the blades, and never cut with the fabric bunched in your hand — both shift the layer and bend the cutting line.
- With a rotary cutter: use a fresh blade, firm even pressure, and a ruler for long straight edges. A worn blade skips threads in a light weave — change it instead of pulling at whiskers.
- Walk around the table rather than reaching across it. Reaching angles your stroke sideways, and a sideways stroke drifts off the line on a slippery fabric first.
- Keep your free hand flat on the fabric ahead of the blades, fingers well back from the cutting line, and slow down on curves.
- Cut notches outward, as small bumps beyond the cutting line, rather than clipping into the seam allowance. On a fabric that frays, an inward clip is the start of a weak point in the seam.
- Transfer markings gently with chalk, a removable marker, or tailor's tacks. Dragging a hard pencil line across challis can pull it off grain.
If something looks wrong, check in this order
- A cut piece twists or will not lie flat: it was probably cut off grain. Lay the pattern piece back on it and re-measure the grainline at both ends against a selvedge-parallel thread. If it is off, only re-cutting fixes it — pressing does not.
- Two pieces that should match are different sizes: one layer shifted, or fabric hung off the table and stretched. Re-cut the smaller piece single-layer and fully supported.
- Stripes or a print do not meet at a seam: the pieces were not laid out in the same direction or the stripe was not aligned at the seam line (not the cutting line) before pinning. For a striped challis, align the stripe at the stitching line on the pieces that will be joined, and accept the extra yardage that costs.
- Edges look chewed: the blade is blunt. Stop, change blades or switch to sharp shears, and trim only what is needed.
After cutting: keep the pieces stable
Leave each piece flat, or roll it loosely with its pattern piece attached as its label. Do not hang cut challis by one edge or drape it over a chair back — it will stretch unevenly before you sew it. Store pieces that wait more than a day flat, out of direct sun. Seams and edge finishes come next, in the guide linked below.
Verified challis options at Linda's
The main collection for this module is the rayon challis collection. All four fabrics below were verified live in the store for this guide — active and available — and their widths are the ones to use when you choose a layout column:
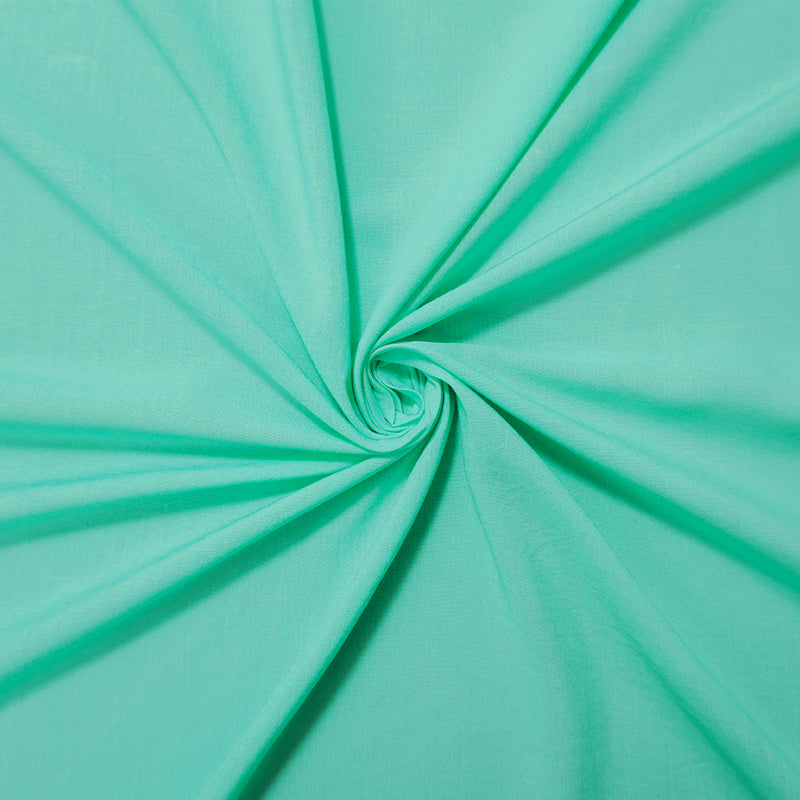
- Light Green Rayon Solid Challis Woven Fabric — 100% rayon, 55 inches wide, Light, Semi-Sheer. The plain solid: the easiest first cut in this set, with no print or stripe to place.
- Aegean Blue Rayon Solid Challis Woven Fabric — 100% rayon, 54 inches wide, Light, Semi-Sheer. The narrowest option here: check the 54-inch layout column before you assume a wide layout fits.
- Pink Rayon Stripe Slub Challis Woven Fabric — 100% rayon, 58 inches wide, Light, Semi-Sheer, matte slub stripe. The widest option, and the stripe case: align stripes at the seam lines, not just at the edges.
- Black-White Famous Designer Viscose Daisy Printed Challis Fabric — 100% viscose, 56 inches wide, Light, Semi-Sheer, matte daisy print. The one-way print case: keep every grainline arrow pointing the same direction.
Care and limitations
Wash and handle cut pieces the way the preparation guide sets out for the whole cut: cool, gentle washing, supported while wet, and cool-to-warm pressing with a cloth. Blades are the safety item here — cut away from your body, close shears and retract or cover a rotary blade the moment you set them down, and keep cutters for fabric only. This guide describes a cutting procedure for you to follow on your own fabric: no fabric was laid out, pinned or cut for it, and no photographed cutting sample is claimed. Where a pattern's own layout instructions and this guide differ for a specific garment, follow the pattern for that garment and keep this guide's grain and support checks.
Keep reading
More from Apparel Fabric School. The prerequisite step is how to prepare rayon challis before cutting — wash, shrinkage test, rest and grain check — and the foundation pieces are how to choose rayon challis by weight, opacity and season and which garments suit challis's structure and drape. For the general grain method this guide builds on, see cutting garment yardage on the grain. Once your pieces are cut, go next to seams and edge finishes for rayon challis, and check quantities any time with the fabric yardage guide.